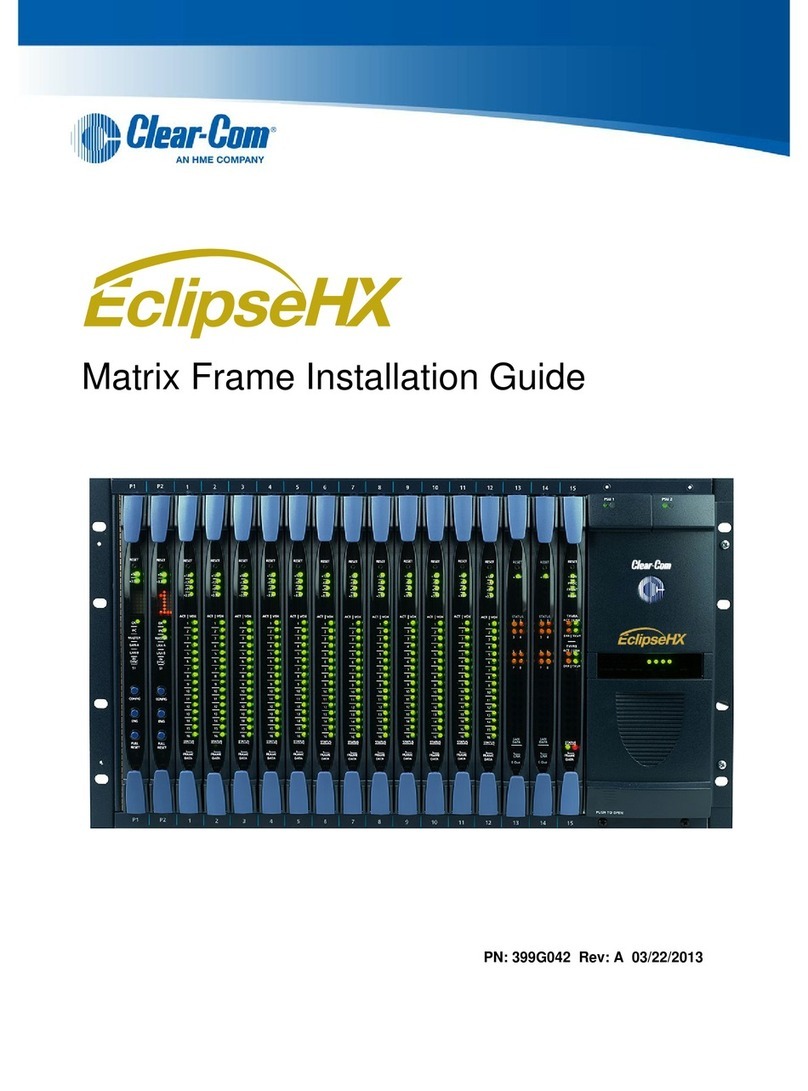
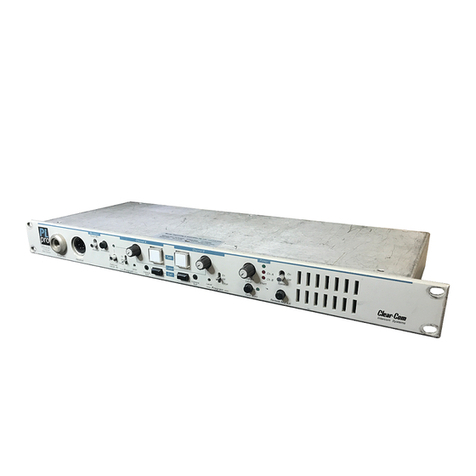
Clear-Com ECLIPSE MATRIX User manual

ECLIPSE MATRIX INSTALLATION
Instruction Manual

Eclipse Matrix Installation Instruction Manual
© 2007, 2009 Vitec Group Communications. All rights reserved.
Part Number 810298Z Rev. 7
Vitec Group Communications LLC
850 Marina Village Parkway
Alameda, CA 94501
U.S.A.
Vitec Group Communications Ltd
7400 Beach Drive
IQ Cambridge
Cambrideshire
United Kingdom
CB25 9TP
The Vitec Group plc
Beijing Representative Office
Room 706, Tower B
Derun Building, YongAn Dongli A No.3
Jianwai Ave., Chaoyang District
Beijing, P.R.China 100022
Clear-Com is a registered trademark of Vitec Group Communications.
The Clear-Com logo is a registered trademark of Vitec Group Communications.
Eclipse is a registered trademark of Vitec Group Communications.
Website: www.clearcom.com

Clear-Com Communication Systems
Eclipse Matrix Installation Instruction Manual i
CONTENTS
INSTALLATION OVERVIEW. . . . . . . . . . . . . . . . . . 1-1
Introduction. . . . . . . . . . . . . . . . . . . . . . . . . . . . . . . . . . . . . . . 1-1
Step-by-Step Installation. . . . . . . . . . . . . . . . . . . . . . . . . . . . . 1-3
Verify the Shipment. . . . . . . . . . . . . . . . . . . . . . . . . . . . . . . . . . . 1-3
Select Locations for the Components . . . . . . . . . . . . . . . . . . . . .1-3
Determine the Wiring Requirements . . . . . . . . . . . . . . . . . . . . . .1-3
Install Components in Rack . . . . . . . . . . . . . . . . . . . . . . . . . . . . .1-4
Install Cables . . . . . . . . . . . . . . . . . . . . . . . . . . . . . . . . . . . . . . . .1-4
Connect Cables and Auxiliary Wiring . . . . . . . . . . . . . . . . . . . . . .1-4
Connect to Mains AC Power . . . . . . . . . . . . . . . . . . . . . . . . . . . .1-5
Matrices. . . . . . . . . . . . . . . . . . . . . . . . . . . . . . . . . . . . . . . . . . .1-5
Panels . . . . . . . . . . . . . . . . . . . . . . . . . . . . . . . . . . . . . . . . . . . .1-6
V-Series Panels . . . . . . . . . . . . . . . . . . . . . . . . . . . . . . . . . .1-6
4000 Series II Panels . . . . . . . . . . . . . . . . . . . . . . . . . . . . . .1-6
ICS Panels and i-Stations . . . . . . . . . . . . . . . . . . . . . . . . . . .1-6
Configure the System . . . . . . . . . . . . . . . . . . . . . . . . . . . . . . . . . .1-6
Verify the Operation of the System . . . . . . . . . . . . . . . . . . . . . . .1-6
Matrix Indicators to Verify . . . . . . . . . . . . . . . . . . . . . . . . . . . . .1-7
Eclipse Omega . . . . . . . . . . . . . . . . . . . . . . . . . . . . . . . . . . .1-7
Eclipse Median . . . . . . . . . . . . . . . . . . . . . . . . . . . . . . . . . . .1-7
Eclipse Pico . . . . . . . . . . . . . . . . . . . . . . . . . . . . . . . . . . . . . .1-7
Eclipse-32 . . . . . . . . . . . . . . . . . . . . . . . . . . . . . . . . . . . . . . .1-8
PLACING SYSTEM COMPONENTS. . . . . . . . . . . . 2-1
Component Location Requirements. . . . . . . . . . . . . . . . . . . . 2-1
Eclipse Matrices . . . . . . . . . . . . . . . . . . . . . . . . . . . . . . . . . . . . . .2-1
Eclipse Omega Matrix . . . . . . . . . . . . . . . . . . . . . . . . . . . . . . . .2-1
Eclipse Median Matrix . . . . . . . . . . . . . . . . . . . . . . . . . . . . . . . .2-2
Eclipse Pico Matrix . . . . . . . . . . . . . . . . . . . . . . . . . . . . . . . . . .2-2
Eclipse-32 Matrix. . . . . . . . . . . . . . . . . . . . . . . . . . . . . . . . . . . .2-3
Interface Frame(s) and Power Supplies . . . . . . . . . . . . . . . . . . . .2-3
IMF-3 Interface Module Frame . . . . . . . . . . . . . . . . . . . . . . . . .2-3
IMF-102 Interface Module Frame . . . . . . . . . . . . . . . . . . . . . . .2-4
DIF-102 Interface Module Frame. . . . . . . . . . . . . . . . . . . . . . . .2-5
Intercom Panels and Expansion Panels . . . . . . . . . . . . . . . . . . . .2-5
External Computer . . . . . . . . . . . . . . . . . . . . . . . . . . . . . . . . . . . .2-5
POWERING SYSTEM COMPONENTS . . . . . . . . . 3-1
Power Requirements . . . . . . . . . . . . . . . . . . . . . . . . . . . . . . . 3-1
Matrices. . . . . . . . . . . . . . . . . . . . . . . . . . . . . . . . . . . . . . . . . . . . .3-1

Clear-Com Communication Systems
Eclipse Matrix Installation Instruction Manual
ii
Eclipse Omega Matrix . . . . . . . . . . . . . . . . . . . . . . . . . . . . . . . .3-1
Eclipse Median Matrix . . . . . . . . . . . . . . . . . . . . . . . . . . . . . . . .3-2
Eclipse Pico Matrix . . . . . . . . . . . . . . . . . . . . . . . . . . . . . . . . . .3-2
Eclipse-32 Matrix. . . . . . . . . . . . . . . . . . . . . . . . . . . . . . . . . . . .3-2
Intercom Panels . . . . . . . . . . . . . . . . . . . . . . . . . . . . . . . . . . . . . .3-3
V-Series Panels and Expansion Panels . . . . . . . . . . . . . . . . . .3-3
4000 Series II Panels and Expansion Panels . . . . . . . . . . . . . .3-3
i-Series Intercom Panels . . . . . . . . . . . . . . . . . . . . . . . . . . . . . .3-3
ICS-2003 Intercom Panels. . . . . . . . . . . . . . . . . . . . . . . . . . . . .3-3
ICS-1008/ICS-1016 Intercom Panels . . . . . . . . . . . . . . . . . . . .3-3
ICS-52/62/92/102 Intercom Panels . . . . . . . . . . . . . . . . . . . . . .3-3
XPL-12/22 Display Expansion Panels and AP-22 Assignment Pan-
els. . . . . . . . . . . . . . . . . . . . . . . . . . . . . . . . . . . . . . . . . . . . . . . . . . .3-4
Interface Module Frame Power Supply Requirements. . . . . . 3-5
IMF-3 Interface Module Frame . . . . . . . . . . . . . . . . . . . . . . . . .3-5
IMF-102 Interface Module Frame . . . . . . . . . . . . . . . . . . . . . . .3-6
DIF-102 Interface Module Frame. . . . . . . . . . . . . . . . . . . . . . . .3-6
WIRING SYSTEM COMPONENTS. . . . . . . . . . . . . 4-1
Summary of Wiring Systems . . . . . . . . . . . . . . . . . . . . . . . . . 4-1
RJ-45 Cables . . . . . . . . . . . . . . . . . . . . . . . . . . . . . . . . . . . . . . . .4-2
General Discussion About RJ-45 Connector Cables. . . . . . . . .4-2
Clear-Com Kits and Recommendation . . . . . . . . . . . . . . . . . . .4-2
Installing RJ-45 Connectors. . . . . . . . . . . . . . . . . . . . . . . . . . . .4-3
Wiring the Matrix to a Computer. . . . . . . . . . . . . . . . . . . . . . . 4-4
Wiring for Serial Connection . . . . . . . . . . . . . . . . . . . . . . . . . . . . .4-4
Wiring for PC to DB-9F Matrix Connectors . . . . . . . . . . . . . . . .4-5
Wiring for PC to 3.5mm Jack Matrix Connector. . . . . . . . . . . . .4-6
Wiring for Ethernet Connection. . . . . . . . . . . . . . . . . . . . . . . . . . .4-7
Connecting Matrices with Fiber-Optic Cable . . . . . . . . . . . . . 4-8
Wiring the Matrix to Intercom PANELS . . . . . . . . . . . . . . . . . 4-8
4-Pair Analog . . . . . . . . . . . . . . . . . . . . . . . . . . . . . . . . . . . . . . . .4-8
Single-Pair Digital . . . . . . . . . . . . . . . . . . . . . . . . . . . . . . . . . . . .4-10
Wiring the Matrix General-Purpose Outputs. . . . . . . . . . . . . 4-10
Wiring the Matrix to General Purpose Inputs . . . . . . . . . . . . 4-12
Opto-Isolated Mode. . . . . . . . . . . . . . . . . . . . . . . . . . . . . . . . . . .4-13
Non-Isolated Mode . . . . . . . . . . . . . . . . . . . . . . . . . . . . . . . . . . .4-14
Wiring the Matrix to an External Alarm. . . . . . . . . . . . . . . . . 4-15
Wiring the Matrix Directly to a 4-Wire Audio Device. . . . . . . 4-16
Wiring the Matrix to Interface Modules. . . . . . . . . . . . . . . . . 4-17

Clear-Com Communication Systems
Eclipse Matrix Installation Instruction Manual iii
FOR-22 4-Wire/Radio Interface Wiring. . . . . . . . . . . . . . . . . . . .4-20
External Audio Devices . . . . . . . . . . . . . . . . . . . . . . . . . . . . . .4-20
Call Signal Input. . . . . . . . . . . . . . . . . . . . . . . . . . . . . . . . . . . .4-21
Relay Contacts . . . . . . . . . . . . . . . . . . . . . . . . . . . . . . . . . . . .4-21
CCI-22 Party-Line Interface Wiring. . . . . . . . . . . . . . . . . . . . . . .4-21
Clear-Com Party Lines General Discussion . . . . . . . . . . . . . .4-22
TEL-14 Telephone Interface Wiring. . . . . . . . . . . . . . . . . . . . . . .4-22
IMF-3 Interface Module Frame Wiring. . . . . . . . . . . . . . . . . . .4-23
IMF-102 Interface Module Frame Wiring. . . . . . . . . . . . . . . . .4-23
Connecting to the Telephone Line. . . . . . . . . . . . . . . . . . . . . .4-24
Telephone Set . . . . . . . . . . . . . . . . . . . . . . . . . . . . . . . . . . . . .4-25
Relay Contacts . . . . . . . . . . . . . . . . . . . . . . . . . . . . . . . . . . . .4-25
RLY-6 Interface Wiring . . . . . . . . . . . . . . . . . . . . . . . . . . . . . . . .4-25
IMF-3 Interface Module Frame Wiring. . . . . . . . . . . . . . . . . . .4-26
To Matrix Frame . . . . . . . . . . . . . . . . . . . . . . . . . . . . . . . . .4-26
To External Device . . . . . . . . . . . . . . . . . . . . . . . . . . . . . . .4-27
IMF-102 Interface Module Frame Wiring. . . . . . . . . . . . . . . . .4-28
Configuration . . . . . . . . . . . . . . . . . . . . . . . . . . . . . . . . . . . . . .4-28
GPI-6 Interface Wiring. . . . . . . . . . . . . . . . . . . . . . . . . . . . . . . . .4-29
IMF-3 Interface Module Frame Wiring. . . . . . . . . . . . . . . . . . .4-29
To Matrix Frame . . . . . . . . . . . . . . . . . . . . . . . . . . . . . . . . .4-29
To External Device . . . . . . . . . . . . . . . . . . . . . . . . . . . . . . .4-29
IMF-102 Interface Module Frame Wiring. . . . . . . . . . . . . . . . .4-30
Configuration . . . . . . . . . . . . . . . . . . . . . . . . . . . . . . . . . . . . . .4-31
Wiring an ICS Panel Miscellaneous Connector . . . . . . . . . . 4-32
External Program Feed Input . . . . . . . . . . . . . . . . . . . . . . . . . . .4-32
Binaural Headset (All Panels Except ICS-2003/2110/1016) . . . .4-33
ICS-2003 Logic Input #1 and Logic Input #2. . . . . . . . . . . . . . . .4-33
Mute Relay Contacts. . . . . . . . . . . . . . . . . . . . . . . . . . . . . . . . . .4-34
Auxiliary Relay Contacts . . . . . . . . . . . . . . . . . . . . . . . . . . . . . . .4-34
Wiring a Binaural Headset (ICS-2003) . . . . . . . . . . . . . . . . . 4-35
Wiring an ICS Panel OPT-100 Auxiliary Audio I/O Option. . 4-36
Auxiliary Audio Line Level Output. . . . . . . . . . . . . . . . . . . . . . . .4-37
Hot Mic Output . . . . . . . . . . . . . . . . . . . . . . . . . . . . . . . . . . . . . .4-37
SA (Studio/Stage Announce) Output. . . . . . . . . . . . . . . . . . . . . .4-37
SA Relay. . . . . . . . . . . . . . . . . . . . . . . . . . . . . . . . . . . . . . . . . . .4-37
Wiring an ICS Panel Accessory Connector . . . . . . . . . . . . . 4-38
CONNECTING MATRICES. . . . . . . . . . . . . . . . . . . 5-1
Intelligent Linking with Trunk Lines. . . . . . . . . . . . . . . . . . . . . 5-1
Base-Loop Linking (Eclipse PiCo/Eclipse-32 Matrix Only) . . . 5-5

Clear-Com Communication Systems
Eclipse Matrix Installation Instruction Manual
iv
Tie-Line (Audio Only) Linking . . . . . . . . . . . . . . . . . . . . . . . . . 5-5
GLOSSARY. . . . . . . . . . . . . . . . . . . . . . . . . . . . . . . 6-1
Eclipse Manuals . . . . . . . . . . . . . . . . . . . . . . . . . . . . . . . . . . . 6-5
Software Manuals . . . . . . . . . . . . . . . . . . . . . . . . . . . . . . . . . . . . .6-5
Hardware Manuals . . . . . . . . . . . . . . . . . . . . . . . . . . . . . . . . . . . .6-5
LIMITED WARRANTY . . . . . . . . . . . . . . . . . . . . . . . W-I
TECHNICAL SUPPORT & REPAIR POLICY. . . . . W-V
TECHNICAL SUPPORT POLICY. . . . . . . . . . . . . . . . . . . . . .W-v
RETURN MATERIAL AUTHORIZATION POLICY . . . . . . . . W-vi
REPAIR POLICY . . . . . . . . . . . . . . . . . . . . . . . . . . . . . . . . W-viii

Clear-Com Communication Systems
Eclipse Matrix Installation Instruction Manual i
FIGURES
Figure 2-1 IMF-3 Interface Frame Rear Panel................................. 2-4
Figure 2-2 IMF-102 Interface Frame Rear Panel............................. 2-4
Figure 3-1 PSU-101 to IMF-3 Wiring............................................... 3-6
Figure 4-1 Computer DB-25F to Matrix DB-9M RS-232 Cable........ 4-5
Figure 4-2 Computer DB-9F to Matrix DB-9M RS-232 Cable.......... 4-5
Figure 4-3 Pin Assignments for LAN 1 and LAN 2 Connectors....... 4-7
Figure 4-4 Wiring Matrix to Analog Panel Using RJ-45................... 4-9
Figure 4-5 Wiring Matrix to Digital Panel Using RJ-45 .................. 4-10
Figure 4-6 General-Purpose Outputs Connector Pinout................ 4-11
Figure 4-7 General-Purpose Inputs Connector Pinout .................. 4-12
Figure 4-8 Opto-Isolated Connection to Eclipse GPI Connector... 4-13
Figure 4-9 Non-Isolated Connection to Eclipse GPI Connector .... 4-14
Figure 4-10 Alarm I/O Connector................................................... 4-15
Figure 4-11 Direct Eclipse Matrix Port Connection........................ 4-16
Figure 4-12 RLY-6/GPI-6 Daisy Chain Connection....................... 4-19
Figure 4-13 Matrix Frame to IMF-3 Interface Connection.............. 4-19
Figure 4-14 Pinout of the DB-9M I/O Connectors for FOR-22s..... 4-20
Figure 4-15 Pinout of the DB-9M Interface I/O Connectors for CCI-22.
4-22
Figure 4-16 Wiring an IMF-3 Rear-Panel Assembly to a TEL-14 Inter-
face................................................................................................ 4-23
Figure 4-17 Wiring an IMF-102 Rear-Panel Assembly to a TEL-14 Inter-
face................................................................................................ 4-24
Figure 4-18 RJ-11 to DB-9 Adaptor for TEL-14 Interfaces............ 4-25
Figure 4-19 Rear View of IMF-3 Frame......................................... 4-27
Figure 4-20 RLY-6 Interface DB-9M Connector Pinout................. 4-28
Figure 4-21 GPI-6 Interface DB-9M Connector Pinout.................. 4-30
Figure 4-22 GPI-6 Application Examples....................................... 4-30
Figure 4-23 Miscellaneous Connector Pin Configuration .............. 4-32
Figure 4-24 Binaural Headset Wiring............................................. 4-35
Figure 4-25 Auxiliary I/O Connector .............................................. 4-36
Figure 4-26 Accessory Panel Connector Pinout............................ 4-38
Figure 5-1 A Linked System on an Ethernet Network...................... 5-1
Figure 5-2 Example of Fiber-Optic Connected Matrices.................. 5-2
Figure 5-3 Dedicated Serial Port Audio Trunk Wiring...................... 5-3
Figure 5-4 Ethernet Wiring............................................................... 5-3
Figure 5-5 Matrices Linked Across Continents................................ 5-4

Clear-Com Communication Systems
Eclipse Matrix Installation Instruction Manual
ii

Clear-Com Communication Systems
Eclipse Matrix Installation Instruction Manual iii
IMPORTANT SAFETY
INSTRUCTIONS
Please read and follow these instructions before operating an Eclipse
system. Keep these instructions for future reference.
1. WARNING: To reduce the risk of fire or electric shock, do not
expose this apparatus to rain or moisture.
2. Do not use the apparatus near water.
3. Clean only with a dry cloth.
4. Do not block any ventilation openings. Install in accordance with
the manufacturer’s instructions. Install product according to the
installation directions of this manual.
5. Do not install near any heat sources such as radiators, heat
registers, stoves, or other apparatus (including amplifiers) that
produce heat. Do not place naked flame sources such as candles
on or near the matrix.
6. Do not defeat the safety purpose of the polarized plug or
grounding-type plug. A polarized plug has two blades with one
wider than the other. A grounding-type plug has two blades and a
third grounding prong. The wide blade or the third prong are
provided for your safety. If the provided plug does not fit into your
outlet, consult an electrician for replacement of the obsolete outlet.
7. Protect power leads from being walked on or pinched particularly
at plugs, at convenience receptacles, and at the point where they
exit from the apparatus.
Note: A “convenience receptacle” is an extra AC power outlet
located on the back of a piece of equipment, intended to
allow you to power other equipment.
8. Only use attachments/accessories specified by the manufacturer.
9. Use only with the cart, stand, tripod, bracket, or table specified by
the manufacturer, or sold with the apparatus. When a cart is used,
use caution when moving the cart/apparatus combination to avoid
injury from tip-over.
10. Unplug the apparatus during lightning storms or when unused for
long periods of time.
11. Refer all servicing to qualified service personnel. Servicing is
required when the apparatus has been damaged in any way, such
as a power-supply cord or plug is damaged, liquid has been spilled
or objects have fallen into the apparatus, the apparatus has been
exposed to rain or moisture, does not operate normally, or has
been dropped.
Please familiarize yourself with the safety symbols in Figure 1.
When you see these symbols on an Eclipse system, they warn
you of the potential danger of electric shock if the system is used
Please read and follow
these instructions
before operating an
Eclipse system.

Clear-Com Communication Systems
Eclipse Matrix Installation Instruction Manual
iv
improperly. They also refer you to important operating and
maintenance instructions in the manual.
Figure 1: Safety Symbols
CAUTION
RISK OF ELECTRIC SHOCK
DO NOT OPEN
This symbol alerts you to the presence of uninsulated dangerous
voltage within the product’s enclosure that might be of sufficient
magnitude to constitute a risk of electric shock. Do not open
the product’s case.
This symbol informs you that important operating and main-
tenance instructions are included in the literature accompanying
this product.

Clear-Com Communication Systems
Eclipse Matrix Installation Instruction Manual 1-1
INSTALLATION
OVERVIEW
INTRODUCTION
The Eclipse Matrix Installation Instruction Manual describes the steps
required to install an Eclipse matrix system and customize it. The
manual provides information about placing, powering, and wiring
components of the Eclipse system.
It is highly recommended that the instruction manual for the matrix to
be installed is read before attempting an installation. That manual
describes the specific Eclipse system hardware and defines many of
the concepts used in the system. An overall understanding of the
system is necessary to make maximum use of its vast capabilities.
Caution: Servicing instructions are for use by qualified personnel only.
To reduce the risk of electric shock, do not perform any
servicing other than that contained in the operating
instructions unless qualified to do so. Refer all servicing to
qualified service personnel.
The information in this manual is presented as follows:
Chapter 1. Installation Overview: Step-By-Step Installation Information
The first chapter provides a step-by-step installation guide for the
components of the Eclipse matrix system as received from the factory.
Chapter 2. Placing System Components
The second chapter describes the Eclipse matrix system’s component
location requirements, including a summary of component sizes.
Chapter 3. Powering System Components
The third chapter provides guidelines for providing AC power to the
system and for planning the powering of interface frames.
Chapter 4. Wiring System Components
The fourth chapter gives an overview of the various wiring systems for
connecting panels and interfaces to the matrix. This chapter contains
reference information necessary to wire all connectors in the Eclipse
system. However, many of the components have internal jumpers and
adjustments. Information on internal jumpers, adjustments, and device
specifications can be found in the individual manuals for each
component.
This manual describes how
to install an Eclipse matrix
system.
Each product manual in the
Eclipse set gives additional
installation information.
1

Clear-Com Communication Systems
Eclipse Matrix Installation Instruction Manual
1-2
Chapter 5. Connecting Matrices
The fifth chapter provides information on linking matrices.

Clear-Com Communication Systems
Eclipse Matrix Installation Instruction Manual 1-3
STEP-BY-STEP INSTALLATION
To install an Eclipse matrix system:
1. Verify the shipment.
2. Select locations for the components.
3. Determine the wiring requirements.
4. Install components in rack.
5. Install cables.
6. Connect cable and auxiliary wiring.
7. Connect to mains AC Power.
8. Configure the system with the Eclipse Configuration System (ECS)
software.
9. Verify the operation of the system.
1. Verify the Shipment
When the equipment is received inspect the boxes for shipping
damage. Report any shipping damage to the carrier. The Eclipse
matrix system distributor is not responsible for shipping damage.
Check the packing list and verify that every item on the list has been
received. Pay special attention to options that have been installed in
intercom panels. Panel options are printed on each panel’s rear cover.
Save all packing materials (boxes, Styrofoam filler, etc.), since they will
be needed if any item must be returned because it was shipped by
mistake, because of malfunction, or for warranty service.
2. Select Locations for the Components
Select locations for the central matrix, intercom panels, interface
modules, computer, and any other system components. For additional
information on limitations imposed on location by the Eclipse matrix
system see Chapter 2, “Placing System Components.”
3. Determine the Wiring Requirements
Eclipse requires shielded category-5 (CAT5) cable with RJ-45
connectors on either end; however, there are various methods
available to deliver these cables from one place to another. For more
information on RJ-45 connectors and their installation, refer to Chapter
4, “Wiring System Components.”
All Eclipse panels have built-in RJ-45 connectors. Shielded CAT5
cables are available with RJ-45 terminations already installed. Bulk
RJ-45 connectors can be bought and installed on custom length
cables.

Clear-Com Communication Systems
Eclipse Matrix Installation Instruction Manual
1-4
4. Install Components in Rack
Install the matrix in a standard Electronics Industry Association 19-inch
wide (48.26 cm) equipment rack. The matrix requires adequate
ventilation. Leave at least 2 inches (50.8 mm) of clearance on all sides
of the matrix to ensure proper airflow. Do not block ventilation vents.
Check the position of circuit cards, power supplies, and rear-connector
panels. Refer to the appropriate manual in the Eclipse set of manuals
for detailed information on installing a particular frame in the rack.
• For matrices, refer to the Eclipse Omega Matrix Instruction Manual
(part 810290Z), the Eclipse Median Matrix Instruction Manual (part
810347Z), the Eclipse Pico Matrix Instruction Manual (part
810348Z) or the Eclipse-32 Matrix Instruction Manual (part
810315Z) as appropriate for complete installation requirements.
• For interface frames, refer to the appropriate instruction manual for
either the IMF-3, IMF-102, or DIF-102 interface frame (part
810313Z).
5. Install Cables
Install the wiring between the Eclipse matrix and the system
components. Usually the connectors are wired to the cables after the
cables are routed. For further information refer to Chapter 4, “Wiring
System Components.”
Install the DC power cables that connect the power supply or supplies
to the IMF-3 interface frame. Connect the mains AC power cables for
the matrix frame and each panel. For further information refer to
Chapter 3, “Powering System Components.”
6. Connect Cables and Auxiliary Wiring
There are several different types of wiring necessary to connect an
Eclipse system. The following is a summary of the subjects.
Analog Panel Wiring - Connect the intercom panels to the matrix using
shielded CAT5 4-twisted pair cables with RJ-45 connectors. At each
panel there may be other connector wiring necessary depending on
the options and accessories installed.
Digital Panel Wiring - The DIF-102 interface frame holds two DIG-2
interface modules. Each DIG-2 interface module connects two digital
intercom panels to the matrix. Connect the intercom panels to the
DIG-2 interface using double shielded (braid and foil) 24 AWG
conductor CAT-6 enhanced STP cable (CAT-6E) with RJ-45
connectors. At each panel there may be other connector wiring
necessary depending on the options and accessories installed.
Interface Wiring - Connect the interface modules to the matrix using
shielded CAT5 4-twisted pair cables with RJ-45 connectors. Each
interface type requires particular wiring schemes on the DB-9

Clear-Com Communication Systems
Eclipse Matrix Installation Instruction Manual 1-5
connectors on the rear of the associated IMF-3 frame per the actual
application. Special interfaces such as the RLY-6 and GPI-6 are
connected directly via an RJ-45 connector on the rear of the matrix to
the appropriate interface input connector on an IMF-3 frame.
External Computer - To connect the computer to the Eclipse matrix,
use the supplied DB-9 cable or a commercially available shielded
RS-232 cable. If an RS-232 cable is used, be sure it provides the
connections described in "Wiring for Serial Connection" in Chapter 4.
Note: If the ECS computer does not have a serial port, but only
offers USB, adapters are available from computer parts
suppliers.
The matrix can be connected to an Ethernet network through the two
standard RJ-45 Ethernet connectors labeled LAN 1 and LAN 2 on the
Eclipse matrix. Ethernet connection allows one or more matrices to be
controlled from one or more computers on a network. See Chapter 4
for more information.
Note: If these ports are used a ferrite must be added to the socket
end of each cable. A suitable ferrite is Würth Electronik part:
74271132.
Note: Shielded CAT-5 cable should be used.
External Alarm Connection - Eclipse matrices have built-in fault alarm
systems. If it is desirable to repeat this alarm with some remote alarm,
relay contacts are available on the matrix frame’s rear panel. If some
external alarm condition needs to be added to the frame’s alarm
system, the same connector on the rear panel ALARM I/Owill allow an
external contact closure to be connected to the frame’s alarm system.
Note: Shielded cables should be used.
7. Connect to Mains AC Power
Each component of the Eclipse system requires AC power except for
the IMF-3 and some expansion panels. The IMF-3 requires an external
power supply. The XP-type expansion panels receive power from the
panels to which they are connected.
Matrices
Eclipse matrices have two separate AC power connectors for two
separate power supplies in the system. Either power supply will
completely power a system, providing 100% power redundancy. If the
two power supplies are connected to different AC power sources and
one of the power supplies loses power, the other will continue to
operate the system.
AC voltage for the matrices and the PSU-101 can be 100 to 240 VAC
without any switching or fuse changes.

Clear-Com Communication Systems
Eclipse Matrix Installation Instruction Manual
1-6
Panels
V-Series Panels
Each V-Series panel (V12LD, V12PD, V24LD, V24PD, V12LDD,
V12PDD, V12LDE, V12PDE) has an external power supply. AC
voltage for these panels can be 100 to 240 VAC without any switching
or fuse changes.
4000 Series II Panels
Each 4000 Series II panel (4212, 4215, 4222, 4224, 4226, 4294, 4203,
4206, 4230, 4230V) has an external power supply. AC voltage for
these panels can be 100 to 240 VAC without any switching or fuse
changes.
ICS Panels and i-Stations
Each ICS-2003 and ICS-1016 panel has an external power supply. A
bracket has been provided to mount this external supply if necessary.
AC voltage for these panels can be 90 to 260 VAC without any
switching or fuse changes.
The ICS-102/92/62/52 panels have wall-mounted transformers for 110
VAC and in-line transformers for 220 VAC. Confirm that the correct
ones have been supplied for the installation.
The i-Stations have internal power supplies, with removable AC power
cords. The power supplies are “universal,” operating over a voltage
range of 90 to 245 VAC and 50 to 60 Hz. The maximum dissipation is
40 W.
Each panel will need to be plugged into an AC source at its location.
8. Configure the System
TheEclipseConfigurationSystem(ECS) programmingsoftwareallows
the system to be configured for the operating environment. With this
software a system administrator can assign port or panel names,
declare interface port functions, assign “labels” to keys on panels, and
perform many other functions. Refer to the Eclipse Configuration
System Manual for instructions on using the software.
9. Verify the Operation of the System
Once the system is configured, a detailed check of each panel,
interface connection, control function, and other features should be
performed. Each audio path, relay output, and control input needs to
be exercised to verify proper operation. Each software function, such
as Party Lines, ISO, and IFB must be verified. Each installation is
different, so it is beyond the scope of this manual to outline in detail
this phase.

Clear-Com Communication Systems
Eclipse Matrix Installation Instruction Manual 1-7
Matrix Indicators to Verify
Eclipse Omega
There are many lights on the front of the matrix that indicate its
operational status. Proper operation of the matrix is indicated by the
following:
1. The two power supply lights, labeled “+5V” and “+3.3V” illuminate
green steadily to indicate that the power supplies are present.
2. The dot-matrix array of lights displays a number to indicate which of
the four stored configurations in the CPU card’s memory is currently
operating. The configuration number displays for a short time after
power up or upon configuration selection.
3. The “OK” light flashes to indicate that the CPU card software is
running.
4. The “master” light illuminates steadily on the currently active CPU
card, indicating that the CPU card is properly installed and operating
correctly.
Eclipse Median
There are many lights on the front of the matrix that indicate its
operational status. Proper operation of the matrix is indicated by the
following:
1. The two power supply lights, labeled “+5V” and “+3.3V” illuminate
green steadily to indicate that the power supplies are present.
2. The dot-matrix array of lights displays a number to indicate which of
the four stored configurations in the CPU card’s memory is currently
operating. The configuration number displays for a short time after
power up or upon configuration selection.
3. The “OK” light flashes to indicate that the CPU card software is
running.
4. The “master” light illuminates steadily on the currently active CPU
card, indicating that the CPU card is properly installed and operating
correctly.
Eclipse Pico
The following front-panel indicators indicate a properly operating
Eclipse Pico matrix:
1. The two PSU alarm lights, labeled “1” and “2” do not illuminate
under normal operating conditions.
2. One of the four green configuration lights illuminates steadily to
identify the currently active configuration.
3. The “OK” light flashes to indicate that the Eclipse-32 is running
successfully.
4. If the matrix is connected to a local area network, the green LAN UP
light illuminates steadily. The yellow RX light flashes when data is
being received.

Clear-Com Communication Systems
Eclipse Matrix Installation Instruction Manual
1-8
Eclipse-32
The following front-panel indicators indicate a properly operating
Eclipse-32 matrix:
1. The two PSU alarm lights, labeled “1” and “2” do not illuminate
under normal operating conditions.
2. One of the four green configuration lights illuminates steadily to
identify the currently active configuration.
3. The “OK” light flashes to indicate that the Eclipse-32 is running
successfully.
4. If the matrix is connected to a local area network, the green LAN UP
light illuminates steadily. The yellow RX light flashes when data is
being received.
5. An illuminated port status light indicates that communications are
running properly between the matrix and the device connected to
that port.

Clear-Com Communication Systems
Eclipse Matrix Installation Instruction Manual 2-1
PLACING SYSTEM
COMPONENTS
COMPONENT LOCATION REQUIREMENTS
This chapter provides guidelines for placing and arranging the main
components of an Eclipse system, including:
• Eclipse matrices
• Interface frame(s) and power supplies
• Intercom panels and accessory panels
• External computer
ECLIPSE MATRICES
The Eclipse matrix is the central connecting point of the system. All
panels, interfaces, and external devices must be connected directly to
the Eclipse matrix, so it should be centrally located. The system matrix
may be an Eclipse Omega, Eclipse Median, Eclipse Pico or an
Eclipse-32, depending on site requirements.
A matrix should be placed in the center portion of a standard
Electronics Industry Association 19-inch wide (48.26 cm) rack,
allowing easy access to the matrix’s port connectors. Some planning is
also necessary for the dressing of cables in the rack because of the
large number of cables.
Note: A “rack unit” refers to a standardized unit of space in an
Electronics Industry Association equipment rack. One rack
unit is 1.75 inches high and 19 inches wide (or 482.6 mm by
44.45 mm). Each increasing “rack unit” adds 1.75 inches to
the area vertically, while staying at 19 inches horizontally.
Eclipse Omega Matrix
The Eclipse Omega matrix requires six vertical rack units (10.5 inches
or 267 mm) in a standard Electronics Industry Association 19-inch
wide (48.26 cm) rack. There are two power supplies in each matrix. A
modular removable alarm module fitted beneath the two power
supplies has two fans that deliver forced air cooling. The primary fan
runs continuously. If the temperature in the matrix exceeds a set
threshold and extra cooling is required, a secondary fan switches on to
increase the air flow in the matrix.
The “fan-on” alarm light on the front of the alarm module illuminates
red to indicate that the secondary fan is on. The red “fan-fail” alarm
light illuminates when either fan stops rotating correctly. These alarm
2

Clear-Com Communication Systems
Eclipse Matrix Installation Instruction Manual
2-2
lights allow the system operator to identify and correct the alarm
conditions. See the Eclipse Omega Matrix Instruction Manual (part
810290Z) for more details.
Caution: It is mandatory that the air flow through an Eclipse Omega
matrix from the bottom to the top is unimpeded. If other
equipment is mounted above and below the matrix that
impedes the air flow through the matrix, it will be necessary
to leave 1 RU of empty space above and below the Eclipse
Omega matrix as over-heating will occur if this is not done. If
the matrix is mounted in a portable case this air flow must not
be impeded.
Eclipse Median Matrix
The Eclipse Median matrix requires six vertical rack units (10.5 inches
or 267 mm) in a standard Electronics Industry Association 19-inch
wide (48.26 cm) rack. There are two power supplies in each matrix. A
modular removable alarm module fitted beneath the two power
supplies has two fans that deliver forced air cooling. The primary fan
runs continuously. If the temperature in the matrix exceeds a set
threshold and extra cooling is required, a secondary fan switches on to
increase the air flow in the matrix.
The “fan-on” alarm light on the front of the alarm module illuminates
red to indicate that the secondary fan is on. The red “fan-fail” alarm
light illuminates when either fan stops rotating correctly. These alarm
lights allow the system operator to identify and correct the alarm
conditions. See the Eclipse Median Matrix Instruction Manual (part
810347Z) for more details.
Caution: It is mandatory that the air flow through an Eclipse Median
matrix from the bottom to the top is unimpeded. If other
equipment is mounted above and below the matrix that
impedes the air flow through the matrix, it will be necessary
to leave 1 RU of empty space above and below the Eclipse
Median matrix as over-heating will occur if this is not done. If
the matrix is mounted in a portable case this air flow must not
be impeded.
Eclipse Pico Matrix
The Eclipse Pico matrix requires one vertical rack unit (1.75 in. or
44.45 mm) in a standard Electronics Industry Association 19-inch
(48.26 cm) rack. A temperature-controlled fan cools the Eclipse Pico
and forces air through the unit horizontally. An alarm light on the front
panel of the Eclipse Pico alerts the system operator when the
temperature-controlled fan activates.
Other manuals for ECLIPSE MATRIX
2
Table of contents
Other Clear-Com Switch manuals
