ClearClick HD Capture Box Platinum Edition User manual


2
Table of Contents
Registration, Safety Precautions,
Warranty Information
Page 3
What's In The Box
Page 4
Device Diagrams & Explanation
Page 5
Remote Control Diagram &
Explanation
Page 7
Quick Start Guide
Page 8
Playing Back Videos On The Device
Page 11
Changing Device Settings &
Scheduling Recordings
Page 12
Connecting the Device to Your PC &
Recording To PC
Page 15
Live Streaming with OBS
Page 18
Live Streaming with XSplit
Page 19
Getting Started With VideoPad
Page 20
Troubleshooting
Page 22
Support Information
Page 24
Technical Specifications
Page 25

3
Register Your Product & Extend Your
Warranty For Free
Register your product at our website and we’ll extend your
warranty period to 3 years for free!
www.clearclicksoftware.com/Register/
Browse All Our Products!
If you’re looking for fun, unique, and easy-to-use technology,
we’ve got it! Please visit our website to browse all of our products:
www.ClearClick.tech
Safety Precautions
1. Do not disassemble the unit.
2. Please note that the device and/or plugged in USB drives
may become very warm during use.
3. Do not operate the unit around water or rain. Do not operate
the unit around any kind of machines or appliances (other
than computers).
4. Turn off and unplug the unit when not in use.
5. Use only the included accessories with the device.
6. Do not connect high powered, amplified audio outputs to the
“in” ports of the device.
7. Follow all copyright laws in your country. You are
responsible for your own use of this device.
2-Year Warranty
Your purchase comes with a 2-year warranty. This means that if
anything goes wrong with the unit (other than accidental damage
on the part of the end user) within the first year of ownership, we
will replace the unit for free, 100% at our cost. Contact us at
support@clearclick.tech with any issues.

4
What’s In The Box?
•HD Capture Box Platinum Edition™
•Power Adapter
•Remote Control
•HDMI Cable
•Multi-Input Cable (AV/VGA/YPbPr)
•Micro USB to USB Cable
•Software Download Card (GXPlayer & VideoPad)
•Quick Start Guide / User’s Manual
NOTE: If you believe you are missing any parts, or if you received
a part that is broken, please contact us directly at
parts@clearclick.tech. For all other technical issues or support,
please contact us at support@clearclick.tech.

5
Device Diagrams & Explanation(continued on next page)

6
1. IR Receiver: Receives the signal from the remote
control.
2. Source Button: Hold down to switch your source to
HDMI, VGA, YPbPr or AV.
3. Snapshot Button: When previewing your signal, press
to take a still image of your video.
4. REC/STOP Button: Press this button to start/stop
recording. The button will flash while recording or saving.
5. USB Storage Port: Plug in your USB flash drive here.
6. MIC: Microphone input port.
7. Line Out: Audio output port.
8. Line In: Audio input port.
9. 5V/2A: Power jack.
10. HDMI IN: HDMI input port.
11. MMI IN: Multi-input port for non-HD (AV, VGA, or YPbPr)
video sources.
12. HDMI OUT: HDMI output port.
13. USB TO PC: Micro USB port for connection to PC for
recording or live streaming (PC only).

7
Remote Control Diagram & Explanation
8
QUICK START GUIDE
Many HDMI video sources are encrypted with content
protection called “HDCP.”Complying with copyright laws,
the HD Capture Box does not disable or override content
protection.
** Therefore, if you simply plug in a content-protected
HDMI video source to the HD Capture Box, it will not
detect a signal or allow you to record. **
However, there are low-cost HDMI splitters available that
disable “HDCP.” Passing a HDMI signal through one of
these splitters first, one can record from HDCP sources.
For example, here is a HDMI splitter (not our product) that
costs around $15: www.amazon.com/dp/B07DQBY5TX
(Product name: “Techole HDMI Splitter 1 in 2 Out”)
To clarify, we are not recommending or condoning the use
of HDMI splitters, or recommending that you record
content-protected HDMI video sources. We are simply
saying that an HDMI splitter makes it theoretically
possible. You are legally responsible for your own use of
HDMI splitters with this device. Please follow all the
copyright laws in your country.

9
1. Connect the power adapter to the DC input jack (see
#9 on the diagram on page 5) of the HD Capture Box.
Plug in the power adapter to any power outlet. If desired,
load batteries into the remote control.
2. After a few seconds, the HD Capture Box will start up.
3. For HDMI Video Sources: Using the included HDMI
cable, connect your video source (gaming system, DVD
player, etc.) to the HD Capture Box. Plug it into the HDMI
IN port (see #10 on the device diagram on page 5).
For AV/VGA/YPbPr Video Sources: Using the included
MMI (multi-input) cable, plug one end into the “MMI IN”
port. Plug your video source into the other end.
4. Plug your TV into the “HDMI Out” port on the HD
Capture Box using another HDMI cable (not included).
Your setup should look something like the diagram below:
NOTE: If you are trying to record from a content-protected HDMI
source, please see the important note on the previous page.

10
5. By default, the HD Capture Box will assume you are
trying to record an HDMI video source. If so, skip to the
next step. If you are trying to record from AV/VGA/YPbPr,
hold down the “Source” button on the HD Capture Box
until it is set to the correct source, or press the “VGA,”
“YPbPr,” or “AV” buttons on the remote control.
6. Once a live signal is coming from your video source to
the HD Capture Box, you should see a live preview of your
video source on your TV screen. (If not, see the notice on
page 8. Also, check your signal and make sure your TV is
set to the correct HDMI input.)
7. Plug in a USB flash drive or hard drive into the USB
port (#5) on the HD Capture Box.
NOTE! For best results, we highly recommend using a
brand new, name-brand USB flash drive (i.e. SanDisk,
Samsung, etc.) that is formatted to a FAT32 or NTFS
file system.
8. To start recording, press the “REC/STOP” button on
the HD Capture Box, or press the “REC” button on the
remote control. The “REC/STOP” button will flash while
the unit is recording or saving a file.
9. To stop recording, press the “REC/STOP” button
again on the HD Capture Box, or press the “STOP” button
on the remote control.

11
10.To play back recordings on your device, press the
“PLAYBACK” button on the remote control (be sure to load
batteries in it first). For more details on the playback
feature, see page 11.
11.To play back or transfer recordings to your PC or
Mac, remove the USB drive from your HD Capture Box
after stopping the recording. Then plug it into your
computer. Browse the drive and go to the “video” folder.
Tip: Using the Remote Control Properly
When using the remote control, make sure the remote control is
aimed directly at the IR Receiver of the HD Capture Box –see #1 on
the device diagram on page 5. Load 2 AAA batteries (not included)
into the remote control before using it.
Tip: Setting the Aspect Ratio
If you’re recording from an AV or older VGA source, you will likely
need to set the recording aspect ratio to 4:3 to avoid the video looking
stretched in the recording. To do this, press the 4:3 button on the
remote control prior to recording. Later, if you switch to an HDMI
video source, you’ll need to press the 16:9 button to switch back to
widescreen recording mode.
Tip: Switching Between 720p/1080p Recording
When the “REC/STOP” button is BLUE, that means the device is
recording in 1080p quality. When the “REC/STOP” button is GREEN,
that means the device is recording in 720p quality. To switch between
recording qualities, hold down the “REC/STOP” button, or press the
720P/1080P buttons on the remote control.
12
How To Play Back Videos On The Device
Once you’ve recorded at least one video, you may play
back videos from the device to your TV using the playback
feature.
To do this, press the “Playback” button on the remote
control. (Make sure the remote control is pointed at the IR
Receiver - #1 in the device diagram).
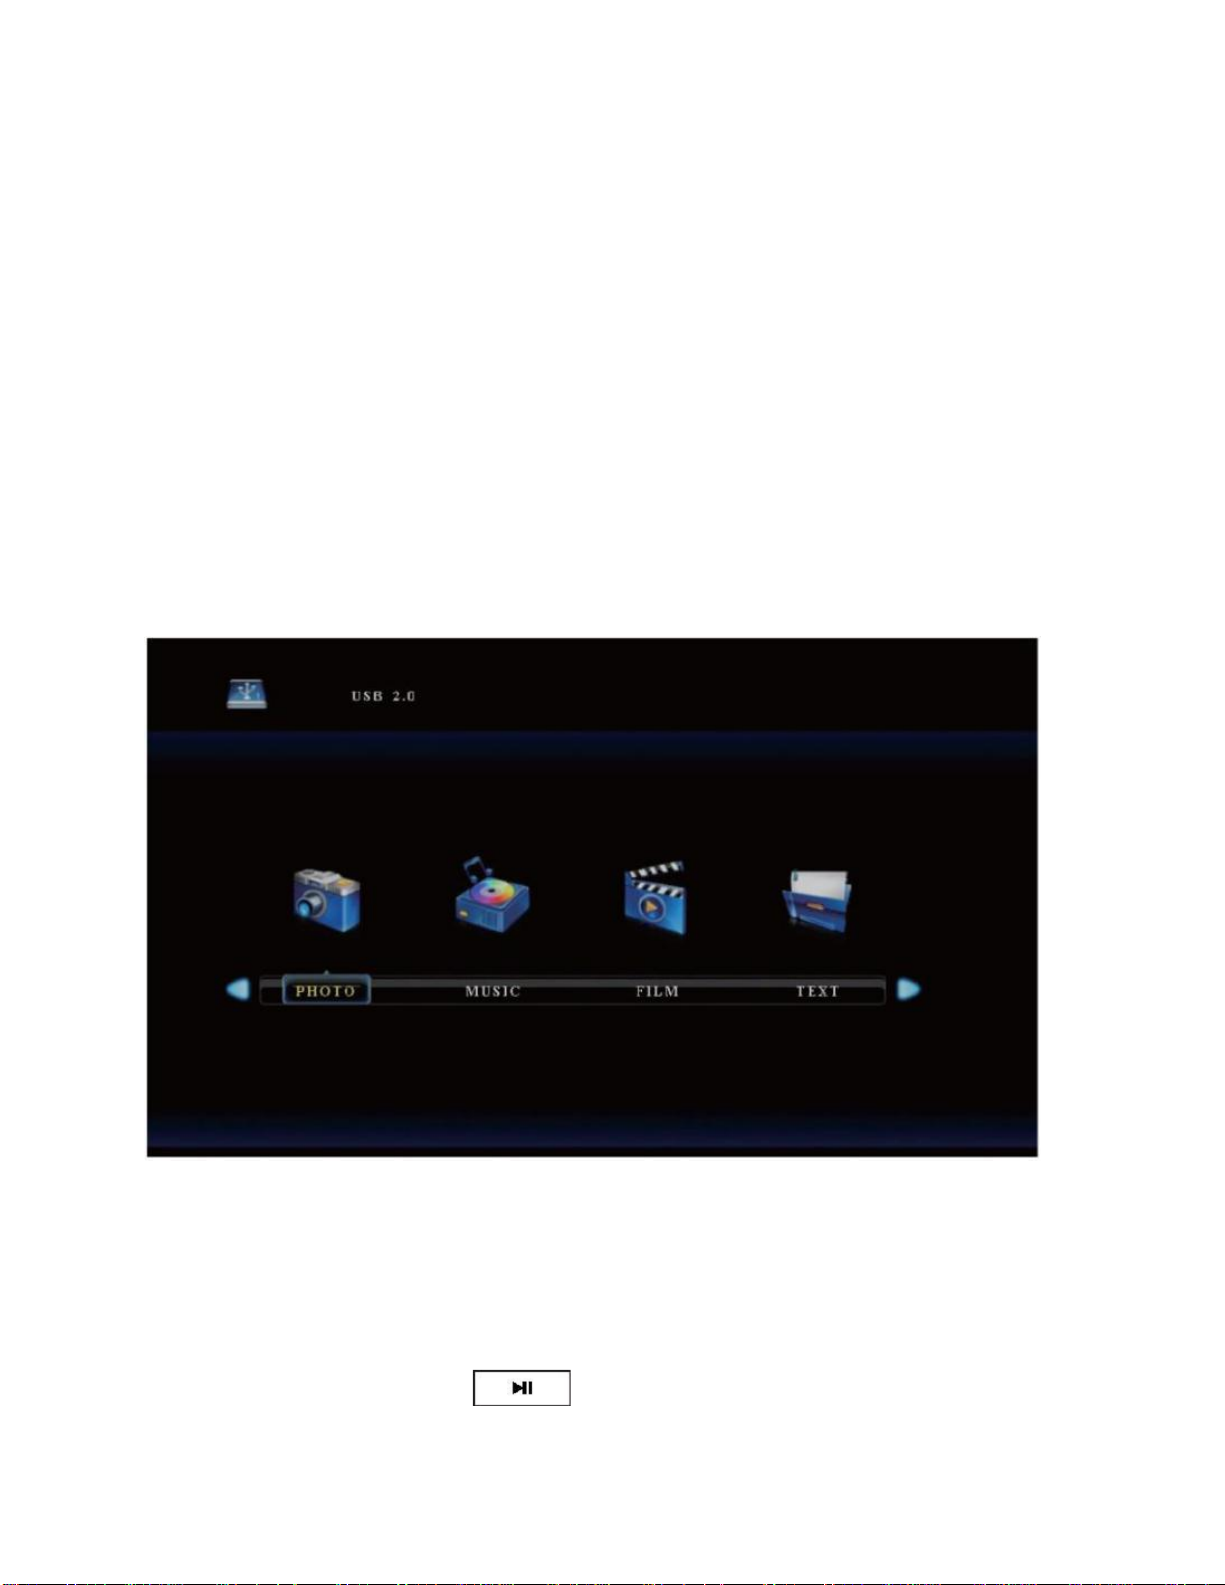
You will then see the playback menu:
Scroll to “FILM” and press the “OK” button on the remote.
You will then see a list of videos that have been recorded.
Select one of the videos to play back and press the
“Play/Pause” button on the remote. (Tip: to play the

13
video, be sure to press the “Play/Pause” button and
not the “OK” or “PLAYBACK” buttons.)
To go back to “Capture” mode when you are done playing
back videos, simply press the “Back” button on the
remote several times until you are back in “Capture”
mode.
How To Change Settings & Schedule Recordings
You can change the device’s settings and schedule
recordings in the “Settings” menu.
Press the “Main Menu” button to open the “Settings”
menu. There are four categories of settings: TIME,
PICTURE, SOUND and OPTION
To schedule a recording, choose the “TIME” category and
select “Schedule Recording.”
TIME SETTINGS
Bitrate Set: Recommended setting: UNLIMITED 16M.
This will allow the highest quality recordings with unlimited
file size. (Only if your flash drive is formatted to NTFS).
“Limited” means limit to 4GB file size. “Loop” means that
the device will overwrite existing files once the drive is full.

14
Headset Mixing On/Off: When “Headset Mixing”is on,
you will be able to hear your voice and audio mix from
your headset. When it’s off, you won’t hear your voice and
audio mix from the headset.
Time Info On/Off: When “Time Info” is on, a time stamp
will appear in the bottom right corner when recording &
playing back recorded files. When it’s off, the time stamp
won’t appear.
Rec Info On/Off: When “Rec Info” is on, a red circle will
blink in the top left corner when recording & playing back
recorded files. When it’s off, you won’t see the red circle
while recording & playing back recorded files.
System Time: Set the time and date on the device.
Schedule Recording: Allows you to program up to 4
different recording schedules.
Recording Resolution: Sets the output resolution. (High,
Middle or Low)
Software Update: Use as instructed by our tech support
team to upgrade your device’s firmware if necessary.
PICTURE SETTINGS
Picture Mode: Mild, User, Dynamic and Standard are
options.

15
Color Temperature: Medium, Warm, User and Cool are
options.
Aspect Ratio: Auto, 4:3, 16:9, Zoom 1, Zoom 2 and Just
Scan are options. (Default: 16:9)
SOUND Settings
Sound Mode: Standard, Music, Movie, Sports and User
are options.
Equalizer: 120 Hz, 500 Hz, 1.5 KHz, 5 KHz and 10 KHz
are options.
OPTION Settings
OSD Language: Sets the language to be displayed on the
menu. English, Japanese, French, Simplified Chinese and
Traditional Chinese are available.
Restore Factory Default: Restore the factory settings.
OSD Transparency: Set the transparency of the menu.
High, Middle, Low and Off are options.
OSD Duration: Set the duration of menu display. 5
seconds, 10s, 15s and Off are options.
Version: Shows the current device version.

16
How To Connect Your HD Capture Box To Your
PC & Record Directly To Your PC (Using the
GXPlayer Software)
1. Download the GXPlayer from the below link:
http://www.clearclicksoftware.com/GXPlayer.zip
2. Connect your HD Capture Box to the power adapter as
normal and connect your HDMI source to the “IN” port.
3. After installing the software/drivers, using the included
micro USB cable, connect the “USB TO PC” port on the
HD Capture Box to your PC. (Macintosh not supported)
4. Once your PC is finished installing the device, open the
GXPlayer software on your computer.
5. Important: When you first use the GXPlayer software,
make sure you register the software first. Otherwise, the
program will only allow you to record 10 minutes of video
at a time.
To register the software, click the button to open the
“About” window. Then click the “Register” button. Enter
your name, email address, and the registration code from
the software download card.

17
6. To start recording, just click the Record button in the
software. To stop recording, press the Stop button.
You can also click the Snapshot button to take a still
image of your source.
7. To view recorded files, click on the Folder and/or
Playback icons.
8. To schedule a recording, click on the Settings
button and then click the “Schedule Recording” button.
GXPlayer Settings Explanation:
To change the following settings in the GXPlayer software,
click on the Settings button.
Video Resolution: Sets the recording resolution. 1080p,
720p and 480p are available.
Video Bitrate: Sets the quality of recording. High, Mid,
Low are available.
Video Render: Sets the video rendering technology.
Video Mix Render9 and Internal YUV Render are
available.
Audio Render: Sets the audio rendering technology.
System DirectSound and Internal Audio Render are

18
available.
Recorded Audio Format: Sets the audio format. MP4
(MPEG-4) / MP4 (MPEG-TS) are available.
Hotkey for Recording: Sets the hotkey for starting and
stopping recording of video.
Recorded Video Format: Sets the video format.
Language: Sets the language to be displayed on the
screen. English, Japanese, Simplified Chinese and
Traditional Chinese are available.
Video Files Saved to Folder: Sets the directory that
recorded videos will be saved in. You can change the
directory by clicking on the folder button.
Automatically generate the file name when recording
starts: If this option is selected, the filenames of recorded
videos will be set automatically.
Set up maximum recording time: Sets the maximum
recording time. GXPlayer will stop recording when the
maximum recording time is reached.
Schedule Recording: Allow you to schedule recordings in
advance.

19
How To Live Stream with OBS (PC Only)
1. If you have not already, install the drivers for the device
by installing the “GXPlayer” software from:
http://www.clearclicksoftware.com/GXPlayer.zip
2. After installing the software/drivers, using the included
micro USB cable, connect the “USB TO PC” port on the
HD Capture Box to your PC. (Macintosh not supported)
3. Download & install the OBS software from
www.OBSproject.com.
4. Open the OBS software.
5. Click Scenes →Add Scene→and enter a name.
6. Click Sources →Add Video Capture Device→and give
it a name.
7. In the capture device settings, choose “GXPlayer Box”
next to Device. Next to Audio Output Mode, choose
“Output desktop audio (DirectSound)” and click OK.
8. Click the “Start Streaming” button to start streaming.

20
How To Live Stream with XSplit (PC Only)
1. If you have not already, install the drivers for the device
by installing the “GXPlayer” software from:
http://www.clearclicksoftware.com/GXPlayer.zip
2. After installing the software/drivers, using the included
micro USB cable, connect the “USB TO PC” port on the
HD Capture Box to your PC. (Macintosh not supported)
3. Download & install the XSplit software from
www.XSplit.com.
4. Open the XSplit software.
5. Click Sources →Add →Webcam/capture card →
GXPlayer Box.
6. Click Outputs →Set up a new output →and Choose
your service (such as YouTube).
7. Now click Outputs →[Service such as YouTube] to start
streaming.
Table of contents
Other ClearClick PCI Card manuals


