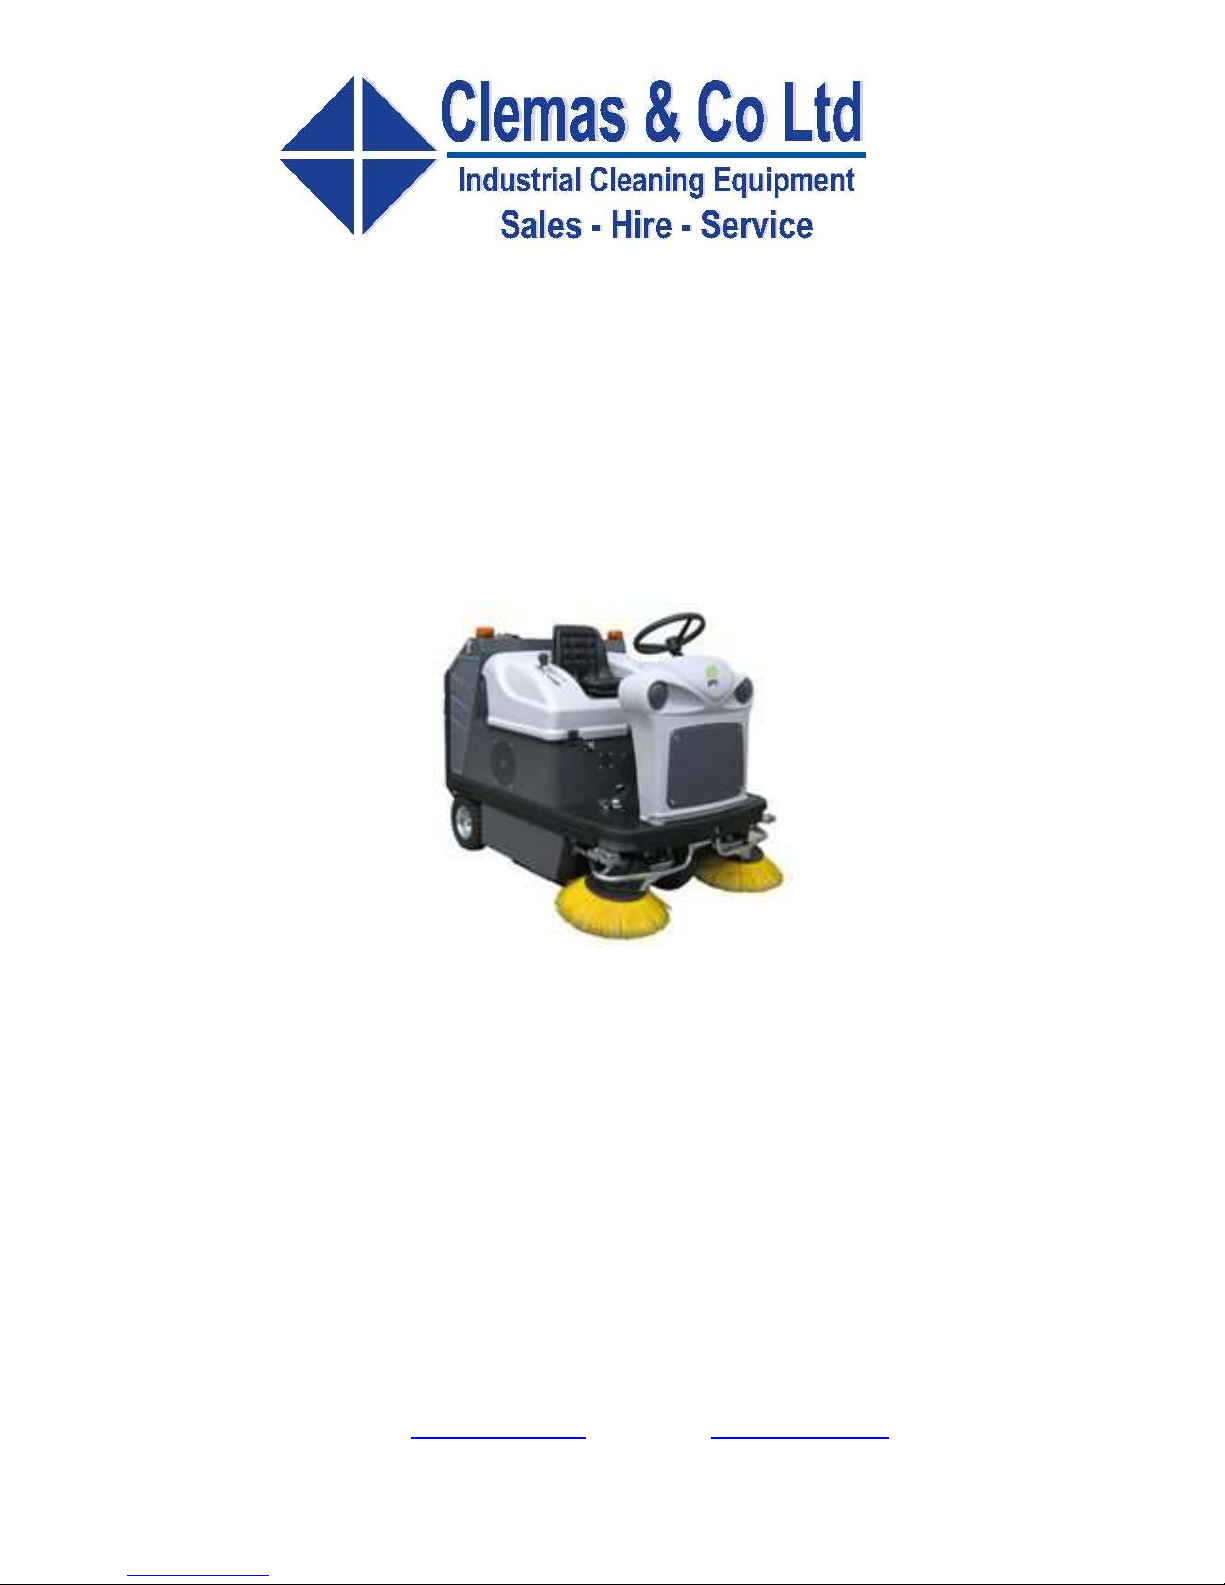
Clemas & Co 1450 User manual

1450 SWEEPER
OPERATOR MANUAL
Clemas & Co. Unit 5 Ashchurch Business Centre, Alexandra Way, Tewkesbury,
Gloucestershire, GL20 8NB.
Tel: 01684 850777 Fax: 01684 850707

ENGLISH
2
1.
CONTENTS
1.
CONTENTS.......................................................................................................................... 2
2.
GENERAL INFORMATION.................................................................................................. 3
2.1.
S
COPE OF THE MANUAL
...................................................................................................................3
2.2.
I
DENTIFYING THE MACHINE
.............................................................................................................3
2.3.
D
OCUMENTATION PROVIDED WITH THE MACHINE
...........................................................................4
3.
TECHNICAL INFORMATION............................................................................................... 4
3.1.
G
ENERAL DESCRIPTION
...................................................................................................................4
3.2.
L
EGEND
..........................................................................................................................................4
3.3.
D
ANGER ZONES
...............................................................................................................................4
4.
SAFETY INFORMATION ..................................................................................................... 4
4.1.
S
AFETY REGULATIONS
....................................................................................................................4
5.
HANDLING AND INSTALLATION....................................................................................... 7
5.1.
L
IFTING AND TRANSPORTING THE PACKAGED MACHINE
..................................................................7
5.2.
C
HECKS ON DELIVERY
.....................................................................................................................7
5.3.
U
NPACKING
....................................................................................................................................7
5.4.
B
ATTERIES
(BATTERY
VERSION) ..............................................................................................7
5.4.1.
Batteries: preparation ................................................................................................................8
5.4.2.
Batteries: installation and connection........................................................................................8
5.4.3.
Batteries: removal......................................................................................................................8
5.4.4.
The battery charger...................................................................................................................9
5.4.5.
Choosing the battery charger.....................................................................................................9
5.4.6.
Preparing the battery charger.....................................................................................................9
5.5.
L
IFTING AND TRANSPORTING THE MACHINE
....................................................................................9
6.
PRACTICAL GUIDE FOR THE OPERATOR....................................................................... 9
6.1.
C
ONTROLS
-
D
ESCRIPTION
..............................................................................................................9
6.2.
P
REPARING THE MACHINE FOR WORK
............................................................................................10
6.2.1.
“PETROL / DIESEL” version ..........................................................................................11
6.2.2.
“BATTERY” version.........................................................................................................11
6.3.
W
ORKING
......................................................................................................................................11
7.
PERIODS OF INACTIVITY................................................................................................. 13
8.
MAINTENANCE INSTRUCTIONS ..................................................................................... 13
8.1.
M
AINTENANCE
-
G
ENERAL RULES
.................................................................................................14
8.2.
R
EPLACING
/
MOUNTING THE CENTRE BRUSH
..................................................................................14
8.3.
R
EPLACING
/
INSTALLING
/
ADJUSTING THE SIDE BRUSHES
................................................................14
8.4.
R
EPLACING
/
INSTALLING THE SUCTION FILTER
. ..............................................................................14
8.5.
F
USES
:
REPLACING
........................................................................................................................15
8.6.
R
EPLACING
/
INSTALLING FLAPS
......................................................................................................15
8.6.1.
Side flaps...........................................................................................................................15
8.6.2.
Rear flap............................................................................................................................15
8.6.3.
Front flap...........................................................................................................................15
8.7.
M
AINTENANCE DEBRIS BIN
,
MAINTENANCE DEBRIS BIN COMPARTMENT
.......................................15
8.8.
B
ATTERIES
....................................................................................................................................16
9.
TROUBLESHOOTING....................................................................................................... 18
9.1.
H
OW TO SOLVE PROBLEMS OCCURRING WITH THE
PETROL
AND
DIESEL
VERSION
....................18

ENGLISH
3
2. GENERAL INFORMATION
Read this manual carefully before carrying out any work on the machine
1
.
2.1. Scope of the manual
This manual has been written by the Manufacturer and is an integral part of the machine.
It defines the purpose for which the machine has been designed and constructed and
contains all the information required by operators.
In addition to this manual containing all user information, other publications are available
providing specific information for maintenance personnel.
Constant respect for the instructions guarantees the safety of the operator and the
machine, low running costs and high quality results and extends the working life of the
machine. Failure to respect the instructions may lead to damage to the operator,
machine, floor and environment.
To find the topic that interests you more rapidly, consult the list of contents at the
beginning of the manual.
Parts of the text requiring special attention are highlighted in bold and preceded by the
symbols illustrated and described here.
!DANGER
Indicates the need for attention in order to avoid a series of consequences which
could cause death or damage to the health of the operator.
IMPORTANT
Indicates the need for attention in order to avoid a series of consequences which
could cause damage to the machine or work environment or financial loss.
i INFORMATION
Particularly important instructions.
In line with the company's policy of constant product development and updating, the
Manufacturer reserves the right to make modifications without warning.
Although your machine may differ appreciably from the illustrations in this document,
safety and the information contained in this manual are guaranteed.
2.2. Identifying the machine
The rating plate located as shown in fig. x, ref. x provides the following information:
•model;
•power supply;
•total nominal power;
•serial number;
•year of fabrication;
•weight fully loaded;
•maximum slope;
•barcode with serial number;
•manufacturer's identification.
•
1
The definition "machine" replaces the trade name covered by this manual.

ENGLISH
4
2.3. Documentation provided with the machine
•user manual;
•guarantee certificate;
•EC certificate of conformity.
3. TECHNICAL INFORMATION
3.1. General description
This machine is a motorised sweeper designed to sweep floors in civil and industrial
premises.
The motorised sweeper may be used to clean the residues from industrial processes,
dust and dirt in general on all relatively even flat hard surfaces such as concrete, asphalt,
porcelain stoneware, ceramic tiles, sheet metal, marble, embossed or smooth rubber or
plastic mats indoors or outdoors.
3.2. Legend
The main parts of the machine are as follows (fig. A-B):
•Debris bin (fig. B, ref. 1), contains the material picked up by the centre brush and the
dust from the filter
•Control panel (fig. C )
•Centre brush (fig. F-G), the principal organ of the machine, transfers the dust and
debris to the bin. Available with bristles of different hardnesses and materials according
to the type of debris to be picked up.
•Side brushes (fig. A, ref. 1), convey the dust and debris, used exclusively to clean
edges, corners and profiles.
•Suction filter (fig. L ), consists of a polyester bag filter which filters the air drawn in by
the suction fan.
•Suction fan, enables the machine to sweep without raising dust (fig. B, ref. 2).
•Flaps (fig. O-P-Q ), surround the centre brush and guarantee the suction effect.
3.3. Danger zones
•Control panel: danger of short circuit.
•Centre brush:danger due to brush rotation.
•Side brushes: danger due to brush rotation.
•Back/front wheels: danger of crushing between the wheel and chassis.
•Motor/battery compartment: danger of short circuit between the battery poles, risk of
serious burns when performing any maintenance with the engine off but not completely
cold (PETROL and DIESEL version).
•Debris bin: during bin raising/lowering, danger of crushing.
4. SAFETY INFORMATION
4.1. Safety regulations
Read the "User Manual" carefully before start-up and use or before performing
maintenance or any other work on the machine.

ENGLISH
5
IMPORTANT
Rigorously respect all instructions in the Manual (in particular those relating to
danger and important information) and on the safety plates fitted to the machine.
The Manufacturer declines all liability for damage to people or things resulting from
failure to observe the instructions.
The appliance must be used exclusively by persons trained in its use and/or who have
demonstrated their ability and have been expressly instructed to use the appliance.
The machine must not be used by minors.
The machine must not be used for purposes other than those for which it was expressly
designed. Scrupulously respect all safety standards and conditions applicable to the type
of building in which the machine is to be operated (eg: pharmaceutical companies,
hospitals, chemicals, etc).
Do not use the machine in places with inadequate lighting or explosive atmospheres, on
public roads, in the presence of dirt hazardous to health (dust, gas, etc) and in unsuitable
environments.
The machine is designed for temperatures of between +4°C and +40°C when in use and
between +0°C and +50°C when not in use.
The machine is designed to work in a humidity of between 30% and 95%.
Never pick up flammable liquids or explosives (eg. petrol, fuel oil, etc), acids and solvents
(eg. paint solvents, acetone etc.). Never pick up flaming or incandescent objects.
Never use the machine on slopes or ramps of more than 18%. In the case of slight
slopes, do not use the machine transversally, always manoeuvre with care and do not
reverse. When transporting the machine on steeper ramps or slopes, take the utmost
care to avoid tipping up and/or uncontrolled acceleration.
Never park the machine on a slope.
The machine must never be left unattended with the engine or motor on. Before leaving it,
turn the engine or motor off, make sure it cannot move accidentally.
Always pay attention to other people, children in particular, present in the place where you
are working.
Never use the machine to transport people or things or to tow things. Do not tow the
machine.
Never rest objects of any weight on the machine for any reason.
Never obstruct ventilation and heat dispersion slits.
Never remove, modify or circumvent safety devices.
Numerous unpleasant experiences have shown that a wide range of personal objects
may cause serious accidents. Before beginning work, remove jewellery, watches, ties,
etc.
The operator must always use personal protection devices - protective apron or overalls,
non-slip waterproof shoes, rubber gloves, protective goggles and ear protectors and mask
to protect the respiratory tract.
Keep the hands away from moving parts.
In the case of malfunction and/or faulty operation, turn the machine off immediately and
do not tamper. Contact a service centre authorised by the Manufacturer.
All maintenance operations must be performed in an adequately lit place.
All work on the electrical system and all maintenance and repair operations other than
those explicitly described in this manual must be performed by specialised personnel
expert in the sector only.
Only original accessories and spare parts supplied by the Manufacturer may be used in
order to guarantee safe problem-free operation of the machine. Never use parts removed
from other machines or from other kits.
This machine has been designed and constructed to provide ten years' service from the
fabrication date shown on the rating plate. After this time, whether the machine has been
used or not, it should be disposed of according to current legislation in the country in
which it is used:

ENGLISH
6
- the product is classified as WEEE type special waste and is covered by the
requisites of the new environmental protection regulations (2002/96/EC WEEE). It
must be disposed of separately from ordinary waste in compliance with current
legislation and standards.
Special waste. Do not dispose of with ordinary waste.
Alternatively the machine must be returned to the Manufacturer for a complete overhaul.
If you decide to stop using the machine, you are recommended to remove the batteries
and dispose of them at an authorised collection centre.
You should also make sure that all parts of the appliance which could represent a hazard,
particularly to children, are made safe.

ENGLISH
7
5. HANDLING AND INSTALLATION
5.1. Lifting and transporting the packaged machine
IMPORTANT
During all lifting operations, make sure the packaged machine is firmly anchored to
avoid it tipping up or being accidentally dropped.
Always load/unload lorries in adequately lit areas.
The machine, packaged on a wooden pallet by the Manufacturer, must be loaded using
suitable equipment (see EC Directive 2006/42 and subsequent amendments and/or
additions).
A fork lift truck must always be used to lift the packaged body of the machine. Handle
with care to avoid knocking or overturning the machine.
5.2. Checks on delivery
When the carrier delivers the machine, make sure the packaging and machine are both
whole and undamaged. If the machine is damaged, make sure the carrier is aware of the
damage and before accepting the goods, reserve the right (in writing) to request
compensation for the damage.
5.3. Unpacking
IMPORTANT
When unpacking the machine, the operator must be provided with the necessary
personal protection devices (gloves, goggles, etc) to limit the risk of accident.
Unpack the machine as follows:
• cut and remove the plastic straps using scissors or nippers;
• remove the cardboard;
• depending on the model, remove the metal brackets or cut the plastic straps fixing the
machine chassis to the pallet;
• using a sloping ramp, push the machine backwards off the pallet;
• move the machine away from the packaging.
The packaging may be kept for reuse to protect the machine if it is moved to another site
or to a repair workshop.
Otherwise it must be disposed off in compliance with current legislation.
!DANGER
Failure to observe these instructions could cause possibly serious damage to
people and things and invalidates the guarantee.
5.4. Batteries (BATTERY VERSION)
Two different types of battery may be installed on these machines:
•wet batteries: the electrolyte level must be checked regularly. When necessary, top
up with distilled water until the plates are covered. Do not over fill (5 mm max. above
the plates).
•gel batteries: this type of battery requires no maintenance.
The technical characteristics must correspond to those indicated in the section on the
technical specification of the machine. The use of heavier batteries could seriously
jeopardise manoeuvrability and the performance of the machine. Batteries with a lower
capacity and weight will require recharging more frequently.
They must be kept charged, dry and clean and the connections must be tight.

ENGLISH
8
5.4.1. Batteries: preparation
!DANGER
While installing or performing maintenance on the batteries, the operator must be
provided with the necessary personal protection devices (gloves, goggles, overalls,
etc) to limit the risk of accident. Keep away from naked flames, avoid short
circuiting the battery poles, avoid sparks and do not smoke.
The batteries are normally supplied filled with acid and ready for use.
If the batteries are dry, before mounting them on the machine, proceed as follows:
• remove the caps and fill all elements with specific sulphuric acid solution until the
plates are entirely covered (this requires at least a couple of passes for each element);
• leave for 4-5 hours to allow the air bubbles to come to the surface and the plates
to absorb the electrolyte;
• make sure the level of electrolyte is still above the plates and if necessary top up
with sulphuric acid solution;
• close the caps;
• mount the batteries on the machine (following the procedure described below).
Before starting up the machine for the first time, charge the batteries as described in the
relevant section (Batteries).
5.4.2. Batteries: installation and connection
!DANGER
Check that all switches on the control panel are in the "0" (off) position.
Make sure you connect the terminals marked with a "+" to the positive poles of the
battery. Do not check the battery charge by sparking.
Follow the instructions given below meticulously as short circuiting the batteries
could cause them to explode.
•Lift the seat cowling and KEEPING HOLD OF IT move it forwards to access the battery
compartment from the top.
•Place the batteries in the battery compartment.
IMPORTANT
Mount the batteries on the machine using lifting means suitable for their weight.
The positive and negative poles have different diameters.
•Connect the batteries to the wiring of the machine
•Lower the cowling into the working position
•Use the machine according to the instructions below.
5.4.3. Batteries: removal
When removing the batteries, the operator must be equipped with suitable personal
protection devices (gloves, goggles, overalls, safety shoes, etc) to reduce the risk of
accidents. Make sure the switches on the control panel are in the "0" position (off) and the
machine is turned off. Keep away from naked flames, do not short circuit the battery
poles, do not cause sparks and do not smoke. Proceed as follows.
•disconnect the battery wiring and bridge terminals from the battery poles.
•if necessary, remove the devices fixing the battery to the base of the machine.
•lift the batteries from the compartment using suitable lifting equipment.

ENGLISH
9
5.4.4. The battery charger
IMPORTANT
Never allow the batteries to become excessively flat as this could damage them
irreparably.
5.4.5. Choosing the battery charger
Make sure the battery charger is compatible with the batteries to be charged:
−tubular lead batteries: an automatic charger is recommended
−Consult the battery charger manufacturer and manual to confirm the choice.
−gel batteries: use a charger specific for this type of battery.
5.4.6. Preparing the battery charger
If you wish to use a battery charger not provided with the machine, you must fit it with the
connector supplied with the machine.
To install the connector, proceed as follows:
•remove about 13 mm of protective sheath from the red and black wires of the
battery charger;
•insert the wires into the connector contacts and squeeze them forcefully with
suitable pliers;
•respect the polarity (red wire + black wire –) when inserting the wires into the
connector.
•Insert the wired-up connector into the connector on the machine.
5.5. Lifting and transporting the machine
IMPORTANT
All phases must be performed in an adequately lit room and adopting the safety
measures most appropriate to the situation.
The operator must always use personal protection devices.
To load the machine onto a means of transport, proceed as follows:
•empty the debris bin
•place the machine on the pallet and fix it with plastic straps or metal brackets;
•lift the pallet (with the machine) using a fork lift truck and load it onto the means of
transport;
•anchor the machine to the means of transport with cables connected to the pallet
and machine itself.
6. PRACTICAL GUIDE FOR THE OPERATOR
6.1. Controls - Description
With reference to fig. C, the machine has the following controls and indicator lights:
ON/OFF switch (PETROL and DIESEL version) (fig. C, ref. 1): turns the machine on
and off
ON/OFF switch (BATTERY version) (fig. C, ref. 1) turns the machine drive pump on and
off
Horn button (fig. C, ref. 2)
Suction fan switch (fig. C, ref. 3): turns the suction motor on and off
Centre brush switch (fig. C, ref. 4): turns the brushes on and off.
Filter shaker button (fig. C, ref. 5): operates the filter shaker
Light switch (fig. C, ref. 6): turns the headlights on and off (OPTIONAL)
Debris bin rotation button (fig. C, ref. 7): enables rotation of the debris bin

ENGLISH
10
Debris bin raising switch (fig. C, ref. 8): enables raising and lowering of the debris bin
Bin raising/lowering enabling button (fig. C, ref. 9): this button must be used together
with the debris bin raising switch.
Emergency button (fig. C, ref. 10): press to stop the machine.
Side brush switch (fig. C, ref. 11): this button enables/disables operation of the side
brushes, but these are activated only when the centre brush is in operation.
Multifunction lights (PETROL and DIESEL):
(
fig. C, ref. 12) OK LED: lights up when the machine is started
(fig. C, ref. 13) MOTOR OIL LED: comes on when the pressure in the internal combustion
engine drops below the standard value.
(fig. C, ref. 14) ALTERNATOR KO LED: comes on when the alternator no longer delivers
current when the internal combustion engine is on.
(fig. C, ref. 15) INTERNAL COMBUSTION ENGINE AIR FILTER CLOGGED LED: comes
on when the air filter is clogged (OPTIONAL)
(fig. C, ref. 16) FUEL LED: comes on when the machine is running on the fuel reserve
Timer
(fig. C, ref. 17):
records the working hours of the internal combustion engine or
drive pump in the BATTERY version
Centre brush pressure regulation handle (fig. A, ref. 2):
regulates the pressure of the
brush on the floor. The handle should be operated with the centre brush STATIONARY.
Accelerator handle (PETROL and DIESEL version)
(fig. D, ref. 1)
: by setting this lever
to MINIMUM or MAXIMUM, you can regulate the speed of the internal combustion engine.
When working, it must always be set to MAXIMUM.
Side brushes adjustment knob (fig. D, ref. 2): this knob sets the number of revolutions
of the side brushes (turn clockwise to reduce the speed)
Machine movement pedal (fig. A, ref. 3): pivoting device, press forwards to move the
machine forwards, press the back to move the machine backwards
Service brake/parking brake pedal (fig. B, ref. 3): acts mechanically on the two brake
drums on the back wheels.
Battery charge indicator (BATTERY version) (fig. C, ref. 19), to improve battery
protection, the machine is fitted with a charge indicator. This safety device consists of a
series of eight LEDs which provide a constant indication of charge level (capacity
indicator) and shut the pump down immediately when the charge drops below the
minimum permitted level. When this occurs, the red LED comes on.
The number of yellow LEDs lit indicates the remaining charge. One LED corresponds to
a charge of about 10%.
When the minimum permitted charge is reached, the left yellow LED flashes to warn that
the pump is about to shut down.
The red LED indicates that the minimum permitted charge has been reached and at the
same time, the pump shuts down.
Pump motor thermal cutout tripped lights (BATTERY version) (fig. C, ref. 20-21),
these two LEDs come on when the electric motors overheat.
If one of these LEDs comes on, stop work immediately and allow the motor to cool down.
If the problem reoccurs, have the machine checked by qualified personnel.
M1= drive pump motor
M2= functions pump motor
6.2. Preparing the machine for work
IMPORTANT
Before starting work, wear overalls, ear protectors, non-slip shoes, mask to protect
the respiratory tract, gloves and all other personal protection devices necessitated
by the work environment.

ENGLISH
11
WARNING
Always monitor the hydraulic oil level. It must be at the correct level to avoid
overheating.
6.2.1. “PETROL / DIESEL” version
Read the engine instruction manual annexed to the machine manual carefully and check
the level of oil in the engine. If low, top up wearing protective gloves.
Check the hydraulic oil level (AGIP ARNICA 68 type), if low, top up wearing protective
gloves.
Fill up with fuel (fig. B, ref. 4).
Mount the side brushes (see MAINTENANCE chapter).
6.2.2. “BATTERY” version
Check the acid level and charge of the batteries. To top up and charge the batteries see
the chapter HANDLING AND INSTALLATION.
Check the hydraulic oil level (AGIP ARNICA 68 type), if low, top up wearing protective
gloves.
Mount the side brushes (see MAINTENANCE chapter).
i INFORMATION
If you are using the machine for the first time, we recommend trying it on a large
obstacle-free surface first to acquire the necessary familiarity.
6.3. Working
Starting up/use:
i INFORMATION
The seat (fig. A, ref. 4) is fitted with a safety sensor which enables operation of the
machine only when the operator is seated.
•Prepare the machine as described above.
•(PETROL and DIESEL version) set the accelerator handle (fig. D, ref 1) to minimum.
•(PETROL and DIESEL version) turn the ignition key (fig. C, ref. 1), then release
when the engine has started. Check that all the multifunction lights are off except for
the OK light (fig. C, ref. 12) .
•(PETROL and DIESEL version) accelerate to maximum using the handle (fig. D, ref.
1) .
•(BATTERY version) turn the ignition key (fig. C, ref. 1), to position 1
i INFORMATION
In the BATTERY version, when you turn the ignition key to position 1 (fig. C, ref. 1),
only the electric motor running the drive pump comes on. The electric motor
running the pump which drives the functions (centre brush feed and bin raising)
comes on when you press the button/switch turning on the functions on the
control panel.
•Move the machine to the work area, keeping your hands on the steering wheel and
pressing the machine movement pedal (fig. A, ref. 3). Pressing it forwards moves the
machine forwards, pressing the back moves the machine backwards.
•Make sure the debris bin is perfectly closed, otherwise close it using the control panel.
i INFORMATION
Opening of the debris bin disables operation of the suction fan and centre brush.

ENGLISH
12
•Use the handle to adjust the pressure of the centre brush on the floor (fig. A, ref. 2)
according to the type of floor and dirt to be picked up. To facilitate use of the handle,
operate with the centre brush STATIONARY. The brush is self-levelling
•Press the suction switch (fig. C, ref. 3)
•Press the centre brush switch (fig. C, ref. 4)
•Press the side brush switch (fig. C, ref. 11)
•Use the knob to adjust the number of revolutions of the side brush (fig. D, ref. 2)
•Start cleaning, manoeuvring with your hands on the steering wheel and moving the
machine forwards or backwards by pressing the pedal (fig. A, ref. 3).
IMPORTANT
To avoid damaging the surface of the floor to be treated, avoid rotating the brushes
with the machine stationary.
IMPORTANT
Each 30 minutes of work, activate the filter shaker button (fig. C, ref. 5) for 30
seconds to clean the suction filter. During this operation, the suction fan shuts off
automatically.
IMPORTANT
Avoid passing over puddles of water. If the work surface is wet, you can only
continue using the machine if you turn off the suction fan as damp/wet dirt reduces
the performance of the suction filter.
i INFORMATION
For good results, empty the debris bin often and keep the filter clean by shaking it
using the special device.
Emptying the debris bin:
IMPORTANT
When emptying the bin, always wear a mask to protect the respiratory tract from
the dust which is always present during this operation.
i INFORMATION
Before empting the debris bin, operate the filter shaker for 30 seconds to clean the
filter
!DANGER
When the debris bin is raised/lowered or rotated, there is a risk of crushing the
hands. To perform this operation, both hands must therefore be used to action the
switches.
•Turn the centre brush off by pressing the switch (fig. C, ref. 4).
•Hold down the bin raising enabling button and use the raising switch (fig. T) to
raise/lower the bin.
•Move the machine with the bin raised to the required height over a waste bin, then
rotate the bin by holding the enabling button and rotation button down at the same
time (fig. U).
•After emptying the material, release the buttons (fig. U), the bin goes back to the
horizontal position.

ENGLISH
13
•Close the bin using the bin lowering switch and keeping the bin raising/lowering
enabling button pressed (fig. T).
When the bin is closed, release the closing commands and the suction motor starts up
again.
•Turn the centre brush on by pressing the switch (fig. C, ref. 4).
•At this point, you can start work again.
Flap raiser
•To collect bulky solid debris, raise the flap by pressing the pedal (fig. B, ref. 5). As far
as possible, you should, however, avoid using the sweeper with the flap raised as
cleaning efficiency is reduced.
Stopping:
•Move the machine to the parking area.
•Release the machine movement pedal (fig. A, ref. 3).
•Set the accelerator to minimum using the handle (fig. D, ref. 1).
•Turn the side brushes off by pressing the switch (fig. C, ref. 11).
•Turn the centre brush off by pressing the switch (fig. C, ref. 4).
•Turn the suction motor off by pressing the switch (fig. C, ref. 3).
•Turn the ignition key (fig. C, ref. 1) to the "0" position.
•Put on the parking brake (fig. B, ref. 3).
i INFORMATION
Pushing and pulling the machine:
When you cannot use the drive, use the by-pass lever (fig. R-R1) to push/pull the
machine. After moving, put the by-pass lever back in the original position.
7. PERIODS OF INACTIVITY
•Disconnect the batteries. To optimise the working life of the battery, it should be
charged every 30/40 days. If the level of solution is low, top up with distilled water.
•Empty the debris bin.
•Clean the machine in general, see chapter MAINTENANCE INSTRUCTIONS.
•Clean the suction filter.
8. MAINTENANCE INSTRUCTIONS
!DANGER
Maintenance must always be carried out with the machine off and ignition key
removed.
All routine and extraordinary maintenance must be performed by competent
personnel or at an authorised service centre.
For all maintenance on the engine, see the instruction book.
!DANGER
Never perform any maintenance operations without first disconnecting the
batteries from the machine’s electrical circuit.
Maintenance on the electrical circuit and all other operations not explicitly
described in this manual must be performed by specialised personnel only, in
compliance with current safety legislation and as described in the maintenance
manual.

ENGLISH
14
8.1. Maintenance - General rules
Performing regular maintenance according to the Manufacturer's instructions improves
performance and extends the working life of the machine.
When cleaning the machine, respect the following:
•avoid the use of high pressure washers. Water could penetrate the electrical
compartment or motors leading to damage or the risk of short circuit;
•do not use steam to avoid the heat warping plastic parts;
•do not use hydrocarbons or solvents as they could damage the cowling and rubber
parts.
8.2. Replacing/mounting the centre brush
!DANGER
This operation must be performed with the machine off and ignition key removed
Proceed as follows:
•Open the door on the left of the machine by unscrewing the knob (fig. E).
•Unscrew and remove the three knobs fixing the brush compartment cover (fig. F).
•Remove the brush compartment cover (fig. F).
•Remove the brush (fig. F).
•Remove the adaptor from the brush drum and place it on the new brush, maintaining
the same bristle slant (fig. G).
•Proceed with the same sequence in reverse to replace the brush.
8.3. Replacing/installing/adjusting the side brushes
!DANGER
This operation must be performed with the machine off and ignition key removed
To facilitate transport, the side brush/es is/are not mounted in the operating position.
To mount the side brush in the correct position, proceed as follows:
•Remove the side brush retainer screw from the motor shaft (fig. H).
•Remove the adhesive tape fixing the drive key to the motor shaft.
•Position the brush complete with flange on the shaft (fig. H).
•Fix the brush in position using the retainer screw removed at point 1 (fig. H).
To replace worn side brushes, repeat the procedure above.
Normal machine operation causes the side brushes to wear down. To adjust the height of
the side brushes from the work surface, proceed as follows:
LOOSEN the 2 screws (fig. S). Adjust (lowering/raising) the height of the mechanical end
stop (fig. S) to determine the operating height of the brushes.
This should be done with
the brushes raised.
8.4. Replacing/installing the suction filter.
!DANGER
This operation must be performed with the machine off and ignition key removed
Every 50 working hours or as necessary, check the suction filter as follows:
•Lift the back guard (suction fan housing) (fig. I). Make sure it is blocked in the open
position by the safety device (fig. V).
•Unscrew the four screws (fig. L).
•Disconnect the connector on the filter shaker (fig. L).

ENGLISH
15
•Remove the filter from its housing (fig. L).
•Thoroughly clean the filter with a vacuum cleaner or replace it (fig. M).
•To mount the filter, follow the same procedure in reverse.
•Close the back guard by releasing the safety device (fig. V).
8.5. Fuses: replacing
IMPORTANT
This operation must be performed with the machine off and ignition key removed
•turn the ignition key (fig. C, ref. 1) to the "0" position.
•lift the fuse compartment cover (fig. C ref. 18 - fig. N).
•check the fuses (fig. N).
•replace with a new fuse.
•close the cover.
Fuse table: For the complete fuse table, see the spare parts catalogue.
IMPORTANT
Never use a fuse with a higher amperage than specified.
If a fuse continues to blow, the fault in the wiring, boards (if present) or motors
must be identified and repaired. Have the machine checked by qualified personnel.
8.6. Replacing/installing flaps
!DANGER
This operation must be performed with the machine off and ignition key removed
Every 50 working hours or as necessary, check the flaps and if worn, proceed as follows:
8.6.1. Side flaps
•Open the side guards (fig. O - fig. P).
•Using a screwdriver, unscrew the flap fixing screws (fig. O - fig. P).
•Replace the worn flaps (fig. O - fig. P).
To mount, follow the same procedure in reverse.
8.6.2. Rear flap
•Remove the left side guard (fig. E).
•Remove the brush compartment cover (fig. F).
•Remove the rear flap (fig. Q, ref. 1).
•Replace the worn rear flap (fig. Q, ref. 1).
To mount, follow the same procedure in reverse.
8.6.3. Front flap
•Remove the two side brushes (fig. H).
•Using a screwdriver, unscrew the worn front flap fixing screws (fig. Q - ref. 2).
•Release the flap from the pronged clip.
•Replace the worn front flap (fig. Q, ref. 2).
To mount, follow the same procedure in reverse.
8.7. Maintenance debris bin, maintenance debris bin compartment
!DANGER
If maintenance on the machine needs to be carried out with the debris bin raised,
the bin lifting piston must be blocked mechanically using the device supplied with
the machine. Follow the instructions in Figure Z precisely.

ENGLISH
16
8.8. Batteries
!DANGER
Do not check the battery by sparking.
The batteries give off flammable fumes. Put out all fires and hot embers before
checking or topping up the batteries.
Perform the operations described above in a ventilated room.
IMPORTANT
This operation must be performed with the machine off and ignition key removed
Check the acid level and charge of the batteries. To top up the batteries see the chapter
HANDLING AND INSTALLATION.
Charge:
•Raise the seat cowling and KEEPING HOLD OF IT move it forwards. This provides
access to the battery compartment from above.
•Connect the battery cable to the battery charger cable
•Plug the battery charger into the mains and turn it on.

ENGLISH
17
MAINTENANCE SCHEDULE
A: On receipt
B: Twice a week
C: Each week
D: Every 20 hours
E: Every 50 hours
F: Every 100 hours
G: Every 150 hours
H: Every 300 hours
I: Every 400 hours
I: Every 400 hours
CHECK A B C D E F G H I
Centre brush: check for nylon
cord or rope wrapped around
the brush and remove if
necessary
Centre brush: check the state
of wear of the brush
Side brushes: check the state
of wear of the brushes
Flaps/bin gasket: check the
state of wear of flaps and
gaskets
Dust filter: check that the filter
is clean and undamaged
Tyres: check that the tyres are
in good condition and the sides
are free from cuts
Steering: grease the steering
chain
Battery: check the acid level
Hydraulic circuit: check oil
level
Hydraulic circuit: check pipes
and hoses for damage
Internal combustion engine:
change engine oil
Internal combustion engine:
change filter oil
Internal combustion engine:
change air filter
Internal combustion engine:
clean air filter
Internal combustion engine:
check engine oil level
General control: check the
tightness of nuts and screws
See engine instructions

ENGLISH
18
9. TROUBLESHOOTING
9.1. How to solve problems occurring with the PETROL and DIESEL
version
PROBLEM CAUSE REMEDY
Battery disconnected
Connect the battery to the machine
Battery flat. Recharge the battery
Ignition key in the "0" position Turn the ignition key to the "1"
position
Emergency button pressed Unblock the emergency button
Main relay malfunction Replace the main relay
The machine does not start
up
Fuses blown Control/replace fuses
Microswitch under seat not pressed Sit correctly on the seat
Ignition key in the "0" position Turn the ignition key to the "1"
position
Emergency button pressed Unblock the emergency button
Internal combustion engine
does not start
No fuel Fill up with fuel
Suction fan switch not pressed Press the suction fan switch
Debris bin open Close the debris bin
"Debris bin closed" microswitch
malfunction, or switch adjusted
incorrectly
Replace or adjust the "debris bin
closed" microswitch
Suction relay malfunction Replace relay
Filter shaker button pressed Release the filter shaker button
Suction motor malfunction Replace the suction motor
Suction motor does not
function
Fuses blown Control/replace fuses
Brush switch not pressed Press the brush switch
Debris bin open Close the debris bin
"Debris bin closed" microswitch
malfunction, or switch adjusted
incorrectly
Replace or adjust the "debris bin
closed" microswitch
Brush drive solenoid valve
malfunction Replace the solenoid valve
The centre brush does not
turn
Fuses blown Control/replace fuses
Filter shaker button not pressed Press the filter shaker button
Filter shaker relay malfunction Replace relay
Filter shaker motor faulty Replace filter shaker motor
Filter shaker not
functioning
Fuses blown Control/replace fuses
Bin tipping button not pressed Press the bin tipping button
Debris bin tipping/raising enabling
button not pressed Press the debris bin tipping/raising
enabling button
"Minimum tipping height"
microswitch malfunction, or switch
adjusted incorrectly
Replace or adjust the "minimum
tipping height" microswitch
Tipping relay malfunction Replace relay
Tipping motor malfunction Replace tipping motor
Debris bin tipping system
not functioning
Fuses blown Control/replace fuses
Bin tipping button pressed Release the bin tipping button
"Debris bin returned" microswitch
adjusted incorrectly or microswitch
malfunction
Replace or adjust the "debris bin
returned" microswitch
Return relay malfunction Replace relay
Debris bin tipping return
system not functioning
Fuses blown Control/replace fuses

ENGLISH
19
The debris bin has not returned to
the correct position, but is still tipped
up or microswitch malfunction
Adjust or replace the microswitch
Debris bin tipping/raising enabling
button not pressed Press the debris bin tipping/raising
enabling button
The centre brush switch is pressed Turn the centre brush switch off
Raising/lowering solenoid valves
malfunction Replace the solenoid valves
Debris bin raising/lowering
not functioning
Fuses blown Control/replace fuses
Side brushes button not pressed Press the side brushes button
Centre brush switch not pressed Press the centre brush switch
Side brush rotation solenoid valve
malfunction Replace the solenoid valve
Side brushes not turning
Fuses blown Control/replace fuses
Side brushes button not pressed Press the side brushes button
Centre brush switch not pressed Press the centre brush switch
Brushes raising/lowering actuator
malfunction Replace actuator
Side brushes do not lower
Actuator microswitches incorrectly
adjusted Adjust microswitches
Side brushes button pressed Release the side brushes button
Centre brush switch pressed Release the centre brush switch
Side brushes do not rise
Actuator microswitches incorrectly
adjusted Adjust microswitches
Fuses blown Control/replace fuses
Bulbs blown Replace the burned bulb
Headlights do not come on
Lights relay malfunction Replace relay
Fuses blown Control/replace fuses
Flashing light not
functioning Bulbs blown Replace the burned bulb
Filter clogged
Shake the filter using the filter
shaker. If necessary, extract and
clean thoroughly
Filter damaged Replace the filter
Filter incorrectly installed Install the filter correctly
The machine raises dust
Filter housing gasket damaged Replace gasket
Centre brush not adjusted or worn Adjust or replace the centre brush
The centre brush has picked up wire
or string Remove the wire or string
The flaps are damaged Replace flaps
The machine leaves dirt on
the ground
Bin full Empty the debris bin
Battery flat Recharge the battery
Drive pump motor not
working (BATTERY
version) Fuses blown Check/replace fuses
Battery flat Recharge the battery
Functions pump motor not
working (BATTERY
version) Fuses blown Check/replace fuses

Table of contents
Other Clemas & Co Blower manuals

Clemas & Co
Clemas & Co 512 User manual

Clemas & Co
Clemas & Co 1010 User manual

Clemas & Co
Clemas & Co GANSOW 125 User manual

Clemas & Co
Clemas & Co S9 User manual

Clemas & Co
Clemas & Co CS70 90B User manual

Clemas & Co
Clemas & Co CS230 145B User manual

Clemas & Co
Clemas & Co CS220 140B User manual

Clemas & Co
Clemas & Co S3 User manual

Clemas & Co
Clemas & Co S9 User manual
Popular Blower manuals by other brands

Ego Power+
Ego Power+ LB5800E Operator's manual

Toro
Toro Debris Blower 800 Operator's manual

Factory Catry Cat
Factory Catry Cat 48 Series Operator and parts manual

FOD Control Corporation
FOD Control Corporation FOD-Razor Operator's manual

Stihl
Stihl BG 50 instruction manual

909
909 BL18L instruction manual