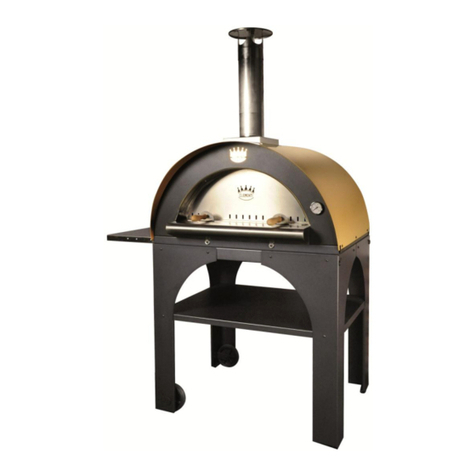
Clementi MASTER User manual

Istruzioni per
l’uso
Operating
instructions
Bedienungsanleitung
Mode
d’emploi
Manual
de instrucciones

Istruzioni per
l’uso
Piano superiore
premere al centro dal
basso
verso
l’alto
e far scivolare
il
piano
obliquamente
Piani laterali
Spingere
il
piano dal basso verso
l’alto
e ribaltarlo
Piano superiore
Piani laterali

I
T
ALIANO
Amo
il
forno
Clementi
perché lui è come me
4
Mod. Master
6
Mod. Bijoux
6
Barbecue Automatico
7
Ricettario

Istruzioni per
l’uso
Mod.
MA
S
TER
dal 1975
Congratulazioni per aver scelto
il
forno a legna prodotto dalla ditta
CLEMENTI
s.n.c., società che dal 1975
vanta una grande
esperienza
nel settore della cucina a legna. Questo tipo di prodotto è frutto di lunghi
® studi ed è costruito con la massima cura, precisione e materiali selezionati ed inoltre è destinato a
dare
un'ottima qualità e durare nel tempo.
Caratteristica
molto importante che possiede
il
forno a legna
CLEMENTI
è la cucina a legna a fuoco
indiretto, una cottura sana e dietetica che lascia inalterati
i
sapori genuini dei cibi.
IMPORTANTE:
per un funzionamento buono e duraturo del forno a legna da interno o da esterno
leggere
attentamente
queste informazioni prima dell’uso.
Informazioni
Utili
• Per
riscaldare
il
forno è preferibile usare legna
secca
di piccolo taglio.
• Per raggiungere la
temperatura
massima di
400°C
occorrono 3,5 kg di
legna.
•Si consiglia una volta raggiunta la
temperatura desiderata,
di lasciare nella camera di combustione solo
carboni accesi. Ma se durante la cottura la
temperatura
dovesse
scendere
si dovrà alimentare
il
fuoco
con pochissima legna. Durante le
accensioni
il
termometro non dovrà mai
superare
la
temperatura
di
450°C.
Se questo dovesse
accadere
aprire immediatamente lo sportello superiore ed
aspettare
che
la
temperatura scenda
fino a
livelli
normali.
•Per le prime 3
accensioni
il
forno non deve
superare
i 150°C.
Durante queste operazioni è preferibile
togliere le teglie che sono all'interno. Inoltre durante le prime 3
accensioni
si potranno verificare
i
seguenti fenomeni:
-Il vetro della camera di cottura si può
appannare
a
causa
dell'umidità delle piane
refrattarie.
-Si possono vedere fuoriuscite del fumo sotto
il
tetto, a causa dell'umidità contenuta nella coibentazio-
ne.
-----
NB:
il
mancato
rispetto delle
norme
e dei consigli
riportati, provoca
il decadimento delle responsabilità
della
ditta
costruttrice.
Istruzioni
tecniche
Se
accanto
al
forno
per esterni volete aggiungere
il
barbecue
non dovete far altro che attenervi a
quanto
illustrato in fig. 1.
Se avete
acquistato
un
forno
a legna per
interni
non dovete far altro che attenervi a quanto illustrato in
fig. 2.
Il
tubo uscita
fumi
ha un diametro di 13 cm e può
essere
collegato
all'esterno
direttamente o
anche
tramite una canna fumaria già
esistente.
Se
incassate
il
forno dovete lasciare 1 cm di spazio tra le
pareti
laterali del forno ed
il
rivestimento, in modo tale che
il
forno si possa togliere dalla sede per eventuali
manutenzioni.
NB: La
cappa si può sfilare.
Staccare
il
trasformatore
(4)
dal forno e
posizionarlo
1 in un
luogo
accessibile e freddo
in dotazione ci sono
3
50
cm di
filo
2
6
4
5
Fig. 1
Le
uscite
vapore (3)
(6)
non vanno collegate, ma
Fig.
2 restano nella
cappa
Inserire
i due
perni sporgenti
del barbecue
negli
appositi buchi,
già
predisposti
nel forno,
per
alloggiare il barbecue.
1. Uscita
fumi Ø 13
cm
2. Cappa
3. Uscita vapori
4.
Trasformatore 12 V
5. Presa
d’aria
per
ventilazione
6. Uscita
vapori
di cottura

IT
ALIANO
Inserire la spina su una normale presa di corrente a
220
V
.
Aprire lo sportello inferiore, immettere nella camera di combustione 3 kg di legna di piccolo taglio e quindi
procedere all'accensione
del fuoco, anche con
l’aiuto
di un
accendifuoco
o della carta. Chiudere lo
spor
-
tello ed
assicurarsi
che la valvola prendiaria sia aperta;
assicurarsi
inoltre che lo sportello superiore
sia
chiuso. A questo punto,
aspettare
che la
temperatura
salga. Quando
il
forno raggiungerà la
temperatura
di
200°C
accendere
la ventilazione (durante questa operazione la
temperatura
diminuirà di massimo 20°C;
cioè da
200°C
passerà
a
180°C,
quindi quando l’aria si sarà miscelata, la
temperatura
riprenderà a salire).
Grazie a questa piccola operazione la
temperatura
sarà omogenea in tutta la camera di cottura,
cuocendo
i
cibi in maniera perfetta (su 3 piani). Raggiunta la
temperatura desiderata
aprire lo sportello superiore
ed
inserire all’interno del vano cottura
i
cibi, chiudere lo sportello ed impostare sul timer
il
tempo di
cottura.
A
questo punto, non resta altro che
aspettare.
Per
osservare
l’andamento della cottura basta
accendere
la luce interna, grazie all’apposito interruttore e guardare
attraverso
il
vetro dello sportello.
Collegamento
elettrico ed
accensione
Pane
240°C
- 300°C
Pizza
400°C
- 450°C
Pasta al forno
250°C
-
300°C
Arrosti
250°C
- 300°C
Carne alla griglia
300°C
- 350°C
Porchetta
250°C
- 300°C
Dolci
200°C
-
250°C
Sperando
che siate
soddisfatti dell’acquisto fatto
dei
nostri prodotti, non
ci
resta
che
augurarVi BUON
APPETITO!
T
emperatura
di cottura
6
Fig.3
8 6.
Camera
di cottura
7 7.
Griglia
porchetta
8.
Carne
9.
T
eglia
9
Il forno a legna
CLEMENTI
è
utilizzabile
dalla moltitudine delle famiglie per
cuocere
PANE, PIZZE,
PASTA
AL FORNO, DOLCI, ARROSTI, GRIGLIATE
E PORCHETTE.
ATTENZIONE
:
per
cuocere
grigliate e porchette occorre seguire le seguenti istruzioni:
•Per le grigliate: inserire su un piano di cottura una teglia con un po’ d’acqua. La carne deve
essere
appoggiata su una griglia piana. Il calore verrà messo in movimento dalla ventilazione e quindi
questo
garantisce
una cottura omogenea senza la
necessità
di girare la carne. Il grasso prodotto durante
la
cottura verrà raccolto dalla teglia
sottostante.
Questa operazione può
essere
definita come
alternativa
al girarrosto ed inoltre
garantisce
una cottura igienica, utilizzando una cucina rapida, semplicissima,
ecologica ed
economica.
•
Per
le
porchette:
è indispensabile
il KIT
da porchetta venduto come optional,
il
quale è composto da
una
griglia ed una teglia
raccogligrasso.
Per le modalità di cottura
attenersi
alle istruzioni delle grigliate.
Le
specialità
Il carrellino inferiore, oltre a
trasportare
il
forno da esterno, viene anche utilizzato come
scaldavivande;
ad esempio per lievitare dolci e pizze o addirittura per
conservare
caldi
i
cibi già cotti.
Lo
scaldavivande
Per pulire la camera superiore (di cottura) basta utilizzare qualsiasi prodotto che si trova in commercio,
adatto per pulire l’acciaio inossidabile. Per quanto riguarda la camera di combustione basta svuotare
il
cassetto
raccogli
cenere.
Come
si pulisce
Istruzioni per
l’uso

Istruzioni per
l’uso
Mod. BIJOUX
Ø 130
Barbecue
A
utomatico
P1
G2
G1
Fig.
4
1.
Infilare
le
gambe G1
e
G2
negli alloggi del barbecue
2.
Fissarle
con le apposite viti
3.
Incastrare
il
piano P1 sopra
la
traversa
delle gambe

IT
ALIANO
RICETT
ARIO
Pane
casereccio
1,5
kg di farina
8 gr di
lievito
di birra
5 gr di
sale
acqua q.b.
Lasagne
pasticciate
700
gr di lasagne
fresche
ragù fatto con
300
gr
di trita di manzo
1 lt di salsa béchamel
300
gr di mozzarella
noce di burro
parmigiano grattugiato
sale e
pepe
Pizza
napoletana
250
gr di pasta di
pane
150
gr di polpa di pomodoro
origano
basilico
olio d’oliva
Porchetta
una porchetta da latte
aglio
finocchio selvatico
olio
d’oliva
vino
bianco
sale, pepe e lardo
Crostata
di frutta
pasta
frolla
surgelata
70
gr. di burro
1 uovo
1 barattolo di confettura
o marmellata di
qualunque
specie
Sciogliete
il
lievito in un poco d’acqua tiepida. Impastate la farina con l’acqua,
aggiungete
il lievito
e
il
sale.
L
’impasto
deve essere molto morbido.
Aiutandovi
con
la farina dategli la forma classica di un filone.
Avvolgetelo
in un panno spolverato
di farina e fatelo lievitare in un ambiente caldo. Quando
il
volume sarà raddoppiato
infornate a
300 °C
per
60
minuti.
Prendete una teglia,
riempitela
a
3/4 di
acqua leggermente salata, mettetela sul fuoco
e quando l’acqua incomincia a
bollire,
fate
bollire
le lasagne per circa 1 minuto
per
parte. Scolatele, e fatele asciugare su uno strofinaccio da cucina senza però sovrap-
porle
altrimenti
si
incollano.
Preparate ora la salsa béchamel, fatela
intiepidire
prima
di mescolarla al ragù di carne ed
accendete
il
forno a
190°C.
Imburrate una
pirofila
e
ricoprite la base con la béchamel al ragù e adagiatevi sopra uno strato
di
lasagne, poi
spalmateci ancora un po’di salsa béchamel e aggiungere abbondante parmigiano
grattugiato e della mozzarella che avrete tritato. Formate altri strati seguendo que-
st’ordine e finendo con un
ultimo
strato di lasagne ricoperte con la salsa bèchamel,
dei fiocchetti di burro qua e là e abbondante parmigiano grattugiato. Infornate
per
circa 30
minuti
a
250°C.
Prima di servire, fate riposare le vostre lasagne per almeno
dieci minuti.
Prendete la pasta di pane e posatela sulla spianatoia leggermente infarinata.
Aiutandovi
con le mani stendete la pasta dandole la forma desiderata. Distribuiteci
sopra la passata
di pomodoro, l’origano, 2
o
3 foglie di
basilico lasciando scoperto
per
2 cm circa
il
bordo della pasta
(il
“cornicione”). Irrorate con abbondante olio e
fate
cuocere per circa
3-4 minuti
nel forno
molto
caldo a 350°-400°C.
Pulite,
svuotate e disossate la porchetta.
Preparate un composto tritando insieme un pò di finocchio selvatico, 5 o 6 spicchi
d’aglio,
il
rosmarino, sale, pepe e mescolate
il
tutto cospargendo poi con
questo
miscuglio
l’interno
della porchetta. Lasciatela riposare per qualche ora poi colloca-
tela in un recipiente grande, ungetela con olio.
Cuocere in forno su apposita
griglia
a
300° C
per 4 ore, irrorando di tanto in tanto con
vino
bianco,
fino
a quando non avrà raggiunto un bel colore dorato.
Posizionare sotto la
griglia
la teglia raccogligrasso con un
po’
d’acqua dentro.
Dopo aver fatto scongelare la pasta
frolla,
tenerne da parte un quarto e stendere la
restante in una sfoglia che andrà adagiata sul fondo di una teglia imburrata.
V
ersate
la marmellata sulla sfoglia preparata, spandendola
fino
a due dita dal bordo.
Stendete sulla tavola infarinata un pò della pasta
frolla
messa da parte e
ricavatene
delle strisce larghe un dito, con cui farete un reticolato sulla marmellata.
Con la pasta avanzata fate un grosso cannello col quale chiuderete intorno intorno
la
crostata.
Spennellare con un uovo sbattuto
il
bordo e
il
reticolato e infornare la crostata
per
40 minuti
a
200°C.
Le
nostre
ricette

Operating
instructions
Upper
level
Press in the center
from
down
to up and make the level slide
obliquely
Lateral
levels
Push the level
from
down to up
and upset it
Upper
level
Lateral
levels

ENGLISH
I
love the
Clementi
kitchen
because he is like me
10
Mod. Mater
12
Mod. Bijoux
12
Automatic
barbecues
13 Recipe
book

10
Operating
instructions
Mod.
M
A
S
TER
dal 1975
Congratulations for your choice of a wood oven by
CLEMENTI
s.n.c., a company with a great
experience
in the wood cooking
sector
.
® Our ovens are top quality articles; built with the utmost care, precision and
selected
materials, they
are
the result of long studies and are made to
last.
A
very important feature of
CLEMENTI's
wood oven is that it works by indirect fire, those baking is healthy
and leaves flavours
unaltered.
IMPORT
ANT
:
for a correct and lasting working of the indoor or outdoor oven, read carefully the fol-
lowing
information
before
use.
Operating
information
• To heat the oven is better to use dry, small cut wood.
• To reach the maximum
temperature
of
400°C
3,5 kg of wood are
needed.
•When the required
temperature
is
reached,
it is advisable to leave only lighted coals in the combustion
chamber. But, if the
temperature
should drop during the cooking, feed the fire with very little wood.
•When the oven is working, the
temperature
must never be over
450°C.
But
if
this should occur, immedia-
tely open the upper door and wait
till
the
temperature
lowers to normal levels.
•The first three times the oven is used, its
temperature
must not exceed
150°C.
During these
operations
is better to take out the baking pans which are inside. Besides, during the first three
(3)
times, it might
occur that:
- The glass pane of the combustion chamber steams up owing to the
dampness
of the refractory
mate
-
rial.
- Smoke leaks from under the roof owing to the
dampness
of the insulation.
NB: The
manufacturing firm
disclaims all responsibilities if the above mentionned rules and
advices
are not followed.
T
echnical
instructions
If you want to place a
barbecue
beside the outdoor oven, follow the instructions (fig. 1).
If you have
purchased
an indoor wood oven, you haven't got to do anything but follow what shown (fig.
2)
.
The fume outlet pipe has a
13
cm diameter and can be directly
connected
outside or also to an existing
chimney flue.
If
you build in the oven, you have to leave 1 cm of
space
between the side wall and the oven
lining so that the oven can be removed from its
seat.
NB: The
hood can be taken off.
Remove
the
transformer (4)
from
the oven and
1 position it in
an
accessible and cool
place.
50
cm of wire
3 are supplied
2
6
4
5
Fig. 1
The steam outlets
(3)
(6)
are not to be
connected
Fig.
2 but remain in the hood
Insert
the two
jutting pivots into
the holes of
the oven to lodge the barbecue.
1.
Ø 13
cm
fumes
outlet
2. Hood
3.
Steam
outlets
4.
12 V
transformer
5.
Air intake for
ventilation
6.
Outlet for
cooking steam

ENGLISH
Insert the
plug
in a
220V. AC
outlet.
Open
the lower
door,
put
3 kg. of small
cut wood
into
the
combustion
chamber and then
light
the
fire,
also using
a
lighter
or some paper
.
Close the door and make sure the air intake valve is open and the upper door is closed. Now wait for the
temperature to rise.
When the oven has reached the temperature of
200°C,
turn on the ventilation (during this operation the
temperature
will
drop of
20°C
at most, that is it
will
go
from 200°C
to
180°C,
then, when the air has
mixed,
the
temperature
will
rise
again). Thanks
to this
little
operation the temperature
will
be kept
uniform in all
the baking
chamber and food
will
be cooked perfectly. When the required temperature is reached, open the upper door
and put the
food
inside, close the door and set the
cooking time
on the timer.
Now you only
have to wait.
To
control the cooking turn on the inside light thanks to the switch and look through the glass pane of the
door.
Electric
connection
and
lighting
Bread
240°C
-
300°C
Pizza
400°C
- 450°C
Baked pasta
250°C
- 300°C
Roast
250°C
- 300°C
Grilled
meat
300°C
- 350°C
Roast pork
250°C
- 300°C
Cakes
200°C
- 250°C
Hoping that you
are satisfied with the
purchase
of
our products,
we
only
have to wish
you
to have a
delicious meal.
Baking
temperatures
6
Fig. 3
8 6.
Baking
chamber
7 7.
Roast pork
grill
8.
Meat
9.
Pan
9
The wood oven by
CLEMENTI
is used by lots of families to cook
BREAD, PIZZA, BAKED PASTA, CAKES,
ROAST, GRILLED FOOD AND ROAST
PORK.
ATTENTION:
to cook grilled food or roast sucking-pork follow the instructions below:
•
Grilled food:
put a baking pan with some water on a cooking top. The meat must be placed on a flat grill.
The heat
will
be set in motion by the ventilation system and this
guarantees
a uniform cooking without
the need to turn the meat. The fat produced by the cooking will be collected by the pan
underneath.
This
way of cooking can be
considered
an alternative to the spit; it
guarantees
a fast, simple,
ecological,
money-saving cooking.
•Roast
pork:
the roast pork kit sold as optional is indispensable; it consists of a
grill
and a dripping
pan.
As to the way of cooking, follow the instructions for the grilled food.
Specialities
The lower trolley, besides carrying the outdoor oven, can be used as food warmer, for instance to
leaven
cakes or pizza or to keep cooked food warm.
Food
warmer
To clean the upper chamber (the baking chamber) use any kind of product available on the market, sui-
table to clean stainless
steel.
As to the combustion chamber, you only have to empty the ash collecting
drawer
.
Oven
cleaning
11
Operating
instructions

1
Operating
instructions
Mod. BIJOUX
Ø 130
Automatic Barbecue
P1
G2
G1
Fig.
4
1.
Insert
the
G1 and G2
legs
into
the
barbecue
housing
2.
Fix them
with the
appropriate
screws
3.
Fix
the
P1 top over
the crosspiece of the
legs

ENGLISH
RECIPE
BOOK
Home-made
bread
1,5
kg of flour
8 gr of brewer’s
yeast
5 gr of
salt
water in sufficient
quantity
Seasoned lasagne
700
gr of fresh
lasagne
meat sauce made with 300
gr. of minced beef
1 litre of béchamel
sauce
300
gr of mozzarella
a pat of butter
grated
Parmesan
salt and
pepper
Neapolitan-style
pizza
250
gr of dough
150
gr of tomato pulp
oregano
basil
olive
oil
Roast pork
a suckling pig
garlic
wild
fennel
olive
oil
white wine
salt, pepper and lard
Fruit
tart
frozen short pastry
70
gr. of butter
1 egg
1 jar of any
kind
of jam or
marmalade
Dissolve
the yeast in a
little
warm water. Knead the
flour
with the water and add
the
yeast and salt. The mixture must become very soft.
Transform
it into the
classical
form
of a loaf using the flour. Wrap it in a cloth
sprinkled
with
flour
and let it rise in
a
warm place. When it has doubled in size, cook at
300 °C
for
60
minutes.
Take
a baking-pan,
fill
it
3/4
with
slightly
salted water, put it on a flame and when
the
water begins to
boil, boil
the lasagne for about 1 minute per portion.
Drain
and leave
to dry on a kitchen dishcloth without however superimposing them or they
will
stick
together. Now prepare the béchamel sauce, letting it cool down before
mixing
it with
the minced beef and
light
the oven at
190°C.
Butter an
oven-proof
dish and cover
the
bottom with the béchamel sauce and minced beef, add a layer of lasagne and then
spread a
little
more béchamel and add abundant grated parmesan and the mozzarella
you have chopped up. Add further layers
following
this order,
finishing
with a final
layer of lasagne covered with béchamel sauce, flakes of butter here and there and
abundant grated Parmesan.
Cook
for about
30
minutes at 250°C.
Leave the lasagne for at least ten minutes before serving.
Take
the dough and place it on a slightly floured pastry board. Stretch the dough
out with your hands until making the form desired. Spread the tomato pulp, put
the
oregano and 2 or 3 leaves of basil over
it,
leaving about 2 cm of the edge of the
pasta
(“the frame”) uncovered. Pour abundant
oil
over it and cook for about
3-4
minutes in
a very hot oven at 350-400°C.
Clean,
empty and de-bone the pig.
Prepare a
mixture by
chopping up a
little wild
fennel,
5
or
6
cloves
of
garlic, rosemary
,
salt and pepper,
filling
the innards of the pig with it. Leave for a few hours and then
put it in a large oiled recipient.
Cook
on the oven
grill
at
300° C
for 4 hours, basting it every now and again
with
white
wine
until
it reaches a nice golden colour.
Place the fat-collector dish with a
little
water in it under the grill.
After
having defrozen the short pastry, put a quarter of it to one side and spread
the
rest out
into
a sheet and place at the
bottom of
a buttered dish. Pour the
jam
over
the
prepared sheet, spreading it up to two fingers
from
the
edge.
Spread a
little
of the short pastry left aside and make strips about a finger wide with
which to make a grid over the
jam. With
the
remaining
pastry made a large container
with which to enclose the tart. Paint the edge and the grid with a beaten egg and
cook the tart for
40
minutes at 200°C.
Our
recipes
13

1
Bedienungasanleitung
Obere
ebene
Von
unten nach oben
im
zentrum
druecken und die ebene
schraeg
gleiten
lassen
Seitenwaende
Von
unten nach oben druecken
und umdrehen
Obere
ebene
Seitenwaende

d
EUTSCH
Ich
liebe den
backofen
Clementi,
denn
er ist wie ich bin
16
Mod. Master
18
Mod. Bijoux
18
Automatische
barbecue
19
Rezeptbuch

1
Bedienungasanleitung
Mod.
MA
S
TER
dal 1975
Herzlichen Glueckwunsch, dass Sie den Holzbackofen der
Firma CLEMENTI
s.n.c., welche auf dem Sektor
Kochen mit
Holz
sehr erfahren ist, gewaehlt haben. Unser Geraet ist das Ergebnis eines langen Studiums
® und ist mit
hoechster
Sorgfalt, Praezision und bestem Material gefertigt worden und bietet deshalb die
beste Qualitaet.
Die
wichtigste Eigenschaft, die der Ofen Clementi hat, ist das Kochen
mit Holz mit
indirek-
tem Feuer, welches gesund und
dietaetisch
ist und den Geschmack der Speisen nicht
veraendert.
WICHTIG: zum
guten und
dauerhaften
betrieb des backofens innen oder draussen bitte die betriebsan-
leitung sorgfaeltig
vor
dem gebrauch
lesen.
Nuetzliche
Hinweise
T
echnische
hinweise
•
Zum
Anheizen sollte in den Ofen moeglichst
trockenes
Kleinholz
gegeben
werden.
• Zur Erreichung der
Hoechsttemperatur
von
400°C
werden 3,5
KG Holz
gebraucht.
•Nach Erreichung der
gewuenschten
Temperatur ist es ratsam im Brennraum nur noch die
brennende
Holzkohle
zu lassen. Sollte die Temperatur sinken, so ist noch mit ganz wenig
Holz
nachzufeuern, beim
Heizen darf die Temperatur
450°
C nicht
uebersteigen,
sollte es jedoch
passieren,
so ist die
Obentuere
mit dem Fenster sofort zu oeffnen und zu warten, bis die Temperatur wieder auf das, normale Niveau
gesunken ist.
•Bei dem ersten dreimaligen Anzuenden darf der Ofen
150°C
nicht
ueberschreiten.
Dabei sollten die Bleche aus dem Ofen genommen werden. Ausserdem koennte bei dem ersten drei-
maligen Anzuenden folgendes
passieren:
- Das Fenster kann
beschlagen
und zwar wegen der Feuchtigkeit der Refraktorflaechen.
- Rauch kann unter dem Dach wegen Feuchtigkeit in dem Nichtleiter rauskom men.
ZUR BEACHTUNG:
bei nichtbeachtung der hinweise und ratschlaege entfaellt die
verantwortung
des
herstellers.
Wenn sie an den
Ofen
aussen das Barbecue anbringen
wollen,
so gehen Sie bitte so vor wie abgebildet wor-
den ist
(in
der
abbildung
1).
Wenn Sie einen
Holzbackofen
fuer innen gekauft haben, so haben Sie nichts anderes zu tun, als abgebildet
(in
der
abbildung 2).
Das
Rohr zum
Ablassen des Rauche hat einen Durchmesser von
13
cm und kann
aussen
direkt oder in einer bereits vorhanden Rauchkammer verbunden werden. Wenn Sie den Ofen einbauen,
so
sollte 1
Cm. Platz
zwischen den Seitenwaenden des Backofens und der
V
erkleidung
gelassen werden, so
dass
der
Ofen
leicht wieder herausgenommen werden kann
ZUR BEACHTUNG:
Die
Haube
ist
abnehmbar
.
T
rennen Sie den
Transformator (4)
vom
Ofen
und bewahren Sie
1 ihn an einem
zugängli
-
chen, kalten
Ort
auf.
Im Lieferumfang
enthal-
3 ten sind
50
cm
Kabel
2
6
4
5
Fig. 1
Die
Öffnungen
für
die
Dämpfe (3) (6)
werden nicht
angeschlos
-
sen, sondern bleiben
in
Fig.
2 der Dunstanzugshaube
Die beiden
Stifte,
die aus
dem Barbecue
rau-
skommen
in die
entsprechender Loeche
des
Ofens zum Halten
des Barbecues stecken.
1.
Rauchabgang Ø 13
cm
2. Dunstabzugshaube
3.
Öffnung für
die Dämpfe
4.
Transformator 12 V
5.
Zuluftöffnung für
die
V
entilation
6.
Öffnung für
die
Kochdünste

DEUTSCH
Den Stecker in eine normale
Steckdose
von
220 V
stecken.
Die untere Tuere oeffnen, in die Feuerkammer 3
KG Kleinholz
legen und das Feuer mit einem Feuerzeug
oder Papier
anstecken,
sich dann
vergewissern,
dass das
Luftventil
auf ist und die Tuere oben
geschlos
-
sen ist. Dann warten, dass die Temperatur steigt. Hat der Ofen die Temperatur von
200°
erreicht, so ist die
V
entilation
einzuschalten
(dabei verringert sich die
Hitze
um 20°
C,
dass heisst von
200°
zu 180°C).
Dann, nachdem sich die
Luft
gemischt hat, steigt die Temperatur wieder. Dank dieses
V
orgehens
bleibt
die Temperatur beim Kochen gleichmaessig und kocht die Speisen auf perfekte Art. Nachdem die gemi-
schte Temperatur erreicht worden ist, oeffnet man die Tuere oben, gibt die Speisen rein und schliesst die
Tuere und stellt die Uhr ein.
Jetzt braucht man nur noch zu warten.
Will
man das Backen
beobachten,
so schaltet man das
Licht
innen
ein, schaut durch das
Fenster
.
Elektrische
verbindung
und
anzuenden
Brot
Pizza
240°C
-
300°C
400°C
-
450°C
Kochzeiten
Nudeln
250°C
-
300°C
Braten
250°C
-
300°C
Gegrilltes fleisch
300°C
-
350°C
Spanferkel
250°C
-
300°C
Kuchen
200°C
-
250°C
Wir hofen,
dass sie
mit dem Kauf unserer Geraete zufrieden sind und
es
bleibt
uns
nichts
anderes
als
Ihnen guten Appetit zu
wuenschen.
6
Fig.3
8 6. Kochraum
7 7. Spanferkelrost
8.
Fleisch
9. Blech
9
Der Holzbackofen
CLEMENTI
kann in der Familie vielseitig verwendet werden und zwar zum
BACKEN
VON BROT, PIZZA, NUDELN, KUCHEN, BRATEN, GEGRILLTES FLEISCH UND
SPANFERKEL.
ZUR BEACHTUNG:
Beim
Grillen
von Fleisch oder Spanferkel bitte Folgendes
beachten:
•Beim grillen: ein Blech mit ein wenig Wasser auf die Kochflaeche schieben. Das Fleisch ist auf
den
ebenen Rost zu legen. Die
Hitze
wird durch die
V
entilation verteilt, so dass ein
gleichmaessiges Kochen
geschieht
und man so das Fleich nicht umdrehen muss. Das ablaufende Fett sammelt sich in dem Blech
unten. Diese Kochen ist eine alternative zum
Grill
und garantiert
ausserdem
ein hygienisches,
schnel
-
les, einfaches,
ekologisches
und wirtschaftliches Kochen.
•Beim
spanferkel:
braucht man den
entsprechenden
Kit,
der als Zusatz verkauft wird. Dieser hat
einen
Grill
und eine Pfanne zum auffagen des
Fettes.
Spezialitaeten
Das untere Gestell dient nicht nur zum Transport sondern auch als Warmhalter der Speisen.
Zum
Beispiel
zum Aufgehen von Kuchen und Pizza oder sogar zum Warmhalten der bereits gekochten
Speisen.
Warmhalter
Zum
Saubermachen
des Ofens innen kann man jedes Produkt, was fuer Inox geeignet ist,
gebrauchen.
Die Feuerkammer wird so
gesaeubert,
dass man einfach den
Aschenkasten
rausnimmt und
leert.
Wie wird
sauber
gemacht
1
Bedienungasanleitung

1
Bedienungasanleitung
Mod. BIJOUX
Ø 130
Automatische Barbecue
P1
G2
G1
Fig.
4
1. Stecken
Sie die
Beine G1 und G2 in
die
Gehäuse
des Barbecues
2. Machen
Sie diese
mit den dafür
vorgesehenen Schrauben
fest
3. Stecken
Sie die
Fläche P1 auf den Querträger der
Beine

DEUTSCH
REZEPTBU
CH
Bauernbrot
1,5 Kilo
Mehl
8
Gramme
Bierhefe
5
Gramme
Salz
Wasser q.b.
Lasagne
pasticciate
(d.h. breite Bandnudeln, die
mit
Tomaten,
Fleischsoße und
Käse überbacken
sind)
700 Gramme
frische Lasagne
Hackfleischsoße, die mit
300 Gramme
gehacktem
Rindfleisch
gemacht ist
1
Liter
Béchamelsoße
salsa
béchamel
300 Gramme
Mozzarella
weniger Butter
geriebener
Parmesankäse
Salz und Pfeffer
Pizza mit
T
omaten,
Sardellen und
Käse
250 Gramme
Brotteig
150 Gramme
passier
-
te
Tomaten,
Origano,
Basilikum,
Olivenöl
Gebratenes Spanferkel
Ein
Milchspanferkel
Knoblauch
Wildfenchel
Olivenöl
Weißwein
Salz,
Pfeffer und Speck
O
b
s
t
m
ü
r
b
e
t
e
ig
ku
c
h
e
n
Mürbeteig
70 Gramme
Butter
1
Ei
1 welche
Konfitüre-
oder
Marmeladedose
Zerlassen Sie die Hefe in wenigem lauwarmen Wasser. Kneten Sie das Mehl
mit
dem
Wasser, der Hefe und dem Salz. Die
T
eigmasse
muss sehr weich sein. Mit der Hilfe
der Mehl geben Sie der
T
eigmasse
die klassische
Form
einer Stange.
V
erhüllen Sie
den
Teig
in einem mit Mehl bestreuten
Tuch
und lassen Sie ihn in einem warmen
Raum aufgeben. Wenn das
V
olumen
sich verdoppeln wird, schieben Sie auf
300° C
für
60
Minuten in den Backofen.
Nehmen Sie eine Backform, füllen Sie sie mit dreiviertellangem leicht gesalzenen
Wasser und stellen Sie aufs Feuer und wenn das Wasser beginnt zu sieden,
lassen
Sie die beide Seite der Lasagne für zirka 1 Minute sieden. Giessen Sie sie ab und
lassen Sie sie auf einem Geschirrtuch abtrocknen, ohne sie übereinander
setzen
zu lassen, sonst kleben sie sich. Jetzt Bereiten Sie die Béchamelsoße zu,
lassen
Sie diese lauwarm machen, bevor Sie mit der Hackfleischsoße mischen und
stel
-
len Sie den Backofen auf 190°
C
an. Buttern Sie eine feuerfeste
Form,
ziehen Sie
mit der Bèchamelsoße mit Hackfleischsoße den Boden über und legen Sie auf ihn
eine Schichte Lasagne hin, dann streichen Sie noch ein bisschen Bèchamelsoße
und fügen Sie reichlichen geriebenen Parmesankäse und den bevor
gehackten
Mozzarella hinzu. Folgen Sie diese Ordnung und bilden Sie andere Schichten und
beenden Sie mit der letzten Schichte Lasage, die mit Béchamelsoße, mit kleinen
B
utt
e
r
fl
o
c
k
e
n und
mit r
e
i
c
h
li
c
h
e
n g
e
r
i
e
b
e
n
e
n Parmesankäse bedeckt w
e
rd
e
n
.
Schieben Sie für zirka 30
minuti
auf
250° C
in den
Ofen.
Bevor aufzutischen,
lassen
Sie Ihre Lasagne für ungefähr zehn Minuten ruhen.
Nehmen Sie den
Brotteig
und stellen Sie
ihn
aufs leicht
mit Mehl
bestreute Nudelbrett.
Helfen Sie sich mit den Händen und rollen Sie den
Teig
aus und geben Sie ihm die
gewünschte
Form.
V
erteilen Sie auf den
Teig
die passierten
Tomaten,
den Origano,
2 oder 3
Basilikumblätter
und lassen Sie den
Teigrand,
“cornicione” d.h. “Gesims”,
ungefähr für 2 cm ungedeckt. Benässen Sie mit reichlichem
Öl
und lassen Sie alle
ungefähr für
3-4
Minuten
im
sehr warmen Backofen auf
350°-400°
C.
Reinigen, leeren und entbeinen Sie das Panferkel. Bereiten Sie eine Mischung
von Wildfenchel, 5 oder 6 Knoblauchzehen, Rosmarin, Salz, Pfeffer, die zusammen
gehackt werden müssen, und mischen Sie alles und dann streuen Sie mit
dieser
Mischung das Innere des Panferkels aus. Lassen Sie für einige Stunde ruhen, dann
stellen Sie es in einen großen Behälter und
mit
fetten Sie es
mit Öl
aus.
Kochen Sie das im Backofen auf einem dafür vorgesehenen Rost auf 300°
C
für
4 Stunden und von Zeit zu Zeit spritzen Sie es mit Weißwein, bis wenn es ein
schön Goldfarbe erreichen wird. Stellen Sie unter dem Rost die Backform für die
Fettsammlung mit
ein bisschen
W
asser
.
Nachdem Sie den Mürbeteig auftauen lassen, legen einem
Teigviertel
beiseite und
rollen den restlichen
Teig
aus und legen Sie ihn auf eine gebutterte Backform hin.
Gießen Sie die Marmelade auf den ausgerollten
Teig
und tragen Sie diese zu zwei
Fingerbreien
vom
Rand auf.
Rollen
Sie auf den mit Mehl aus bestreuten
Tisch
weni-
gen beiseite gestellten Mürbeteig und bekommen Sie mit dem Finger einige breite
Streifen heraus,
mit
denen Sie ein
Gitternetz
auf die Marmelade machen werden. Mit
dem übrig gebliebenen
Teig
machen Sie ein großes Röhrchen, mit dem Sie um den
Mürbeteigkuchen schließen. Bestreichen Sie
mit
einem verschlagen
Ei
den
Rand
und
das Gitternetz und schieben Sie das Mürbeteigkuchen für 40 Minuten auf
200° C
in
den Backofen.
Unsere
Kochrezepte
19

0
Mode d’emploi
Plan superieur
Pressez au centre de bas vers
haut et faisez glisser le plan obli-
quement
Plans
lateraux
Poussez le plan de bas vers haut
et renversez le plan
Plan superieur
Plans
lateraux
This manual suits for next models
1
Table of contents
Languages:
Other Clementi Oven manuals

