Cleva JOEY VSA1402UK User manual

Cordless Vacuum Cleaner
Slimline Design and 2-in-1
JOEY 14.4V Lithium
TM
Model Number - VSA1402UK

Thank you for choosing our JOEYTM cordless vacuum
cleaner. This is a cordless vacuum cleaner intended for
indoor use on light, dry household dust and debris.
Before Using Your New Vacuum Cleaner..........................
Getting Help..........................................................................
Safety Information...............................................................
Guarantee Information.......................................................
Parts and Features...............................................................
Assembly Instructions.........................................................
Charging Instructions..........................................................
Operating Instructions & Tips ...........................................
Maintenance and Care........................................................
Troubleshooting...................................................................
Technical Data .....................................................................
Disposal and Recycling .......................................................
CONTENTS
• Please read this instruction manual. It will help you
assemble and operate your new vacuum cleaner in the
safest and most effective way.
• Keep this instruction book and your sales receipt in a
safe place for future reference.
BEFORE USING YOUR VACUUM CLEANER
1
1
1
2
4
5
6
7
8
10
14
16
16
For more information on this product, please visit our
website.
cleva-uk.com
GETTING HELP

• This appliance can be used by children aged from 8
years and above and persons with reduced physical,
sensory or mental capabilities or lack of experience and
knowledge if they have been given supervision or
instruction concerning use of the appliance in a safe
way and understand the hazards involved. Children
shall not play with the appliance. Cleaning and user
maintenance shall not be made by children without
supervision.
• This appliance should only be used for normal
vacuuming in a domestic environment.
• Make sure the vacuum cleaner is stored in a dry place.
• Unplug the vacuum cleaner from the charger before
cleaning or maintenance.
• Children should be supervised to ensure that they do
not play with the appliance.
• Packaging material, e.g. plastic bags should not be
accessible to children to avoid suffocation.
• Check that your supply voltage is the same as that
stated on the rating plate on the charging adaptor.
• Each vacuum cleaner is designed for a specific charging
voltage, use only the original charging adaptor
supplied with this vacuum cleaner.
• While there is no shock hazard from electrical terminals
located on the vacuum, a burn could result from metal
objects being inserted into the terminal areas. Vacuum
cleaner terminals should always be kept free of objects.
• Leaks from battery cells can occur under extreme
usage or temperature conditions. If the liquid gets on
skin, wash quickly with water. If liquid gets into the
eyes, flush them immediately with clean water for a
minimum of 10 minutes. Seek medical attention.
• Do not mutilate or incinerate batteries as they will
explode at high temperatures.
SAFETY INFORMATION
2

• The appliance must only be stored and charged
indoors.
• Do not leave the vacuum cleaner in direct sunlight.
• Avoid exposing the vacuum cleaner to strong heat.
• Do not expose the appliance to temperatures below
0 °C or above 40 °C.
• Keep the vacuum cleaner away from your head when
using nozzles and tubes.
• Do not use a damaged charger or cable.
• When disconnecting the charging cable from the mains,
pull the plug itself to remove it; do not pull on the
power cord.
• Do not pull the charging cable over sharp edges or
allow it to become trapped.
• If a fault is detected, switch off the appliance and
disconnect it from the charging cable and the mains.
• For safety reasons, only authorised or experienced
service personnel are permitted to carry out repairs.
• Do not try to touch the brush roll while the cleaner is
switched on and the brush roll is turning.
• Switch off the appliance when it is not in use.
• The battery cells within must not be dismantled, short
circuited, or placed against a metal surface.
PROPER USE
3

Cleva take pride in engineering high quality, durable
products.
This product is guaranteed against defects in
workmanship and materials for two years from the date
of purchase when it is assembled, operated and
maintained according to all supplied instructions.
• This guarantee is void if this product is used for
anything other than private household purposes.
• This guarantee does not apply to defects due to direct
or indirect abuse, negligence, misuse, accidental
damage, repairs or alterations or lack of maintenance.
• This guarantee provides benefits which are additional
to your statutory rights as a consumer and does not
affect your legal rights.
For more detailed information about your guarantee,
please visit cleva-uk.com
GUARANTEE INFORMATION
• In wet areas.
• On building rubble.
• Close to flammable gases, etc.
• When the product shows visible signs of damage.
• On sharp objects or fluids.
• On hot or cold cinders, lighted cigarette butts, etc.
• On fine dust, for instance from plaster, concrete, flour,
hot or cold ashes.
• Without its filters.
Using the vacuum cleaner in the above circumstances
may cause serious personal injury or damage to the
product. Such injury or damage is not covered by the
warranty or by CLEVA.
NEVER USE THIS VACUUM CLEANER
4

PARTS AND FEATURES
5
1
2
3
4
5
6
8
7
9
10
11
12
15
14 13
Handle
Power/Speed Switch
Battery Charging Indicator
Handheld Vacuum Cleaner
Main Body
Release Button
Combination Tool
Motorised Brush Head
1
2
3
4
5
6
7
8
Handheld Vacuum
Cleaner Release Button
Handheld Vacuum
Cleaner Power Switch
Dust Bin Release Button
Dust Bin (Filter Inside)
Charging Adapter
Vacuum Cleaner Support
Charger Base
9
10
11
12
13
14
15
ASSEMBLY INSTRUCTIONS
6
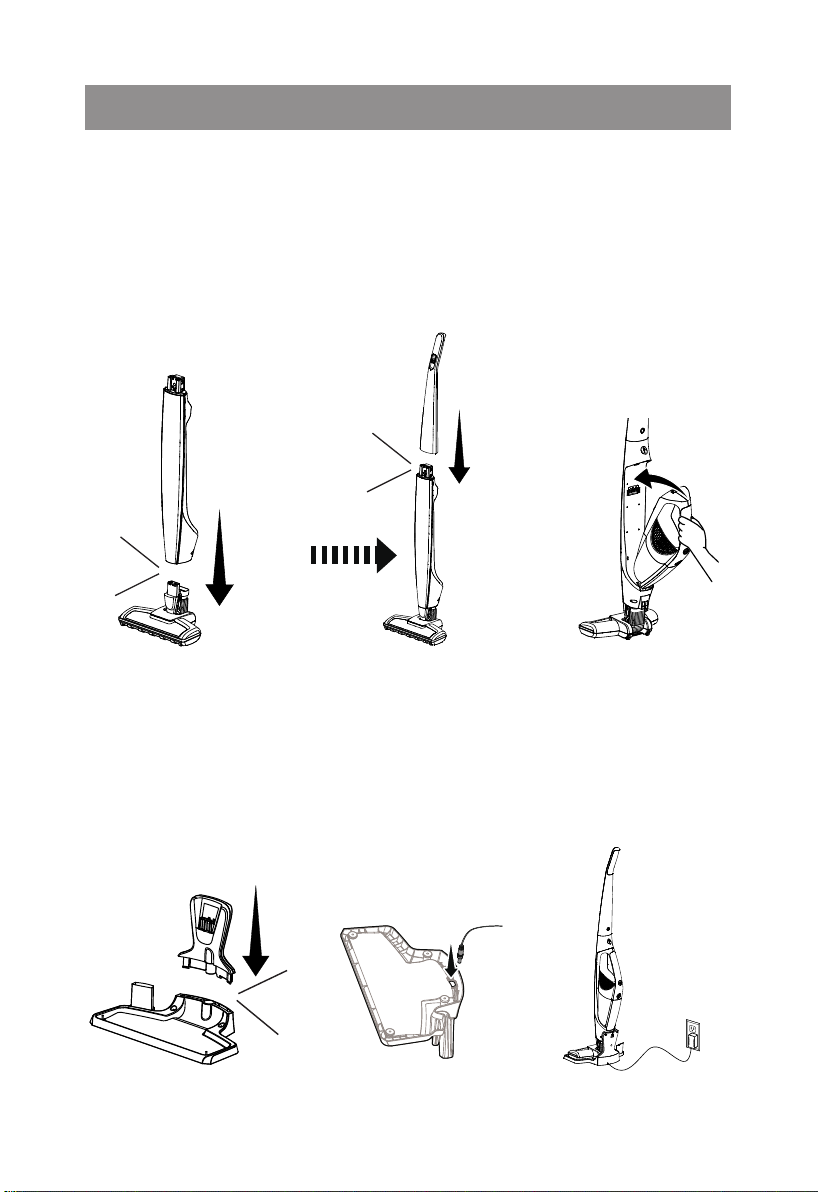
• Fit the vacuum cleaner body into the motorised brush
head and lock into place (Fig.1).
• Insert the handle into the top of the main body as
illustrated and lock into place (Fig.2).
• Insert the handheld vacuum cleaner into the main body
as shown and lock into place. Ensure that the dust bin is
secure in place (Fig.3).
• Insert vacuum cleaner support into charger base and
lock into place (Fig.4).
• Insert the charging adapter plug into the charging port
on the bottom of the charger base and secure the cord
(Fig.5).
• Plug the adapter into a wall socket (Fig.6).
Lock!
Lock!
Lock!
Fig.1 Fig.2 Fig.3
Fig.4 Fig.5 Fig.6

When the vacuum cleaner is fully charged, the battery
charging indicator will remain lit for 3 seconds then go to
dormant mode with no illuminated lights showing.
NOTE: If the battery charging indicator does not
illuminate when charging, ensure:
• that the vacuum cleaner is seated properly on to the
charger base.
• that the charging adaptor is plugged into the wall
socket properly.
• that the wall socket is switched on.
• that the adaptor power plug is connected properly
on the charger base.
7
CHARGING INSTRUCTIONS
Battery
Charging
Indicator
Fig.7 Fig.8
Please switch off the unit before placing it on the charger.
• Plug the charging adapter into an outlet. Insert the
vacuum cleaner onto the charger base as shown (Fig.7).
• Make sure the vacuum cleaner is fully charged before
using for the first time. The vacuum cleaner may take up
to 5 hours to charge completely if fully discharged.
• While the vacuum cleaner is being charged, the battery
charge indicator will be flashing continuously until fully
charged (Fig.8).
NOTE: For improved battery performance, always keep
the vacuum cleaner on the charger base while not in use.
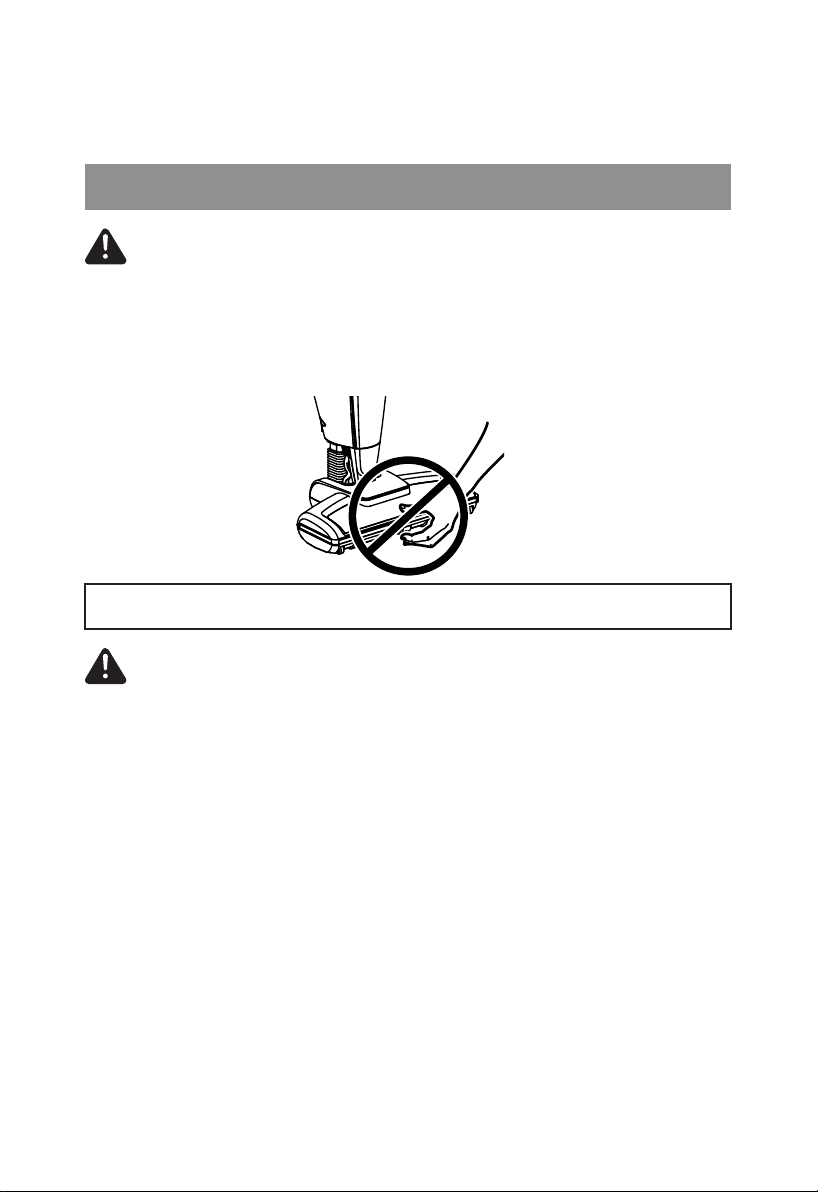
CAUTION! Moving parts! To reduce the risk of
personal injury, DO NOT touch the brush roll when
vacuum cleaner is on. Contacting the brush roll
while it is rotating can cut, bruise or cause other
injuries. Always turn off before servicing. Use cau-
tion when operating near children (Fig.9).
WARNING - Do not operate vacuum cleaner
without filter in place.
• Before vacuuming, check that the brush wheels and
brush roll are clear from any sharp objects to avoid
scratching floors.
• Use low speed for surface cleaning of bare floors or low
pile rugs and carpets or when increased runtime is needed.
• Use high speed for cleaning of plush rugs and carpets
or when additional cleaning power is required.
8
OPERATING INSTRUCTIONS & TIPS
USING YOUR VACUUM CLEANER
• OFF: To stop the vacuum cleaner, place the power
switch in the OFF position (Fig.10).
• LOW: To start the vacuum cleaner, slide the power
switch to the LOW speed position (Fig.11).
• HIGH: To increase the speed and performance of the
vacuum cleaner slide the power switch to the HIGH
speed position (Fig.12).
Fig.9

9
Fig.10 Fig.11 Fig.12
NOTE: When battery power is low, the battery charge
indicator around the switch will flash.
To charge, place the handheld vacuum cleaner into the
main body and place the whole unit onto the charger base
• To remove the handheld vacuum cleaner, press the
release button and detach from the main body (Fig.13).
• To turn on the handheld vacuum cleaner, press the
power switch located on top of the handle (Fig.14).
• To clean difficult to reach areas, use the Combination
Tool by inserting end of tool into the handheld vacuum
cleaner as shown (Fig.15).
CLEANING WITH THE HANDHELD VACUUM CLEANER
Power
Switch
Fig.13 Fig.14 Fig.15

10
For best performance, empty the dust bin after every
use. Never operate the vacuum cleaner without the dust
bin and filter in place.
• Remove the handheld vacuum cleaner from the main
body by pressing the release button and detaching it
(Fig.16).
• Press the dust bin release button and separate the dust
bin from the handheld vacuum cleaner body (Fig.17).
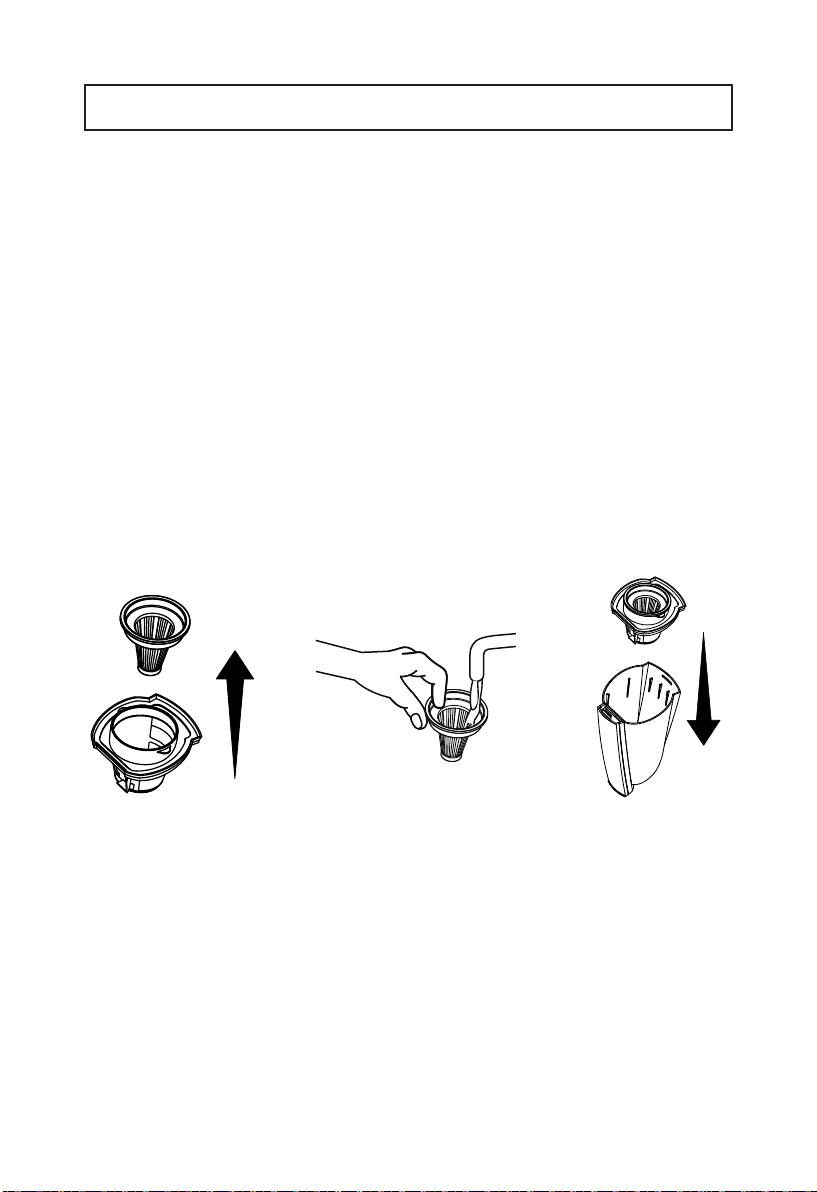
• Remove the filter basket from the dust cup. Empty the
dust cup contents into a waste bin (Fig.18).
MAINTENANCE AND CARE
EMPTYING THE DUST BIN
Fig.16 Fig.17 Fig.18
11
• Remove the filter from the filter basket. With a soft
brush, brush accumulated debris from the side screens
of the filter basket and from the filter cloth (Fig.19).
• After repeated use, it may be necessary to wash the
filter. First brush loose debris from the filter cloth, then
hand wash in warm water. After washing, set it aside
and allow it to air dry (Fig.20).
• Insert the spare clean, dry filter into the basket, fit the
basket into the dust bin, and reconnect the dust bin to
the handheld vacuum cleaner (Fig.21).
The key to maximum performance is having a clean
filter. Cleaning the filter frequently will help your vacuum
cleaner operate at peak efficiency. A spare filter is provided
with your vacuum cleaner to allow you to dry 1 filter
properly while using the other.
CLEANING THE FILTER
IMPORTANT: The filter must be completely dry before
reuse. A spare filter is provided with your vacuum
cleaner to allow you to dry 1 filter properly while
using the other.
Fig.19 Fig.20 Fig.21
12
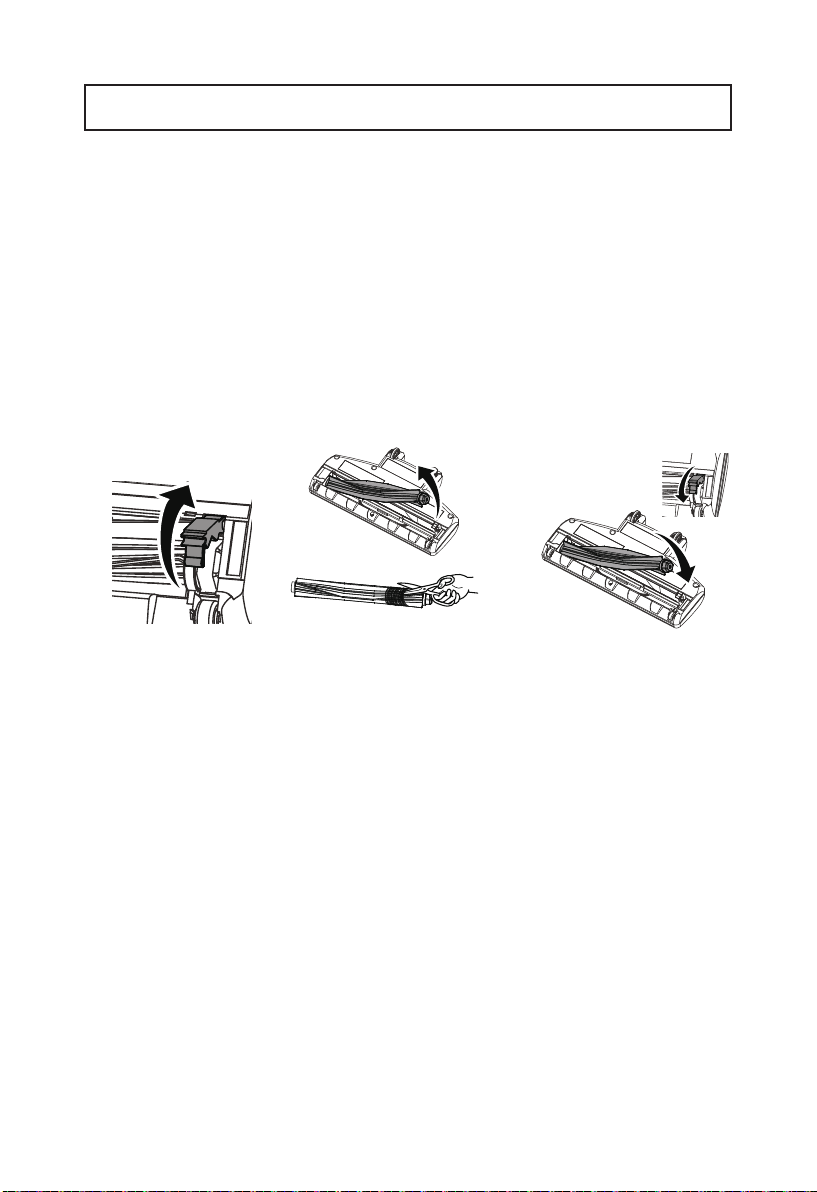
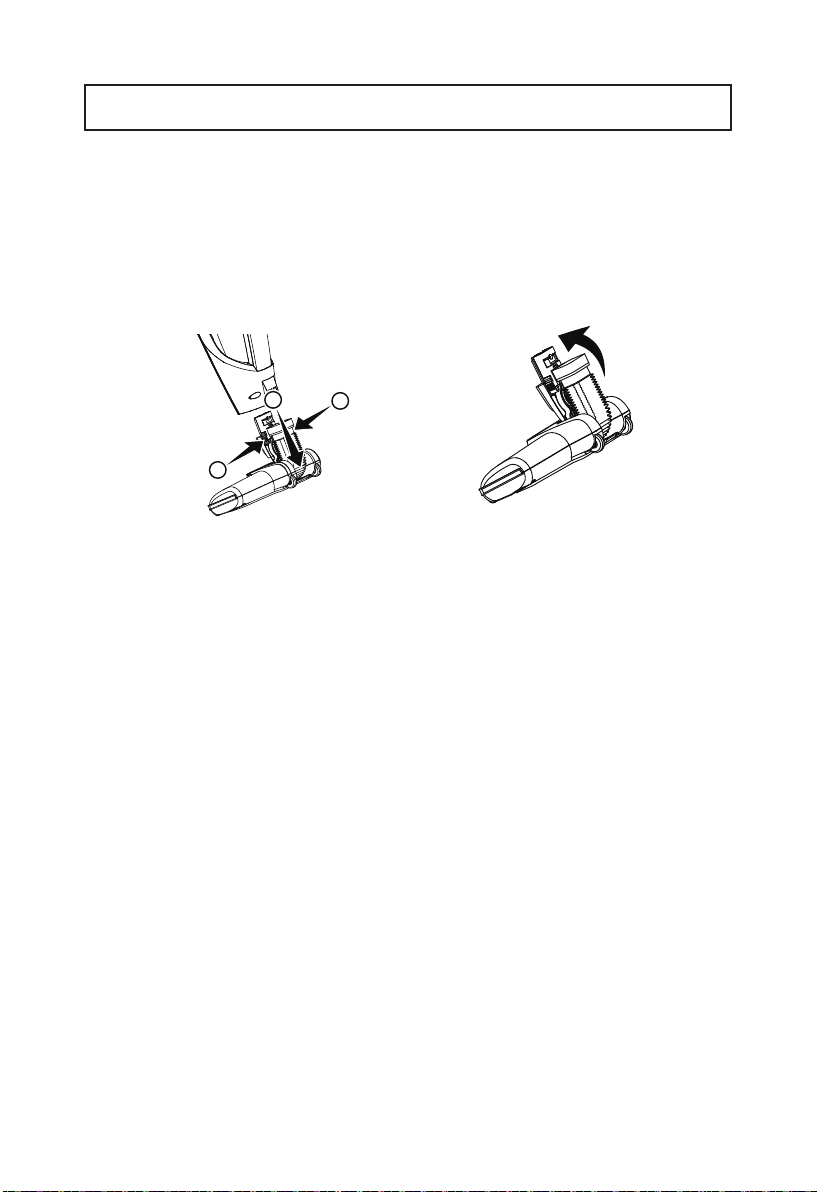
• Ensure the vacuum cleaner is OFF. Turn unit over to
access the brush roll, unlock the brush roll tab with flat
head screwdriver or similar tool as illustrated (Fig.23).
• Lift the brush roll out of the housing. Clean off debris
and anything wrapped around the brush (Fig.24).
• Align the end to the brush drive first, then insert the
other end correctly. When installed correctly, the brush
roll should rotate freely. Lock the brush in place by
closing the tab as illustrated (Fig.25).
REMOVING THE BRUSH ROLL FOR CLEANING
Fig.23 Fig.24 Fig.25
13
NOTE: Do not use scissors or other sharp objects to
remove a blockage from the hose as these may
damage the hose.
• To clean out the hose, press the hose release tabs, as
illustrated, and pull the motorised brush head away
from the main body (Fig.26).
• Carefully remove any debris or blockage from the inside
of the hose. Reattach the motorised brush head onto
the main body (Fig.27).
REMOVING BLOCKAGES
1
1
2
Fig.26 Fig.27
14
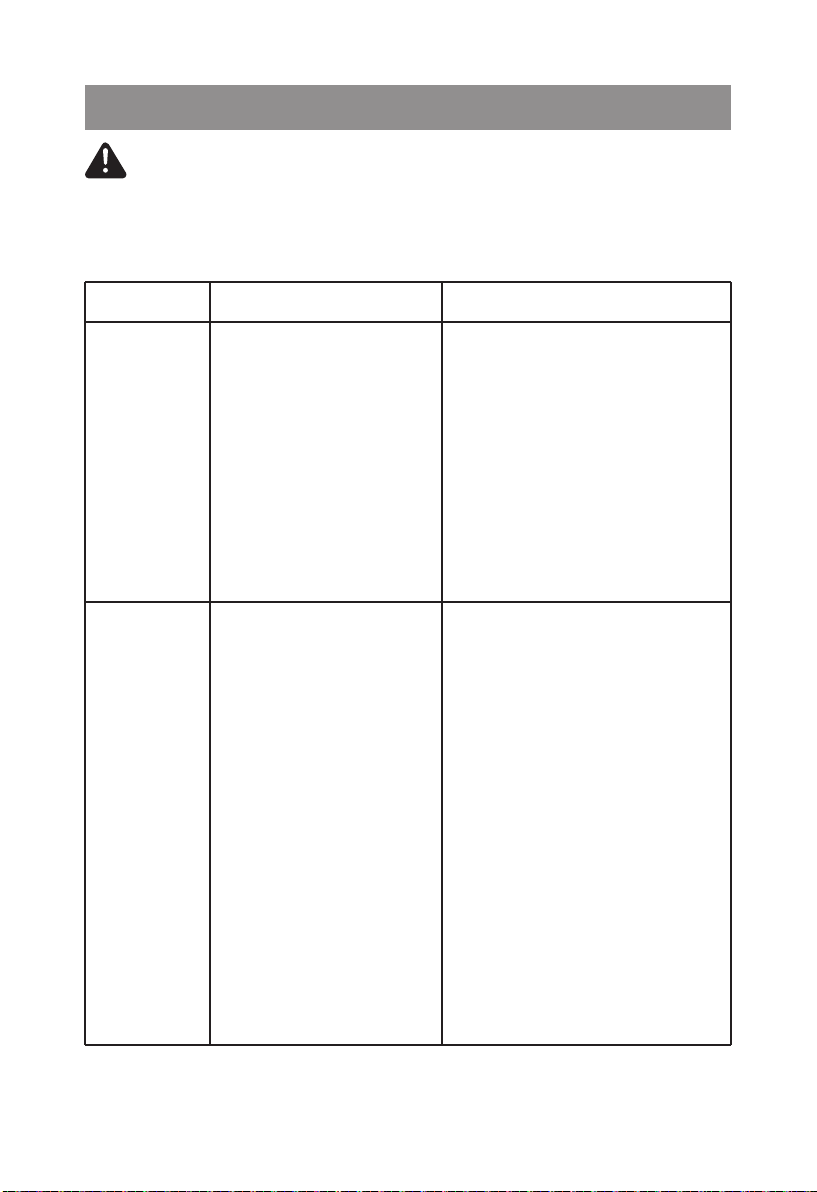
WARNING: Disconnect electrical supply before
performing maintenance to the vacuum cleaner.
Failure to do so could result in electrical shock or
personal injury.
TROUBLESHOOTING
Problem
Vacuum
cleaner
will not
turn on.
Possible Cause
1. Battery may be
depleted.
2. Wrong charger
being used.
3. Handheld
vacuum cleaner is
not installed
properly.
1. Charge the battery
as instructed on
page 7.
2. Be sure to use only
the charger supplied
with your product.
3. Remove handheld
vacuum cleaner and
reattach ensuring that
it is securely in place.
Battery
charge
indicator
does not
illuminate.
1. Battery may be
depleted.
2. Charging
adapter is not
plugged in.
3. Debris
accumulated on
the metal charge
contacts on the
handheld vacuum
cleaner, main body
and charging
adapter.
4. The electrical
outlet is switched
off.
1. Charge the battery as
instructed on page 7.
2. Be sure the charging
adapter is plugged in
properly to the outlet
and to the charging
hole on the bottom of
the charging adapter.
3. Be sure no debris is
accumulated on the
metal charger contacts
on the handheld
vacuum cleaner, main
body and charging
adapter.
4. Ensure that the outlet
is supplying power to
the charger.
Solution

15
Motorized
brush
not turning.
1. Brush roll is
jammed.
2. Brush roll needs
to be reset.
3. Brush roll is not
installed well.
1. Remove obstruction.
Follow instructions on
page 12.
2. Turn the unit off and
remove the obstruction,
then turn back on.
3. Remove brush roll
and reinstall following
instructions on page 12.
Vacuum
cleaner not
picking up
or suction
power is
weak.
1. Dust bin is full.
2. Filter needs
cleaning.
3. Filter needs to
be replaced.
4. Battery may be
depleted.
5. Dust bin is not
installed well.
1. Empty dust bin.
2. Follow filter cleaning
instructions on page 11.
3. Replace filter.
4. Charge the battery as
instructed on page 7.
5. Check dust bin for
correct installation and
ensure it is snapped
firmly in place.
Dust
escapes
from
vacuum
cleaner.
1. Filter is missing
or installed
incorrectly.
2. Filter is
damaged and
needs to be
replaced.
3. Dust bin
installed
incorrectly.
1. Check filter for
correct installation.
2. Replace filter.
3. Position dust bin
correctly and snap
firmly into place.
Vacuum
cleaner
turns off on
its own.
1. Battery may be
depleted.
1. Charge the battery as
instructed on page 7.
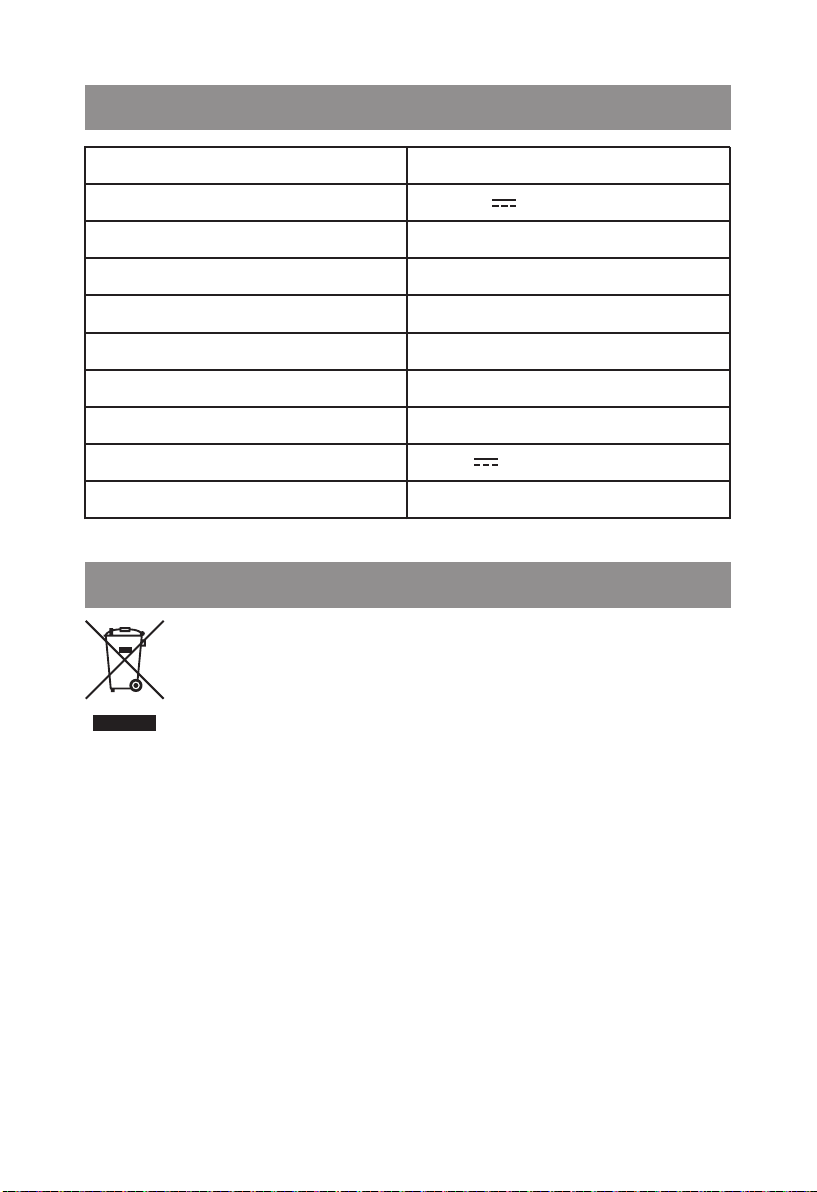
Do not dispose with household waste
Recycle products and components according to
local legal requirements.
TECHNICAL DATA
DISPOSAL AND RECYCLING
16
Specification
Battery power
Battery pack
Running time
Speed settings
Dust capacity
Weight
Charger input
Charger output
Battery full charge time
Value
14.4V 2.0Ah
14.4V Li-ion
30 mins max
2 speeds
0.5L
2.4 kg
100-240V~ 50-60Hz
17V 500mA
5 hours

Cleva UK Ltd
G2 Stephenson
Prestwick Park
Prestwick
Newcastle upon Tyne
NE20 9SJ
cleva-uk.com
Table of contents
Other Cleva Vacuum Cleaner manuals


