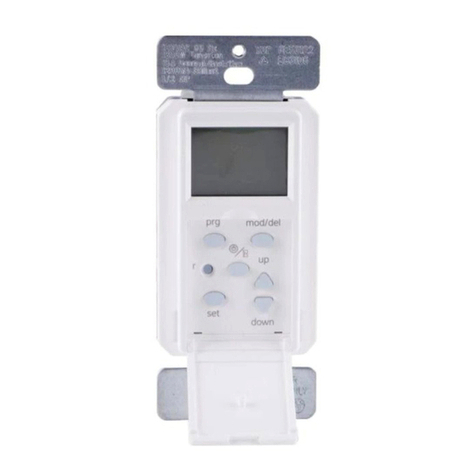
Click CLKTS02 User manual

CLKTS02
24/7 DIGITALTIMER
OPERATING IN TRUCTIONS
Introduction
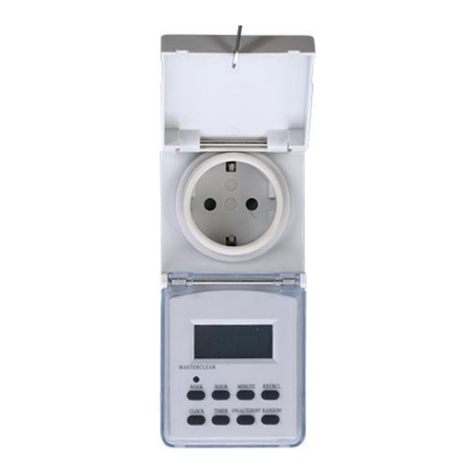
The CLKTS02 Electronic Timer is a plug-in time switch suitable
for continuous indoor use to switch ON and OFFhousehold
appliances. The timer also incorporates a NiMH rechargeable
battery. If a power failure occurs or the unit is removed from the
mains outlet, the battery will power the unit, avoiding the loss of
any preset programs.
NOTE: The rechargeable battery isa non-replaceable type.
The battery will not provide power to any appliance during
a power failure.
Safety Information
DO NOT IMMERSE TIMER IN WATER OR ANY OTHER LIQUID.
DO NOT use the device if any signs of damage to the device
are observed.
DO NOT plug in an appliance where the load exceeds 10A.
DO NOT use solvents or detergent to clean the timer.
ALWAYS remove timer from mains socket outlet and clean with a
damp rag if cleaning is needed.
ALWAYSensure the plug of any appliance is fully inserted
into the timer outlet.
Heaters and similar appliances should never be left unattended
during operation. The manufacturer recommends such
appliances not be connected to timers.
READ INSTRUCTIONS CAREFULLY BEFORE INITIAL USE.
Keep in a convenient place for future reference.
This product is for indoor use only.
1
Initial Set-Up
1) Plug the timer into a mains outlet. All segments of the display
should flash on momentarily if the screen was blank prior to
power up.
NOTE: If screen remains blank after connection to mains
supply, leave the unit for approx. 14 hours to fully charge the
battery before operation.
2) Clear all current information b pressing MASTER CLEARbutton
using a paperclip or pen. The display segments should all illuminate
and the unit will reset to Monday at 0:00 in 24-hour format.
3) The timer is now ready to be set up for use.
Setting Current Time
1. Press UP or DOWN button to select clock mode. While in clock
mode, "CLOCK" appears on the bottom left of the LCD.
·2. Press SETand CD buttons simultaneously to toggle between
12-hour and 24-hour format.
3. Pressand Hold SET button to enter set mode. While in set
mode, "SET"appears and flashes on the bottom left corner of
the LCD and the day starts to flash.
4. Press UP and DOWN buttons tb change and press SET button
to continue selecting hour and minute, successively.
5. PressSET button again to exit set mode. If no button is pressed
after
1 minute, it will exit from set mode automatically.
6. Repeat step 1 to 5 until current time is correctly set.
Example: Set current time at 4:10 pm on Wednesday.
1. Reset by pressing MASTER CLEAR, clock is reset to time
0:00:00 on MONDAY in 24-hour format. Alternatively, Press UP
or DOWN button to select clock mode.
2. PressSETand CD buttons simultaneously to change to 12-hour
format.
3. Pressand Hold SET button to enter set mode.
4. Press UP and DOWN buttons to change day to WE, i.e.
Wednesday.
5. Press SET button to select hour.
6. Press UP and DOWN buttons to change hour to 4 PM.
7. PressSET button to select minute.
8. Press UP and DOWN buttons to change minute to 10.
9. PressSET button again to exit set mode.
2
Setting Timer Programs
1. Press UP or DOWN button to select program mode. While in
-program mode, "PROGRAM" appears at the bottom centre of
the LCD.
2. PressUP or DOWN button to select desired program number and
action, i.e., number 1-10, ON or OFF,that are shown on the left
of the LCD.
3. PressSET to enter set mode. While in set mode, "SET"appears
and flashes on the bottom left corner of the LCDand the day
starts to flash.
4. Press UP and DOWN buttons to change and press SET button
to continue selecting day, hour and minute. (Refer the TIP 1
below for selectable combination of days)
5. PressSET button again to exit set mode. If no button is pressed
after 1 minute, it will exit from set mode automatically.
6. PressSET and CD buttons simultaneously to toggle between
12-hour and 24-hour format.
7. Check "AUTO" is shown on the bottom right of the LCD. If not,
press MANUAL button while in clock mode until "AUTO" is
shown. (Refer to Manual Operation Section for more details.)
8. Repeat step 1 to 7 until current time is correctly set.
TIP1
16SELECTABLEDAYOR COMBINATION OF DAYSAREAS
FOLLOWED
INDIVIDUAL DAY LCDdisplaysone of "MO,TU,WE,TH, FR,SA,SU'
ALLDAYS LCDdisplays"MO TU WETH FRSASU"
WEEKDAYS LCDdisplays "MOTU WETH FR"
WEEKEND LCDdisplays"SASU"
ALL DAYSEXCEPT LCDdisplays"MO TU WETH FRSA"
FORSUNDAY
DAYSGROUPING 1 LCDdisplays"MO WEFR"
DAYSGROUPING 2 LCDdisplays "TUTH SA"
DAYSGROUPING 3 LCDdisplays "MOTU WE"
DAYSGROUPING 4 LCDdisplays"TH FRSA"
DAYSGROUPING 5 LCDdisplays"MO WEFRSU"
TIP 2:The timer ON or OFFwill be executed according to preset time
not to program number. When setting timer programs, ensure the
settings do not overlap. If there are program settings overlapping,
program OFFalways hasthe priority over program ON. In order to
activate the preset timer programs, the timer must be working in
AUTO mode. 3

Example: Set Timer Program 2: ON at 18:15
and OFF at 22:15 everyday.
1.
2.
3.
4.
5.
6.
7.
8.
9.
10.
11.
12.
PressUPor DOWN button to selecttimer program and action until
2_ON isshown on the LCD. )
PressSETto enter set mode. While in set mode, "SET"appearsand
flasheson the bottom left corner of the LCDand the day starts to
flash.
PressUPand DOWN buttons to change day until all daysare
shown on the LCD.
PressSETbutton to select hour.
PressUPand DOWN buttons to change hour to 18.
PressSETbutton to select minute.
PressUPand DOWN buttons to dhange minute to 15.
PressSETbutton again to exit set mode.
PressSETand CD buttons simuldneously to toggle between 12-
hour and 24-hour format.
PressUPor DOWN button to select timer program and action until
2 OFFisshown on the LCD.
Repeatstep 2-9 until LCDdisplaJ 22:15,or 10:15PM
Check "AUTO"is shown on the bottom right of the LCD.If not,
pressMANUALbutton while in clock mode until "AUTO"isshown.
Override Function
Timer program(s) can be overridden individually.
PressUPand DOWN button the relevant timer program number and
action aredisplayed. PressMANUALbutton to override the timer
program, the time isthen replaced by short lines.
Repeatif there are multiple timer program(s)and action(s) to be
override.
To re-enable the overridden timer program, pressMANUALbutton
whilst relevant timer program and action isdisplayed.The pre-set timer
program will revert back on the LCDandthe timer program isactivated
again. Repeatif there are multiple timer program(s) to be re-enabled.
Set Timer Countdowr,
The digital timer incorporates acountdown function. It allows userto
quickly turn ON or OFFthe connected appliance for acertain period
of time.
1. PressUPor DOWN button until countdown program isshown on
the LCD.While in countdown program, "CD"appearson the bottom
centre of the LCD.
2. Pressand Hold SETbutton to enter setmode. While in set mode,
"SET"appearsand flasheson the bottom left corner of the LCD.
4
3. PressUPand DOWN buttons to selectthe intended action, i.e.,ON
or OFF,during the countdown period.
4. PressSETbutton to select hour, minute, and second; pressUPand
DOWN buttons to change.
5. PressSETbutton again to exit setmode. If no button is pressedafter
1minute, it will exit from set mode automatically.
6. PressUPor DOWN buttons to enter clock mode; pressCD button
to activate countdown function. While activated, "CD"appearsand
flasheson the bottom centre of the LCD.PressCDbutton anytime
to stop CDfunction.
NOTE:Thetimer mustbesetto AUTOmodeto usethisfunction.
Thecountdown function can onlybeactivatedor de-activated
while inclockmode.
Manual Operation
The digital timer can be controlled manually if desired. To switch
ON, press MANUAL button while in clock mode until "ON" is
shown on the bottom right of the LCD.To switch OFF,press
MANUAL button while in clock mode until "OFF" is shown on
the bottom right of the LCD. If the timer is set to ON and then
switched to AUTO by pressing MANUAL button, it will remain
switched on until the next programmed OFF time occurs. If
no OFF time is set, then the timer will remain switched on.
If the timer is set to OFF and then switched to AUTO by
pressing MANUAL
button, it will remain switched off until the next programmed
ON time
occurs. If no ON time is set, then the timer will remain
switched OFF.
NOTE: Neither "ON" nor "OFF" should be shown on the LCD
if automatically controlling by timer programs is intended.
Press MANUAL button while in clock mode until "AUTO" is
shown on the bottom right of the LCD.
Random Function
The digital timer incorporates a random function. When acti-
vated, the timer will switch on randomly for 10 to 31 minutes
from 6:00pm to 6:00am. To activate, press RANDOM button in
clock mode. The symbol R will appear on the LCD indicating
the random function being activated. Ensure the timer is set to
AUTO. Pressthe RANDOM button again to deactivate. RANDOM
function will overwrite all other settings at 6:00pm-6:00am.
5
Daylight Saving Function
The Digital Timer incorporates a daylight-saving function. Press
SETand MANUAL buttons simultaneously, the current time is
set one hour ahead and the symbol S also appears on the right
of the LCD, indicating the daylight-saving function being acti-
vated. Press SETand MANUAL buttons again to deactivate.
Technical Specifications
VoltaQe 240Vac, SOHz
Max. Load 10A Max. 2400W
OoeratinQ Temoerature . -10 to +40°C
Backup Battery NiMH 1.2V, >100h
(non-replaceable type) (when fully charged) *
Time Minimum Setting Interval 1Min
Time Accuracy +1 Min/Month
• This time may also be affected by the battery life.
WARRANTY
Arleeguaranteesthisproductin accordancewiththe
AustralianConsumer
LawandallotherapplicableAustralian
andNewZealandlawsthatareunabletobeexcluded.
Arleealsowarrantstotheoriginalfirstpurchaserofthis
product ("you") fromaretailerwithwhichthisdocumentis
giventhatthisproductwillbefreeofdefectsinmaterials
andworkmanshipforaperiodof12monthsfromthedate
ofpurchase;providedtheproductisnotusedotherthan
forthepurpose,orinamannernotwithinthescopeofthe
recommendationsandlimitations,specifiedbyArlee,is
newandnotdamagedatthetimeofpurchase,hasbeen
maintainedin accordamewiththe recommendations
specifiedbyArlee,hasnotbeensubjectedto abuse,
misuse,neglectordamage,hasnotbeenmodifiedor
repairedwithouttheapprovalofArleeandhasnotbeen
usedforcommercialpurposes {"Warranty").
IfyouwishtoclaimontheWarranty,youmust,atyour
ownexpense,returntheproduct,andprovideproofof
originalpurchaseandyourname,addressandtelephone
number,toArleeattheaddressbelowortheretailerfrom
whomyouoriginallypurchasedtheproductwithin11
monthsfromthedateofpurchase.
Arleewill(orauthorisetheretailerto)assessanyclaimyou
maymakeontheWarrantyintheabovemannerand
if,in
Arlee'sreasonableopinion,theWarrantyapplies,Arlecwill
atitsownoptionandexpense(orauthorisetheretailerto)
replacetheproductwiththesameorsimilarproductor
repairtheproductandreturnittoyouorrefundtheprice
youpaidfortheproduct.Arleewillbearitsownexpenses
of doingthosethings,andyoumustbearanyother
expensesofclaimingontheWarranty.
ForgoodspurchasedinAustralia(only):
TheWarrantyisinadditiontootherrightsandremedies
youmayhaveunderalawin relationtotheproductto
whichtheWarrantyrelates
Ourgoodscomewithguaranteesthatcannotbeexcluded
undertheAustralianConsumerLaw.Youareentitled
toareplacementorrefundfora majorfailureandfor
compensationfor anyotherreasonablyforeseeable
lossordamage.Youarealsoentitledtohavethegoods
repairedorreplacedifthegoodsfailtobeofacceptable
qualityandthefailuredoesnotamounttoamajorfailure.
ForgoodspurchasedinNewZealand(only):
TheWarrantyisinadditionto,anddoesnotaffect,other
rightsandremediesyoumayhaveunderalawinrelation
totheproducttowhichtheWarrantyrelates.
Ourgoodscomewithguaranteesthatcanonlybe
excludedundertheNewZealandConsumerGuarantees
Act1993totheextentyouareacquiringtheproductfora
businesspurposeanditwouldbefairandreasonablefor
Arleetocontractoutofthoseguarantees.
ArleeAustraliaPty.Ltd.ACN009311105("Arlec")givestheWarranty.
CustomerService:1800826859
NewZealandTollFree:0800003329
CaribbeanPark,36LakeviewDrive,Scoresby,Victoria3179
PostOfficeBox1596,Rowville,Victoria3178
Email:[email protected]
6
