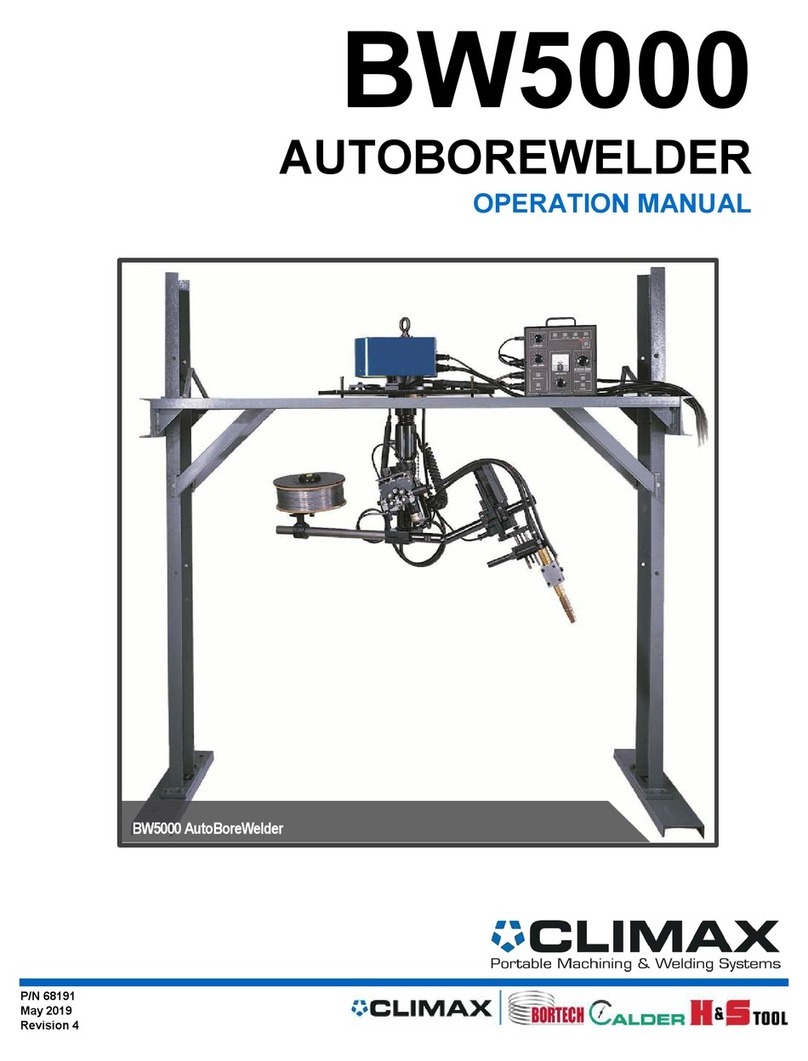
Climax BW2600 User manual

BW2600
AUTOBOREWELDER
BW2600 OPERATING MANUAL
ORIGINAL INSTRUCTIONS
P/N 85555
January 2019
Revision 6


P/N 85555, Rev. 6 Page A
©2019 CLIMAX or its subsidiaries.
All rights reserved.
Except as expressly provided herein, no part of this manual may be reproduced, copied, transmitted, dissem-
inated, downloaded, or stored in any storage medium, without the express prior written consent of CLIMAX.
CLIMAX hereby grants permission to download a single copy of this manual and of any revision hereto onto
an electronic storage medium to be viewed and to print one copy of this manual or any revision hereto, pro-
vided that such electronic or printed copy of this manual or revision must contain the complete text of this
copyright notice and provided further that any unauthorized commercial distribution of this manual or any
revision hereto is prohibited.
At CLIMAX, we value your opinion.
For comments or questions about this manual or other CLIMAX documentation, please e-mail
documentation@cpmt.com.
For comments or questions about CLIMAX products or services, please call CLIMAX or e-mail
[email protected]. For quick and accurate service, please provide your representative with the following:
• Your name
• Shipping address
• Telephone number
• Machine model
• Serial number (if applicable)
• Date of purchase
CLIMAX World Headquarters
2712 East 2nd Street
Newberg, Oregon 97132 USA
Telephone (worldwide): +1-503-538-2815
Toll-free (North America): 1-800-333-8311
Fax: 503-538-7600
H&S Tool World Headquarters
715 Weber Dr.
Wadsworth, OH 44281 USA
Telephone: +1-330-336-4550
Fax: 1-330-336-9159
hstool.com
CLIMAX | H&S Tool (UK Headquarters)
Unit 7 Castlehill Industrial Estate
Bredbury Industrial Park
Horsfield Way
Stockport SK6 2SU, UK
Telephone: +44 (0) 161-406-1720
CLIMAX | H&S Tool (European Headquarters)
Am Langen Graben 8
52353 Düren, Germany
Telephone: +49 (0) 24-219-1770
E-mail: ClimaxEurope@cpmt.com
CLIMAX | H&S Tool (Asia Pacific
Headquarters)
316 Tanglin Road #02-01
Singapore 247978
Telephone: +65-9647-2289
Fax: +65-6801-0699
CLIMAX | H&S Tool (Middle East Headquarters)
Warehouse #5, Plot: 369 272
Um Sequim Road
Al Quoz 4
PO Box 414 084
Dubai, UAE
Telephone: +971-04-321-0328

Page B BW2600 Operating Manual
CLIMAX GLOBAL LOCATIONS

P/N 85555, Rev. 6 Page C
CE DOCUMENTATION

Page D BW2600 Operating Manual
LIMITED WARRANTY
CLIMAX Portable Machining & Welding Systems, Inc. (hereafter referred to as “CLIMAX”) warrants that
all new machines are free from defects in materials and workmanship. This warranty is available to the orig-
inal purchaser for a period of one year after delivery. If the original purchaser finds any defect in materials or
workmanship within the warranty period, the original purchaser should contact its factory representative and
return the entire machine, shipping prepaid, to the factory. CLIMAX will, at its option, either repair or
replace the defective machine at no charge and will return the machine with shipping prepaid.
CLIMAX warrants that all parts are free from defects in materials and workmanship, and that all labor has
been performed properly. This warranty is available to the customer purchasing parts or labor for a period of
90 days after delivery of the part or repaired machine or 180 days on used machines and components. If the
customer purchasing parts or labor finds any defect in materials or workmanship within the warranty period,
the purchaser should contact its factory representative and return the part or repaired machine, shipping
prepaid, to the factory. CLIMAX will, at its option, either repair or replace the defective part and/or correct
any defect in the labor performed, both at no charge, and return the part or repaired machine shipping
prepaid.
These warranties do not apply to the following:
• Damage after the date of shipment not caused by defects in materials or workmanship
• Damage caused by improper or inadequate machine maintenance
• Damage caused by unauthorized machine modification or repair
• Damage caused by machine abuse
• Damage caused by using the machine beyond its rated capacity
All other warranties, express or implied, including without limitation the warranties of merchantability and
fitness for a particular purpose are disclaimed and excluded.
Terms of sale
Be sure to review the terms of sale which appear on the reverse side of your invoice. These terms control and
limit your rights with respect to the goods purchased from CLIMAX.
About this manual
CLIMAX provides the contents of this manual in good faith as a guideline to the operator. CLIMAX cannot
guarantee that the information contained in this manual is correct for applications other than the application
described in this manual. Product specifications are subject to change without notice.

P/N 85555, Rev. 6 Page i
TABLE OF CONTENTS
CHAPTER/SECTION PAGE
1 INTRODUCTION . . . . . . . . . . . . . . . . . . . . . . . . . . . . . . . . . . . . . . . . . . . . . . . . . . . . . . . . . . . . 1
1.1 HOW TO USE THIS MANUAL - - - - - - - - - - - - - - - - - - - - - - - - - - - - - - - - - - - - 1
1.2 SAFETY ALERTS - - - - - - - - - - - - - - - - - - - - - - - - - - - - - - - - - - - - - - - - - 1
1.3 GENERAL SAFETY PRECAUTIONS - - - - - - - - - - - - - - - - - - - - - - - - - - - - - - - - - 2
1.4 MACHINE-SPECIFIC SAFETY PRECAUTIONS - - - - - - - - - - - - - - - - - - - - - - - - - - - - - 3
1.5 RISK ASSESSMENT AND HAZARD MITIGATION - - - - - - - - - - - - - - - - - - - - - - - - - - - - 4
1.6 RISK ASSESSMENT CHECKLIST - - - - - - - - - - - - - - - - - - - - - - - - - - - - - - - - - - 5
1.7 LABELS - - - - - - - - - - - - - - - - - - - - - - - - - - - - - - - - - - - - - - - - - - - - - 6
1.8 LABEL LOCATIONS - - - - - - - - - - - - - - - - - - - - - - - - - - - - - - - - - - - - - - - - 8
2 OVERVIEW . . . . . . . . . . . . . . . . . . . . . . . . . . . . . . . . . . . . . . . . . . . . . . . . . . . . . . . . . . . . . . . 11
2.1 FEATURES AND COMPONENTS - - - - - - - - - - - - - - - - - - - - - - - - - - - - - - - - - - 11
2.1.1 Features - - - - - - - - - - - - - - - - - - - - - - - - - - - - - - - - - - - - - - - - - 13
2.1.2 Stock components - - - - - - - - - - - - - - - - - - - - - - - - - - - - - - - - - - - - 16
2.1.3 Accessories - - - - - - - - - - - - - - - - - - - - - - - - - - - - - - - - - - - - - - - 18
2.2 CONTROLS - - - - - - - - - - - - - - - - - - - - - - - - - - - - - - - - - - - - - - - - - - - 23
2.3 MACHINE SPECIFICATIONS - - - - - - - - - - - - - - - - - - - - - - - - - - - - - - - - - - - - 25
2.4 ITEMS REQUIRED BUT NOT SUPPLIED - - - - - - - - - - - - - - - - - - - - - - - - - - - - - - - 26
3 SETUP. . . . . . . . . . . . . . . . . . . . . . . . . . . . . . . . . . . . . . . . . . . . . . . . . . . . . . . . . . . . . . . . . . . 27
3.1 PREPARING THE MACHINE FOR USE - - - - - - - - - - - - - - - - - - - - - - - - - - - - - - - - 27
3.1.1 Inspecting the machine - - - - - - - - - - - - - - - - - - - - - - - - - - - - - - - - - - 27
3.1.2 Assessing the work area - - - - - - - - - - - - - - - - - - - - - - - - - - - - - - - - - 28
3.2 LIFTING AND RIGGING - - - - - - - - - - - - - - - - - - - - - - - - - - - - - - - - - - - - - - 28
3.3 INSTALLING THE BORE WELDER - - - - - - - - - - - - - - - - - - - - - - - - - - - - - - - - - - 28
3.3.1 Mounting to a boring bar - - - - - - - - - - - - - - - - - - - - - - - - - - - - - - - - - 29
3.3.2 Installing the bore welder with an adjustable base - - - - - - - - - - - - - - - - - - - - - 38
3.3.3 Finishing the installation- - - - - - - - - - - - - - - - - - - - - - - - - - - - - - - - - - 42
3.4 INSTALLING ACCESSORIES - - - - - - - - - - - - - - - - - - - - - - - - - - - - - - - - - - - - 46
3.4.1 Standard torch adapter - - - - - - - - - - - - - - - - - - - - - - - - - - - - - - - - - - 46
3.4.2 Torch #00 and #0 - - - - - - - - - - - - - - - - - - - - - - - - - - - - - - - - - - - - - 47
3.4.3 Torch extension support kit - - - - - - - - - - - - - - - - - - - - - - - - - - - - - - - - 48
4 OPERATION . . . . . . . . . . . . . . . . . . . . . . . . . . . . . . . . . . . . . . . . . . . . . . . . . . . . . . . . . . . . . . 51
4.1 OPERATION MODES - - - - - - - - - - - - - - - - - - - - - - - - - - - - - - - - - - - - - - - 51
4.2 PRINCIPLES OF OPERATION - - - - - - - - - - - - - - - - - - - - - - - - - - - - - - - - - - - - 52
4.3 PRE-OPERATION CHECKS- - - - - - - - - - - - - - - - - - - - - - - - - - - - - - - - - - - - - 52
4.4 PREPARING THE BORE WELDER FOR WELDING - - - - - - - - - - - - - - - - - - - - - - - - - - - 53
4.4.1 Setting the rotation speed - - - - - - - - - - - - - - - - - - - - - - - - - - - - - - - - - 53

Page ii BW2600 Operating Manual
TABLE OF CONTENTS (CONTINUED)
CHAPTER/SECTION PAGE
4.4.2 Setting the gas flow - - - - - - - - - - - - - - - - - - - - - - - - - - - - - - - - - - - 53
4.4.3 Setting the wire speed - - - - - - - - - - - - - - - - - - - - - - - - - - - - - - - - - - 54
4.4.4 Checking the step setting - - - - - - - - - - - - - - - - - - - - - - - - - - - - - - - - - 54
4.4.5 Attaching the weld ground clamp - - - - - - - - - - - - - - - - - - - - - - - - - - - - - 55
4.5 WELDING - - - - - - - - - - - - - - - - - - - - - - - - - - - - - - - - - - - - - - - - - - - - 56
4.5.1 Welding safety during adjustments - - - - - - - - - - - - - - - - - - - - - - - - - - - - 56
4.5.2 Weld interrupt options - - - - - - - - - - - - - - - - - - - - - - - - - - - - - - - - - - 57
4.6 WELDING POINTERS - - - - - - - - - - - - - - - - - - - - - - - - - - - - - - - - - - - - - - - 58
4.6.1 Arc voltage - - - - - - - - - - - - - - - - - - - - - - - - - - - - - - - - - - - - - - - - 58
4.6.2 Using 0.035" wire- - - - - - - - - - - - - - - - - - - - - - - - - - - - - - - - - - - - - 59
4.6.3 Shielding gas- - - - - - - - - - - - - - - - - - - - - - - - - - - - - - - - - - - - - - - 59
4.6.4 Wire and gas - - - - - - - - - - - - - - - - - - - - - - - - - - - - - - - - - - - - - - - 59
4.6.5 Spindle feed and wire location - - - - - - - - - - - - - - - - - - - - - - - - - - - - - - 60
4.6.6 Welding in the horizontal axis - - - - - - - - - - - - - - - - - - - - - - - - - - - - - - - 60
5 MAINTENANCE AND TROUBLESHOOTING . . . . . . . . . . . . . . . . . . . . . . . . . . . . . . . . . . . . .63
5.1 OVERVIEW - - - - - - - - - - - - - - - - - - - - - - - - - - - - - - - - - - - - - - - - - - - 63
5.2 MAINTENANCE INTERVALS - - - - - - - - - - - - - - - - - - - - - - - - - - - - - - - - - - - - 64
5.3 MAINTENANCE TASKS - - - - - - - - - - - - - - - - - - - - - - - - - - - - - - - - - - - - - - 64
5.4 REPLACING LINERS - - - - - - - - - - - - - - - - - - - - - - - - - - - - - - - - - - - - - - - 64
5.5 TROUBLESHOOTING - - - - - - - - - - - - - - - - - - - - - - - - - - - - - - - - - - - - - - - 65
5.5.1 If the feed will not work - - - - - - - - - - - - - - - - - - - - - - - - - - - - - - - - - - 65
5.5.2 If there is a lack of fusion to the bore surface - - - - - - - - - - - - - - - - - - - - - - - 65
5.5.3 If the wire feeding stops and wire burns back to tip - - - - - - - - - - - - - - - - - - - - 65
5.5.4 If weld beads are “ropey” - - - - - - - - - - - - - - - - - - - - - - - - - - - - - - - - - 66
5.5.5 If there is too much spatter - - - - - - - - - - - - - - - - - - - - - - - - - - - - - - - - 66
5.5.6 If the weld is porous - - - - - - - - - - - - - - - - - - - - - - - - - - - - - - - - - - - 67
5.5.7 If experiencing wire flip - - - - - - - - - - - - - - - - - - - - - - - - - - - - - - - - - - 67
5.5.8 If steel weld deposits are too hard to machine - - - - - - - - - - - - - - - - - - - - - - - 68
5.5.9 If the weld is “graping” in the horizontal axis - - - - - - - - - - - - - - - - - - - - - - - - 68
5.5.10 If the weld voltage is hard to control - - - - - - - - - - - - - - - - - - - - - - - - - - - - 69
5.6 TRAINING - - - - - - - - - - - - - - - - - - - - - - - - - - - - - - - - - - - - - - - - - - - - 69
5.7 DECOMMISSIONING - - - - - - - - - - - - - - - - - - - - - - - - - - - - - - - - - - - - - - - 70
5.8 TOOL KIT - - - - - - - - - - - - - - - - - - - - - - - - - - - - - - - - - - - - - - - - - - - - 71
6 STORAGE AND SHIPPING . . . . . . . . . . . . . . . . . . . . . . . . . . . . . . . . . . . . . . . . . . . . . . . . . . .73
6.1 STORAGE- - - - - - - - - - - - - - - - - - - - - - - - - - - - - - - - - - - - - - - - - - - - 73
6.1.1 Short-term storage - - - - - - - - - - - - - - - - - - - - - - - - - - - - - - - - - - - - 73

P/N 85555, Rev. 6 Page iii
TABLE OF CONTENTS (CONTINUED)
CHAPTER/SECTION PAGE
6.1.2 Long-term storage - - - - - - - - - - - - - - - - - - - - - - - - - - - - - - - - - - - - 73
6.2 SHIPPING - - - - - - - - - - - - - - - - - - - - - - - - - - - - - - - - - - - - - - - - - - - - 73
APPENDIX A EXPLODED VIEWS AND PARTS LISTS . . . . . . . . . . . . . . . . . . . . . . . . . . . . . 75
APPENDIX B SCHEMATICS . . . . . . . . . . . . . . . . . . . . . . . . . . . . . . . . . . . . . . . . . . . . . . . . . . 95

Page iv BW2600 Operating Manual
This page intentionally left blank

P/N 85555, Rev. 6 Page v
LIST OF FIGURES
FIGURE PAGE
1-1 Top label locations. . . . . . . . . . . . . . . . . . . . . . . . . . . . . . . . . . . . . . . . . . . . . . . . . . . . . . . . . . . . . . . . . . 8
1-2 Bottom label locations . . . . . . . . . . . . . . . . . . . . . . . . . . . . . . . . . . . . . . . . . . . . . . . . . . . . . . . . . . . . . . . 8
1-3 Side label locations . . . . . . . . . . . . . . . . . . . . . . . . . . . . . . . . . . . . . . . . . . . . . . . . . . . . . . . . . . . . . . . . . 9
2-1 BW2600 controls and components . . . . . . . . . . . . . . . . . . . . . . . . . . . . . . . . . . . . . . . . . . . . . . . . . . . . 12
2-2 BW2600 Skip or fill controls. . . . . . . . . . . . . . . . . . . . . . . . . . . . . . . . . . . . . . . . . . . . . . . . . . . . . . . . . . 13
2-3 Step amount indicator . . . . . . . . . . . . . . . . . . . . . . . . . . . . . . . . . . . . . . . . . . . . . . . . . . . . . . . . . . . . . . 14
2-4 Drag brake adjustment . . . . . . . . . . . . . . . . . . . . . . . . . . . . . . . . . . . . . . . . . . . . . . . . . . . . . . . . . . . . . 14
2-5 BW2600 Control features . . . . . . . . . . . . . . . . . . . . . . . . . . . . . . . . . . . . . . . . . . . . . . . . . . . . . . . . . . . 15
2-6 Conduit assembly (Miller example shown) . . . . . . . . . . . . . . . . . . . . . . . . . . . . . . . . . . . . . . . . . . . . . . 16
2-7 BW2600 Radial mount. . . . . . . . . . . . . . . . . . . . . . . . . . . . . . . . . . . . . . . . . . . . . . . . . . . . . . . . . . . . . . 16
2-8 Swivel head assembly . . . . . . . . . . . . . . . . . . . . . . . . . . . . . . . . . . . . . . . . . . . . . . . . . . . . . . . . . . . . . . 17
2-9 Swivel assembly and torch . . . . . . . . . . . . . . . . . . . . . . . . . . . . . . . . . . . . . . . . . . . . . . . . . . . . . . . . . . 17
2-10 Torch sizes #1 and #2 . . . . . . . . . . . . . . . . . . . . . . . . . . . . . . . . . . . . . . . . . . . . . . . . . . . . . . . . . . . . . 17
2-11 6" and 12" extension . . . . . . . . . . . . . . . . . . . . . . . . . . . . . . . . . . . . . . . . . . . . . . . . . . . . . . . . . . . . . . 18
2-12 Detail of mounting rod P/N 30773 . . . . . . . . . . . . . . . . . . . . . . . . . . . . . . . . . . . . . . . . . . . . . . . . . . . . 18
2-13 Detail of BW2600 carrying case . . . . . . . . . . . . . . . . . . . . . . . . . . . . . . . . . . . . . . . . . . . . . . . . . . . . . 18
2-14 Torch sizes #00 and #0 . . . . . . . . . . . . . . . . . . . . . . . . . . . . . . . . . . . . . . . . . . . . . . . . . . . . . . . . . . . . 19
2-15 Standard torch adapter kit (shown with swivel installed) . . . . . . . . . . . . . . . . . . . . . . . . . . . . . . . . . . . 19
2-16 Remote operator pendant . . . . . . . . . . . . . . . . . . . . . . . . . . . . . . . . . . . . . . . . . . . . . . . . . . . . . . . . . . 19
2-17 Compact face torch . . . . . . . . . . . . . . . . . . . . . . . . . . . . . . . . . . . . . . . . . . . . . . . . . . . . . . . . . . . . . . . 20
2-18 Standard face torch . . . . . . . . . . . . . . . . . . . . . . . . . . . . . . . . . . . . . . . . . . . . . . . . . . . . . . . . . . . . . . . 20
2-19 BW2600 adjustable base. . . . . . . . . . . . . . . . . . . . . . . . . . . . . . . . . . . . . . . . . . . . . . . . . . . . . . . . . . . 21
2-20 BW2600 Radial mount. . . . . . . . . . . . . . . . . . . . . . . . . . . . . . . . . . . . . . . . . . . . . . . . . . . . . . . . . . . . . 21
2-21 Mounting rod extender. . . . . . . . . . . . . . . . . . . . . . . . . . . . . . . . . . . . . . . . . . . . . . . . . . . . . . . . . . . . . 21
2-22 BW2600 torch extension support . . . . . . . . . . . . . . . . . . . . . . . . . . . . . . . . . . . . . . . . . . . . . . . . . . . . 22
2-23 BW2600 front panel controls . . . . . . . . . . . . . . . . . . . . . . . . . . . . . . . . . . . . . . . . . . . . . . . . . . . . . . . . 23
2-24 Remote pendant controller . . . . . . . . . . . . . . . . . . . . . . . . . . . . . . . . . . . . . . . . . . . . . . . . . . . . . . . . . 24
2-25 BW2600 dimensions . . . . . . . . . . . . . . . . . . . . . . . . . . . . . . . . . . . . . . . . . . . . . . . . . . . . . . . . . . . . . . 25
3-1 Detail of installing the boring bar adapter kit . . . . . . . . . . . . . . . . . . . . . . . . . . . . . . . . . . . . . . . . . . . . . 29
3-2 Set screws in adapter plate . . . . . . . . . . . . . . . . . . . . . . . . . . . . . . . . . . . . . . . . . . . . . . . . . . . . . . . . . . 30
3-3 Alignment tool over the mounting rod . . . . . . . . . . . . . . . . . . . . . . . . . . . . . . . . . . . . . . . . . . . . . . . . . . 30
3-4 Tightening the set screws . . . . . . . . . . . . . . . . . . . . . . . . . . . . . . . . . . . . . . . . . . . . . . . . . . . . . . . . . . . 31
3-5 BW2600 assembly components . . . . . . . . . . . . . . . . . . . . . . . . . . . . . . . . . . . . . . . . . . . . . . . . . . . . . . 31
3-6 BW2600 and radial mount on mounting rod . . . . . . . . . . . . . . . . . . . . . . . . . . . . . . . . . . . . . . . . . . . . . 32
3-7 Torch and swivel assembly . . . . . . . . . . . . . . . . . . . . . . . . . . . . . . . . . . . . . . . . . . . . . . . . . . . . . . . . . . 33
3-8 Torch aligned with the travel slot . . . . . . . . . . . . . . . . . . . . . . . . . . . . . . . . . . . . . . . . . . . . . . . . . . . . . . 33
3-9 Jam nut tightened . . . . . . . . . . . . . . . . . . . . . . . . . . . . . . . . . . . . . . . . . . . . . . . . . . . . . . . . . . . . . . . . . 34
3-10 Liner through diffuser gas holes . . . . . . . . . . . . . . . . . . . . . . . . . . . . . . . . . . . . . . . . . . . . . . . . . . . . . 34
3-11 Torch extension assembly. . . . . . . . . . . . . . . . . . . . . . . . . . . . . . . . . . . . . . . . . . . . . . . . . . . . . . . . . . 35
3-12 BW2600 controls side view . . . . . . . . . . . . . . . . . . . . . . . . . . . . . . . . . . . . . . . . . . . . . . . . . . . . . . . . . 35
3-13 BW2600 axial stroke distance . . . . . . . . . . . . . . . . . . . . . . . . . . . . . . . . . . . . . . . . . . . . . . . . . . . . . . . 36
3-14 3 o’clock and 9 o’clock positions . . . . . . . . . . . . . . . . . . . . . . . . . . . . . . . . . . . . . . . . . . . . . . . . . . . . . 37
3-15 Swinging the bore welder to attain center . . . . . . . . . . . . . . . . . . . . . . . . . . . . . . . . . . . . . . . . . . . . . . 37
3-16 Supporting the bore welder for sag adjustment (extensions not shown). . . . . . . . . . . . . . . . . . . . . . . 38

Page vi BW2600 Operating Manual
LIST OF FIGURES (CONTINUED)
FIGURE PAGE
3-17 Assembly on adjustable base . . . . . . . . . . . . . . . . . . . . . . . . . . . . . . . . . . . . . . . . . . . . . . . . . . . . . . . 39
3-18 Radial mount on the mounting rod . . . . . . . . . . . . . . . . . . . . . . . . . . . . . . . . . . . . . . . . . . . . . . . . . . . 40
3-19 BW2600 on the mounting rod . . . . . . . . . . . . . . . . . . . . . . . . . . . . . . . . . . . . . . . . . . . . . . . . . . . . . . . 40
3-20 Parallelism check at 3 o’clock . . . . . . . . . . . . . . . . . . . . . . . . . . . . . . . . . . . . . . . . . . . . . . . . . . . . . . . 41
3-21 Parallelism check at 6 o’clock . . . . . . . . . . . . . . . . . . . . . . . . . . . . . . . . . . . . . . . . . . . . . . . . . . . . . . . 41
3-22 BW2600 articulated at the bore center . . . . . . . . . . . . . . . . . . . . . . . . . . . . . . . . . . . . . . . . . . . . . . . . 42
3-23 Power cord connection . . . . . . . . . . . . . . . . . . . . . . . . . . . . . . . . . . . . . . . . . . . . . . . . . . . . . . . . . . . . 43
3-24 Wire feed conduit connected. . . . . . . . . . . . . . . . . . . . . . . . . . . . . . . . . . . . . . . . . . . . . . . . . . . . . . . . 43
3-25 Wire feed control cable connected . . . . . . . . . . . . . . . . . . . . . . . . . . . . . . . . . . . . . . . . . . . . . . . . . . . 44
3-26 Wire feed conduit connection . . . . . . . . . . . . . . . . . . . . . . . . . . . . . . . . . . . . . . . . . . . . . . . . . . . . . . . 44
3-27 Wire feed control cable connected to the wire feeder . . . . . . . . . . . . . . . . . . . . . . . . . . . . . . . . . . . . . 44
3-28 Wire straightened before feeding . . . . . . . . . . . . . . . . . . . . . . . . . . . . . . . . . . . . . . . . . . . . . . . . . . . . 45
3-29 Weld start switch . . . . . . . . . . . . . . . . . . . . . . . . . . . . . . . . . . . . . . . . . . . . . . . . . . . . . . . . . . . . . . . . . 45
3-30 Liner and standard torch adapter . . . . . . . . . . . . . . . . . . . . . . . . . . . . . . . . . . . . . . . . . . . . . . . . . . . . 46
3-31 Liner tightened in the swivel . . . . . . . . . . . . . . . . . . . . . . . . . . . . . . . . . . . . . . . . . . . . . . . . . . . . . . . . 47
3-32 Torch nozzle orientation . . . . . . . . . . . . . . . . . . . . . . . . . . . . . . . . . . . . . . . . . . . . . . . . . . . . . . . . . . . 47
3-33 Tip position with hex wrenches . . . . . . . . . . . . . . . . . . . . . . . . . . . . . . . . . . . . . . . . . . . . . . . . . . . . . . 48
3-34 Torch extension support kit . . . . . . . . . . . . . . . . . . . . . . . . . . . . . . . . . . . . . . . . . . . . . . . . . . . . . . . . . 49
4-1 Controls for checking the step setting . . . . . . . . . . . . . . . . . . . . . . . . . . . . . . . . . . . . . . . . . . . . . . . . . . 54
4-2 Location of the step adjustment knob . . . . . . . . . . . . . . . . . . . . . . . . . . . . . . . . . . . . . . . . . . . . . . . . . . 55
4-3 C-clamp example. . . . . . . . . . . . . . . . . . . . . . . . . . . . . . . . . . . . . . . . . . . . . . . . . . . . . . . . . . . . . . . . . . 55
4-4 Skip and fill comparison. . . . . . . . . . . . . . . . . . . . . . . . . . . . . . . . . . . . . . . . . . . . . . . . . . . . . . . . . . . . . 57
6-1 BW2600 Shipping container with components packed . . . . . . . . . . . . . . . . . . . . . . . . . . . . . . . . . . . . . 74
A-1 BW2600 assembly (P/N 91579) . . . . . . . . . . . . . . . . . . . . . . . . . . . . . . . . . . . . . . . . . . . . . . . . . . . . . . 76
A-2 BW2600 assembly parts list 1 (P/N 91579) . . . . . . . . . . . . . . . . . . . . . . . . . . . . . . . . . . . . . . . . . . . . . 77
A-3 BW2600 assembly parts list 2 (P/N 91579) . . . . . . . . . . . . . . . . . . . . . . . . . . . . . . . . . . . . . . . . . . . . . 78
A-4 Step positioner assembly (P/N 90590) . . . . . . . . . . . . . . . . . . . . . . . . . . . . . . . . . . . . . . . . . . . . . . . . . 80
A-5 Step positioner assembly parts list (P/N 90590) . . . . . . . . . . . . . . . . . . . . . . . . . . . . . . . . . . . . . . . . . . 81
A-6 Radial isolation mount assembly (P/N 85771) . . . . . . . . . . . . . . . . . . . . . . . . . . . . . . . . . . . . . . . . . . . 82
A-7 Pelican case assembly (P/N 85771) . . . . . . . . . . . . . . . . . . . . . . . . . . . . . . . . . . . . . . . . . . . . . . . . . . . 83
A-8 Base unit and pelican case assembly (P/N 85824). . . . . . . . . . . . . . . . . . . . . . . . . . . . . . . . . . . . . . . . 84
A-9 Blank end contactor with four pin assembly (P/N 85396) . . . . . . . . . . . . . . . . . . . . . . . . . . . . . . . . . . . 85
A-10 Conduit assembly with euro connector (P/N 85435). . . . . . . . . . . . . . . . . . . . . . . . . . . . . . . . . . . . . . 86
A-11 Power supply for switch miller assembly (P/N 85475) . . . . . . . . . . . . . . . . . . . . . . . . . . . . . . . . . . . . 87
A-12 Conduit assembly for miller (P/N 85476) . . . . . . . . . . . . . . . . . . . . . . . . . . . . . . . . . . . . . . . . . . . . . . 88
A-13 Conduit power assembly for MIG 225 Lincoln (P/N 85527) . . . . . . . . . . . . . . . . . . . . . . . . . . . . . . . . 89
A-14 Contactor assembly for Hobart and Thermal arc (P/N 85530) . . . . . . . . . . . . . . . . . . . . . . . . . . . . . . 90
A-15 Conduit assembly for Hobart and Thermal arc hefty II (P/N 85532) . . . . . . . . . . . . . . . . . . . . . . . . . . 91
A-16 Conduit assembly for TWECO (P/N 85534) . . . . . . . . . . . . . . . . . . . . . . . . . . . . . . . . . . . . . . . . . . . . 92
A-17 Conduit assembly for Lincoln (P/N 85536) . . . . . . . . . . . . . . . . . . . . . . . . . . . . . . . . . . . . . . . . . . . . . 93
A-18 Contactor assembly for Lincoln 5 pin (P/N 85540) . . . . . . . . . . . . . . . . . . . . . . . . . . . . . . . . . . . . . . . 94
B-1 Schematic (P/N 84635). . . . . . . . . . . . . . . . . . . . . . . . . . . . . . . . . . . . . . . . . . . . . . . . . . . . . . . . . . . . . 97
B-2 Cable assembly rocker switch (P/N 84898) . . . . . . . . . . . . . . . . . . . . . . . . . . . . . . . . . . . . . . . . . . . . . 99
B-3 Connector assembly remote pendant (P/N 85037). . . . . . . . . . . . . . . . . . . . . . . . . . . . . . . . . . . . . . . 100
B-4 Pendant assembly (P/N 85341) . . . . . . . . . . . . . . . . . . . . . . . . . . . . . . . . . . . . . . . . . . . . . . . . . . . . . 101

P/N 85555, Rev. 6 Page vii
LIST OF FIGURES (CONTINUED)
FIGURE PAGE
B-5 Power entry module assembly (P/N 86514) . . . . . . . . . . . . . . . . . . . . . . . . . . . . . . . . . . . . . . . . . . . . 102
B-6 Power and control harness assembly (P/N 86516). . . . . . . . . . . . . . . . . . . . . . . . . . . . . . . . . . . . . . . 103
B-7 Potentiometer and harness assembly (P/N 86517) . . . . . . . . . . . . . . . . . . . . . . . . . . . . . . . . . . . . . . 104
B-8 Switch rotation and harness assembly (P/N 86518) . . . . . . . . . . . . . . . . . . . . . . . . . . . . . . . . . . . . . . 105
B-9 Switch auto-skip on/off harness assembly (P/N 86520) . . . . . . . . . . . . . . . . . . . . . . . . . . . . . . . . . . . 106
B-10 Switch skip/fill and harness assembly (P/N 86521) . . . . . . . . . . . . . . . . . . . . . . . . . . . . . . . . . . . . . 107

Page viii BW2600 Operating Manual
This page intentionally left blank

P/N 85555, Rev. 6 Page ix
LIST OF TABLES
TABLE PAGE
1-1 Sound levels . . . . . . . . . . . . . . . . . . . . . . . . . . . . . . . . . . . . . . . . . . . . . . . . . . . . . . . . . . . . . . . . . . . . . . 3
1-2 Risk assessment checklist before set-up . . . . . . . . . . . . . . . . . . . . . . . . . . . . . . . . . . . . . . . . . . . . . . . . 5
1-3 Risk assessment checklist after set-up . . . . . . . . . . . . . . . . . . . . . . . . . . . . . . . . . . . . . . . . . . . . . . . . . . 5
1-4 Labels . . . . . . . . . . . . . . . . . . . . . . . . . . . . . . . . . . . . . . . . . . . . . . . . . . . . . . . . . . . . . . . . . . . . . . . . . . . 6
2-1 BW2600 front panel controls . . . . . . . . . . . . . . . . . . . . . . . . . . . . . . . . . . . . . . . . . . . . . . . . . . . . . . . . . 23
2-2 Remote pendant controls . . . . . . . . . . . . . . . . . . . . . . . . . . . . . . . . . . . . . . . . . . . . . . . . . . . . . . . . . . . 24
2-3 BW2600 specifications . . . . . . . . . . . . . . . . . . . . . . . . . . . . . . . . . . . . . . . . . . . . . . . . . . . . . . . . . . . . . 25
2-4 Buildup diameters per swivel head . . . . . . . . . . . . . . . . . . . . . . . . . . . . . . . . . . . . . . . . . . . . . . . . . . . . 26
2-5 Optional torch diameter ranges . . . . . . . . . . . . . . . . . . . . . . . . . . . . . . . . . . . . . . . . . . . . . . . . . . . . . . . 26
3-1 Torch and diameter range . . . . . . . . . . . . . . . . . . . . . . . . . . . . . . . . . . . . . . . . . . . . . . . . . . . . . . . . . . . 32
4-1 Rotational speed in inches at 20 in/min (508 mm/min) . . . . . . . . . . . . . . . . . . . . . . . . . . . . . . . . . . . . . 53
5-1 Maintenance intervals and tasks . . . . . . . . . . . . . . . . . . . . . . . . . . . . . . . . . . . . . . . . . . . . . . . . . . . . . . 64
5-2 P/N 86863 Tool kit . . . . . . . . . . . . . . . . . . . . . . . . . . . . . . . . . . . . . . . . . . . . . . . . . . . . . . . . . . . . . . . . . 71

Page x BW2600 Operating Manual
This page intentionally left blank

P/N 85555, Rev. 6 Page 1
1 INTRODUCTION
IN THIS CHAPTER:
1.1 HOW TO USE THIS MANUAL - - - - - - - - - - - - - - - - - - - - - - - - - - - - - - - - - - - - - - 1
1.2 SAFETY ALERTS - - - - - - - - - - - - - - - - - - - - - - - - - - - - - - - - - - - - - - - - - - - 1
1.3 GENERAL SAFETY PRECAUTIONS - - - - - - - - - - - - - - - - - - - - - - - - - - - - - - - - - - - 2
1.4 MACHINE-SPECIFIC SAFETY PRECAUTIONS - - - - - - - - - - - - - - - - - - - - - - - - - - - - - - - 3
1.5 RISK ASSESSMENT AND HAZARD MITIGATION - - - - - - - - - - - - - - - - - - - - - - - - - - - - - - 4
1.6 RISK ASSESSMENT CHECKLIST - - - - - - - - - - - - - - - - - - - - - - - - - - - - - - - - - - - - 5
1.7 LABELS - - - - - - - - - - - - - - - - - - - - - - - - - - - - - - - - - - - - - - - - - - - - - - - 6
1.8 LABEL LOCATIONS - - - - - - - - - - - - - - - - - - - - - - - - - - - - - - - - - - - - - - - - - - 8
1.1 HOW TO USE THIS MANUAL
This manual describes the setup, operation, maintenance, storage, shipping, and
decommissioning of the BW2600 bore welding machine.
NOTICE
For maximum safety and performance, read this entire manual
before attempting to set up or operate the machine.
The first page of each chapter includes a list of the chapter contents to help you
locate specific information.
The appendices contain supplemental product information to aid in setup, opera-
tion, and maintenance tasks.
1.2 SAFETY ALERTS
Pay careful attention to the safety alerts in this manual. Safety alerts call your
attention to dangerous situations that you may encounter when operating this
machine. This manual uses the following types of safety alerts:1
DANGER
indicates a dangerous situation that, if not avoided, WILL result
in death or serious injury.
1. For more information on safety alerts, see ANSI/NEMA Z535.6-2011, Product safety
Information in Product Manuals, Instructions, and Other Collateral Materials.

Page 2 BW2600 Operating Manual
WARNING
indicates a dangerous situation that, if not avoided, COULD
result in death or serious injury.
CAUTION
indicates a dangerous situation that, if not avoided, could result
in minor or moderate injury.
NOTICE
indicates a dangerous situation that, if not avoided, could result
in property damage, equipment failure, or undesirable work
results.
1.3 GENERAL SAFETY PRECAUTIONS
CLIMAX leads the way in promoting the safe use of portable machine tools.
Safety is a joint effort. You must do your part by:
• Being aware of your work environment
• Closely following the operating procedures and safety precautions con-
tained in this manual
• Closely following your employer’s safety guidelines
When operating or working around the machine, observe the safety precautions
below.
Training – Before operating this or any machine tool, you should receive
instruction from a qualified trainer. Contact CLIMAX for machine-specific
training information.
Risk assessment – Working with and around this machine poses risks to
your safety. Conduct a risk assessment (Section 1.5 and Section 1.5 on
page 4) of each job site before setting up and operating this machine.
Intended use – Use this machine in accordance with the instructions and
precautions in this manual. Do not use this machine for any purpose other
than its intended use as described in this manual.
Personal protective equipment – Always wear appropriate personal pro-
tective gear when operating this or any other machine tool. Wear
flame-resistant clothing with long sleeves and legs when operating the
machine, as hot flying spatter from the workpiece may burn bare skin. This
machine produces radiation in the visible and ultraviolet spectrum range
called arc rays. Always wear welding PPE for eyes and exposed skin when
observing or working around the machine during operation.

P/N 85555, Rev. 6 Page 3
Work area – Keep the work area around the machine clear of clutter. Restrain
cords and hoses connected to the machine. Keep other cords and hoses
away from the work area.
Danger zone – The danger zone of this machine is inside the bore during
welding operations. The main danger of this machine is from the arc flash,
and is mainly visual in nature. All persons in the area of the machine need
to have proper shielding from the radiation produced while welding.
Moving parts – Many CLIMAX machines have numerous exposed moving
parts and interfaces that can cause severe impact, pinching, cutting, and
other injuries.
During machine operation:
• Keep hands and tools away from moving parts.
• Wear proper PPE for welding and always maintain a clear working area
to prevent tripping hazards.
Hot surfaces – During operation, torches and extensions will get hot enough
to cause severe burns. Pay attention to hot-surface warning labels and
avoid contact with bare skin until the machine has cooled.
1.4 MACHINE-SPECIFIC SAFETY PRECAUTIONS
Hazardous environments – Do not operate the machine in environments
where explosive materials, toxic chemicals, or radiation may be present.
Do not expose the machine to rain or wet conditions.
Welding hazards – This machine produces radiation in the visible and ultra-
violet spectrum range. Always wear welding PPE for eyes and exposed
skin when observing or working around the machine during operation. For
more information on welding hazards and safety precautions, refer to ANSI
749.1, Safety in Welding and Cutting.
Sound level – This machine produces potentially harmful sound levels.
Always wear hearing protection when operating the machine or working
around it.
During testing, the machine produced the following sound levels.1
TABLE 1-1. SOUND LEVELS
The declared sound power level is: 59.7 dBA
The declared operator sound pressure level is: 58.0 dBA
The declared bystander sound pressure level is: 56.4 dBA
1. Machine sound testing was conducted in accordance with European Harmonized
Standards EN ISO 3744:2010 and EN 11201:2010.

Page 4 BW2600 Operating Manual
Hoses, pendants, and electrical cables – Follow these rules:
• Do not abuse the pendant cable as this can damage the cable and pen-
dant.
• Never use the cord for carrying, pulling, or unplugging.
• Remove any and all kinks before straightening the cable.
• Keep cords and hoses away from heat, oil, sharp edges, and moving
parts.
• Plugs must match the outlet. Never modify the plugs in any way. Do
not use an adapter plug with grounded power tools.
• Always examine hoses and cables for damage before use.
Adjustments and maintenance – Stop the machine and lock out all power
sources before performing any adjustment, lubrication, or maintenance.
Controls – The machine controls are designed to withstand the rigors of nor-
mal use.
The on/off switches are clearly visible and identifiable. When you leave the
machine, disconnect all power sources to the machine.
1.5 RISK ASSESSMENT AND HAZARD MITIGATION
Welding tools are specifically designed to perform precise metal-joining and over-
lay operations. Some welding tools are used in controlled environments such as
factories and repair shops; however, portable welding tools are used in a wide vari-
ety of conditions. A portable welding tool typically attaches directly to the work-
piece itself, or to an adjacent structure. The design intent is that the portable
welding tool and the structure to which it is attached become one complete
machine during the welding processes.
To achieve the intended results and to promote safety, the operator must under-
stand and follow the design intent, setup, and operation practices that are unique to
portable welding tools. Hazards include the potential for operator injury, as well as
the potential for damage to the workpiece and to the welding equipment itself.
Precautions are required to avoid injury from burns, electric shock, vision damage,
inhalation of poisonous gases and fumes, and exposure to intense ultraviolet radia-
tion. When welding is performed on motorized equipment, precaution is required
to minimize the risk of fuel ignition or electrical damage to vehicle instrumenta-
tion. Power sources must be evaluated for proper voltage and current rating. To
avoid damaging generators, weld power supplies, and welding equipment, power
cabling must be maintained and replaced as required.
The operator must perform an overall review and on-site risk assessment of the
intended application. Due to the unique nature of welding tool applications, identi-
fying one or more hazards that must be addressed is typical. When performing the
on-site risk assessment, it is important to consider the portable welding tool and
the workpiece as a whole.
Table of contents
Other Climax Welding System manuals
Popular Welding System manuals by other brands

TradeWeld
TradeWeld DIGITEC 200 owner's manual

Miller Electric
Miller Electric Sidekick GA-16C Gun owner's manual

Kemppi
Kemppi KEMPACT MIG 2520 operation instruction

Lincoln Electric
Lincoln Electric IDEALARC DC-400 brochure

Everlast
Everlast POWER i-MIG 140E Operator's manual

SPT Plasmateknik AB
SPT Plasmateknik AB UNIFIRE 31PFC Instructions for use