Climer HTM EVI SERIES User manual

1 V0REV5ES1218
INSTALLATION AND USER MANUAL
HTM EVI SERIES

INSTALLATION AND USER MANUAL
HTM-24E
2 V0REV5ES1218

INSTALLATION AND USER MANUAL
HTM-24E
3 V0REV5ES1218
1. INTRODUCTION
Thank you for buying a product manufactured by CLIMER TECHNOLOGY. This product, has
been manufactured according to the European Quality Standards, incorporates prime grade
materials and its correct working has been tested before it leaves our facilities.
Through this Installation and User Manual, you will be guide towards the correct and safety
installation of the product. It is necessary to carefully read this manual before make any
handling to avoid problems arising from the misuse of the product.
The company CLIMER TECHNOLOGY reserves the right to modify the information included
in this document at any time without prior notice.
2. GENERAL INDICATIONS
1. Safety notes
- The incorrect or inappropriate use of this product could lead to hazardous
situations, causing damage or injuries to the user, third parties or even to the
product itself or material goods.
- The installer has the responsibility to install the minimum safety devices
(hydraulic and electrical) set out in this Manual. In case of failure, the lack of any
device may cause burns or other injuries.
- The installer has the responsibility to inform the user about the function and
placement of the safety devices installed into the device and the installation.
- The water outlet temperature could reach 65 degrees (depending on the model).
Do not touch the pipes while the system is working to avoid any risk of burns.
- Do not use not approved anticorrosive materials in the water circuit. It may cause
damage to the components.
- The system has to be charged with R407C coolant (depending on model).
These coolants should not be released to the atmosphere. It is responsibility of
the installer to check the tightness of the installation before making the gas
charge.

INSTALLATION AND USER MANUAL
HTM-24E
4 V0REV5ES1218
2. Installer’s qualification
Since the installation of the Heating Thermodynamic Module involves handling coolant as
well as carry out welding work, it is needed the technical staff have the official certification that
accredits them as authorized to handle coolants.
The installer must explain the user the application of the product and the use and
management of the unit, and he should provide the user all the documentation supplied with
the equipment.
3. Package contents
The HTM-E system comprises the following components:
- Thermodynamic panles which number depend on the model
- Liquid distributors
- Anchoring elements
- Heating Module
- Silent-Blocks
- User Manual
4. Indications about transport and unpacking the unit
The HTM-E is supplied packed into a wooden pallet properly secured to prevent damage
during transport.
The material that CLIMER TECHNOLOGY uses to the packing are recyclables, so dispose
it in an appropriate container.
Use a forklift or hand pallet truck to transport the unit to the installation site, always
introducing the forks into the bottom of the pallet being careful not to damage the unit.
In case you identify any damage at the time of the reception of the unit, it is mandatory
to register it in the reception note of the transport company, and then, submit the complaint.
For this reason, it is recommended to make a thorough visual inspection of the goods
before signing the reception note.

INSTALLATION AND USER MANUAL
HTM-24E
5 V0REV5ES1218
3. TECHNICAL INFORMATION
The HTM-EVI is manufactured with high quality and maximum reliability materials:
- Stainless steel 316L plate heat exchanger
- High efficiency Scroll compressor
- Electronic expansion valve
- Liquid receiver
- Filter drier
- Oil separator
- High and low pressure switch
- Safety compressor thermostat
- Electric switchboard with overcurrent and short circuit protections.
- Flow switch
- Temperature sensors placed at inlet and outlet water pipe.
- Steel lacquered casing
Below are indicated the technical data of the system:
HTM24E
Heating capacity range (1), W
26210-18710
Input power range (1), W
4220-4260
Heating capacity range (2), W
26050-19610
Input power range (2), W
7600-7390
Heating capacity (3), W
12.180
Input power (3), W
7.040
Maximum temp. HP, ºC
60
Coolant
R407C
Power supply, V/ph/Hz
380 /3 /50
Number of panels
24
Panel dimensions, mm
1700x800

INSTALLATION AND USER MANUAL
HTM-24E
6 V0REV5ES1218
4. INSTALLATION STEPS
Before starting the installation, check the availability of all the necessary components and
tools:
- High and low pressure manometers
- Vacuum pump
- Scales
- Coolant bottle (R407C depending on the model)
- Nitrogen bottle
- Refrigerant quality copper pipe
- Pipe-cutter
- Tube bender
- Pipe expander
- Welder
- Copper Rods (40% Siver)
- Insulating hose
- Drill
- Screwdriver
- Hydraulic installation components
- Electric installation components
Once it has been checked that it is available all the necessary components and tools, the
installer should follow the next steps:
1. Placing and anchoring panels
2. Installation of the liquid distributors
3. Installation of the gas manifold
4. Joining and welding the refrigerant pipes
5. Placing the Heating Module
6. Joining and welding liquid and suction line between heating module and panels.
7. Nitrogen pressure test (maximum10 bar)
8. Vacuum

INSTALLATION AND USER MANUAL
HTM-24E
7 V0REV5ES1218
9. Pre-load coolant
10. Hydraulic installation
11. Electric installation
12. Commissioning
13. Adjustment of refrigerant load
5. THERMODYNAMIC SOLAR PANELS INSTALLATION
1. Site selection
The choice of the installation site of thermodynamic panels is a key factor in the final
performance of the heating module. For this reason, we recommend to follow the indications in
order to achieve the best performance:
- South orientation is indeed the best to take the maximum advantage of solar
radiation. Panels may also have other orientations, but northerly orientation is
the worst to receive solar radiation.
- Inclination: The minimum inclination of the panel is 15 º in order to ensure the
correct evaporation of the coolant. It is recommended to install the panel with
an inclination between 45º and 90 º.
- Orientation: It is possible to install the panel both in vertical or horizontal
position
When the panel is installed in vertical
position, always the inlet and outlet
connection has been at the bottom. (It is not
allow to install the reverse)
If the panel is installed at horizontal
position, it is recommended to install pair of
panels confronted for having less piping
towards the distributor.
1700
800
1700
800
1700
800
1700
800
1700
800
1700
800

8 V0REV5ES1218
IMPORTANT: If the panel is installed at horizontal position, refrigerant inlet pipe should be
connected into the bottom connection.
- Distances to heating module:
• The maximum allowed distance from the farthest panel to the
heating module is 15 meters.
• It is recommended not to exceed 20 meters of total length from
the heating module to the panels.
- Gap between panels: A minimum distance of 50 cm between panels should be
kept in order to have enough space to fit the pipes and collectors.
In the picture below is shown the dimensions of the panel:
2. Anchoring panels
Beside the panels is supplied a bag with anchoring elements that contain the following
pieces (per each panel):
- 6 x Aluminium support (L shape)
- 6 x Screws M5
- 12 x Nuts M5
- 18 x Washer 5
- 18 x Sheet Metal Screws
- 18 x Blocks M6
Anchor the panels using the lateral and front holes to the suitable surface.
c. Liquid distributor connections
1700
800

INSTALLATION AND USER MANUAL
HTM-24E
9 V0REV5ES1218
IMPORTANT: It is recommended to weld pipelines by oxyacetylene welding.
Welding is a critical step in the installation and to do it well ensures that the system will run
properly along its useful life.
Only expert staff should make this step by using proper tools and high quality materials.
Once panels are anchored, the next step consists on the installation of the liquid
distributor. Its function is to ensure the homogeneous refrigerant flow in the whole panel
installation.
Possible distributor scheme is shown in the next picture:
Install the distributor vertically, face upwards according to the picture.
IMPORTANT: To ensure the same flow of refrigerant in every panel and consequently take
advantage of the evaporation surface entirely; you should install the same tube length from the
distributor to every panel. If a pipe is too long for the length require, it must be rolled up.
Panels are supplied with two nuts at the inlet and outlet connection. The inlet to each panel is
1/4 inch diameter. The installer has to insert the nut into the copper pipe, flare the pipe and
then use the nut to fit it.
Repeat the procedure with the outlet connection using 3/ 8 inch copper pipe.
3/4’’
1/2 ‘’
1/4 ‘’
6
1/4 ‘’
6
1/4 ‘’
8
1/4 ‘’
8
3/8‘’
3/4’’
5
1/4 ‘’
4
1/4 ‘’
4
1/4 ‘’
4
1/4 ‘’
4
1/4 ‘’
4
3/8‘’
3/4’’
5
3/8‘’
3/4’’
4
1/4 ‘’
6
1/4 ‘’
6
1/4 ‘’
6
1/4 ‘’
6
1/4 ‘’
6
1/4 ‘’
6
1/4 ‘’
6
1/4 ‘’
6
1/4 ‘’
6
3/8‘’
3/4’’
6
1/4 ‘’
6
1/4 ‘’
6
1/4 ‘’
66
1/4 ‘’ 1/4 ‘’
6
1/4 ‘’
6
HTM 20
HTM 30 HTM 36
HTM 24
HTM 12 HTM 16
1/2’’
1/2 ‘’

INSTALLATION AND USER MANUAL
HTM-24E
10 V0REV5ES1218
L: Liquid line
3. Collector
Join every panel outlet to a secondary collector in a simple way. All the secondary collectors will
be joined to the main suction line.
A: Main suction line
4. Pipe connections
Once the panel scheme is made, proceed to join the liquid and suction line.
Refrigerant quality copper pipe is used to make the connection, with a diameter specified in the
following table:
Model
Suction Line
Liquid Line
HTM-24E
1 1/8’’
3/4’’

INSTALLATION AND USER MANUAL
HTM-24E
11 V0REV5ES1218
6. PLACING HEATING MODULE
Firstly check the dimension of the heating module and the connections disposition:
Models
A
mm
B
mm
C
mm
W1
Water
Outlet
W2
Water
inlet
G
L
E
Electric
connection
HTM-24E
690
658
734
1 ‘’
1 1/8’’
3/4’’
4 wires
The place where the module will be installed should allow an easy access to it in order to
make maintenance work or inspection. It is recommended to leave at least 400 mm of free space.

INSTALLATION AND USER MANUAL
HTM-24E
12 V0REV5ES1218
Beside these factors, it is important to take into account the following indications regards
the installation site:
- The system has been designed and manufactured for it indoors utilization. In
case the system has to be placed outdoors, it must be protected against the
adverse weather conditions (direct solar radiation, rain, snow…)
- Since the Heating Module could cause vibrations and noise, it is recommended
to install it far away from bedrooms or resting places.
- Try to place the heating module as near as possible of the panels’ installation,
and also near to the buffer tank.
- Installer must install the supplied Silent blocks to avoid the transmission of
vibration.
7. CONNECTION BETWEEN HEATING MODULE AND PANELS
CAUTION: Heating Module is preload with a 20 kg of Nitrogen to ensure its tightness
during the transport. Liquid and suction connection are sealed, so before handle the module,
the installer must discharge the nitrogen through the charge ports located at the high and low
pressure line.
a. Check the tightness
Firstly, put the pressure gauge into the charge ports of the high pressure line and low
pressure line.
L
E
G
W1
W2
B
77
884
86
A150
1700
800
400
400
400

INSTALLATION AND USER MANUAL
HTM-24E
13 V0REV5ES1218
Then, check that the pressure at the module is not lower that 15 bar. If the pressure has
decreased, check the installation looking for leakages before continuing with the procedure.
b. Discharge Nitrogen
Discharge the nitrogen preload, opening the load ports until empty.
c. Cut the refrigerant pipes
Inlet and outlet refrigerant pipes are protected by insulating hoses. Firstly, remove the
isolation and through the use of pipe cuter, cut the ends of each tube.
d. Expand tubes
Use the tube expander for expanding the inlet and outlet refrigerant pipe in order to
proceed with the welding. Another option is to install a coupler between pipes.
e. Welding
Join the suction line that comes from the panels to the coolant inlet, and the liquid line to
the coolant outlet. Then weld it by the oxyacetylene welding.
f. Nitrogen load
In order to check the tightness, introduce nitrogen by using the pressure gauge already
installed into load ports.
CAUTION: Never exceed a nitrogen load greater than 10 bars.
Use soapy water at every welding and even in panel’s connections to verify the absence of leaks.
g. Vacuum
Connect the vacuum pipe to the pressure gauge to carry out a vacuum of the whole installation.
The recommended vacuum time is shown in the table below:
Model
Vacuum time
HTM-24E
2 h 30 min

INSTALLATION AND USER MANUAL
HTM-24E
14 V0REV5ES1218
h. Coolant load
Depending on the model of the heating module, the installer has to fill a minimum load
of refrigerant according to the following table:
Standard
Models
Refrig.
Minim.L
oad (kg)
HTM-24E
R407C
3,1
IMPORTANT: Refrigerant 407C, is a zeotropic mix that is composed by 3 different
components. For this reason, the refrigerant has to be in liquid state at the moment of the
loading to ensure the homogeneous charge of each compound.
Do the load always taking the refrigerant of the bottom of the recipient
Load the refrigerant ALWAYS WITH THE MODUEL SWITCH OFF and using the load port
located at the high pressure line, always in liquid state.
Once the initial load has been done, make hydraulic and electric installation.
When the heating module has been connected to the grid, switch on the grid voltage via
the line circuit breaker.
DO NOT ACTIVE TH SYSTEM BY THE THERMOSTAT: The heating module must be
switch off at least 10 minutes, while the crankcase heater is heating the compressor in order to
avoid any risk of liquid hammer in the compressor.
After this period, switch on the heating module using the thermostat key (or the switch)
and start the refrigerant load until achieve the appropriate load. For this issue, check the
ambient temperature and load refrigerant until the evaporation pressure (indicated in the
pressure gauge) match with the values at the table below:

INSTALLATION AND USER MANUAL
HTM-24E
15 V0REV5ES1218
Refrig.
Tem.
Ext. ºC
Evapor.
Pressure
bar
R407C
0
1,6
5
2,15
10
3
15
3,6
20
4,5
25
5,4
30
6,55
8. HIDRAULIC CONNECTION
In Annex 1 is shown two recommended hydraulic schemes.
The installer must install the following components of the hydraulic circuit:
- Circulation pump
- Ball valves
- Lined Filter Strainer (Y Type)
- Pressure reducing valve
- Expansion vessel
- Safety valve
For the selection of the circulating pump it is needed to take into account the pressure
loss in pipes and accessories (pipe elbow, filter, valves).
In the following table is shown the water flow that must flow at least through the heat
exchanger :
Standard
models
Water
flow
(L/h)
Pressure
loss (kPa)
HTM-24E
5.158
52
Once the hydraulic connections are made, vent the circuit to avoid the air inside the
installation.

INSTALLATION AND USER MANUAL
HTM-24E
16 V0REV5ES1218
Temperature probe
The installer has to install the temperature probe B1 in one of the following points:
- Inside the buffer tank
- Return water pipe
- If the buffer tank has a coil, in the return water pipe of the coil
9. ELECTRICAL CONNECTION
The electric switchboard is located in the front of the module. The installer has to make
the following connections:
1.
Power supply:
Connect the system directly from the general control panel. The minimum wire section
and the characteristics of the circuit breaker that the installer has to install are shown in the
following table:
These data are calculated based on a maximum distance of 15m. In case of higher
distances contact with technical department for a new dimensioning.
2.
Circulator pump
Connect the circulator pump to the heating module. The system will control
automatically the operation of the pump when it is needed.
The connection is single-phase 230V/ 50 Hz. Pump must not exceed 5 A current.
In the Annex 2 and 3, are shown electric schemes. Connect the pump in the terminals 0-0.
Models
Power Supply
mm2
Circuit breaker
HTM-24E
380 V/ 3ph
/50 Hz
6
20 A- curve D

INSTALLATION AND USER MANUAL
HTM-24E
17 V0REV5ES1218
3. Remote start/stop
There is the possibility of connecting an external switch to control the ON/ OFF of the
system. It is a zero-voltage contact, that must be connected to the terminals 7-7.
If the installer does not use an external switch, jumper connect the terminal blocks 7-7. In
this case, the module will be switch on through the thermostat (see section 10. Comminisioning).

INSTALLATION AND USER MANUAL
HTM-24E
18 V0REV5ES1218
10. COMISSIONING. CONTROLLER.
1. Meaning of the buttons/ controller symbols
2. Use of buttons
A C
IH
G
F
E
B D
Symbol
Meaning ON
E
Compressor ON
F
Heating mode ON
G
Alarm
H
Pump ON
I
Compressor ON
Button
Meaning
A
Programming button
B
Select button
C
Increase buton
D
Decrease button
Button
Mode
Pressing
Function
Mode normal
Press for 5 sec.
Access to USER parameter
Navigation menu
Once pressing
Select item in programming and
visualising environmentvalue of USER
parameters
Confirmation
Navigation menu
Once pressing
Select upper item in menus
Mode modify
Once pressing
Increase parameter value
Mode normal
Press for 5 sec.
Swicht on/off the system if the remote
swicht is not installed
Navigation menu
Once pressing
Select lower item in menus
Mode modify
Once pressing
Decrease parameter value
+
Alarm
Press for 5 sec.
Manually reset alarm
Navigation menu
Press for 5 sec.
Immediate zero set of hour counter

INSTALLATION AND USER MANUAL
HTM-24E
19 V0REV5ES1218
3. Modifying parameters
Below is shown in the picture the procedure to change the parameters:
- r03: Change the hot water temperature set point
- r04: Change temperature differential
5 s
menu

INSTALLATION AND USER MANUAL
HTM-24E
20 V0REV5ES1218
11. ALARMS
To reset manually the alarms, press for 5 seconds +
Alarms
Reset
HP1
High pressure
Manual
LP1
Low pressure
Automatic 5 times in one hour. Once
exceeded, manually reset.
TC1
Circuit thermal
overload
Manual
E1
Probe B1
Automatic reset
E2
Probe B2
Automatic reset
FL
Flow switch
Automatic 5 times in one hour. Once
exceeded, manually reset.
ELS
Low supply voltage
Automatic
EHS
High supply voltage
Automatic
CP1
Hours of compressor
working
Manual Reset. The system does not stop.
This manual suits for next models
1
Table of contents
Popular Heating System manuals by other brands

flamco
flamco Flexcon P Installation and operating instructions

Viessmann
Viessmann Vitotronic 200 KW2 operating instructions
aerauliqa
aerauliqa QR180ABP installation manual
Velux
Velux CLI U12 SD0(W/L/F/P) 118 El B/U instruction manual
Amana
Amana APG14 M Series manual

Ducasa
Ducasa AVANT-DGi+ 350 Operating and installation instructions

Energotech
Energotech EnergoCassette ENC 300 Fitting instructions
Lindab
Lindab PENNY QN Instructions for installation, use and maintenance manual

GammaSwiss
GammaSwiss RoofMate Assembly, installation and operation instructions
Monitor
Monitor M2200 owner's guide
Sentinel
Sentinel ELIMINATOR installation manual
Jaga
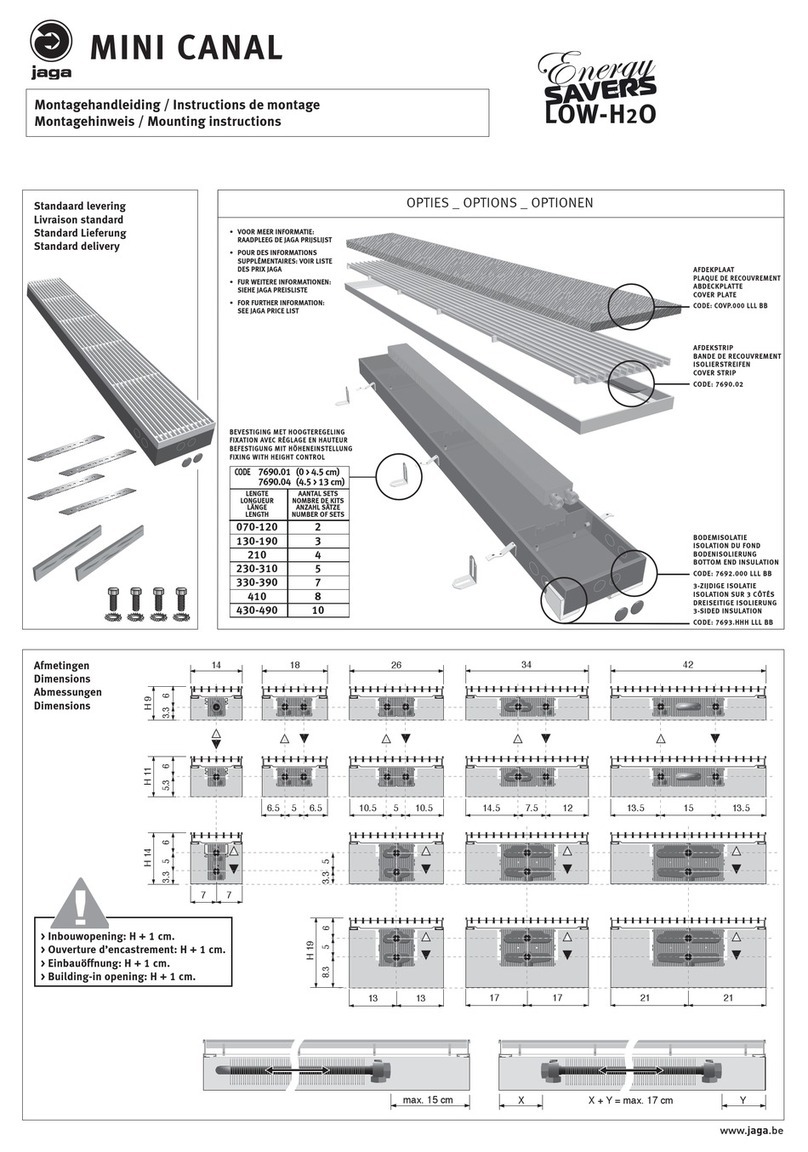
Jaga Mini Canal Mounting instructions

