manuals.online logo
Brands
  1. Home
  2. •
  3. Brands
  4. •
  5. Clou
  6. •
  7. Bathtub
  8. •
  9. Clou Hammock User manual

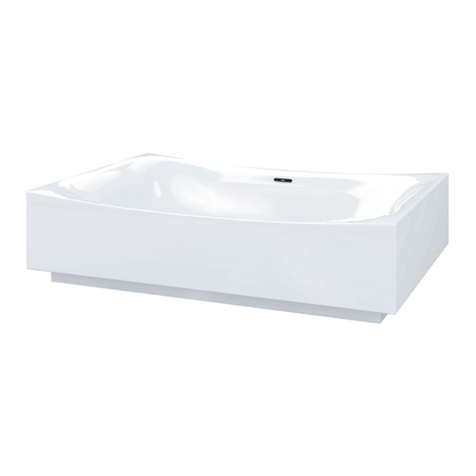
Clou Hammock User manual

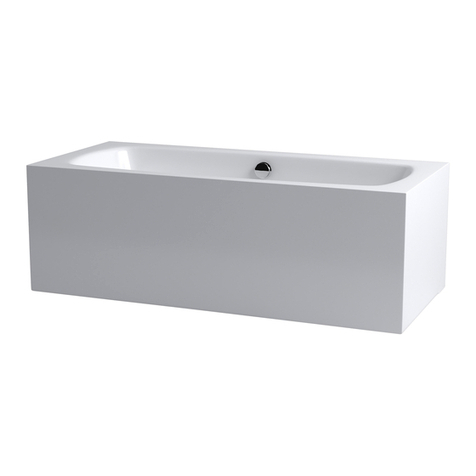
Hammock
Freestanding bathtub
CL/05.60020
Montage instructies
Installation instructions
Notice de montage
Montageanweisungen
REV 02
29.03.2019
- Alvorens de montage te beginnen moet de
volledigheid van de levering gecontroleerd
worden. Tevens moet ook op transport-
schade gecontroleerd worden, te late
schademeldingen (> 1 dag na levering) wor-
den niet aanvaard.
- De meegeleverde bevestigingsartikelen zijn
geschikt voor gestucte of betegelde,
massieve muren die voldoende draagkracht
hebben. Voor andere muren dient men zelf
bevestigingsartikelen te voorzien en dient
de muur mogelijk verstevigd te worden.
- Clou behoudt zich het recht voor
technische en optische wijzigingen aan te
brengen t.o.v. afgebeelde producten.
- Door wijzigingen in de productie kan het
zijn dat gegeven afmetingen niet meer
correct zijn. Alle vermelde afmetingen in
deze handleiding dienen te worden
geverifieerd alvorens de actie uit te voeren.
- Clou b.v. kan niet verantwoordelijk worden
gesteld voor de gevolgen van onaangepast
gebruik, onaangepast transport of
beschadigingen veroorzaakt door
tussenopslag.
- De van toepassing zijnde garantievoor-
waarden gelden steeds.
- Alle maten zijn in mm.
- Before starting with the mounting check
whether the delivery is complete. At the
same time the delivery should be checked
for damage due to transportation, damage
reports that are too late (> 1 day after
delivery) will not be accepted.
- The included fixing media are suited for
plastered or tiled solid walls with enough
supporting power. For other walls the used
fixing media is at own responsibility, and
the wall might need reinforcement.
- Clou reserves the right to introduce
technical and visual changes with respect
to the depicted images.
- Due to changes in production it is
possible that given dimensions are no
longer correct. All mentioned dimensions
in this manual should be verified before
executing the action.
- Clou b.v. can not be held responsible for
the results of improper use, improper
transportation or any damage caused
during interim storage.
- The current terms of guarantee are always
valid.
- All dimensions are in mm.
NL EN
- Avant de procéder au montage, veuillez
contrôler si l’article livré est complet.
Veuillez aussi contrôler des dommages
éventuels causés par le transport, nous
n’acceptons pas de réclamations dues à
des dégâts causés par le transport au-delà
de 1 jour après livraison.
- Les fixations livrées avec les articles sont
destinés pour montage sur un mur
massif porteur, finition stuc ou carrelé.
Pour d’autres finitions ou murs plus faibles,
prévoir d’autres fixations et éventuellement
consolider le mur si nécessaire.
- Clou se réserve le droit pour tout
changement technique ou optique par
rapport à la photo représentant le produit.
- Des changements de production peuvent
faire en sorte que les dimensions achées
ne correspondent plus, nous vous prions de
vérifier avant de procéder à toute action.
- Clou BV ne peut être tenu responsable
pour usage non approprié des articles,
transport inadéquat ou dommage causés à
votre entrepôt en attente de livraison.
- Les conditions de garanties en vigueur
restent toujours valables.
- Toutes les mesures achées sont en mm.
- Bevor Sie die Montage durchführen,
kontrollieren Sie bitte wenn der gelieferte
Artikel vollständig ist. Auch kontrollieren
Sie mögliche durch den Transport
verursachte Schäden, wir akzeptieren
keine Beschwerden auf Schäden nach
1 Tag nach Lieferung.
- Die mit den Artikeln gelieferten
Befestigungen sind für Montage auf einer
vergipste oder mit Fliesen gedeckte feste
Wände mit genügender stützenenergie.
Für andere Wände ist die verwendeten
regelnmittel an eigener Verantwortlichkeit,
und die Wand konnte Verstärkung
benötigen.
- Clou behält sich das Recht vor, die
technische und Sichtbarmachungsände-
rungen in Bezug auf die bildlich
dargestellten Bilder vorzustellen.
- Wegen der Änderungen in der Produktion
ist es möglich, dass gegebene Maße nicht
mehr korrekt sind. Vor der Durchführung
der Tätigkeit alle erwähnten Maße in
diesem Handbuch sollten überprüft werden.
- Clou b.v. kann nicht verantwortlich
gehalten werden für die Resultate des
unsachgemäßen Gebrauches,
unsachgemäßen Transportes oder
irgendeines Schadens, die während der
Zwischenlagerung verursacht werden.
- Die gegenwärtigen Ausdrücke der Garantie
sind immer gültig.
- Alle Maße sind in Millimeter.
FR DE
Gebruiksvoorschriften: zie ook de onderhoudsvoorschriften op www.clou.nl
User’s instructions: See also the maintenance guides at www.clou.nl
Instructions d’utilisation: Voyer aussi les instructions de maintenance sur www.clou.nl
Gebrauchsanweisungen: Sehen Sie auch die Wartungsanweisungen am www.clou.nl
Inhoud levering:
Content of delivery:
Contenu de la livraison:
Inhalt der Anlieferung:
Benodigd gereedschap:
Required tools:
Outils requis:
Erforderliche Werkzeuge:
Tijdens de installatie moet men voorkomen dat het
oppervlak van het product beschadigd raakt door harde
voorwerpen op het product te leggen.
During installation one has to prevent damaging the surface of
the product due to placing hard objects on the product.
Pendant l’installation on doit empêcher d’endommager la surface
du produit en évitant de poser des objets contondants sur le
produit.
Während der Installation muss man Schädigung verhindern der
Oberfläche des Produktes, das zur Platzierung der harten
Gegenstände auf das Produkt passend ist.
1210
80
50
50
400
ø51
500
1810
1746
1125
2000
1400
475
80
420
1560 1080
Hammock
acrylic
CL/05.60020
Dimensions in mm, for reference only / 05.04.2019 / rev_02 www.clou.nl
Dimensions in mm, for reference only / 08.04.2019 / rev_01 www.clou.nl
Hammock
drain and overflow set including trap
CL/05.60010 - CL/05.60020
Part
1
2
3
4
5
6
7
8
9
10
11
12
13
14
15
16
17
18
trap
O-ring overflow connection cap
overflow connection cap
O-ring trap and overflow
O-ring sewer connection cap
ring sewer connection cap
sewer connection cap
sewer tube
overflow tube
overflow connector
drain overflow
overflow mouning plate
drain cap
O-ring bottom cap
bottom cap
M6x30 bolt
O-ring stop/go drain
stop/go drain with cap
8 7 6 5 1 2 3
10
9
11
12 413
15
14
4
16
18
17
1000
700
2000
1400
475
420
475
420
350
75
500
90
1
Bepaal de positie van de
afvoer van het bad.
Decide on the position of the
drain of the bathtub.
Décider la position du bonde
de la baignoire.
Entscheiden Sie auf der
Position des Abflusses der
Badewanne.
2
Voorzie op deze plek een
uitsparing in de vloer,
500 x 350 mm breed en 90
mm diep.
Make at this position a cut-
away in the floor,
500 x 350 mm wide, 90 mm
deep. Allow extra space for
the connection hoses.
Faire à cette position un
coupé dans le plancher,
500 x 350 millimètres de
large, 90 millimètres de
profond.
Bilden Sie in dieser Position
ein Schnitt im Fußboden,
500 x 350 Millimeter breit,
90 Millimeter tief.
A
B
3
Plaats het bad op de gewenste
plaats en zet het bad waterpas
door moer A en stelvoet B bij te
stellen voor alle 6 de pootjes.
Place the bathtub in the desired
position and place the tub level
by adjusting nut A and levelling
foot B for all 6 feet.
Placer la baignoire dans la posi-
tion désirée et niveller la avec
l’écrous A et pied réglable B de
chaque des 6 pieds.
Legen Sie die Badewanne in
die gewünschte Position und
nivellieren Sie das durch Mutter
A und Stelzfuß B zu justieren
für alle 6 Füße.
4
Bevestig de afvoer (inbegre-
pen) in het bad. Gebruik de
explosietekening op p. 6 om
alles correct te installeren.
Mount the drain (included)
in the bathtub. Use the
exploded view on p. 6 to as-
semble the trap correctly.
Fixer la bonde (inclus) dans
le baignoire. Employer la vue
éclatée sur p. 6 pour assem-
bler le siphon correctement.
Befestigen Sie den Ablauf
(im Lieferumfang enthalten)
am Badewanne. Verwenden
Sie die Explosionzeichnung
über S. 6, um die Siphon
richtig zusammenzubauen.
6
Laat het bad vol met water
lopen en controleer op
eventuele lekkages.
Fill the bathtub completely with
water and check for leaks.
Remplissez la baignoire
complètement avec de l’eau et
vérifiez s’il y a des fuites.
Füllen Sie die Badewanne ganz
mit Wasser und auf Undichtig-
keiten untersuchen.
5
Bevestig de sifon (inbegrepen)
op de afvoer. Gebruik de ex-
plosietekening op p. 6 om alles
correct te installeren.
Install the trap (included) on
the drain. Use the exploded
view on p. 6 to assemble the
trap correctly.
Fixer le siphon (inclus) sur la
bonde. Employer la vue éclatée
sur p. 6 pour assembler le
siphon correctement.
Befestigen Sie den Siphon
(im Lieferumfang enthalten)
am Ablauf. Verwenden Sie die
Explosionzeichnung über S. 8,
um die Siphon richtig zusam-
menzubauen.
8
Installeer de kraan (niet inbe-
grepen) op de vloer en sluit
deze aan op de waterleiding.
Install the tap (not included)
on the floor and connect it to
the water supply.
Installer le robinet (non
inclus) sur le plancher et
le raccorder à la conduite
d’eau.
Befestigen Sie die Arma-
tur (nicht im Lieferumfang
enthalten) am Fußboden
und schließen Sie ihn an der
Wasserleitung an.
7
Controleer of de afvoer en
sifon correct zijn aangesloten.
Bevestig vervolgens het bad
aan de vloer met siliconenkit op
de stelpootjes.
Check wether the drain and
trap are installed correctly. Then
fixate the bathtub to the floor
with silicone sealant on the feet.
Vérifier si le bonde et le siphon
sont installés correctement.
Fixer alors la baignoire au plan-
cher avec du mastic silicone sur
les pieds.
Überprüfen Sie ob der Abfluss
und die Siphon richtig ange-
bracht sind. Fixieren Sie dann
die Badewanne zum Fußboden
mit Silikone auf die Füße.
Clou. Bath findings.
Clou bv
Thermiekstraat 1
NL-6361 HB Nuth
T +31 (0)45 524 56 56
[email protected]
www.clou.nl
Looking for inspiration?

Other manuals for Hammock

1

This manual suits for next models

1

Other Clou Bathtub manuals

Clou Wash Me CL/05.50010 User manual

Clou

Clou Wash Me CL/05.50010 User manual

Clou First CL/05.13010.20 User manual

Clou

Clou First CL/05.13010.20 User manual
Clou InBe IB/05.40300 User manual

Clou

Clou InBe IB/05.40300 User manual

Clou InBe IB/05.40305 User manual

Clou

Clou InBe IB/05.40305 User manual
Clou InBe IB/05.40305 User manual

Clou

Clou InBe IB/05.40305 User manual

Clou InBe IB/05.40300 User manual

Clou

Clou InBe IB/05.40300 User manual

Clou Hammock CL/05.60020 User manual

Clou

Clou Hammock CL/05.60020 User manual

Clou InBe IB/05.40305 User manual

Clou

Clou InBe IB/05.40305 User manual

Clou InBe IB/05.40102 User manual

Clou

Clou InBe IB/05.40102 User manual

Clou InBe IB/05.40102 User manual

Clou

Clou InBe IB/05.40102 User manual

Clou Wash Me CL/05.50010 User manual

Clou

Clou Wash Me CL/05.50010 User manual

Clou Hammock CL/05.60010 User manual

Clou

Clou Hammock CL/05.60010 User manual

Clou First CL/05.13010 User manual

Clou

Clou First CL/05.13010 User manual

Clou CL/05.70010.20 User manual

Clou

Clou CL/05.70010.20 User manual

Clou Solium II CL/05.70020 User manual

Clou

Clou Solium II CL/05.70020 User manual

Clou InBe IB/05.40507 User manual

Clou

Clou InBe IB/05.40507 User manual

Clou InBe IB/05.40506 User manual

Clou

Clou InBe IB/05.40506 User manual

Clou InBe IB/05.40402 User manual

Clou

Clou InBe IB/05.40402 User manual

Clou first CL/05.08010 User manual

Clou

Clou first CL/05.08010 User manual

Clou First CL/05.13010 User manual

Clou

Clou First CL/05.13010 User manual

Clou Solium I CL/05.70010 User manual

Clou

Clou Solium I CL/05.70010 User manual

Clou InBe IB/05.40302 User manual

Clou

Clou InBe IB/05.40302 User manual

Clou InBe IB/05.40105 User manual

Clou

Clou InBe IB/05.40105 User manual
Clou CL/05.70020.20 User manual

Clou

Clou CL/05.70020.20 User manual

Popular Bathtub manuals by other brands

Summer 19330A instructions

Summer

Summer 19330A instructions

Kingkraft EASIBATH Instructions for use

Kingkraft

Kingkraft EASIBATH Instructions for use

BATO SM-3060 installation guide

BATO

BATO SM-3060 installation guide

Kohler K-98155X Installation and care guide

Kohler

Kohler K-98155X Installation and care guide

Teuco Accademia T13 Assembly instructions

Teuco

Teuco Accademia T13 Assembly instructions

Empava EMPV-67AIS01 quick start guide

Empava

Empava EMPV-67AIS01 quick start guide

American Standard Virtuoso Elite Whirlpool 7236E parts list

American Standard

American Standard Virtuoso Elite Whirlpool 7236E parts list

KOLLER POOL EDGE Installation and operation manual

KOLLER POOL

KOLLER POOL EDGE Installation and operation manual

Teuco HYDROSONIC Hydrosilence user manual

Teuco

Teuco HYDROSONIC Hydrosilence user manual

Kohler K-1112-LA Roughing-In Guide

Kohler

Kohler K-1112-LA Roughing-In Guide

Kohler K-1835 Homeowner's guide

Kohler

Kohler K-1835 Homeowner's guide

Zucchettikos Kaos 1 installation manual

Zucchettikos

Zucchettikos Kaos 1 installation manual

STROMBERG URBAN SHOWERBATH Assembly & Operating Instruction

STROMBERG

STROMBERG URBAN SHOWERBATH Assembly & Operating Instruction

Kohler K-1492 Roughing-In Guide

Kohler

Kohler K-1492 Roughing-In Guide

Jacuzzi Stella Installation and operation instructions

Jacuzzi

Jacuzzi Stella Installation and operation instructions

DURAVIT D-Code 26020758 Mounting instructions

DURAVIT

DURAVIT D-Code 26020758 Mounting instructions

American Standard Ellisse Elite 2711EC Specifications

American Standard

American Standard Ellisse Elite 2711EC Specifications

Whirlpool SALAMANCA Product information

Whirlpool

Whirlpool SALAMANCA Product information

manuals.online logo
manuals.online logoBrands
  • About & Mission
  • Contact us
  • Privacy Policy
  • Terms and Conditions

Copyright 2025 Manuals.Online. All Rights Reserved.