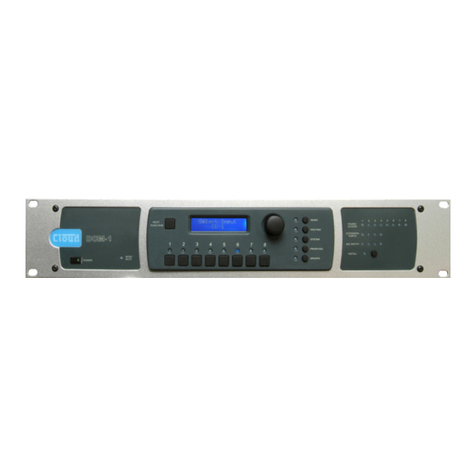
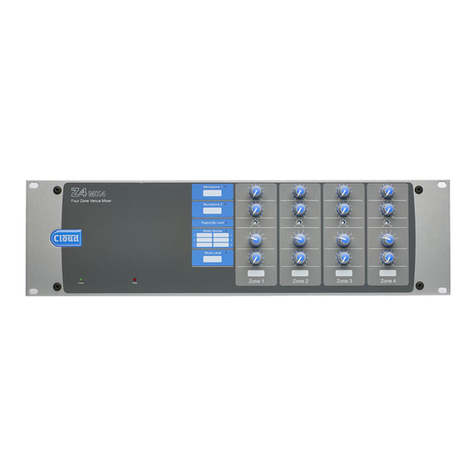
Cloud DCM-1 User manual

DCM-1
Digitally Controlled Mixer
Installation and User Guide


DCM-1 User Manual v1.0 1
DCM-1
Digitally Controlled Mixer

DCM-1 User Manual v1.02
z
Contents......................................................... 2
Safety Information........................................................................5
Safety Notes regarding Installation...................................5
Conformities .................................................................................5
Safety Considerations and Information...........................5
Mains Fuse..............................................................................5
Caution – Servicing..............................................................5
Introduction................................................... 5
Welcome........................................................................................6
Scope of this manual............................................................6
What’s in the box.........................................................................6
Section 1 : Overview .................................... 7
Introduction...................................................................................7
List of Main Features ...................................................................7
System Components ...................................................................8
DCM-1....................................................................................8
Optional components .................................................................8
CDR-1.....................................................................................8
LE-1..........................................................................................9
BE-1 .........................................................................................9
ME-1 ..................................................................................... 10
CDPM range....................................................................... 10
System Capabilities ................................................................... 11
Music sources and routing............................................... 11
Microphone Inputs............................................................ 11
Paging mic facilities............................................................ 11
Zone Outputs .................................................................... 11
Zone Groups...................................................................... 11
Priority and Logic .............................................................. 11
Remote Control ................................................................ 12
Misc....................................................................................... 12
Applications and Examples...................................................... 12
System 1 ............................................................................. 12
System 2 ............................................................................. 13
System 3 ............................................................................. 14
Section 2 : Installation................................. 15
Description of front panel....................................................... 15
Description of rear panel........................................................ 16
Hardware considerations ........................................................ 17
Power Supply...................................................................... 17
System Connections................................................................. 17
Music Sources..................................................................... 17
Standard connection......................................................... 17
Mono sources..................................................................... 17
Balanced sources ............................................................... 17
Additional balanced sources ........................................... 18
Zone outputs ............................................................................. 19
Standard connection......................................................... 19
Unbalanced inputs ............................................................. 19
CDR-1 Remote Control Panels............................................. 19
Connections ............................................................................... 21
Network Terminations ..................................................... 21
Cable length and DC power considerations............... 22
Mic and Line input plates................................................. 22
Connections and wiring................................................... 23
Connecting Paging systems..................................................... 24
Cloud CDPM Paging Microphones................................ 24
Connections and wiring................................................... 24
CDPM Terminations ......................................................... 24
CDPM DC power ............................................................. 24
Adjusting paging levels...................................................... 24
Zone paging outputs......................................................... 25
3rd.-party Paging systems................................................ 26
Paging microphone input ................................................. 26
Adjusting paging levels...................................................... 26
Paging Access Connector ................................................ 26
Music Mute.......................................................................... 27
Section 3 : Conguration........................... 28
User Mode .......................................................................... 28
Installer Mode .................................................................... 28
Navigating the menu system................................................... 29
Context-sensitive Help messages.................................. 29
User Mode.................................................................................. 30
Music menu............................................................................. 30
Select Input ........................................................ 30
Level .................................................................................... 30
Groups menu ......................................................................... 30
Group Enable...................................................................... 30
Installer Mode ............................................................................ 31
Music Menu............................................................................. 31
Select Input ......................................................................... 31
Level ..................................................................................... 31
Treble .................................................................................. 31
Mid........................................................................................ 31
Bass ...................................................................................... 31
Input Gain .......................................................................... 32
Maximum Music Level ..................................................... 32
Minimum Music Level ...................................................... 32
Routing Menu......................................................................... 33
Enable Mic Inputs............................................................... 33
Input Enable ....................................................................... 33
Congure Access Connector ......................................... 34
CDPM Zone Offset .......................................................... 34
CDR Zone Offset.............................................................. 34
System Menu .......................................................................... 35
CDR Zone Setup............................................................... 35
Stereo/Mono Zone selection.......................................... 36
Rename Inputs.................................................................... 36
Rename Zones ................................................................... 37
Rename Groups................................................................. 37
Set Key................................................................................. 37
RS232 Baud Rate ............................................................... 37
RS232 Flow......................................................................... 37
Power Up Mode ................................................................ 38
Save Defaults ...................................................................... 38
Update Firmware............................................................... 38
Reset Mixer......................................................................... 38
Contents

DCM-1 User Manual v1.0 3
Priorities Menu ...................................................................... 39
Select Priority Line Input................................................. 39
Line Priority Hold Time ................................................... 40
Line Priority Release Time............................................... 40
Select Mic Priority Input.................................................. 40
Mic Priority Hold Time..................................................... 40
Mic Priority Release Time................................................ 40
Mic Priority Attenuation .................................................. 41
Page Priority Select .......................................................... 41
Page Priority Hold Time................................................... 41
Page Priority Release Time.............................................. 41
Page Priority Attenuation ................................................ 41
Select Emergency Source ................................................ 42
Emergency Level................................................................ 42
Congure Music Mute...................................................... 42
Groups Menu ......................................................................... 43
Group Enable...................................................................... 43
Dene Groups ................................................................... 43
Other DCM-1 adjustments..................................................... 44
Paging mic gain ................................................................... 44
CDPM paging microphone gain...................................... 44
Paging mic EQ .................................................................... 44
Zone Paging Levels............................................................ 44
Setting up levels for best performance......................... 45
Display Contrast adjustment .......................................... 45
CDR-1 Remote Control Plates.............................................. 45
User Operation ................................................................. 45
Engineer Mode ................................................................... 46
Installer Mode .................................................................... 46
To activate Installer Mode:............................................... 46
Display adjustments .......................................................... 48
Inactivity Time .................................................................... 48
Assign Zone........................................................................ 48
Set Key................................................................................. 48
Combining Engineer and Installer Modes .................... 48
Larger systems – cascading DCM-1s.................................... 49
System Interconnections ................................................. 49
Line Inputs........................................................................... 49
Extension Ports.................................................................. 50
Mic Inputs............................................................................ 50
Zone Outputs .................................................................... 50
CDR-1s................................................................................ 50
CDPM .................................................................................. 50
3rd.-party paging system.................................................. 50
Music Mute Input............................................................... 50
RS232 Control ................................................................... 50
Section 4 : Appendix................................... 51
Jumper locations and settings................................................. 51
RS232 Serial Control................................................................ 52
Pinout................................................................................... 52
Port parameters................................................................. 52
Abridged command set.................................................... 52
Examples:............................................................................. 52
1) Input Selection .......................................................... 52
2) Zone Levels................................................................ 52
3) Enable/Disable Groups............................................ 53
4) Enable/Release Paging.............................................. 53
PSU capability............................................................................. 53
RJ45 pinouts ............................................................................... 54
Fitting Bose®Series II EQ cards............................................. 54
Firmware updates...................................................................... 54
Factory default settings .......................................................... 55
EMC considerations ................................................................. 55
Specications.............................................................................. 56
DCM‑1 Conguration Notes................................................. 58
To change Music Source for a Zone ................................. 58
To alter Music Volume in a Zone ....................................... 58
To enable/disable a Group of Zones................................. 58
DCM‑1 Installer Conguration Notes ................................. 60
Notes ............................................................ 62

DCM-1 User Manual v1.04
Notes

DCM-1 User Manual v1.0 5
Safety Information
Safety Notes regarding Installation
Do not expose the unit to water or moisture.
Do not expose the unit to naked ames.
Do not block or restrict any air vent.
Do not operate the unit in ambient temperatures above
35OC.
Do not perform any internal adjustments unless you
are qualied to do so and fully understand the hazards
associated with mains-operated equipment.
The unit has no user-serviceable parts. Refer servicing
to qualied service personnel.
If the moulded plug is cut off the mains lead for any
reason, the discarded plug is a potential hazard and
should be disposed of in a responsible manner.
•
•
•
•
•
•
•
Conformities
This product conforms to the following European EMC
Standards:
BS EN 55103-1:1997
BS EN 55103-2:1997
This product has been tested for use in commercial and
light industrial environments. If the unit is used in controlled
EMC environments, the urban outdoors, heavy industrial
environments or close to railways, transmitters, overhead
power lines, etc., the performance of the unit may be
degraded.
The product conforms to the following European electrical
safety standard:
BS EN 60065:2002
Safety Considerations and Information
The DCM-1 is powered by a separate Power Supply Unit
(PSU), which must be earthed. Ensure that the mains power
supply provides an effective earth connection using a three-
wire termination.
Mains Fuse
The PSU is a sealed unit and contains no user-replaceable
fuses. Mains over-current protection is provided by the fuse
in the 13A plug, which should be rated at 5A.
Caution – Servicing
The unit contains no user-serviceable parts. Refer servicing
to qualied personnel. Do not perform servicing unless
you are qualied to do so. Disconnect the power supply
from the unit before removing the top panel and do not
make any internal adjustments with the unit switched on.
Only reassemble the unit using bolts/screws identical to the
original parts.
Introduction

DCM-1 User Manual v1.06
Welcome
Thank you for purchasing this Cloud DCM-1, which
combines the traditional simplicity of Cloud products with
far greater functionality. We are condent that you will
be pleased with its performance, features, exibility and
reliability.
The DCM‑1 is Cloud’s digitally controlled multi zoner. It
combines traditional “installer-friendly” analogue I/O and
signal path, with the exibility and adaptability of digital
control.
Scope of this manual
This manual provides a comprehensive guide to the features
and functionality of the Cloud DCM-1 Digitally Controlled
Mixer. Please read through it to become fully acquainted
with the many conguration and control functions it offers.
It is recognised that the tasks of design/set-up, physical
installation and day-to-day operation of an audio system
based on the DCM-1 are likely to be performed by at least
three different people. You will nd, therefore, that this
manual is divided into sections:
Overview – introduction to the DCM-1 and its
options. Everyone should read this.
Installation – wiring the DCM-1 in a practical
situation.This should be read by the engineer
performing the installation and wiring.
Conguration – setting the system up.This
should be read by the systems designer/engineer who
will congure the system to suit the user’s particular
requirements.
Appendix – additional technical information.
Includes notes about controlling the DCM-1 remotely
via RS232.
User Templates – User’s operating instructions.A set
of blank templates which can be completed and left with
the user when the installation is nished, “personalising”
the DCM-1’s menu system to the particular installation.
The DCM-1 manual includes full details of the optional
CDR-1 remote control panel and the various optional
remote input plates.This information is also supplied with
each item when they are purchased separately.
Thank you again for placing your condence in Cloud
products.
•
•
•
•
•
What’s in the box
Unpack the DCM-1 and its accessories with care. It is always
a good idea to store all packaging (if practical), in case you
ever need to return the unit to your Cloud dealer for any
reason.
As well as this manual, the shipping carton should contain
the items listed below. Please contact your Cloud dealer
immediately if any of them are missing or damaged.
Cloud DCM-1 Digitally Controlled Mixer
Universal DC Power Supply Unit (100-240v), with DC
cable
IEC mains lead (AC cord)
Set of mating connectors for all rear panel Phoenix-type
sockets
•
•
•

Overview
DCM-1 User Manual v1.0 7
Introduction
The Cloud DCM-1 is an analogue audio Multi-Zone Mixer.
A digital control system, using a front-panel LCD display and
a simple, minimal set of controls replace the relatively large
number of switch and rotary controls found on conventional
units, yet provide far greater exibility of conguration than
would be possible with such units. It provides a wide range
of input and output connectivity possibilities to suit most
practical situations. It also offers simple and exible remote
control in addition to front-panel operation.
The DCM-1 has been designed to provide a simple, reliable
and elegant method of providing audio in a number of
different zones, typically the various areas of shops, bars,
hotels, schools, conference centres, ofces, factories and
even private residences. Local (per‑zone) remote control of
music source and level can be simply provided in as many
of the zones as necessary. The DCM‑1 has been designed
to allow easy integration with mic and line external inputs,
paging microphones and re alarm systems. Once set up, the
DCM‑1 allows zones to be combined (and separated) simply,
as space utilisation of the building demands.
An important aspect of the DCM-1’s design is that it is
completely self-contained, and requires no computer
interface of any kind, either to congure or control it.
The DCM-1 allows connection of up to 8 line-level sources
such as CD players, audio jukeboxes, PC sound cards, radio
or TV tuners, etc. In addition, both Cloud CDPM Series
paging microphones and third-party paging systems may
be directly connected. Each of the 8 outputs is intended to
supply audio to a separate zone. Two of the zone outputs
are available in stereo.Any one source can be routed to
any zone, and the music level in each zone can be adjusted
independently.
The exibility of the DCM‑1 is explained in greater detail in
System Capabilities on page 11.
List of Main Features
8 stereo line inputs (1 balanced)
8 balanced line outputs (2 stereo + 6 mono)
4 dedicated ports for optional remote line input
modules
4 dedicated ports for optional remote mic input
modules
Mic paging to all zones with fully programmable override
logic
Separate analogue paging mic input with contact closure
zone selection
Separate RJ45 interface for CDPM Series digital paging
microphones
Supports multiple CDR-1 Remote Controls (optional) in
any wiring conguration
CDR-1 provides local control of source, level, EQ and
group enable
2 x 16 character LCD dot-matrix display (both DCM-1
and CDR-1)
4 denable zone groups
Any line input may have priority in any zone; operation
also congurable per‑zone
Key-protected “Installer” mode (both DCM-1 and
CDR‑1) prevents user access to conguration menus
Inputs, zones and groups can be named
RS232 interface for control by third-party control
systems
Front‑panel LEDs conrm remote access
Accepts Bose®EQ cards
No PC required
Multiple DCM-1’s may be cascaded for larger systems
External Music Mute input for interfacing with
emergency systems
Any input (mic or line) may be assigned as Emergency
Input, overriding Music Mute
2U 19” rack-mounting unit
•
•
•
•
•
•
•
•
•
•
•
•
•
•
•
•
•
•
•
•
•
•
Section 1 : Overview

DCM-1 User Manual v1.0
Overview
8
System Components
DCM-1
The DCM-1 is the system “core” and all the primary audio
input sources, zone amplier inputs, paging mics/control and
all remote controls are connected directly to it.The DCM-1
mainframe should ideally be rack-mounted along with the
audio sources and zone ampliers, in a central equipment
area.
A practical multi‑zone audio system is perfectly realisable
with just a single DCM‑1, but system exibility and ease
of operation will be greatly enhanced by the addition of
optional Cloud remote controls and/or local input plates.
Optional components
CDR-1
Zone
The CDR‑1 is a remote control unit specically designed for
use with the DCM‑1. CDR‑1s may be tted to standard
electrical back boxes in whatever location is convenient in
each zone. Any zone may have one CDR‑1, more than one,
or none at all.The DCM-1 can support up to 100 CDR-1s.
CDR-1s are interconnected with just one standard CAT-5
UTP cable; units may be daisy‑chained at will and/or
connected individually back to the DCM-1’s four CDR ports
using almost any wiring topology convenient for the
installation.
The DCM-1’s own PSU has the capacity to power up to
8 CDR-1s directly, via the CAT-5 connections. Systems
requiring more than 8 CDR-1s will need additional power
supplies, whose location and system connection will depend
on the topology and cable lengths involved. Full details are
provided with each CDR-1.
The CDR-1 provides the user with local source selection
and level control for the zone in which it is tted. It
additionally allows selection of any zone groups to which
the zone has been assigned, which gives simple and complete
control over audio in multiple areas which may be split or
joined in different ways at different times.
Once enabled on the DCM-1 and a local key code entered,
zone EQ is also adjustable from the CDR‑1, allowing audio
optimisation from within the zone itself. An Installer Mode
permits zone assignment and adjustment of other installation
parameters.

Overview
DCM-1 User Manual v1.0 9
LE-1
The LE-1 is an input connector plate which can be installed
wherever required. Versions are available to t standard UK,
US or Australian dual-gang electrical back boxes. It allows
connection of a stereo unbalanced line-level audio source,
such as a portable music centre, laptop, radio mic receiver
or similar, and connects to one of the DCM-1’s Extension
Ports with a single screened CAT-5 cable.
Multiple LE-1s may be “daisy-chained” together to provide
input points at different locations in the same zone. Signals
applied to plates wired in this way will be summed together.
An internal gating circuit on each plate automatically
“disconnects” any chained plates which are not in use, to
minimise noise contribution.
The LE-1’s inputs are electronically buffered to minimise
noise and interference pickup, and input gain is locally
adjustable with a preset control.Two types of input
connector are provided for user convenience: dual phono
sockets and a 3.5mm stereo jack socket; ±12dB of gain trim
adjustment is available on the faceplate.
Once connected, any audio connected to an LE-1 is treated
as any other source and can be routed to any zone in the
same manner.
BE-1
The BE-1 is an input connector plate of similar type to the
LE-1. It provides a stereo balanced line-level input, permitting
professional audio equipment such as mixing consoles, DI
boxes or broadcast equipment to be connected. Like the LE-
1, it connects to one of the DCM-1’s Extension Ports with a
single screened CAT-5 cable.
BE-1s may be daisy-chained in the same way as LE-1s, and
the two types of plate may be intermixed.
Two industry-standard latching 3-pin female XLR connectors
are tted.
Once connected, any audio connected to the BE-1 is treated
as any other source and can be routed to any zone in the
same manner.

DCM-1 User Manual v1.0
Overview
10
ME-1
The ME-1 input connector plate provides two balanced
microphone inputs, and is useful in multi-purpose areas
where mics are sometimes needed.The ME-1 has adjustable
mic level and EQ per input, and connects to one of the
DCM-1’s four dedicated Mic Inputs with a single screened
CAT-5 cable.The ME-1’s two inputs are mixed together at
the plate, and the summed mic signal applied to the DCM-1.
Any of the DCM‑1’s mic inputs can be routed to any zone
without restriction.
Inputs on the ME-1 are via latching 3-pin female XLR
connectors. 12v phantom power is available on either input
if required (set via a jumper accessible from the rear plate).
CDPM range
The CDPM range of paging microphones integrate directly
with the DCM-1 and provide a simple and convenient
method of adding multi‑zone paging facilities to the audio
system. Multiple CDPMs can be easily daisy-chained if more
than one paging location is needed.
Full installation and operation instructions are supplied
separately with each CDPM unit.
(Cloud Digital Paging Microphone)

Overview
DCM-1 User Manual v1.0 11
The simplied block diagram above illustrates the basic
signal architecture of the DCM-1. Only the routing and logic
for one zone output is shown.
The main system and interfacing capabilities of the DCM-1
are listed below:
Music sources and routing
Provision for 8 music sources. Inputs are stereo, line-
level and unbalanced.
Input 8 also available as a balanced input.
Inputs 1 to 4 may be fed from LE-1 or BE-1 input plates
(see above), which have a balanced connection via
dedicated input sockets.
Any music source may be routed to any zone.
Inputs available for selection may be dened, per‑zone.
Microphone Inputs
Provision for 4 ME-1 mic input plates, each of which can
accept 2 microphones.
Each mic input assignable to any zone in any
combination.
Paging mic facilities
RJ45 digital interface for CDPM Series paging
microphones.
Additional balanced input for 3rd.-party paging mic.
Per‑zone contact closure routing for 3rd.‑party mic.
Both CDPM and 3rd.-party systems may be used
together; independent gain controls.
HF/LF EQ adjustment of paging signal.
Paging level independently adjustable per‑zone.
•
•
•
•
•
•
•
•
•
•
•
•
•
Zone Outputs
8 balanced line level zone outputs.
Zones 1 & 2 are stereo, 3 to 8 are mono.
Zone Groups
Zones may be assigned in any combination to 4 Groups.
Groups can be enabled/disabled by user as required.
Groups have same source selection functions as zones.
Priority and Logic
Any music source may be assigned as priority line input,
per‑zone/group. If enabled, a signal at the priority input
overrides the source selection in the zone/group.
Priority music source may be a source normally
unavailable to a zone.
One or more priority mic inputs may be similarly
dened; an active mic signal causes the music level to
reduce (“ducking”).
During Paging, music ducking may be triggered by the
paging signal or zone selection; it can also be disabled;
these options are selectable per‑zone/group.
Independently adjustable hold and release times for all
priority types, plus music attenuation (ducking) level for
mic and paging priorities.
•
•
•
•
•
•
•
•
•
•
SPE
ZONES 1 AND 2 ARE STEREO
ZONES 3...8 ARE MONO
+
MIC PRIORITY
MICROPHONE INPUTS
EQ VCA
ATTENUATOR
LINE 8
LINE 7
LINE 6
LINE 5
LINE 4
LINE 3
L
R
LINE 2
LINE 1
EXTENSION PORTS
1
2
3+
+
LINE 8
BALANCED
R
L
LINE 1
LINE 2
LINE 3
LINE 4
MIC 1
MIC 2
MIC 3
MIC 4
GAIN
SOURCE SELECT LOGIC
CDR-1
CDR-1 PORTS
EQ CONTROL BY CDR-1 IS ONLY
AVAILABLE IN ENGINEER MODE
LINE PRIORITY
LOGIC
GAIN IS APPLIED
ACCORDING TO
SOURCE SELECTED
+
+
EQ
PAGING ACCESS
LOGIC
PAGING
MICROPHONE
INPUT
CDPM IN
CDPM THRU
+
PAGING ACCESS
Z2Z1 Z3 Z4 Z5 Z6 Z7 Z8 0V
+12V
CDR-1
PORT
A
PORT
A
PORT
B
PORT
B
ONLY RIGHT STEREO SIGNAL
SHOWN FOR CLARITY.
ZONES 3...8. SIGNALS ARE SUMMED
TO MONO BEFORE SOURCE SELECT.
1
2
3
1
2
3
1
2
3
System Block Diagram
System Capabilities

DCM-1 User Manual v1.0
Overview
12
Remote Control
Optional CDR-1 dedicated remote control for DCM-1
available separately
Up to 100 CDR-1s may be connected to the 4 CDR-1
Ports, using standard CAT-5 UTP cable.
CDR-1s can be daisy-chained and/or wired directly to
the CDR-1 Ports as cabling convenience dictates.
Multiple CDR‑1s per‑zone permitted
CDR‑1 provides local (in‑zone) user control of source
selection and level control and key-protected EQ
adjustment.
RS232 serial remote control interface for integration
with 3rd.-party control systems (Crestron,AMX, etc.)
•
•
•
•
•
•
Misc
Programmable external Music Mute input for re alarm
interface, etc.
One input (mic or line) can be installer‑congured to
be protected from Music Mute (e.g. for evac message,
emergency mic, etc.)
Optional Bose® speaker EQ cards (per‑zone)
•
•
•
AREA 1
AREA 2
AREA 3
POWER
AMPLIFIERS
OTHER
AREAS
CD PLAYER
PC
RADIO
TUNER
FREEVIEW
RECIEVER
CDPM
PAGING
STATION
CDR-1
CDR-1
CDR-1
INPUT 1
INPUT 6
INPUT 4
INPUT 8
INPUT 2
INPUT 7
INPUT 3
INPUT 5
CDPM
MIC 1
MIC 4
MIC 2
MIC 3
PAGING MIC
PAGING ACCESS
1
2
3
4
ZONE 5
ZONE 3
ZONE 2
ZONE 6
ZONE 8
ZONE 4
ZONE 7
ZONE 1
CDR-1 PORTS
DCM-1
System 1
Applications and Examples
The DCM‑1 will nd application in many types of premises,
including shops, bars, hotels, schools, conference centres,
ofces, etc. The congurational exibility of the DCM‑1
means that it can be set up by the system designer to
provide precisely the facilities the user needs.
A few simple examples are given below to illustrate typical
installations.
System 1
This depicts a simple system where four possible audio
sources are made available to three or more zones (areas).
Only three are shown for clarity. Points to note:
Each of the three areas shown is equipped with a
CDR-1 remote control. Note that Area 3’s remote
is wired directly back to the DCM-1, while those in
Areas 1 & 2 are daisy-chained together and wired back
to the DCM-1 separately.This is possible because the
DCM-1/CDR-1 permit almost any wiring topology that
is convenient for the building layout.
Area 3 has a Cloud CDPM paging microphone, which
would be used to originate voice messages to any of
the other areas.The paging level to Area 3 (if required)
would be adjusted on installation to be at a level that
does not cause feedback.
•
•

Overview
DCM-1 User Manual v1.0 13
System 2
This shows a more complex system, which illustrates some
additional DCM-1 installation possibilities. Points to note:
The large area has two CDR-1 remote controls in the
same zone; typically, these might be adjacent to doors at
opposite ends of the room.
Two of the areas are separated by a folding partition
which may be removed to create one large space.
By assigning these two zones to a Group within the
DCM‑1, the two zones can be treated as one for audio
purposes when the partition is removed and return to
two separate zones when it is reinstated.
•
•
Each half of the partitioned area also has an ME-1 mic
input plate. Because these have been wired back to
the DCM-1 independently, each can be made available
to their respective room halves as and when required.
Alternatively, it may be that they are only required
when the partition is folded back; in this case they are
activated for the Group instead.
•
AREA 3
POWER
AMPLIFIERS
OTHER
AREAS
CD
JUKEBOX
OFF-AIR
RECEIVER
MP3
PLAYER
DOCK
MUSIC
SERVER
CDR-1
CDR-1
CDR-1
INPUT 1
INPUT 6
INPUT 4
INPUT 8
INPUT 2
INPUT 7
INPUT 3
INPUT 5
CDPM
MIC 1
MIC 4
MIC 2
MIC 3
PAGING MIC
PAGING ACCESS
1
2
3
4
ZONE 5
ZONE 3
ZONE 2
ZONE 6
ZONE 8
ZONE 4
ZONE 7
ZONE 1
AREAS 1 & 2
ME-1
ME-1
PARTITION
AREA 4
CDR-1
CDR-1 PORTS
DCM-1
System 2

DCM-1 User Manual v1.0
Overview
14
System 3
This shows a system interfaced to two paging stations, a
CDPM (which might be located at the building’s reception
desk) and a separate 3rd.-party system, which might typically
be in a security ofce. Other points to note:
The CDR‑1 remote control panels in each zone are
wired in two chains, to suit the building layout.
Two of the line inputs are from LE-1 remote line input
plates in two different zones. Other music sources have,
in this case, been connected to Inputs 5 to 8.
•
•
EXTENSION 1
INPUT 6
INPUT 8
INPUT 7
INPUT 5
CDPM
MIC 1
MIC 4
MIC 2
MIC 3
PAGING MIC
PAGING ACCESS
1
2
3
4
ZONE 5
ZONE 3
ZONE 2
ZONE 6
ZONE 8
ZONE 4
ZONE 7
ZONE 1
AREA 1
AREA 2
AREA 3
AREA 4
AREA 5
AREA 6
CDR-1
CDR-1
CDR-1 CDR-1
CDR-1
CDR-1
CDPM
SECURITY
3RD. PARTY
PAGING
SYSTEM
MIC
CONTROL
LE-1
LE-1
EXTENSION 2
EXTENSION 3
EXTENSION 4
RADIO
TUNER TV MP3
PLAYER
CD
PLAYER
CDR-1 PORTS
DCM-1
System 3

Installation
DCM-1 User Manual v1.0 15
1
Power button: applies DC power to the DCM-1 (note
external PSU)
2
LCD display: 2 x 16-character backlit blue LCD
display used in all control and menu functions.
3
Rotary control: for adjusting unit parameters via the
display.The control also has a “press” action, which is
required for some front panel operations.
4
Next Function button: used to scroll through the
various functions of each menu
5
Numeric buttons 1 - 8: the operation of these
buttons varies with the selected menu function. In
many of them they represent Zones 1 to 8, each button
selecting a zone that the menu function will apply to. In
others, they may represent Inputs 1 to 8, for example.
Each button has an associated blue LED to indicate the
current status of that zone or input for the function.
The menu system is divided into ve groups, each of which
is selected by one of the menu buttons.An associated blue
LED indicates selection.
6
Music: gives access to per‑zone source selection, level
control, EQ, maximum and minimum levels, and input
gain per-input.
7
Routing: Allows per‑zone mic enabling and input
masking, plus other installation‑specic functions.
8
System: system menu includes enabling of CDR-1
Installer Mode per‑zone, mono/stereo selection for
Zones 1 & 2, RS232 port set‑up, zone and input naming,
security key set-up, etc.
9
Priorities: allows assignment of priority inputs
(including paging inputs) and adjustment of the DCM-1’s
operation when priorities are active.
10
Groups: the Group menu allows assignment of Zones
to Groups, and dened Groups to be enabled.
11
Paging Access LEDs: 8 LEDs (one per zone) which
illuminate when a zone is selected for paging from an
external paging microphone.
12
Extension Ports LEDs: 4 LEDs corresponding to
the Extension Ports of Line Inputs 1 to 4.These LEDs
illuminate when a LE-1 or BE-1 remote input plate is
connected, and the input to which it is connected is
enabled for the currently selected zone.
13
Mic Inputs LEDs: 4 LEDs corresponding to Mic Inputs
1 to 4.These LEDs illuminate when an ME-1 remote
input plate is connected, and the input to which it is
connected is enabled for the currently selected zone.
14
Install button: activates Installer Mode.Allows
access to the menu functions which are intended to be
unavailable to the user.A key needs to be entered on
the numeric buttons for Installer Mode to be active.
15
Music Mute LED: illuminates when an external Mute
is applied at the Music Mute connector (normally linked
to Fire Alarm or other emergency system).
Section 2 : Installation
3
46
28
712 11
515 14 131 910
Description of front panel

DCM-1 User Manual v1.0
Installation
16
1
Line Inputs 1 to 4: inputs for music sources 1 to 4, on
phono sockets (unbalanced).
2
Extension Ports 1 to 4: These are alternative input
connectors for Line Inputs 1 to 4. If Cloud remote
line input plates (LE-1 or BE-1) are being used, they
should be connected here via screened CAT-5 cable and
shielded RJ45 connectors.These ports each provide a
stereo pair of electronically-balanced inputs, together
with DC power for the active circuitry in the remote
plate. Do not connect a music source to the phono
sockets ([1] above) of a Line Input when its Extension
Port is connected to a remote input plate.
3
Line Inputs 5 to 7: inputs for music sources 5 to 7, on
phonos only.
4
Line Input 8: Input 8 is available both as unbalanced on
phonos and electronically-balanced on 2 x 3-pin 3.5mm*
Phoenix-type connectors.The balanced input allows
connection of professional audio equipment such as
mixing consoles, DJ desks, etc.
5
Microphone Inputs 1 to 4: four shielded RJ45
sockets for the connection of Cloud ME-1 microphone
remote input plates. Connection should be via screened
CAT-5 cable.These inputs are balanced, and the
connectors additionally provide DC power for the
active circuitry in the input plates.
6
Paging mic input: balanced input for the connection
of an external paging microphone.This input is enabled
via the access connector [7].Adjacent to the 3-pin
3.5mm* Phoenix-type connector are preset controls
for mic gain and HF/LF EQ. Phantom power is available
(enabled by internal jumper).
7
Paging Access connector: 10-pin 5mm* Phoenix-
type connector providing two distinct functions. If the
DCM-1 is being used with a 3rd.-party paging system,
this connector provides contact-closure selection of
the zone(s) to be paged. If a Cloud CDPM is the only
type of paging system being used, the connector can
be reassigned as an output port, the 8 pins becoming
per‑zone open‑collector outputs which can be used
(typically) for external level restoration. 0v and +12v are
provided on the remaining two pins.
8
Zone Outputs 1 and 2: electronically-balanced
outputs on 3-pin 3.5mm* Phoenix-type connectors.
Zone Outputs 1 & 2 are stereo; separate L and R
connectors are provided. Stereo music sources routed
to Zones 1 and 2 will remain in full stereo. Each Zone
Output can be recongured as mono via the menu
system.
9
Zone Outputs 3 to 8: as Zones 1 and 2, but mono
only, with a single connector. These zones will receive a
mono L+R sum of stereo inputs routed to them.
10
Paging level controls: each Zone output has an
adjacent preset control which sets the volume of the
paging mic (either from CDPM or 3rd.-party systems) in
that zone.
11
CDPM Ports: two RJ45 sockets, IN and THRU. IN
is for the connection of Cloud CDPM Series paging
microphones; THRU is used when a system employs
multiple DCM‑1s. DC power, zone selection data and
the paging microphone signal are all catered for on
the IN socket.The adjacent preset control adjusts the
CDPM microphone level.
12
CDR-1 Ports: four RJ45 ports for connection of
CDR-1 remote control panels. CDR-1s may be daisy-
chained, and the installer may use one or more of the
four ports for individual or daisy-chained CDR-1s as the
building layout dictates.
13
RS232 serial interface: a 9-pin female Dsub
connector providing a bi-directional RS232 interface,
enabling control of the DCM-1’s primary functions from
an external system.
14
Music Mute input: 2-pin 5mm* Phoenix-type
connector for interfacing the DCM‑1 to a re alarm
or other emergency system. The input is congurable
for use with either Normally Open (NO) or Normally
Closed (NC) contacts; shorting (or removing a short)
will mute music in all zones (see page 42). One input
source may be protected from this mute if wished,
permitting the input to be used for automatic or manual
evacuation messages (see page 42).
15
DC power connector: Locking 4-pin power mini-DIN
for connection of the DCM-1’s external DC PSU.
(* dimension refers to pin pitch)
5
67
8 910
415
1
2
312
11 14
13
Description of rear panel

Installation
DCM-1 User Manual v1.0 17
Music Sources
Connect the system’s various music sources to LINE 1 to 8.
When allocating sources to inputs, bear in mind that if Cloud
LE-1 or BE-1 remote plates also form part of the system,
these can be connected to LINE 1 to 4only.
Standard connection
All 8 line inputs offer unbalanced connection for stereo
sources on a pair of standard phono sockets (RCA jacks).
The sensitivity range available should allow most standard
items of audio equipment such as CD players, PC-based
music servers,TV tuners, etc. to operate at a satisfactory
level. Most such equipment will have stereo unbalanced
outputs, and as long as the source equipment is adjacent to
the DCM-1, normal phono-phono leads can be used.
Mono sources
If connecting a source with only a single mono output to
the DCM-1, connect it to both the L and R sockets, using a
Y-splitter lead or similar.
Balanced sources
LINE 8 is additionally provided with electronically-balanced
inputs, which may be used to connect source equipment
with balanced outputs. Balanced connection is always
preferable to unbalanced for situations involving long cable
runs, and should be used if one of the music sources is
remote from the DCM-1 (a DJ mixing system is a common
example).
When connecting balanced sources to LINE 8’s balanced
input connector, wire as shown below. Note that the cables’
screens are not connected at the source end.
Do not connect music sources to both the balanced and
unbalanced connectors of LINE 8.
Hardware considerations
The DCM-1 is built in a 2U-high 19” rackmount enclosure.
It is strongly recommended that the DCM-1 is
installed in a 19” rack wherever possible. The DCM-1
is approx. 160mm deep, but 250mm of rack depth should be
available to allow for rear connectors and cabling.
The DCM-1 has low power consumption and there are
no thermal considerations other than ensuring that the
ventilation grilles (one on each side, one on the bottom
panel) are not obstructed once installed. Other equipment
may be installed above or below the DCM-1 within this
constraint.
The choice of location will be dictated by the specics of the
system and building layout. It is recommended that wherever
possible, the DCM-1 should be mounted in an equipment
rack along with as many of the music sources (CD players,
music servers,TV receiver boxes, etc.) and audio power
ampliers (driving the zone loudspeakers) as practical.
When deciding the DCM-1’s location, bear in mind
that access to it will probably be required, as there are
numerous conguration settings that may need to be
changed - occasionally or frequently - depending on the daily
requirements of the building.
Power Supply
The DCM-1 requires ±12v DC, which is supplied by the
external DC Power Supply Unit (PSU) included with the
unit.This has a 1m captive cable with a moulded 4-pin plug
for connection to the DCM-1.The PSU is of the “Universal”
type, and will operate on any AC supply voltage from 100 to
240v.Wherever possible, mount the PSU in a safe location
within the equipment rack, securing both the DC cable
and the IEC mains lead with cable ties to avoid inadvertent
disconnection.
System Connections
1 2
3
LEFT RIGHT
LEFT
RIGHT
1 2 3 1 2 3
+
+
-
-
+
+
-
-
SCN
SCN
pin 1 ground
pin 2 hot
pin 3 cold
Balanced outputs (XLRs):
DCM-1 Balanced inputs
pin 1 ground
pin 2 cold
pin 3 hot
1 2
3
Balanced source to balanced inputs

DCM-1 User Manual v1.0
Installation
18
Additional balanced sources
If it is necessary to connect more than one balanced
source to the DCM-1, one of the unbalanced inputs 1 to
7 may be used, but the advantages of balanced connection
will be lost unless a balancing transformer is connected
between the source and the unbalanced input. Suitable
audio transformers, which should have a ratio of 1:1, are
readily available from major audio component suppliers.The
transformer(s) should be mounted as close to the DCM-1 as
practical, and housed in a screened enclosure if they are not
individually screened.The preferred connection method is
shown below.
If transformers are not available, a balanced source may
feed an unbalanced input directly as long as care is taken
over how the connections are made.A variety of design
techniques are in use to implement balanced outputs in
audio equipment, and some designs require different wiring
protocols to others. Installers are advised to check the
manuals with each item for guidance on how the outputs
should be connected to an unbalanced input.
However, the wiring methods shown below will work in a
large number of cases. If hum or other distortion is found to
result, try disconnecting the ‘cold’ leg of the balanced output
(pin 3 on XLRs).
Always avoid using pre-made leads of an unnecessary length.
An alternative method of providing additional balanced
sources is to use BE-1 remote input plates connected to
EXTENSION PORTS 1 to 4; these could be installed
adjacent to the DCM-1 in such a situation.
LEFT
+
-
SCN
Unbalanced
inputs
SCN
LEFT
+
-
SCN
Audio balancing transformers
RIGHT
+
-
SCN
Unbalanced
inputs
SCN
RIGHT
+
-
SCN
pin 1 ground
pin 2 hot
pin 3 cold
Balanced outputs (XLRs):
1 2
3
1 2
3
Balanced source to unbalanced inputs via transformers
Unbalanced
inputs
LEFT
RIGHT
+
+
-
-
SCN
SCN
+
+
-
-
SCN
SCN
When using twin-and-screen
cable, join ‘cold’ to screen at
DCM-1 end
LEFT RIGHT
pin 1 ground
pin 2 hot
pin 3 cold
Balanced outputs (XLRs):
12
3
12
3
Balanced source to unbalanced input - using twin-and-screen cable
12
3Unbalanced
inputs
LEFT
RIGHT
+
+
SCN
SCN
+
+
SCN
SCN
When using single-core cable,
join ‘cold’ to screen at the
source
LEFT RIGHT
pin 1 ground
pin 2 hot
pin 3 cold
Balanced outputs (XLRs):
12
3
Balanced source to unbalanced input - using single-core cable
Other manuals for DCM-1
2
Table of contents
Other Cloud Mixer manuals
