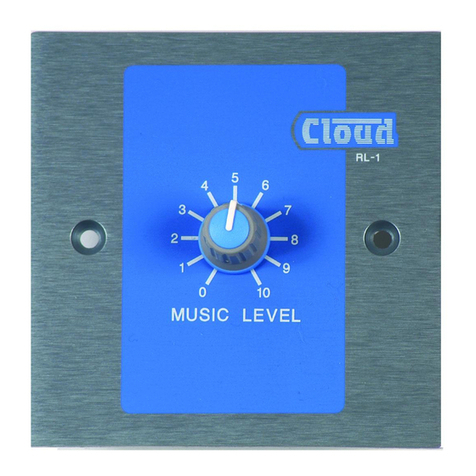
Cloud WP-8 User manual

WP-8
Installation Guide V4.0
Cloud Electronics Limited
140 Staniforth Road, Sheffield, S9 3HF England
Tel +44 (0) 114 244 7051
Fax +44 (0) 114 242 5462
E-mail [email protected]
Web site http://www.cloud.co.uk

WP-8: Installation Guide Page 1
WP-8
Installation Guide
Contents
Section Page
1 Introduction ..............................................................................2
2 Mechanical Installation ............................................................2
3 Electrical Installation ...............................................................2
Wiring a WP-8 to a Pump/Sub Station 16-R...............................3
Wiring a WP-8 to Low Power Speakers .....................................3
Controlling a Pump Station 16 Line Output with a WP-8............3
Providing a Line Level Output from a WP-8 ...............................4
Wiring a WP-8 to Powered Speakers.........................................4
Wiring a WP-8 to a Sub Station 16.............................................4
4 WP-8A Information...................................................................5
15-05-02 V4

Page 2 WP-8: Installation Guide
WP-8
Installation Guide
1 Introduction
The WP-8 remote control plate is a dedicated wall mounting unit
that is compatible with Cloud headphone distribution processors
it has facilities that allow a user to select the music level and
music source whilst monitoring the signal through stereo
headphones and/or low power speakers. The WP-8 is primarily
aimed at scenarios such as tanning suites and treatment rooms
where users may wish to listen to any one of the eight available
programmes. The WP-8 has two low impedance, low power
speaker outputs each with a different operation:
• The first is a normal low impedance speaker output.
• This second provides a similar low impedance output that is
disconnected when headphones are connected to the WP-8.
2 Mechanical installation
The Cloud WP-8 remote control module is designed to be wall mounted. The WP-8 is the same
physical size as a single UK electrical socket (13A Type) and can be mounted in the recessed
back box provided or be surface mounted in a standard 25mm deep housing. (Details of the
WP-8A, a US variant of the WP-8 can be found in section 4).
3 Electrical Installation
The WP-8 should be wired directly to the equipment rack using unscreened
‘Category 5’ cable (4 pair CAT 5), the cable length should not exceed 100m
(328ft). Termination of CAT 5 cable to a WP-8 remote control plate is via an
IDC connector block for which an IDC insertion tool will be required.
The Pump Station 16-R and Sub Station 16-R have an RJ-45 connector for
each remote control unit. The RJ45 plug is a compact 8-pole connector
primarily designed for CAT5 cable. Special tools are available making
termination both easy and quick. The RJ45 plug and socket pin out is shown to
the right:
To terminate an RJ45 plug to CAT5 cable follow the instructions below:
1) Strip approximately 1” of outer sheath from the cable.
2) Remove extraneous material such as plastic wrap or foil screen from the 8 exposed cores
but do not strip their sheaths.
3) Cut the 8 exposed cores down so that when the cable is inserted into the RJ45 the outer
core can be held by the plugs cable retention system.
4) Insert the 8 cores into the RJ45 plug fully making sure that they are all correctly arranged.
(Information on the correct arrangement of cores for the WP-8 can be found in the tables
on page 3&4)
5) Place the plug/cable into the assembly tool and operate the mechanism.
6) You should now have a firmly connected plug/cable assembly that is ready for installation.
Note: These instructions are guidance only; always follow the instructions supplied with the
assembly tool
The WP-8 is fitted with a 3.5mm stereo jack socket that will accept a pair of stereo headphones.
We recommend the use of headphones with an impedance of 32 ohms for example, the Cloud
CP-32.
Please note: The Pump Station 16 and Sub Station 8 have been discontinued as of March
2002 and November 2001 respectively, information regarding wiring an RH-8 to either of these
units can be found on page 4
15-05-02 V4

WP-8: Installation Guide Page 3
Wiring a WP-8 to a Pump/Sub Station-16R
Wiring Information: WP-8 to a Pump/Sub Station-16R
WP-8 (IDC) Pump/Sub Station-16R (RJ45) CAT 5*
Pin 1 Pin 8 Brown/White
Pin 2 Pin 7 White/Brown
Pin 3 Pin 6 Green/White
Pin 4 Pin 5 White/Blue
Pin 5 Pin 4 Blue/White
Pin 6 Pin 3 White/Green
Pin 7 Pin 2 Orange/White
Pin 8 Pin 1 White/Orange
*The CAT 5 colour is described as the dominant colour first with the tracer second.
Wiring a WP-8 to Low Power Speakers
The following diagrams show how to wire either speaker output in stereo or mono.
Permanent Speaker Network (Stereo) Switched Speaker Network (Stereo)
Permanent Speaker Network (Mono) Switched Speaker Network (Mono)
The WP-8 will provide 150mW of power in stereo configuration and 300mW in mono into 8Ω
speakers. The impedance of the speakers is not critical.
Be vigilant when wiring a WP-8 since wiring errors can cause flawed operation. If a problem is
experienced, turn off the power, disconnect the remote control module and double-check the
wiring against the diagram.
Controlling the Pump Station 16-R Line Output with a WP-8.
Channel 16 on a Pump Station 16-R is fitted with a mono balanced line output that can be used
to feed a signal to a general PA system, perhaps for background music purposes. When this
output is to be used, a WP-8 can be connected to channel 16 to control the music signal level
and the music source selection. When a WP-8 is used for this purpose, it is not necessary for
any headphones or speakers to be connected.
15-05-02 V4

Page 4 WP-8: Installation Guide
Providing a Line Level Output from a WP-8
Wire a WP-8 as shown in the diagrams below to obtain a line level output.
Permanent Line Level Output (Stereo) Switchable Line Level Output (Stereo)
Permanent Line Level Output (mono) Switchable Line Level Output (mono)
Wiring a WP-8 to Powered Speakers
The output of a WP-8 can be used to drive a pair of powered speakers if extra volume is
required. The diagram below shows how this can be achieved.
Powered Speaker Output (mono) Powered Speaker Output (stereo)
Wiring a WP-8 to a Pump Station 16 or Sub Station 8
Wiring Information: WP-8 to a Pump Station 16 or Sub Station 8
WP-8 (IDC) Pump Station 16 or Sub Station 8 (Screw Terminal) CAT 5*
Pin 1 Pin 1 White/Orange
Pin 2 Pin 2 Orange/White
Pin 3 Pin 3 White/Green
Pin 4 Pin 4 Blue/White
Pin 5 Pin 5 White/Blue
Pin 6 Pin 6 Green/White
Pin 7 Pin 7 White/Brown
Pin 8 Pin 8 Brown/White
*The CAT 5 colour is described as the dominant colour first with the tracer second.
15-05-02 V4

WP-8: Installation Guide Page 5
15-05-02 V4
4 WP-8A Information
The WP-8A has identical operation to that of the WP-8 but has been designed to fit single US
electrical outlets only. A diagram of the WP-8A can be seen below:
Should you require further help, please contact our technical support staff
(Contact details on front cover)
Table of contents
Other Cloud Remote Control manuals
Popular Remote Control manuals by other brands

Universal Remote Control
Universal Remote Control Automator URC-200 owner's manual

FUTABA
FUTABA 3PL-2.4G instruction manual
minkaAire
minkaAire AireControl RC223 Installation & operating instructions

Agilent Technologies
Agilent Technologies OmniBER 720 manual

TechBook
TechBook in.touch 2 manual
Sony
Sony RM-LP204M operating instructions
