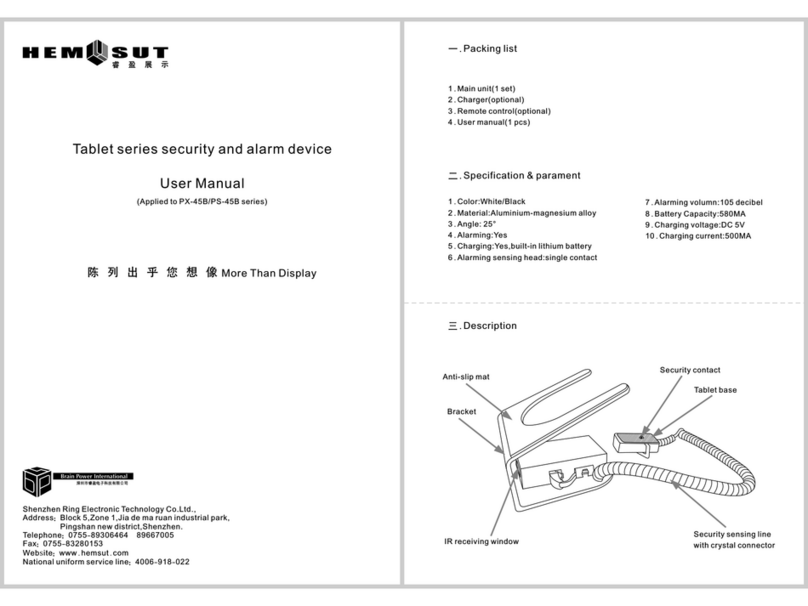
CM security FPC1381 User manual

CM Security GmbH
Otto-Hahn-Str. 3 D-72406 Bisingen
Tel: 07476 9495-0 Fax: 7476 9495-50
http://www.cm-security.com
CM-PAPP security GmbH & Co. KG
Sigmaringer Str. 10 D-72379
Hechingen
Tel: +49 (07471) 188-0 Fax: +49 (07471) 188-
Fingerprint Scan System
FPC1381
User Manual
User Manual
Betreiberanleitung

FingerPrintScan-System FPC 1381 –Technical Handbook
Seite 2 Version 2.00
Author:
Alexander Epple, Tino Kuolt
Document name
FPC1381_Tech-Dok_EN
Level:
05 Apr 2012
Version:
2.00
CM security GmbH Otto-Hahn-Str. 3 D-72406 Bisingen (Germany)
Tel.: +49-7476-9495-0 Fax: +49-7476-9495-50
www.cm-security.com info@cm-security.com
Modifications for reasons arising from development, construction and sales-related technical issues
are reserved. Copyright© 2012 CM security GmbH

FingerPrintScan-System FPC 1381 –Technical Handbook
Version 2.00 page 3
1. Table of Contents
1. Table of Contents................................................................................................ 3
2. Introduction.......................................................................................................... 4
3. Disclaimer............................................................................................................ 4
4. Function Mode..................................................................................................... 5
5. Modes of Operation............................................................................................. 5
6. Fundamentals...................................................................................................... 5
7. Data Protection.................................................................................................... 5
8. Definitions............................................................................................................ 6
9. The Function of the Thermal Line Sensor ........................................................... 7
10. Scanner Displays ................................................................................................ 8
11. Successfully Drawing Finger Over Scanner........................................................ 9
12. Operation........................................................................................................... 10
12.1. Menu Navigation..................................................................................... 10
12.2. Basic Menu............................................................................................. 11
12.3. Access Levels......................................................................................... 11
12.4. Login....................................................................................................... 12
12.5. Logout..................................................................................................... 12
12.6. Main Memory Item: Info.......................................................................... 13
12.6.1. Free Space.......................................................................................... 13
12.6.2. Active Relay........................................................................................ 13
12.6.3. Last Finger.......................................................................................... 13
12.6.4. Scanner Info........................................................................................ 14
12.6.5. Protocol............................................................................................... 14
12.6.5.1. Show Protocol.............................................................................. 14
12.7. Main Menu Item: Learn Finger................................................................ 14
12.7.1. The Process of Leaning One Finger: .................................................. 15
12.8. Main Menu Item: Delete.......................................................................... 16
12.8.1. Delete Person ..................................................................................... 16
12.8.2. Delete Database ................................................................................. 16
12.8.3. Delete Name....................................................................................... 16
12.8.4. Delete All Names ................................................................................ 16
12.9. Main Menu Item: Settings....................................................................... 17
12.9.1. Set Date.............................................................................................. 17
12.9.2. Set Time.............................................................................................. 17
12.9.3. List of Persons .................................................................................... 17
12.9.4. System Parameters............................................................................. 18
12.9.4.1. Key tone....................................................................................... 18
12.9.4.2. Error tone..................................................................................... 18
12.9.4.3. User Code.................................................................................... 18
12.9.5. User Code........................................................................................... 18
13. User Menu......................................................................................................... 20
14. User Menu with Active VdS-Operation.............................................................. 22

FingerPrintScan System FPC 1381 –Technical Handbook
page 4 Version 2.00
2. Introduction
This user manual gives an overview of the basic using of the FingerPrintScan
System (FPS-S) P 1381.
3. Disclaimer
All rights reserved.
CM Security GmbH makes no guarantee for the contents listed here, especially in
relation to statutory warranties relating to the commercial viability of devices or
relating to special suitability for certain purposes.
Reproducing or distributing this instruction manual or the software of FingerPrintScan
System in any form without written permission is not allowed.
Copies of this manual or parts thereof may be prepared for the sole purpose of
providing documentation for installed systems provided they remain in the
possession of the operator or installer.
This information is subject to errors and change without notice.
Copyright© 2012 CM Security GmbH

FingerPrintScan System FPC 1381 –Technical Handbook
Version 2.00 page 5
4. Function Mode
The FPS-S enables control functions to be processed using the unique biometric
characteristics of individuals. The system uses the biometric characteristics of
fingerprints. The fingerprint is recorded on a scanner using a “thermal line sensor”.
Recording is performed by noting temperature differences on the fingerprint,
evaluating the print and its unique characteristics (minutiae) and finally storing the
information in the system. If the print is recognised in further scan processing, then
attributed functions are carried out (e.g. opening doors, arming/disarming an IDS).
5. Modes of Operation
The system can be used in two basic modes of operation
Operation Mode 1 (BA1):
For general use without requirements or dependencies: For switching functions four
isolated switch relays are provided. Each relay can be programmed for different
operation modes.
Operation Mode 2 (BA2):
Specially design for arming/disarming intruder detection systems. The evaluation of
signals for the so-called “inevitability” is guaranteed. In this operation mode relay 1 is
provided for the arming of an intrusion alarm control unit. The other three relays are
available for individual programming.
6. Fundamentals
The FingerPrintScan System consists of the P1381 controller and the P1384 / P1385
scanner. The system operates on 12 V. Communication between the controller and
the scanner takes place over an RS –485 data bus. Four two-way switch relays and
three 12 V outputs are provided for display purposes. The P1384 scanner has a
buzzer as well as 3 LEDs for displaying status. The P1385 scanner has a buzzer as
well as 2 multi-coloured LEDs for displaying status.
7. Data Protection
Fingerprints are recognised through their minutiae, distinctive points in the fingerprint
pattern (e.g. bifurcations, terminations). The system extracts such minutiae from each
print read and stores the position and angle of each. A reconstruction of the full print
using the minutiae is not possible, thus guaranteeing data protection and unlimited
use.

FingerPrintScan System FPC 1381 –Technical Handbook
page 6 Version 2.00
8. Definitions
Evaluation Unit (EU):
The evaluation unit is the controller of the fingerprint system FPC-1381. Hereafter
abbreviated as EU.
Intruder Detection System (IDS):
An IDS is a hazard detection system which recognises e.g. an intrusion into property
and as the case may be, the notification of a security firm by means of a transmitter.
False Rejection Rate (FRR):
The percentage of admissible users who were mistakenly not admitted by the
biometric system.
False Acceptance Rate (FAR):
The percentage of prohibited users who were mistakenly admitted by the biometric
system.
Minutiae:
Branches in the grooves, occlusions, crossovers, short lines as well as ends of
grooves are the characteristic structures in a fingerprint. These patterns are detected
wherever the grooves in the skin disperse or terminate. The points are named
minutiae.
Minutiae based process:
Comparison of the fingerprint (the current image) with a reference image (template)
for the determination of the following:
compliance with the accuracy of position
compliance with the type of minutiae
compliance with the direction of the minutiae
Characteristics:
Minimum number of minutiae: 15 minutiae
False Rejection Rate (FRR) 7-9.5%
False Acceptance Rate (FAR) 9*10-6 = 0.0009%
Lock plate contact (LPC):
The device built into the lock plate, e.g. contact or sensor, through which the latch
activates the lock (Source VdS).
Template:
A template is a record of a fingerprint. This record also contains personal
identification numbers, finger numbers and minutiae.
Inevitability (IE):
A method which prevents an IDS which is not completely functional, from being
armed or an armed IDS from unintentionally being triggered by means of an external
or distant alarm. (Source VdS).

FingerPrintScan System FPC 1381 –Technical Handbook
Version 2.00 page 7
9. The Function of the Thermal Line Sensor
Layout: The thermal sensors are located in a narrow, elongated block.
Function: If a finger is placed over the block, the thermal sensors register temporal
temperature changes.
The temperature differences between the lines and grooves of a fingerprint are so
large that they can be recognised by the line sensor. The temperature differences are
digitally processed by a micro controller and a greyscale image is calculated. The
accuracy of the line sensor is such that a picture with a resolution of approx. 500dpi
can be generated. From this picture the lines of the finger are digitally measured. The
angle and position of distinct points (minutiae) are determined. Finally, these
minutiae are either compared with information in the database or stored.

FingerPrintScan System FPC 1381 –Technical Handbook
page 8 Version 2.00
10. Scanner Displays
The FP1384 and FP1385 scanners have optical and acoustic displays. Their
meanings are summarised in the following table:
Scanner FPL1384
Scanner FPL1385
Both FPL
Meaning
LED
green
LED
yellow
LED
red
LED
left
LED
right
Buzzer
Briefly
lighting up
every 5
seconds
-
-
Briefly
flashing
blue
every 5
sec
Briefly
flashing
blue
every 5
sec
-
Status display:
everything OK!
-
Briefly
lighting
up
every 5
seconds
-
Briefly
flashing
blue
every 5
sec
Briefly
flashing
blue
every 5
sec
-
Status display: scanner
in standby mode,
everything OK!
Briefly
lighting up
every 5
seconds
-
Briefly
lighting
up every
5
seconds
Briefly
flashing
blue
every 5
sec
Briefly
flashing
red every
5 sec
-
No communication with
EU! check data lines
2 sec
-
-
2 sec
green
-
1 sec
Positive
acknowledgement: e.g.
finger is successfully
incorporated
2 sec
-
2 sec
blinking
2 sec
green
Blinking
red 2 sec
1.5 sec
intermitte
nt
Finger recognised but
action cannot be
performed!
-
-
2 sec
blinking
-
Blinking
red 2 sec
1.5 sec
intermitte
nt
Negative
acknowledgement :
finger is not recognised
or drawn incorrectly over
sensor
2 sec
blinking
-
2 sec
green
Blinking
yellow
1 sec
Acknowledged for
arm/disarm, but EU
waits for arm/disarm
signal from hazard
detection system
-
shining
-
Shining
yellow
Shining
yellow
1 sec.
2 finger or 4 eye
principle active. Wait for
second finger or EU
waits for arm/disarm
acknowledgement from
the hazard detection
system after an
arm/disarm request
Flash yellow 3x with approx. 1 sec pause
-
Incorporate finger. Draw
over 3 more times
Flash yellow 2x with approx. 1 sec pause
-
Incorporate finger. Draw
over 2 more times
Flash yellow 1x with approx. 1 sec pause
-
Incorporate finger. Draw
over 1 more time

FingerPrintScan System FPC 1381 –Technical Handbook
Version 2.00 page 9
The LEDs and the buzzer can also be externally controlled, e.g. to implement the
disarmed –display of a hazard detection system. See page: Fehler! Textmarke
nicht definiert.: Fehler! Verweisquelle konnte nicht gefunden werden.. Fehler!
Verweisquelle konnte nicht gefunden werden. and page: Fehler! Textmarke
nicht definiert.: Fehler! Verweisquelle konnte nicht gefunden werden.. Fehler!
Verweisquelle konnte nicht gefunden werden.
11. Successfully Drawing Finger Over Scanner
The way a finger is drawn over the scanner is critical to having the scanner recognise
the print as easily as possible. With some practice the user can keep the FRR (false
rejection rate) lower than that which the statistics reflect.
Include as much of the surface of the finger (outermost finger limb) as possible.
Set the finger onto the uppermost limit of the guide, not coming in contact with the
sensor. Then let the finger fall onto the surface of the sensor and immediately draw
the finger down at a steady rate and with light pressure on the sensor. Perform this
freely but not rapidly. If the finger jerks over the sensor, it is a sign that too much
pressure is being applied. The finger must be pulled far enough over the sensor until
it no longer touches the thermal line sensor. Only then the scan is complete.

FingerPrintScan System FPC 1381 –Technical Handbook
page 10 Version 2.00
Learn to finger scan successfully - “how to do it”
Put the finger at the very top of the guide.
Do not touch the sensor yet.
Place the finger onto the sensor.
Press lightly.
...and at a steady rate...
... draw the finger completely across the sensor.
12. Operation
12.1. Menu Navigation
↓ / ↑ - button: main menu
← / → - button: menu selection
“OK” - button: perform action / open submenu

FingerPrintScan System FPC 1381 –Technical Handbook
Version 2.00 page 11
12.2. Basic Menu
The basic menu of the EU shows date / time:
Pressing ↓ or ↑brings the user into the main menu.
Pressing “OK” jump into the info menu : last finger (see page 13: 12.6.3 Last Finger).
12.3. Access Levels
There are three different access levels. Everyone, Operator and Installer.
- Everyone:
If the operator and installer passwords have been set then everyone has
access to the info menu (See page: 13: 12.6.
FPC-1381
14:35 29.05.13

FingerPrintScan System FPC 1381 –Technical Handbook
page 12 Version 2.00
Main Memory Item: Info)
- Operator account:
This access level is shown when
a) an installer password but no operator password has been set or
b) an installer and an operator password have been set and the operator has
logged in with his password.
- Installer account:
This access level is shown when an installer password has been set and the
installer has logged in with his password.
12.4. Login
If an installer password or an operator password has been set, one must login as
follows:
In the basic menu press ↓ or ↑. Enter the code:
Using the arrow keys one can enter the code and confirm the input with “OK”.
12.5. Logout
If a time passes without input then the basic display is automatically shown. When
one wishes to continue only ↓ or ↑ must be pressed and then one can work at the
same operating level as before without re-entering the code. The access level will
only return to the former level automatically after 10 minutes. If the access level was
previously changed then one can press the "OK" key, allowing one to view the "Last
Finger" display. This display discards the last previously inputted code and in order to
continue one must enter the code again.
code-entry
>A < >Abbr.<

FingerPrintScan System FPC 1381 –Technical Handbook
Version 2.00 page 13
12.6. Main Memory Item: Info
This main menu serves to show information concerning the state of the system.
Press „↓“ in the basic menu and then confirm with "OK".
12.6.1. Free Space
In this menu one can seek out a free personal ID number in a reader. Select the
scanner address and the initial personal ID number and confirm with OK. The EU
displays the first free personal ID number.
12.6.2. Active Relay
This shows the state of the four programmable relays. On or off
12.6.3. Last Finger
Here the last recognised finger is displayed.
With the keys → and ← further information can be requested:
→ →
S: scanner address
P: personal ID number
R**--: activated relay (*), inactive relay (-)
Hans: name
Q: quality of the fingerprint read
Nr: finger number, if several fingers of the same person with the same relay
configuration were stored.
Pressing again on → displays the current software version of the EU:
Free space
S:1 P: 1 >Abbr<
Last Finger
Q: 61 No: 1
Last Finger
Tommy
Last Finger
S:1 P: 1 R**--
R1:off R2: on
R3: on R3:off
►Free space
Active relays
Last finger
Scanner-info
Event log
Back
►info
Learn finger
Delete
Settings
PC-Communicat.
Back

FingerPrintScan System FPC 1381 –Technical Handbook
page 14 Version 2.00
12.6.4. Scanner Info
The number of scanners recognised and learned by the system is displayed, or
whether the scanner has no contact with the EU.
1: scanner 1 is learned and communicating
F: scanner 2 is learned but not connected
-: scanners 3 to 8 are not learned
12.6.5. Protocol
In this menu the event protocol can be displayed or by means of an interface
converter, sent to a PC:
12.6.5.1. Show Protocol
Here the most recent event is shown
B: operator
S: system
Depending on which event is shown, pressing → shows further information about the
event.
12.7. Main Menu Item: Learn Finger
When learning a finger, print information recorded over the scanner is linked to
personal information and control information (relay). This is then stored into the
database of the selected scanner.
Up to 10 fingers can be learned with different functions (relay assignments)
associated to the person.
The function of the finger is defined in the evaluation unit (controller).
[B05E2] 29.05.12
19:35 F detected
►Watch events
Send events
Scanner - Info
1 F - - - - - -
FPC-1381
Version: V1.48

FingerPrintScan System FPC 1381 –Technical Handbook
Version 2.00 page 15
S: here the scanner (1-8) is selected for which the finger is learned and
which finger functions are valid
P: here the person is selected (1-200)
R: here the function (relay) which the finger is assigned to is selected
* = ON (active)
- = OFF (inactive)
The first place holder represents Rel1 and the last, Rel4.
12.7.1. The Process of Leaning One Finger:
Learning a finger involves a total of three scans. The system then compares all three
prints and stores the best image in the database.
- After the learning process has been started with „OK“, the EU displays >input<
and the LED of the selected scanner blinks three times. After a short pause it
blinks again three times.
- Now the selected finger must be drawn over the scanner (see page 9: 11.
Successfully Drawing Finger Over Scanner)
- After scanning the finger, a green LED briefly shines green, which means that
the finger has been successfully recognised. If a red LED or no LED shines
then the finger was not recognised and must be scanned again.
- Now the yellow LED blinks only two times => The finger must be drawn over
the scanner two more times.
- Scan the same finger again.
- If the finger has been recognised successfully then the yellow LED will blink
only once.
- Scan the same finger one last time.
- If the third scan was successful then the system will begin to compare the
fingerprints with each other. If all prints are in order then the green LED will
issue with a 3 second long beep. The EU now shows „- i.O.-„ in the display.
The finger print is now stored in the database and is immediately valid.
- If the three finger prints are too varied or show too few characteristics
(minutiae), the red LED shines, a buzzer signals and the EU displays
„Template unclear“. In this case the learning procedure has failed and must be
repeated.
- If a repeated attempt fails then it can be attempted to slightly reduce the
security level (See pate: Fehler! Textmarke nicht definiert. Fehler!
Verweisquelle konnte nicht gefunden werden. Fehler! Verweisquelle
konnte nicht gefunden werden.)
Learn finger
S:1 P: 1 R:*---

FingerPrintScan System FPC 1381 –Technical Handbook
page 16 Version 2.00
12.8. Main Menu Item: Delete
12.8.1. Delete Person
This submenu deletes all finger information about a single person in a scanner
S: the scanner address from where the person should be deleted
P: the personal ID number of the finger which should be deleted
Caution: if the finger data has been deleted it cannot be recovered.
12.8.2. Delete Database
Here all fingers in a scanner can be deleted.
S: the scanner address
CAUTION: when the fingers have been deleted once, they can never be recovered
12.8.3. Delete Name
Here the personal ID number can be selected of a person whose name in the system
should be deleted.
P: personal ID number, of the person whose name should be deleted. This number
represents the currently registered name in the system.
Pressing → brings up the cancel menu
12.8.4. Delete All Names
Here a complete table of persons can be deleted, however no finger templates are
deleted.
Delete Name
P: 1 Tommy
Delete data base
S: 1 >abort<
Delete person
S:1 P: 1 >abor<
►Delete person
Del. data base
Delete Name
DeleteAll Names
Back

FingerPrintScan System FPC 1381 –Technical Handbook
Version 2.00 page 17
By pressing the keys → and ← the security question can be confirmed or
unconfirmed.
12.9. Main Menu Item: Settings
Here the following submenu selections are possible:
12.9.1. Set Date
Here the date can be set. The date and time values are buffered in the EU. The
integrated clock can run several days without the power supply being connected.
Using the arrow keys the correct date can be set and after pressing “OK” the setting
is confirmed.
12.9.2. Set Time
Here the time can be set. The date and time values are buffered in the EU. The
integrated clock can run several days without the power supply being connected.
Using the arrow keys the correct time can be set and after pressing “OK” the setting
is confirmed.
12.9.3. List of Persons
Every person can be assigned a name with a maximum of 16 characters. This name
is stored in the event memory for a recognised finger of this person.
Name: 1 >abort<
Tommy
Set Time
16:54:12 >abort<
Set Date
30.07.13 >abort<
►Set Date
Set Time
Person list
SystemParameter
User Code
Back
Delete all Names
>yes< >no<

FingerPrintScan System FPC 1381 –Technical Handbook
page 18 Version 2.00
At first using the ↑ and ↓ keys the personal ID number can be selected. After pressing
→ the cursor moves to the first letter of the name. The letters can be selected by
using ↑ and ↓ keys to go through the alphabetically listed letters. When the desired
letter appears, pressing → lets you continue with the selection of the next letter.
When the name is completely spelled out, press "OK" and the name is stored.
Giving names on the PC makes entering information easier. For this the optional
interface converter is necessary. (See page: Fehler! Textmarke nicht definiert.:
Fehler! Verweisquelle konnte nicht gefunden werden.. Fehler! Verweisquelle
konnte nicht gefunden werden.)
12.9.4. System Parameters
In this submenu all system relevant parameters are set. With the keys → and ← the
individual parameters can be selected. With ↑ they are set or activated and with ↓
they are deleted or deactivated.
12.9.4.1. Key tone
Off: No acoustic signal when pressing keys
On: When pressing keys a short beep tone is issued in the EU.
12.9.4.2. Error tone
Off: No acoustic signal when an error occurs
On: When an error occurs (e.g. scanner not connected) a short beep tone is
issued in the EU.
12.9.4.3. User Code
This parameter activates the operator code for the operator level. If this parameter is
activated (on) the operator has access to the system only after entering the operator
code. The operator code can be activated only in conjunction with the installer code.
The 1-6 character code is entered in the menu operator code.
12.9.5. User Code
Here an operator code can be defined.
Using the keys ↑ and ↓ in alphabetical order the letter of the currently selected
position can be changed. With the → and ← keys the position can be selected.
Pressing "OK" confirms the code.
User-Code
> < >Abbr.<


FingerPrintScan System FPC 1381 –Technical Handbook
page 20 Version 2.00
13. User Menu
Table of contents