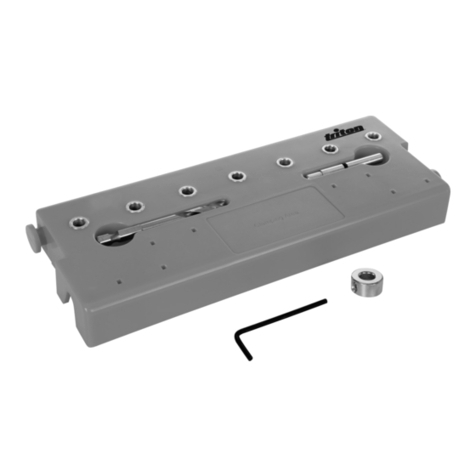
CMT 792 User manual

© C.M.T. UTENSILI S.P.A. ®: CMT, the CMT logos, CMT ORANGE TOOLS and the orange color applied to the tool surfaces are trademarks of C.M.T. UTENSILI S.p.A.
®: CMT, los logotipos CMT, CMT ORANGE TOOLS y el color anaranjado del revestimiento de la superficie de las herramientas son marcas registradas de C.M.T. UTENSILI S.p.A.
®: CMT, les logos CMT, CMT ORANGE TOOLS et la couleur orange du revêtement de la surface des outils sont des marques déposées de la société C.M.T. Utensili S.p.A.
®: CMT, i loghi CMT, CMT ORANGE TOOLS e il colore arancio del rivestimento della superficie degli utensili sono marchi registrati di C.M.T. UTENSILI S.p.A.
®: CMT, die CMT Logos, CMT ORANGE TOOLS und die orangene Farbe der Werkzeugflächen sind eingetragene Warenzeichen von C.M.T. Utensili S.p.A.
®: CMT, logo CMT i pomaranczowy kolor stosowany do powierzchni narzedzi sa znakami towarowymi rmy CMT UTENSILI S.p.a. © C.M.T. UTENSILI S.p.a.
®: CMT, логотипы CMT, CMT ORANGE TOOLS и оранжевое покрытие на поверхности инструмента являются торговой маркой компании C.M.T. UTENSILI S.p.A.
CMT792
INSTRUCTION MANUAL
03.60.0216
B) Direct positioning on both the planer
table and the tool holder body: detection
of the knife position (allowing for a perfect
alignment, even if the planer table is worn
out).
Detection of the knife position (allowing for
a perfect alignment, even if the planer table
is worn out).
Remark: place one joint of the rst jig on the
planer table and the other joint on the tool
holder body. Position the magnetic head on the knife at one end. Record the gures
on the scale. Place the second jig with the magnetic head onto the knife at its oppo-
site end and adjust it by setting up the magnetic head with the previously-recorded
gures. You will then obtain a perfect knife alignment.
B) Colocación sobre ambos, mesa de cepidallora y portacuchillas: detección
de la posición de la cuchilla (que permite una alineación perfecta, aunque la
mesa de cepilladora esté desgastada).
Detección de la posición de la cuchilla (permite una alineación perfecta, aunque la
mesa de cepilladora esté desgastada).
Nota: posicione una rótula del primer regulador sobre la mesa de cepidallora y la
otra rótula sobre el portacuchillas. Coloque el cabezal magnético sobre la cuchilla,
en su extremo. Registre las cifras de su escala. Posicione el segundo regulador con
su cabezal magnético sobre la cuchilla, en su extremo opuesto, y ajuste el cabezal
con las mismas cifras registradas en el primer regulador. Obtendrá así una alinea-
ción perfecta.
3
2
1
A) Positioning on the tool holder body: plan-
ers, thickness planers, combined machines,
etc., with detection of the knife position.
Detection of the knife position.
Remark: place the rst jig’s magnetic head
onto the knife at one end. Record the gures
on the scale. Position the second jig on the
tool holder body with its magnetic head onto
the knife at the opposite end by setting up the
magnetic head with the previously-recorded
gures. You will then obtain a perfect knife
alignment.
A) Colocación sobre el cuerpo de la portacuchilla: cepilladoras, regruesado-
ras, máquinas combinadas, etc., y detección de la posición de la cuchilla.
Detección de la posición de la cuchilla.
Nota: coloque el cabezal magnético del primer regulador sobre la cuchilla, en su
extremo. Registre las cifras de su escala. Posicione el segundo regulador sobre el
portacuchillas con su cabezal magnético sobre la cuchilla, en su extremo opuesto, y
ajuste el cabezal con las mismas cifras registradas en el primer regulador. Obtendrá
así una alineación perfecta.
High precision adjustment
for perfect knife alignment
Fast knife setup and adjustment
Alta precisión de ajuste que permite una perfecta alineación de las cuchillas Rapidez de montaje y de alineación
DOS POSIBILIDADES DE MONTAJE
1. Magnetic stop
2. Joints with magnetic connectors
3. Lock screw
1. Tope magnético
2. Rótulas con
bornes magnéticos
3. Tornillo de bloqueo
1. Arrêt magnétique
2. Joints avec
connecteurs magnétiques
3. Vis d’arrêt
1. Arresto magnetico
2. Articolazioni
con morsetti magnetici
3. Vite d’arresto
1. Magnetischer Halt
2. Gelenke mit magnetischen
Verbindern
3. Fixierschraube
1. Stopa magnetyczna
2. Nóżki magnetyczne
3. Śruba blokująca
1. Установочная магнитная головка
2. Магнитная шарнирная опора
3. Фиксирующий винт
TWO SETUP POSSIBILITIES
Set of 2 magnetic knife setting jigs
Juego de 2 reguladores magnéticos para cuchillas de cepilladoras
Jeu de 2 régulateurs magnétiques de couteaux de rabotage
Set di 2 allineatori magnetici per coltelli da pialla
Set mit 2 magnetischen Reglern für Hobelmesser
Przyrząd do ustawiania noży (komplet 2szt.)
Набор из 2х магнитных приспособлений для установки ножей
Manual de instrucciones - Manuel d’instructions
Manuale di istruzioni - Gebrauchsanweisungen
Instrukcja obsługi - Инструкция

B) Placement sur l’établi de raboteuse et le corps du porte-outil: détection
de la position du couteau (pour un alignement parfait, même si l’établi de la
raboteuse est usé).
Détection de la position du couteau (pour un alignement parfait, quand même l’éta-
bli de raboteuse est épuisé). Remarques: placez un joint du premier régulateur
sur l’établi de raboteuse et l’autre joint sur le corps du porte-outil. Positionnez la
tête magnétique sur le couteau, à une extrémité. Enregistrez les chiffres de l’échelle.
Placez le deuxième régulateur sur le corps du porte-outil avec la tête magnétique
sur le couteau à l’extrémité opposée, en réglant la tête magnétique avec les chiffres
précédemment enregistrés. Vous obtiendrez un parfait alignement du couteau!
B) Posizionamento sul tavolo della piallatrice e corpo dell’utensile: rilevamen-
to della posizione del coltello (garantisce un allineamento perfetto anche in
caso il tavolo della fresatrice fosse usurato).
Rilevamento della posizione del coltello (garantisce un allineamento perfetto anche
in caso il tavolo della fresatrice fosse usurato).
Nota: per la regolazione dei coltelli posizionare un’articolazione del primo allinea-
tore sul tavolo della piallatrice e l’altra sul corpo dell’utensile. Collocare la testina
magnetica sopra un’estremità del coltello per rilevarne la posizione registrando i va-
lori riportati sulla scala. Posizionare il secondo allineatore con la testina magnetica
sopra l’altra estremità del coltello, regolandola con gli stessi valori registrati su scala
dal primo allineatore. Otterrete così il perfetto allineamento del coltello.
B) Positionierung auf beiden Hobeltisch und Gehäuse der Werkzeughalter: Erfas-
sung der Messerposition (zur richtigen Ausrichtung, auch wenn der Hobeltisch ab-
genutzt ist).
Erfassung der Messerposition (zur richtigen Ausrichtung, auch wenn der Hobeltisch abge-
nutzt ist). Bitte achten Sie darauf: Stellen Sie ein Gelenk des ersten Reglersauf den Ho-
beltisch und das andere Gelenk auf das Gehäuse der Werkzeughalter ein. Setzen Sie den
magnetischen Kopf auf das Messer, an einem Ende. Vermerken Sie die aufgezeichneten
Zahlen auf der Skala, wenn den Kopf in Berührung mit dem Messer gekommen ist. Stel-
len Sie den zweiten Regler auf das Gehäuse der Werkzeughalter mit dem magnetischen
Kopf, an dem gegenüberliegenden Ende ein. Setzen Sie den magnetischen Kopf mit den
vorher aufgezeichneten Zahlen ein, wenn er auch in Kontakt mit dem Messer gekommen
ist. Schließlich werden Sie eine richtige Ausrichtung der Messer erhalten.
B)Ustawianie noży na blacie roboczym urządzenia i korpusie głowicy, bez konieczności
demontażu głowicy
Ustawianie żądanej wysokości noża:
Umieszczamy przyrządy tak aby nóżki znajdowały się zarówno na blacie roboczym jak i korpusie głowicy.
Ustawiamy żądaną wysokość noża na skali i dokręcamy śrubę blokującą. Przykładamy do noża, delikatnie
obluzowując śruby mocujące tak aby magnes przytrzymał nóż na ustalonej wysokość. Następnie należy
dokręcić śruby mocujące nóż.
B) Установка вылета и параллельности расположения ножей одновременно
относительно стола станка и корпуса строгальной головки (для установки правильного
положения ножей, даже если строгальный стол изношен).
Установите одну магнитную шарнирную опору (2) первого позиционера на строгальный стол, а
другую магнитную шарнирную опору (2) на корпус строгальной головки на одном краю барабана.
Заметьте положение магнитной головки (1) по шкале при её соприкосновении с режущей
гранью ножа. Установите второй позиционер на строгальный стол и корпус строгальной головки
аналогично первому на противоположной стороне ножа. По шкале установите высоту магнитной
головки (1) в этом позиционере такой же, как в первом позиционере. Выровняйте нож по обоим
магнитным установочным головкам (1) и зафиксируйте это положение.
A) Placement sur le corps du porte-outil: raboteuses, raboteuses bois, ma-
chines combinées, etc., et détection de la position du couteau.
Détection de la position du couteau.
Remarques: placez la tête magnétique du premier régulateur sur le couteau, à une
extrémité. enregistrez les chiffres de l’échelle. Positionnez le deuxième régulateur sur
le corps du porte-outil avec la tête magnétique sur le couteau à l’extrémité opposée,
en réglant la tête magnétique avec les chiffres précédemment enregistrés. Vous
obtiendrez un parfait alignement du couteau!
A) Posizionamento sul corpo dell’utensile: piallatrici, piallatrici a spessore,
macchine combinate, ecc., con rilevamento della posizione del coltello.
Rilevamento della posizione del coltello.
Nota: posizionare la testina magnetica del primo allineatore sopra un’estremità
del coltello. Registrare i valori riportati sulla scala. Utilizzare il secondo allineatore
appoggiandolo sul corpo dell’utensile e posizionando la testina magnetica sopra
l’altra estremità del coltello, regolandola con gli stessi valori registrati su scala dal
primo allineatore. Otterrete così il perfetto allineamento del coltello.
A) Positionierung auf dem Gehäuse der Werkzeughalter: Hobelmaschinen, große
Hobelmaschinen, kombinierte Maschinen, usw., und Erfassung der Messerposition.
Erfassung der Messerposition. Bitte achten Sie darauf: Stellen Sie den magnetischen
Kopf des ersten Reglers auf das Messer, an einem Ende ein. Vermerken Sie die auf-
gezeichneten Zahlen auf der Skala, wenn der Kopf in Berührung mit dem Messer ge-
kommen ist. Setzen Sie den zweiten Regler auf das Gehäuse der Werkzeughalter mit dem
magnetischen Kopf auf das Messer, an dem gegenüberliegenden Ende. Stellen Sie den
magnetischen Kopf mit den vorher aufgezeichneten Zahlen ein, wenn er auch in Kontakt
mit dem Messer gekommen ist. Schließlich werden Sie eine richtige Ausrichtung der
Messer erhalten.
A)Ustawianie noży bezpośrednio na korpusie głowicy
Ustawianie żądanej wysokości noża:
Umieszczamy jeden z przyrządów na początku a drugi na końcu korpusu głowicy. Ustawiamy żądaną
wysokość noża na skali i dokręcamy śrubę blokującą. Przykładamy do noża, delikatnie obluzowując
śruby mocujące nóż tak aby magnes przytrzymał nóż na ustalonej wysokość, nóżki magnetyczne
powinny znajdować się na korpusie głowicy. Następnie należy dokręcić śruby mocujące nóż.
A) Установка вылета и параллельности расположения ножей относительно корпуса
строгальной или фрезерной головки фрезерных, строгальных, больших фуговально-
рейсмусовых, комбинированных и прочих станков с опорой на корпус фрезерных или
строгальных головок.
Установите магнитную головку первого позиционера на корпус фрезы (строгальной головки) на
одном краю ножевого барабана. Заметьте показания на шкале при касании магнитной головки
(1) с режущей гранью ножа. Установите второй позиционер на корпус фрезы на противоположном
конце барабана выставив нож по позиционеру с отметкой на шкале такой же, как в первом
позиционере. Выровняйте нож по обоим магнитным установочным головкам и зафиксируйте это
положение.
Réglage de haute précision pour un parfait alignement des couteaux Rapide Montage et réglage des couteaux
DEUX OPTIONS DE MONTAGE
Perfetto allineamento dei coltelli grazie alla regolazione di precisione Rapidità nel montaggio e nella regolazione dei coltelli
DUE POSSIBILITÀ DI MONTAGGIO
Hochpräzisions-Einstellungen zur richtigen Ausrichtung der Messer Schnelle Montage und Einstellung
ZWEI MONTAGEMÖGLICHKEITEN
Wysoka precyzja regulacji gwarantuje perfekcyjne ułożenie noży. Szybka i wygodna regulacja noży.
2 SPOSOBY MOCOWANIA NOŻY
Высокоточная регулировка Для идеального выравнивания Быстрая установка и позиционирование ножей
ДВА ВАРИАНТА УСТАНОВКИ НОЖЕЙ
Table of contents
Other CMT Tools manuals
Popular Tools manuals by other brands

Astro Pneumatic Tool
Astro Pneumatic Tool 78344 manual
Everwin
Everwin SN40 Series Operation and maintenance manual
Errebi
Errebi COMPACT KS10 Use and maintenance manual

Arctic Cove
Arctic Cove MCLM008 Operator's manual
Samoa
Samoa 160 500 Parts and technical service guide
Nederman
Nederman 884 Original user manual
