13
Nothing Comes Close to a Cobra®
English
12
Operation
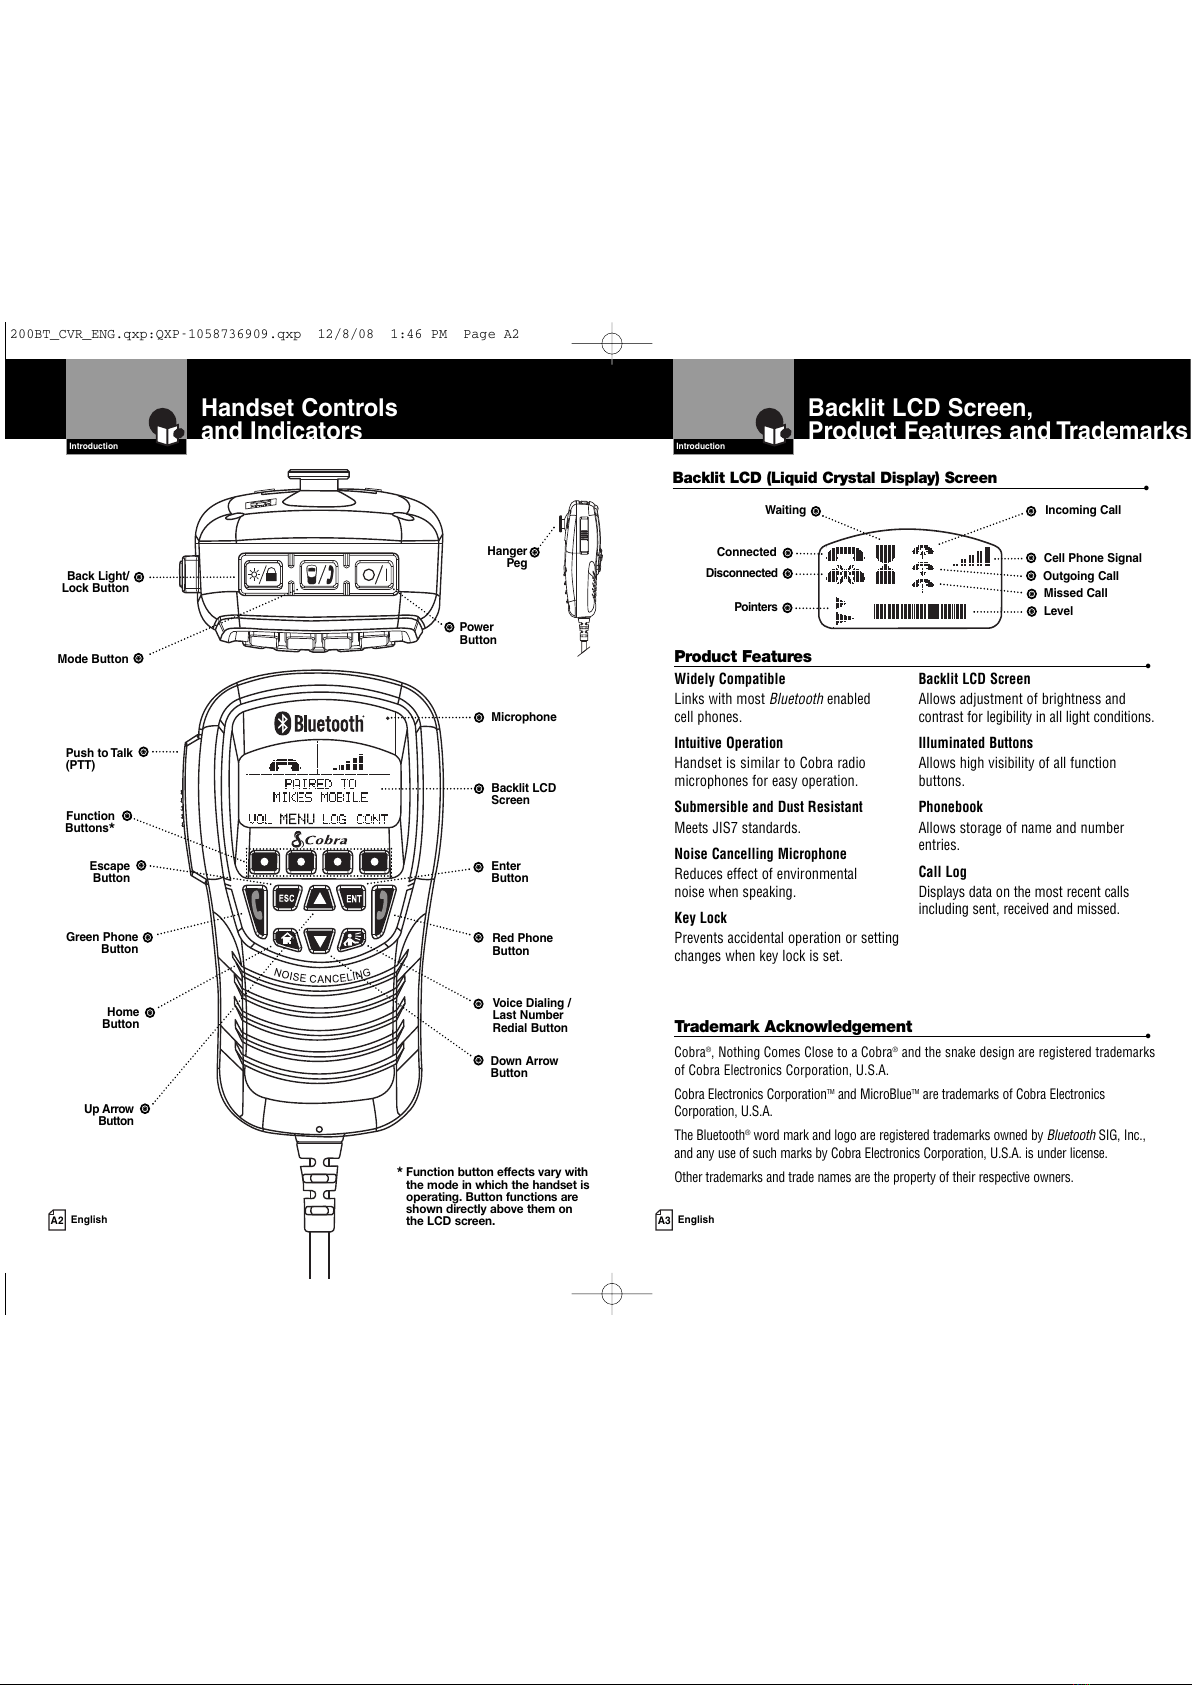
Operating Your Handset Operation
Operating Your Handset
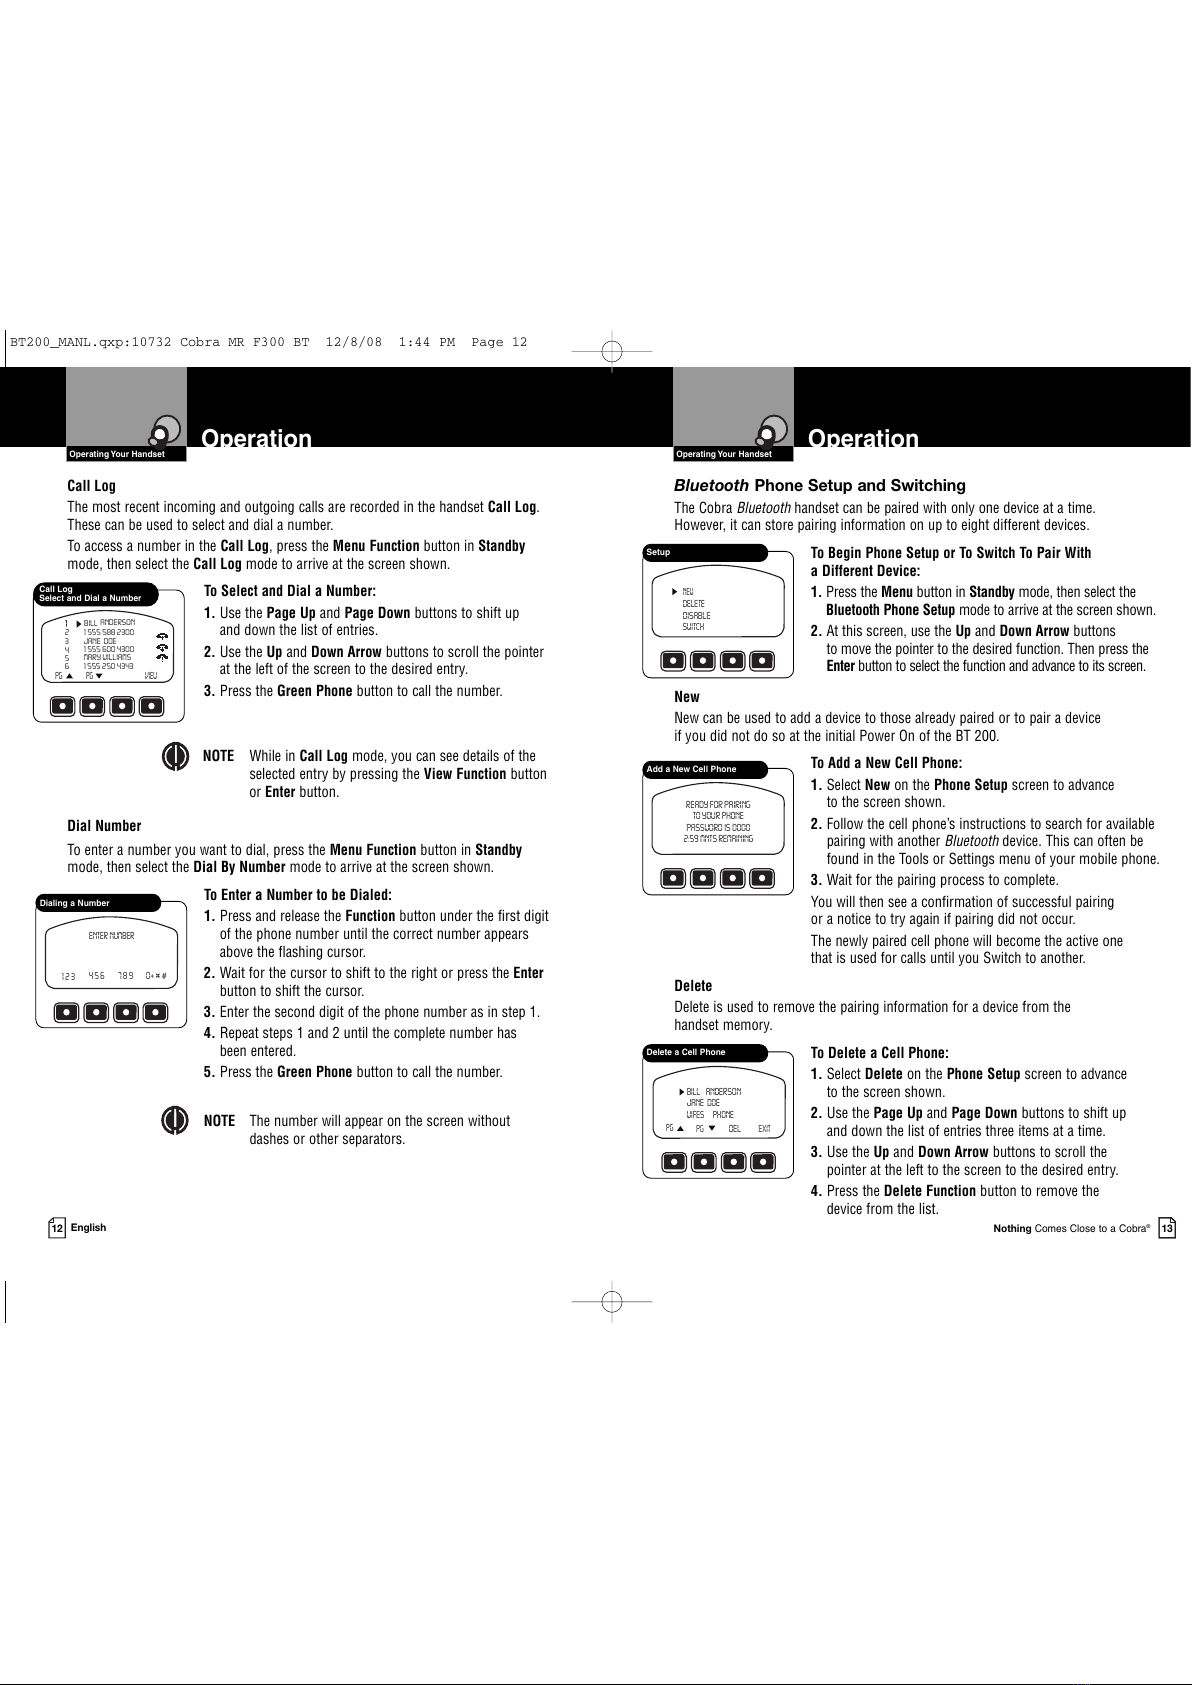
Call Log
The most recent incoming and outgoing calls are recorded in the handset Call Log.
These can be used to select and dial a number.
To access a number in the Call Log, press the Menu Function button in Standby
mode, then select the Call Log mode to arrive at the screen shown.
To Select and Dial a Number:
1. Use the Page Up and Page Down buttons to shift up
and down the list of entries.
2. Use the Up and Down Arrow buttons to scroll the pointer
at the left of the screen to the desired entry.
3. Press the Green Phone button to call the number.
NOTE While in Call Log mode, you can see details of the
selected entry by pressing the View Function button
or Enter button.
Dial Number
To enter a number you want to dial, press the Menu Function button in Standby
mode, then select the Dial By Number mode to arrive at the screen shown.
To Enter a Number to be Dialed:
1. Press and release the Function button under the first digit
of the phone number until the correct number appears
above the flashing cursor.
2. Wait for the cursor to shift to the right or press the Enter
button to shift the cursor.
3. Enter the second digit of the phone number as in step 1.
4. Repeat steps 1 and 2 until the complete number has
been entered.
5. Press the Green Phone button to call the number.
NOTE The number will appear on the screen without
dashes or other separators.
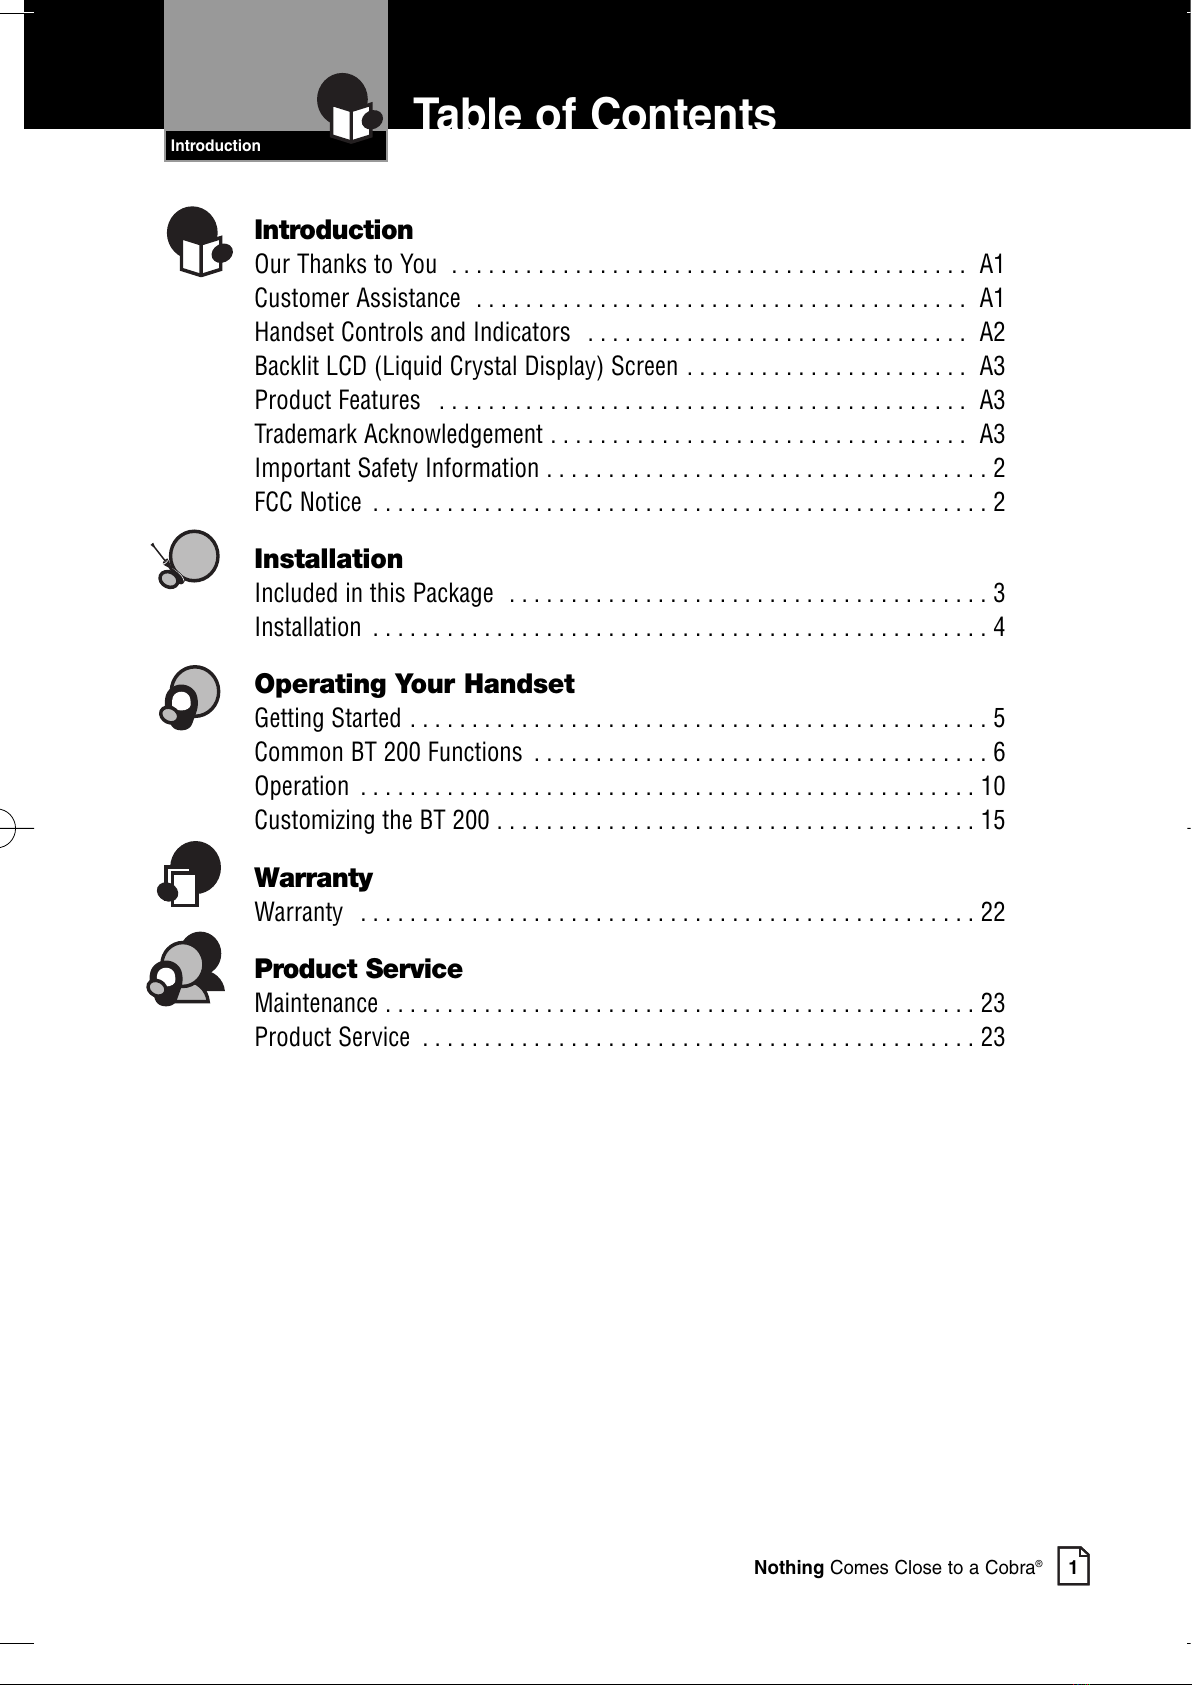
Bluetooth Phone etup and witching
The Cobra Bluetooth handset can be paired with only one device at a time.
owever, it can store pairing information on up to eight different devices.
To Begin Phone Setup or To Switch To Pair With
a Different Device:
1. Press the Menu button in Standby mode, then select the
Bluetooth Phone Setup mode to arrive at the screen shown.
2. At this screen, use the Up and Down Arrow buttons
to move the pointer to the desired function. Then press the
Enter button to select the function and advance to its screen.
New
New can be used to add a device to those already paired or to pair a device
if you did not do so at the initial Power On of the BT 200.
To Add a New Cell Phone:
1. Select New on the Phone Setup screen to advance
to the screen shown.
2. Follow the cell phone’s instructions to search for available
pairing with another Bluetooth device. This can often be
found in the Tools or Settings menu of your mobile phone.
3. Wait for the pairing process to complete.
You will then see a confirmation of successful pairing
or a notice to try again if pairing did not occur.
The newly paired cell phone will become the active one
that is used for calls until you Switch to another.
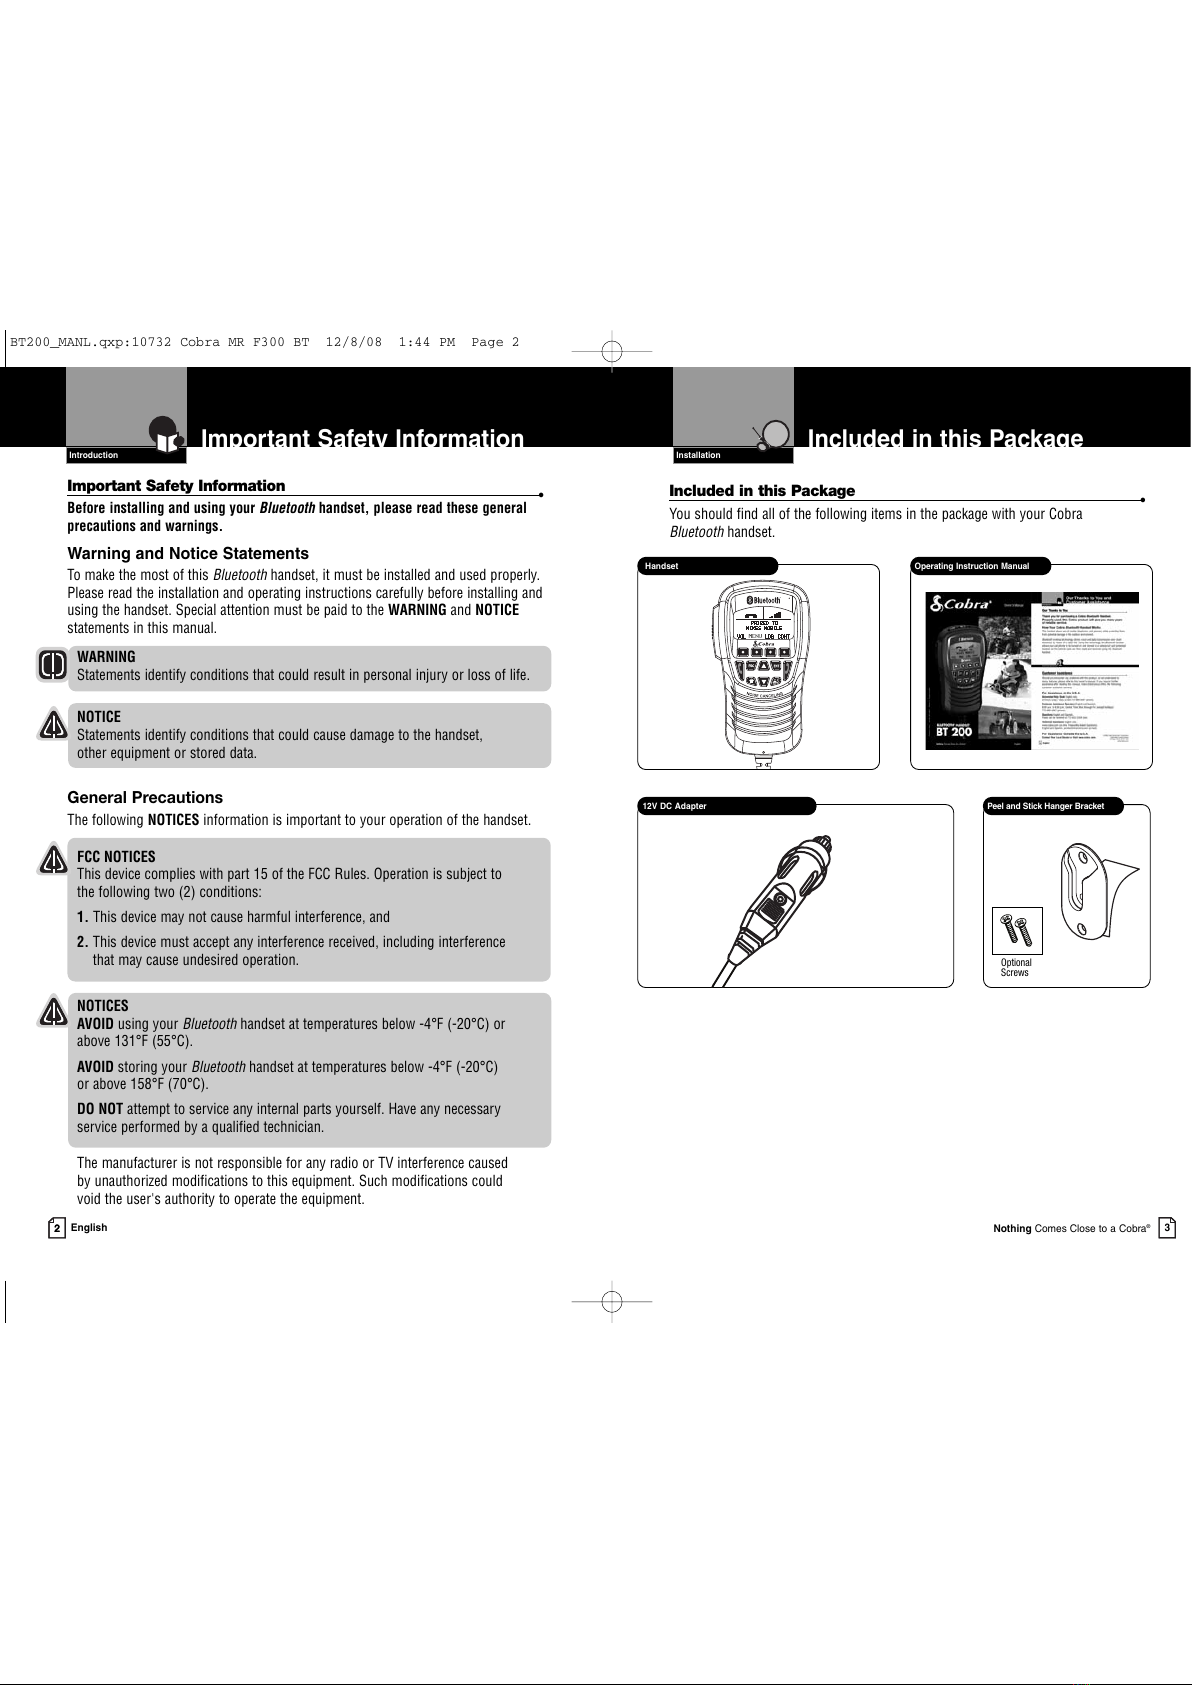
Delete
Delete is used to remove the pairing information for a device from the
handset memory.
To Delete a Cell Phone:
1. Select Delete on the Phone Setup screen to advance
to the screen shown.
2. Use the Page Up and Page Down buttons to shift up
and down the list of entries three items at a time.
3. Use the Up and Down Arrow buttons to scroll the
pointer at the left to the screen to the desired entry.
4. Press the Delete Function button to remove the
device from the list.