Thanks for buying the photoelectric and temperature smoke alarm. Read all
instrucons before installing the smoke alarm, so it will protect your home in
the best possible way.
• If you are installing the smoke alarm for some other person, leave these
instrucons or a copy of them with him/her.
• The photoelectric and temperature smoke alarm is also suitable for use
in a travel vehicle, such as camper vans, caravans, and boats.
• Allow interconnect 30 detectors.
1. POSITIONING THE SMOKE ALARM
• Place at least one smoke alarm per 60 m 2 on each floor.
• Place a smoke alarm in each corridor and bedroom.
• The smoke alarm is to be placed on the calling in such a way that it is in
the middle of the room.
Alarm mode: When the smoke alarm detects smoke, it goes into an alarm
mode in which the smoke alarm sounds with a frequency of 3 mes
connuously and the red light flash.
Error mode: When the detectors detect any anomaly, the smoke alarm beeps
at intervals of 50 seconds.
Low baery: When the baery it’s running out, the smoke alarm beeps and
the red light flash at intervals of 50 seconds. You can silence this alarm for 10
hours by press the test buon (the detector will remain in operaonal mode
even if you have silenced the low baery alarm).
Silence mode: during alarm mode, pressed the test buon for 1 second, the
smoke alarm is immediately reset out of the alarm condion and the beep is
silenced for 10 minutes. In silence mode, the red light flashes once every 16
seconds.
Wireless mode:
Wireless funcon decripon:
Wireless frequency: 868MHz
Wireless distance: >100 meters
Note: Make sure that the baeries have been installed correctly before the
detectors are put into operaon. For the correct operaon of the Eyehome+
detector it will be necessary to acquire the MDAHWF module from COFEM.
The Eyehome+ detectors are capable of interconnect 30 units among them
with a distance of 100 meters.
Los detectores Eyehome+ permiten la conexión al módulo MDAHWF que le
permirá mediante la conexión a una red wifi y la descarga de una aplicación
móvil poder conocer el estado de su instalación desde cualquier lugar dónde
se encuentre.
Follow these steps to interconnect the smoke detectors:
1) Proceed with the start-up of the detectors to be interconnected.
2) Take the first detector to connect and press the test buon 3 mes
consecuvely. You can see how the red light turns on. In this moment the
detector remain in wifi learning mode.
If you press the test buon or the detector doesn’t receive a wireless in less
than 10 seconds, it will automacally return to
operaonal mode.
3) When you have the first detector in wireless learning mode (step 2) take
the second detector and press the test buon 3 mes consecuvely, you can
hear a double beep and the red light flash, at which me the two detectors
will be linked.
The detector in learning mode will leave the light fixed again if you want to
connect another detector. If you don’t want to interconnect more detectors,
press the test buon to exit learning mode and the detectors will remain in
operaonal mode.
4) If one of detectors enters in alarm mode, the alarm will be reproduced
aer a few seconds by all interconnected detectors through a double beep
and the acvaon of the red light. When the detector that enters in alarm
mode is stopped, the interconnected detectors are stopped in a few seconds.
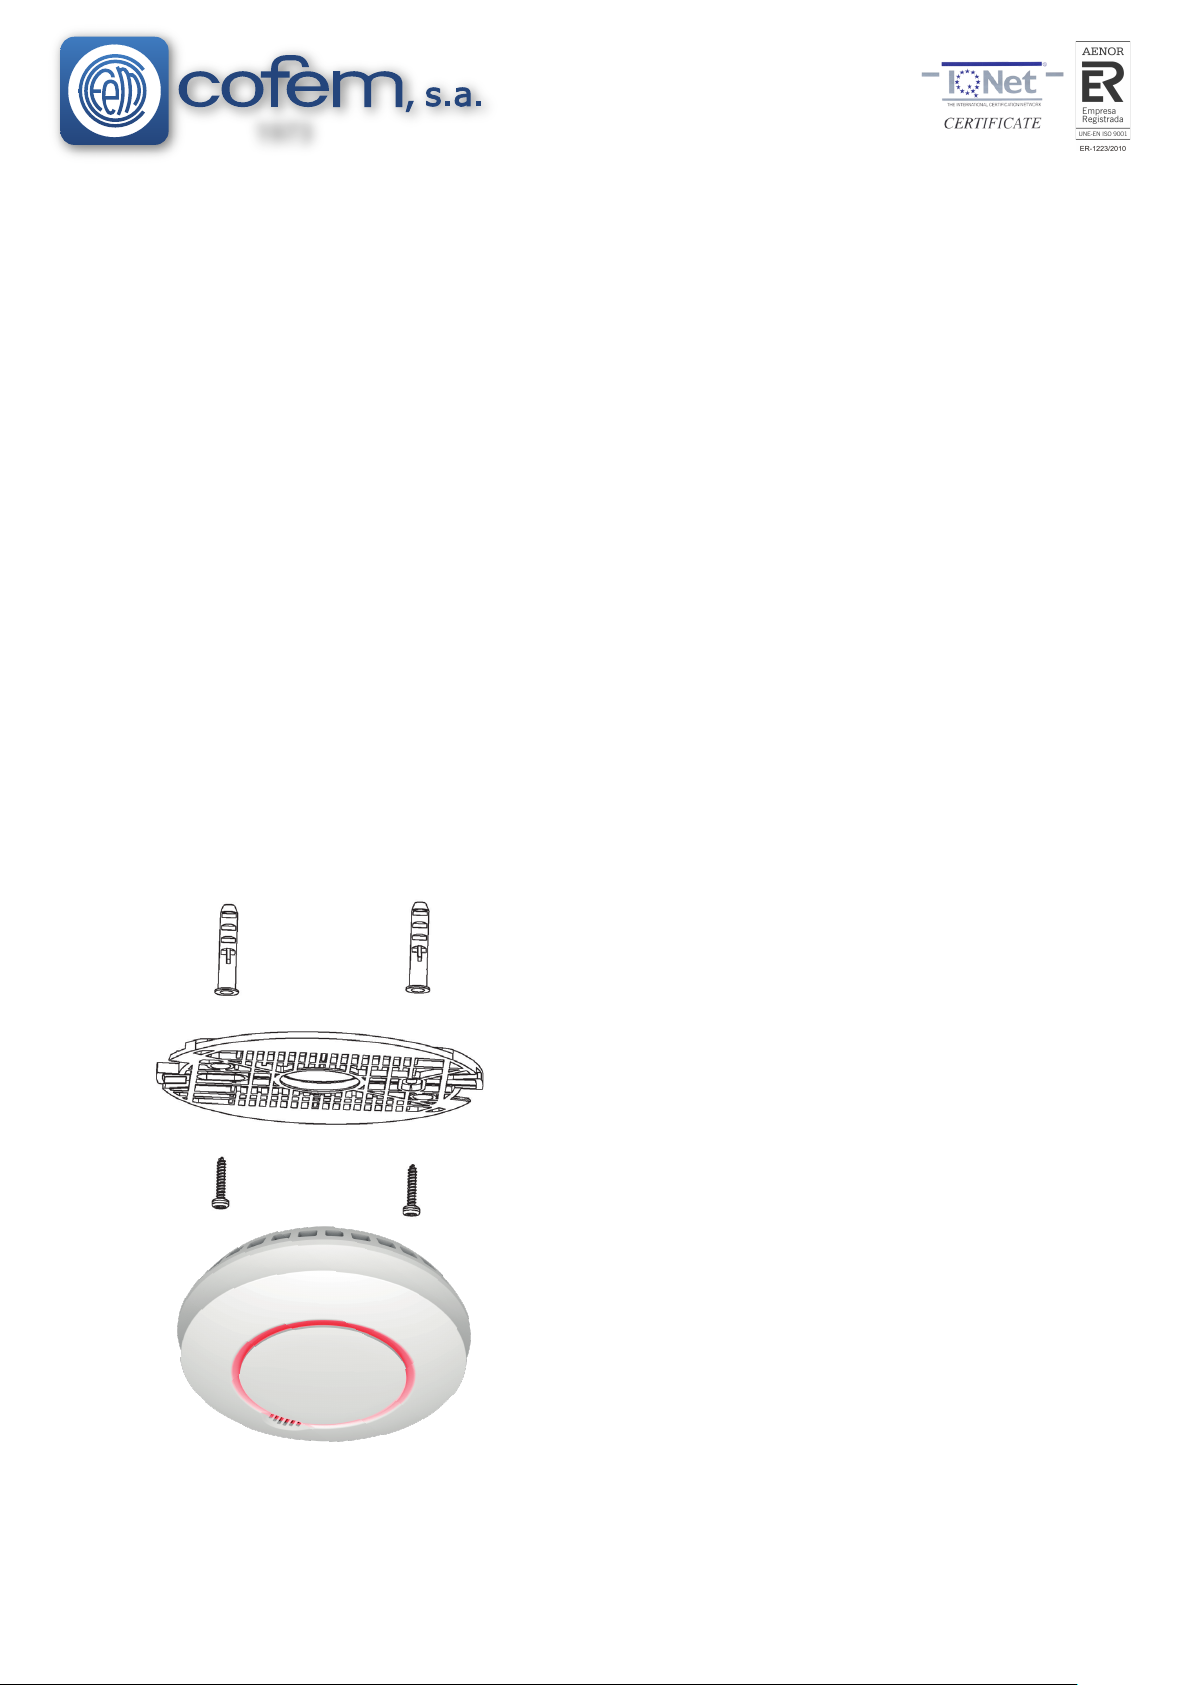
3. MAINTENANCE
The detector used 2 1,5V AA Alkaline baeries. When the detector enters in
low baery mode it’s recommended replace them for the correct funconing
of this device.
Warning: Do not paint or modify the smoke alarm!
Waste handing: The smoke alarm should be disposed in accordance with
normal waste handing for electronics.
AVOID THESE POSITIONS:
Near a wall or corner: Place the smoke alarm at a distance of at least 50 cm
from a wall or corner.
Moist places: Avoid installing smoke alarms near moist or occasionally moist
places such as immediately close to a shower or kitchen, where steam can
cause false alarm.
Venlaon ducts: Avoid installing a smoke alarm immediately next to a
venlaon duct. The dra may prevent smoke from reaching the smoke
alarm. Smoke alarm can't be installed in the locaon where the air velocity is
more than 300 /min (1.5 m/sec).
Dead-air spaces: Avoid installing a smoke alarm in the angle of a pitched roof.
Install it at a distance of least 10 cm from the ridge.
Fluorescent lamps: Avoid installing a smoke alarm immediately next to
fluorescent lamps, such as halogen lights.
Radiaon heang source: Avoid installing a smoke alarm radiant heat ing
source, such as radiant heang in the ceiling can create a hot air boundary
layer along the ceiling surface, which can seriously restrict the movement of
smoke and heat to a smoke alarm.
2. OPERATION AND TESTING
Start-up: When you install the baeries for the first me, or make the
replacement of them, the led will flash for half a second and the detector
emit one beep: If once this sequence is finished the detector doesn’t emit any
sound, the detector will be operaonal and the red light flash every 50
seconds.
Test mode: Press the test buon of the smoke alarm for 1 second unl you
hear 3 beeps, aer 1.5 seconds will hear again 3 beeps. This will happen for 3
cycles, if you keep pressing the test buon, the cycle of beeps will be
repeated with an increase volume and if there are more interconnected
detectors, they will also enter in test mode. While holding down the test
buon the red light will also light up. When you release the test buon of the
detector (and the other interconnected detectors) will return to the
operaonal mode.
Compulsory locaon Recommended locaon
Incorrect installaon will decrease operaonal
effecveness.
Place the smoke alarm on the ceiling and posion it least
50cm from the nearest wall or corner.
Bedroom BedroomHall
Living room Kitchen
Cellar
FABRICANTE DE PRODUCTOS CONTRA INCENDIOS - FIRE PROTECTION MANUFACTURER
Ctra. de Molins de Rei a Rubí, Km. 8,4 - 08191 RUBÍ (Barcelona) SPAIN.
1973
EYEHOME+
(english)
628008 - ENE18