Section-5: Run the preservation cycle
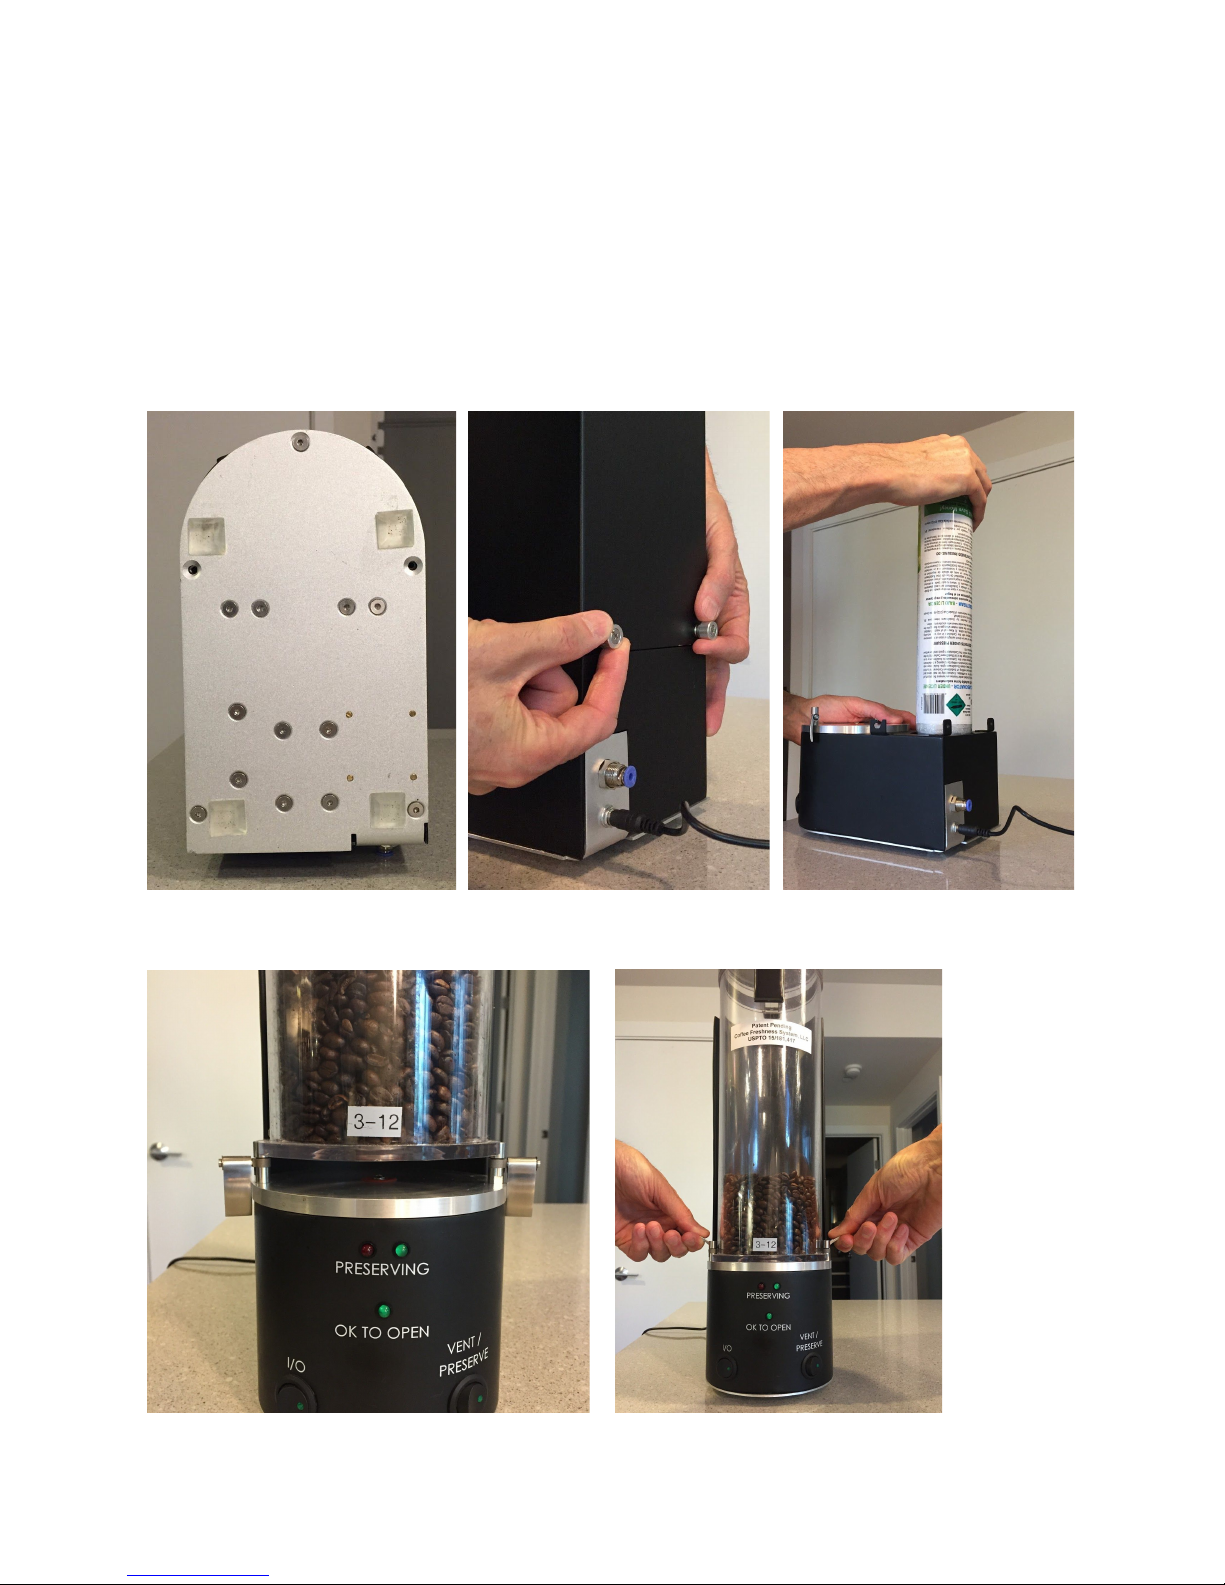
5.1 Turn the Main Power On by depressing the main power switch ‘I / O’ to the right.
The Green LED on the main power switch will illuminate.
5.2 Start the preservation cycle by depressing the ‘VENT / PRESERVE’ switch to the
right. The preservation cycle will run automatically and stop when complete. You will
hear valves switching on and off and gas flowing when the preservation cycle is
running; this is normal and takes about 2 minutes.
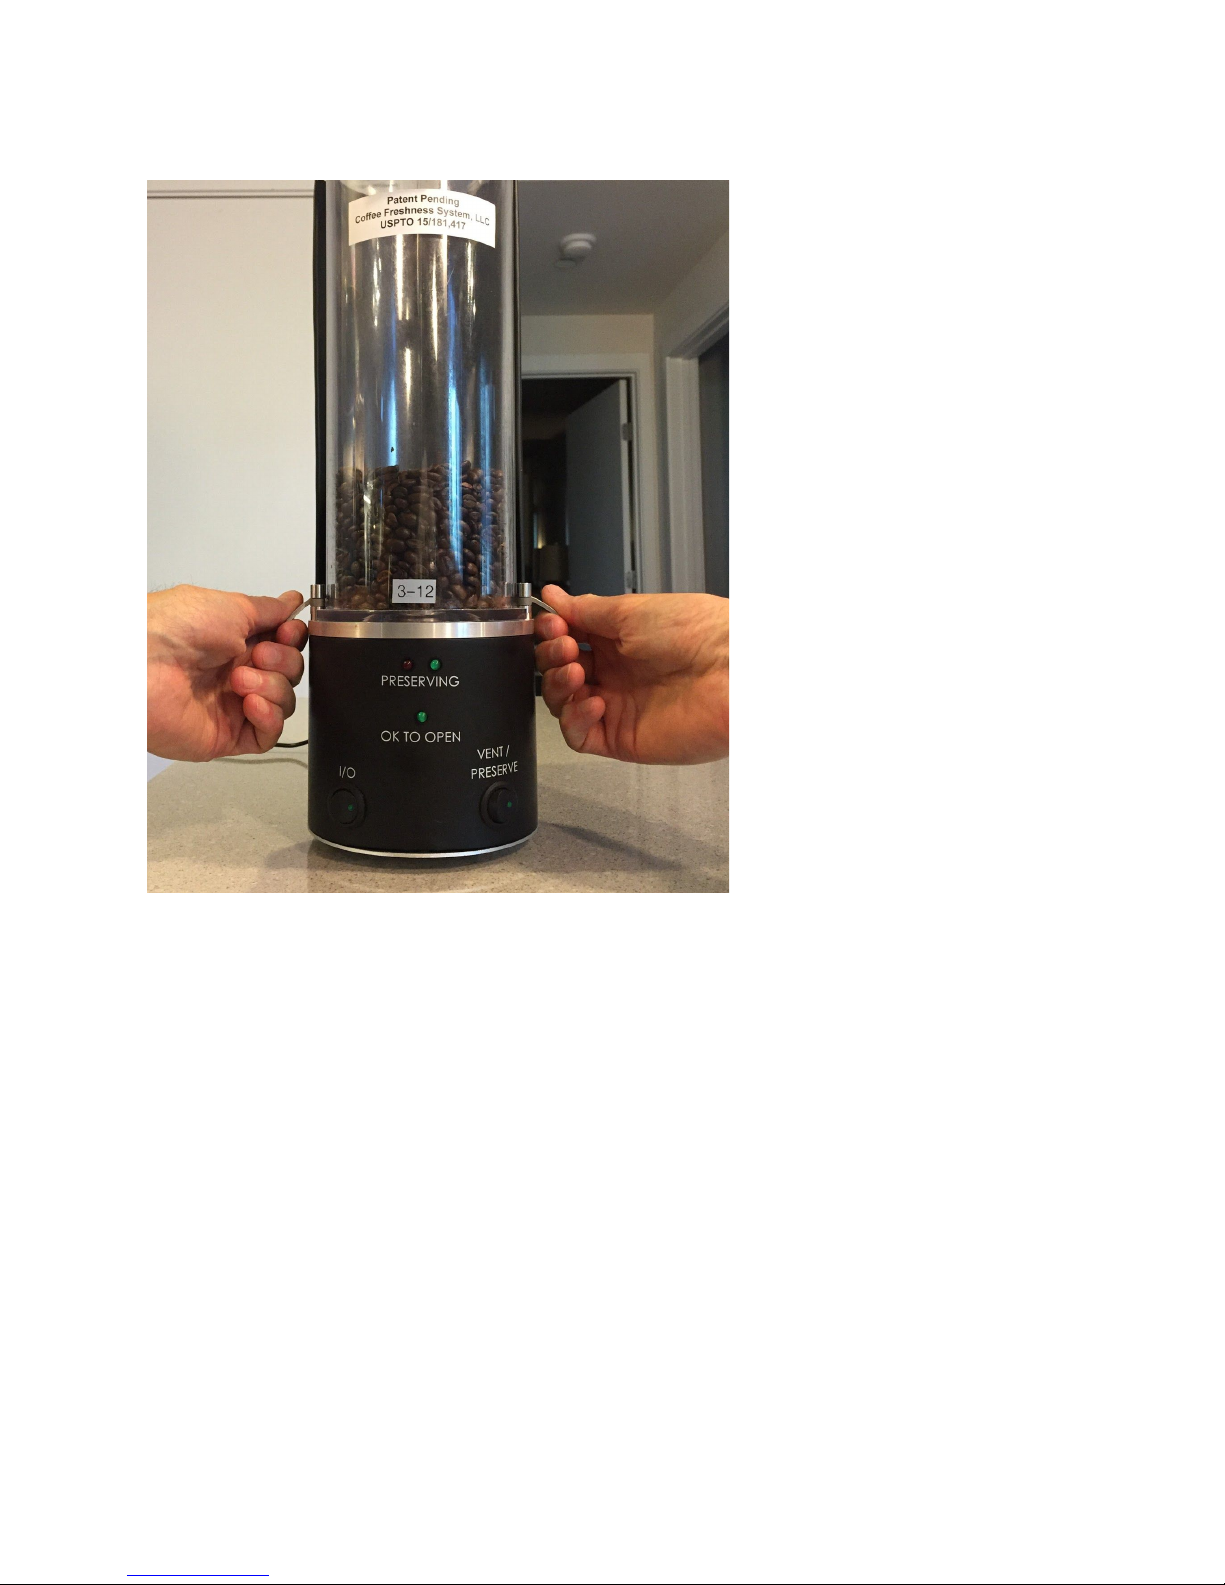
The Green LED on the ‘VENT /
PRESERVE’ switch will illuminate and the Green LED labeled ‘PRESERVING’ will flash
while the preservation cycle is running, then will remain illuminated once the
preservation cycle successfully completes. [Important: with the External CO2 Gas
Tank Option, the time of each gas fill cycle (there are 7 cycles - which are defined
as the time when gas starts to enter the container until the pressure switch
triggers and gas / air mixture purges - you can hear gas / air coming out) needs to
be in the range of 8 to 15 seconds. If the fill time is less than 8 seconds, the gas
regulator pressure is too high (even if the dial says 15psig). If this situation
occurs, the dilution of oxygen will NOT be sufficient to protect your coffee from
oxidation. In this case, lower the gas pressure from your regulator slightly until
the fill time is in the range of 8 to 15 seconds. Conversely, if the fill time is too
long you will get a red alarm for not filling the airtight canister with gas. In this
case slightly increase the pressure until the fill time is in the range of 8 to 15
seconds. The fill time is not to be confused with the gas purge cycles which are
factory set at a constant 8 seconds.
If the fill time cannot be properly set in the range
of 8 to 15 seconds
, contact Coffee Freshness System Support either by email at
5.3 If the Red LED labeled ‘PRESERVING’ is flashing, the preservation cycle was not
successful. Consult Section - 10 ‘’Alarms”.
5.4 Leave the system ‘On’ and in the preservation mode until you need to remove a
dose of the coffee for brewing.
Section-6: Venting the Airtight Canister in order to open for removing a dose of
coffee for brewing. Reminder - NEVER open the latch to the Airtight Canister lid
when the Airtight Canister is pressurized.
6.1 Depress the ‘VENT / PRESERVE’ switch to the left. The Green LED on the
‘VENT / PRESERVE’ switch will turn off and the vent cycle will run automatically, then
will stop after 30 seconds and the Green LED labeled ‘OK TO OPEN’ will illuminate.
6.2 [IMPORTANT FOR SAFETY] Before opening the Airtight Canister, ensure that
the Green LED labeled ‘OK TO OPEN’ is illuminated. This indicates that the Airtight
Canister can be safely opened. If the Green LED labeled ‘OK TO OPEN’ does not
illuminate 30 seconds after turning Off the function switch ‘VENT / PRESERVE’, contact