5
Only for outdoor use.
Teach your children to swim.
Never dive, jump, or slide into the pool.
Adult supervision is always required.
Parents should learn CPR.
Never swim alone.
Keep all electrical radios, speakers and other appliances away
from the swimming pool.
When you touch the filter, pump, or electrical parts, be sure the
ground under your feet is “Bone Dry.”
All electrical outlets should have a GFCI and connections should
be a minimum of 5 feet (1.52 m) from the outside perimeter of
the wall of the pool. From 5–10 feet (1.52–3.05 m), there should
be either a fixed connection (outlet box) or twist lock connection
with a GFCI.
Connect power cords to a 3-wire grounding-type outlet only.
Keep all breakable objects out of the pool area.
Alcohol consumption and pool activities do not mix. Never allow
anyone to swim, dive or slide under the influence of alcohol or
drugs.
Severe electrical shock could result if you install your pump or
filter on a deck. The pump or filter could fall into the water,
causing severe shock or electrocution. Do not install on a deck
or other surface at, above, or slightly below the top rail of the
pool.
Do not use the pool during severe weather conditions, i.e.
electrical storms, tornadoes, etc.
Be aware of overhead power lines when vacuuming your pool or
using a telescoping pole.
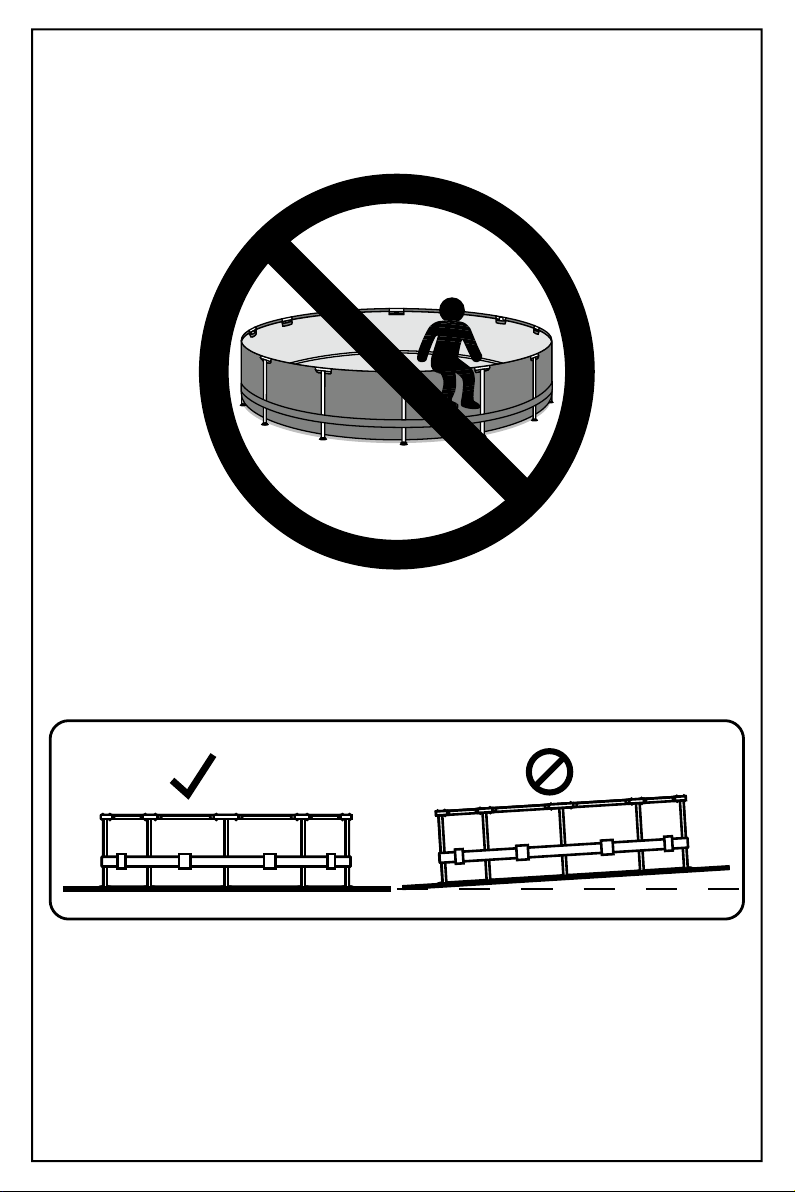
Do not allow diving, climbing, sitting, or standing on the top rails
of the pools.
Do not allow roughhousing and horseplay.
Do not engage in extended breath holding activities underwater;
you may black out and drown.
Install a pool ladder(s) or staircase for entry and exit from the
pool.
Keep deck clean and clear of objects that may create a tripping
hazard.
Check regularly for signs of wear or loose bolts that could make
the deck unsafe.
Instruct pool users about the proper use of all pool ladder(s) and
staircases.
Face ladder going up or down.
Allow only one person at a time on the ladder.
Check all nuts and bolts regularly to ensure that the ladder stays
sturdy.
Remove or secure the ladder to prevent entry to pool when not in
use.
Please contact pool site dealer or manufacturer for additional
safety signs if deemed necessary.
For pool service, select a certified pool professional.
Any equipment connected to the circulation systems shall be
positioned so as to prevent their being used as a means of
access to the pool by young children.
The installation must comply with the codes of the authority
having jurisdiction and may require permits for building, plumbing
electrical, zoning, etc.
The pool shall be located a minimum distance of 6 ft. (1.83 m)
from any electrical receptacle.
All 125 volt, 15 and 20 ampere receptacles located within 20 ft.
(6.0 m) of the pool shall be protected by a ground fault circuit
interrupter (GFCI). The 20 ft. (6 m) distance is measured via the
shortest straight line distance the supply cord would follow
without piercing a floor, wall, ceiling, doorway, window, or other
permanent barrier.
Prior to use of the pool, the installer shall affix all no diving signs
and safety signs in accordance with installation instructions so
they can be easily visible.
A barrier is necessary to provide protection against potential
drowning and near drowning. Barriers are not a substitute for the
constant supervision of children.
A list of emergency telephone numbers shall be posted, such as
the nearest available police, fire, ambulance, and/or rescue unit.
These numbers are to be kept near the telephone that is closest
to the pool.
Toys, chairs, tables, or similar objects that a young child could
climb shall be at least 4 feet (1219 mm) from the pool.
If deck is used by the installer, it will need to comply with
APSP-8.
Basic lifesaving equipment, including one of the following, shall
be on hand at all times: a. A light, strong, rigid pole (shepherd’s
crook) not less than 12 ft. (3.66 m) long. b. A minimum ¼ in.
(6 mm) diameter rope as long as 1½ times the maximum width of
the pool or 50 feet (15.24 m), whichever is less, which has been
firmly attached to a Coast Guard-approved ring buoy, or similarly
approved flotation devices.
The swimming pool cover is not designated as a safety barrier.
Please use artificial lighting during nighttime pool use, to
illuminate all safety signs, ladders, steps, deck surfaces and
walks.
The pool is subject to wear and deterioration. If not maintained
properly, certain types of excessive or accelerated deterioration
can lead to failure of the pool structure that might release large
quantities of water that could cause bodily harm and property
damage.
The bottom of the pool shall be visible at all times from the
outside perimeter of the pool.
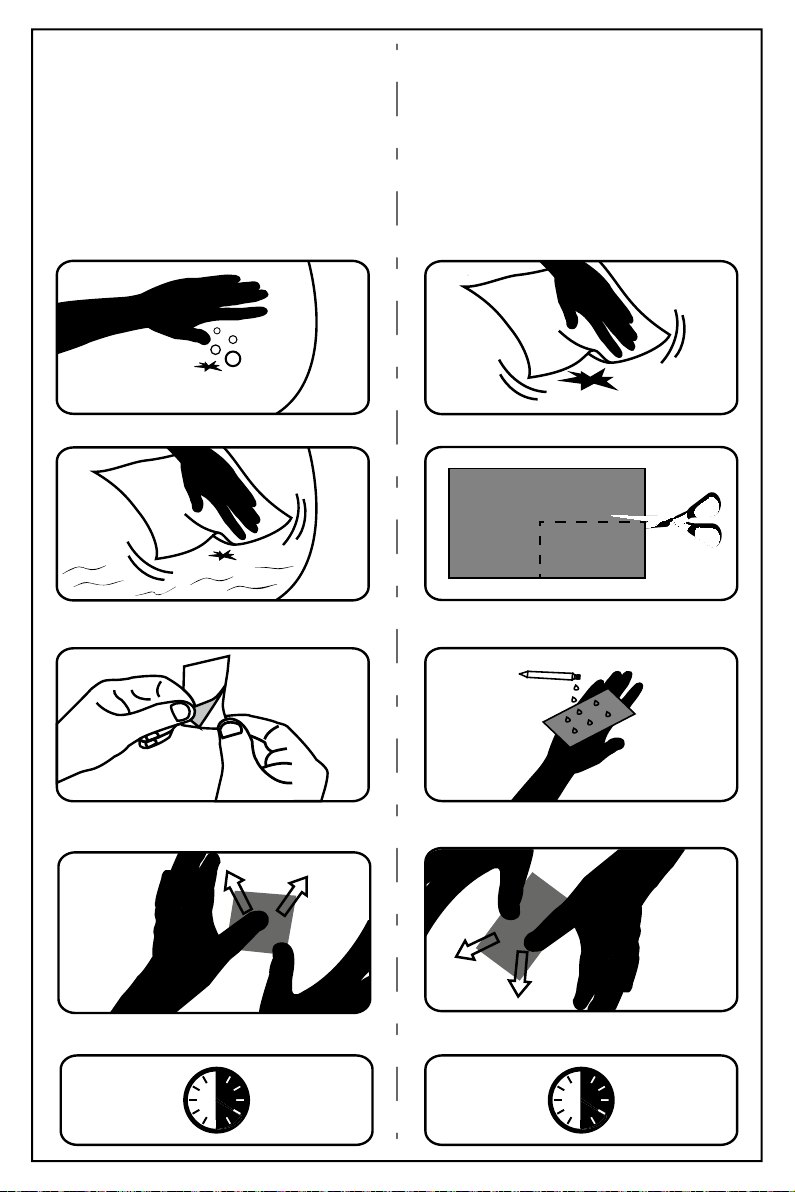
The installer of the vinyl liner shall affix on the original or
replacement liner, or on the pool structure, all safety signs in
accordance with the manufacturer’s instructions.
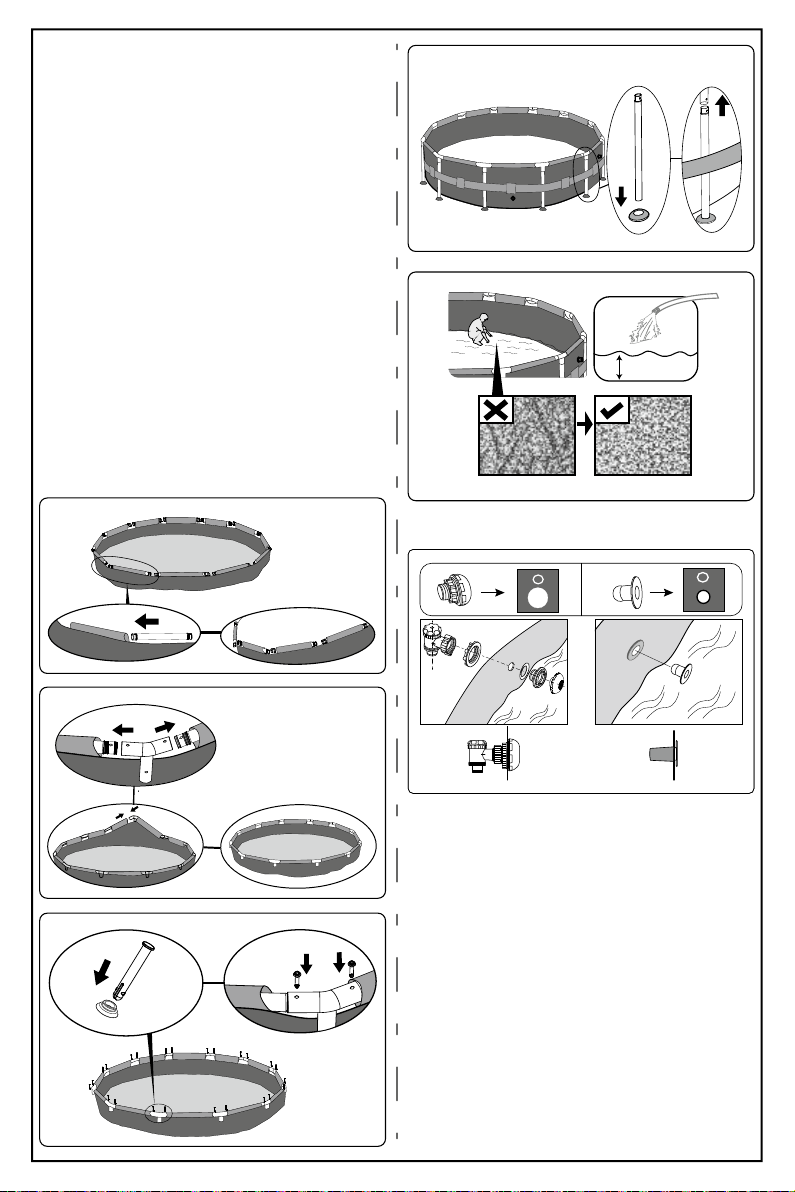
If you have a filter pump, refer to the pump’s manual for
instructions.
The ladder shall be located on a solid base and the ladder shall
be installed per the ladder’s instructions.
Publications are available that describe the risk of drowning,
entrapment, and diving accidents. Available publications related
to pool safety include the Association of Pool and Spa
Professionals’ (APSP) booklets entitled: The Sensible Way to
Enjoy Your Aboveground/Onground Swimming Pool, Children
Aren’t Waterproof, Pool and Spa Emergency Procedures for
Infants and Children, Layers of Protection, and the latest
published edition of ANSI/APSP-8 Model Barrier Code for
Residential Swimming Pools, Spas, and Hot Tubs.
For additional safety information, see www.APSP.org.
THIS PRODUCT IS COMPLIANT TO ANSI/ APSP 4 AMERICAN
NATIONAL STANDARD FOR ABOVEGROUND POOLS /
ONGROUND RESIDENTIAL SWIMMING POOLS &
INTERNATIONAL SWIMMING POOL & SPA CODE (ISPSC)
(Only for USA & only for pools with a water depth of more than
36in. (914mm))
Please read carefully and keep for future reference.
Assembly usually takes approximately 20-30 minutes with 2-3
people.
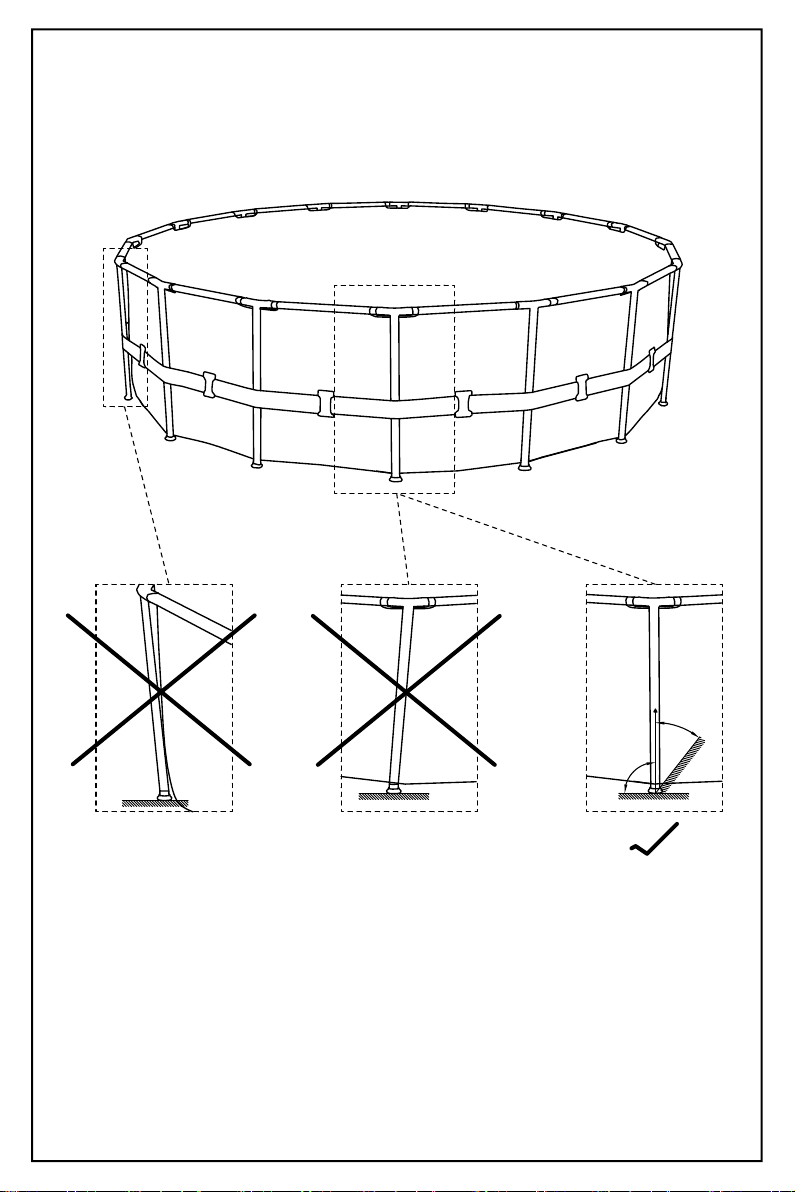
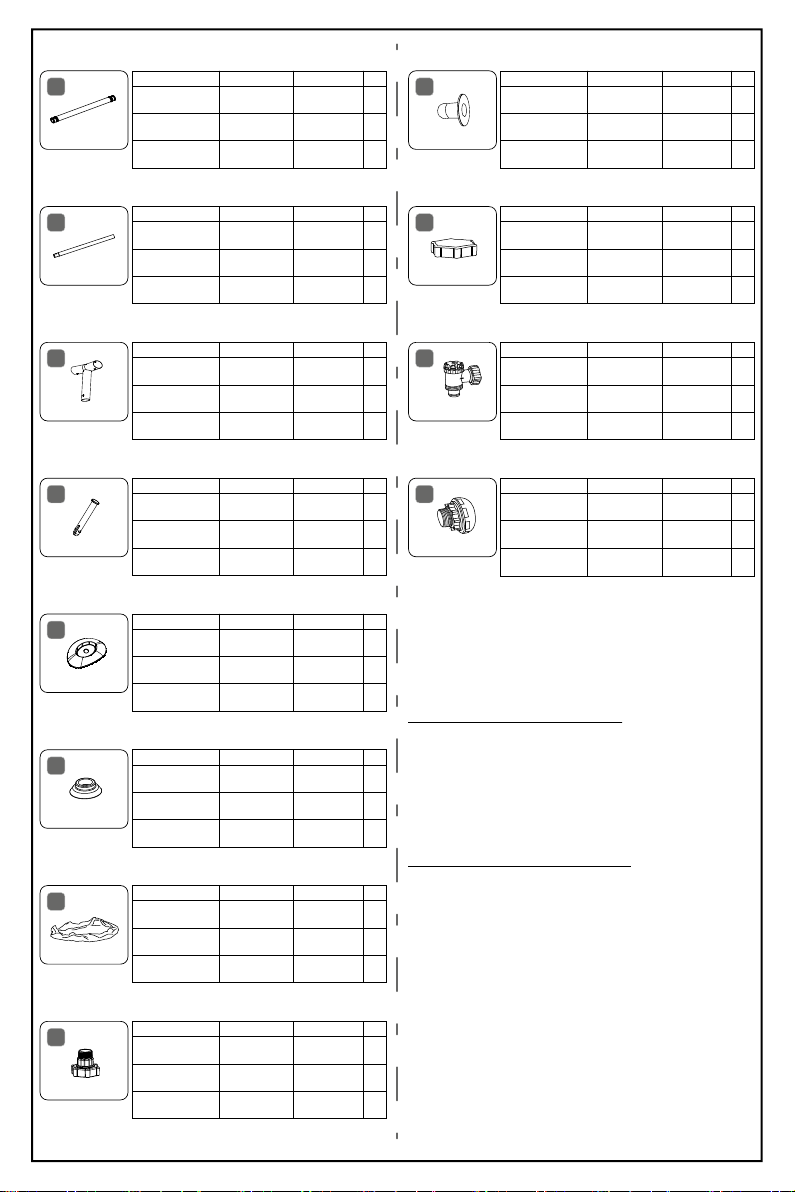
Part descriptions
NOTE: Some parts already have been installed on the
pool.
WARNING
PREVENT
DROWNING
Watch children at all times.
NO DIVING!
You can be permanently injured.
Shallow water.
WARNING