Page 1 of 2
Ladders Assembly Instructions 11/2/21
This document replaces original instructions
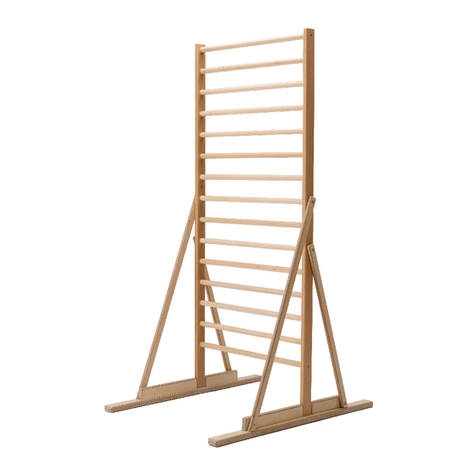
Vertical Ladder (optional)
Assemble the Vertical Ladder separately first.
◄ Due to the Rung edges being rounded, the
front of the Rung will extend out about 1/8”
beyond the edge of the leg.
We will provide you with a 1/8” drill bit for drilling pilot holes as needed.
Place a small bead of glue at the base and sides of each Vertical Ladder
Leg notch and spread it out evenly covering the entire notch. Insert the
2x4x18” rungs (rungs have 2 pilot holes at each end) into the notches.
If it is a tight fit, it can be sanded or use a rubber mallet or hammer to
gently push the rung to the bottom of the notch. If using a hammer,
hammer against a scrap piece of lumber so as to not dent the wood.
Please Note: The gluing step is required to be able to
make a sturdy ladder.
Make sure the rungs are square (90º degrees) to the legs and parallel to
each other. Use 2½” screws to fasten each rung to the legs. Drive the
screws nice and tight. While driving the screws, make sure there is no
gap between the rung and the base of the notch.
Suggestion. Put your knee tightly on the rung keeping constant pressure
on the leg. Slowly drive the screw half-way into the leg, then unscrew it
so it is just slightly comes out of the leg, then drive it all the way back
in. The screw should recess about 1/8” into the rung to make a nice tight
fit. Note, due to temperature and humidity differences the rungs may
have expanded and may need to be slightly sanded to fit.
Attach the assembled ladder to the bed, it may be attached to either the left or right end and tight to the edge of the bed
corner post leg. The picture here shows the ladder on the right end. Use 2½” screws in the pilot holes to fasten the
ladder leg to the bed leg. From behind the front rail or header, drill pilot holes above and below the 2x2 ledge to go into
the other vertical ladder leg. Use (2) 2½” screws to fasten each leg to the rail or header. For Bunk Beds fasten to the
bottom rail also.
Depending on your specific configuration, we may also provide you a 2x6 Safety Rail Brace (see above picture). It goes
from the bottom of the Front Rail or Header to the top of the Vertical Ladder Leg. Using the 1/8” drill bit, drill (3) pilot holes
above and below the 2x2 ledge to line up with the brace. Attach the brace to the with 2-1/2” screws. Also attach the
ladder leg to the brace with 2-1/2” screws going into the edge of the brace.
Vertical Front Ladder Parts List
(2) Front Ladder Legs 1-1/2” thick x 4” wide Ladder Rungs 18" long
The glue will take about 2 hours to dry. It is important that it completely dries to give you a
very sturdy ladder.
Do not use the loft or put any pressure on the ladder rungs while the glue is drying.

