V2
t+44 (0) 1604 495 151 I f+44 (0) 1604 495 095 I esales@collingwoodgroup.com I wcollingwoodlighting.com
Collingwood Lighting, Brooklands House, Sywell Aerodrome, Sywell, Northampton NN6 0BT, United Kingdom
t+33 (0) 4 816 816 10 I f+33 (0) 4 816 816 11 I eventes@collingwoodgroup.com I wcollingwoodlighting.com
Collingwood Lighting, 43-47 Avenue de la Grande Armée, 75116, Paris, France
en
fr
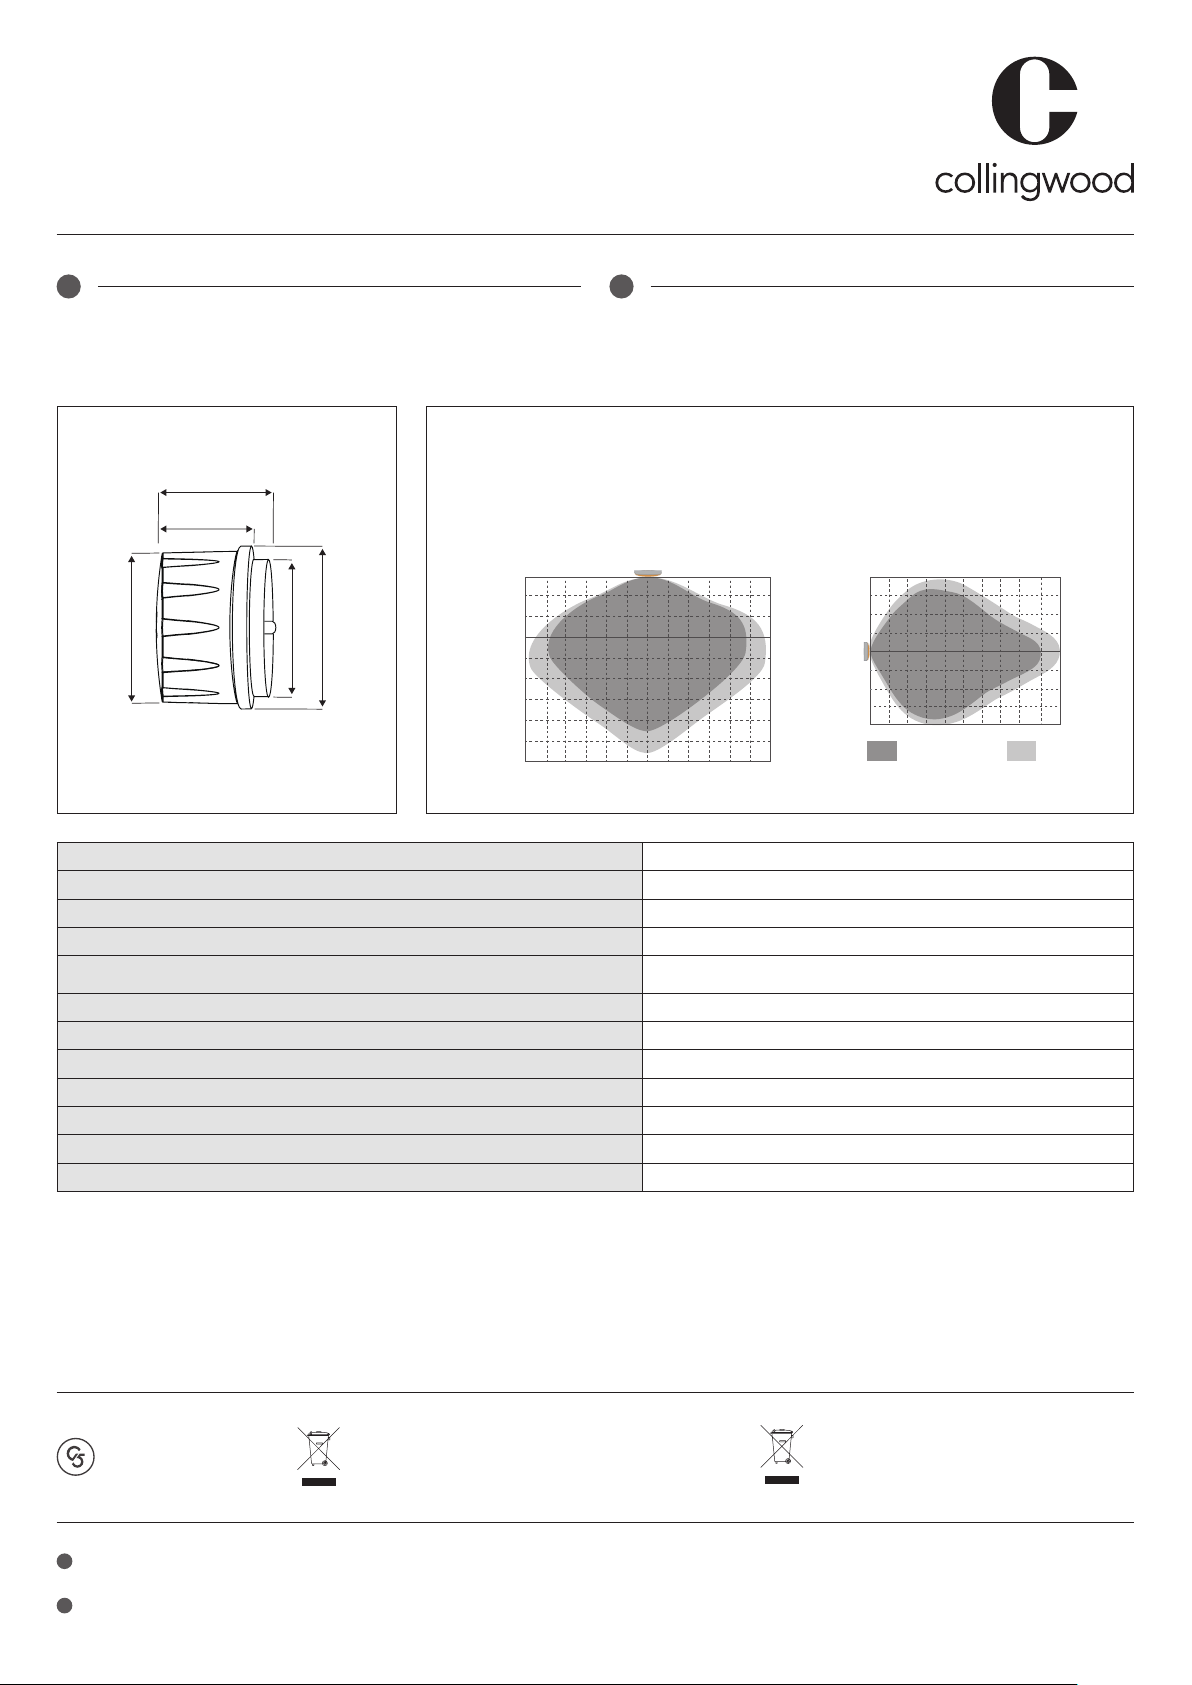
Rack Bay | Area Bay Sensors
Rayonnage | Zone d’entrepôt - Détecteurs
Installation instructions I Consignes d’installation
This instruction leaflet covers the centrally mounted sensors, which are designed to be used
with Collingwood Area Bay and Rack Bay luminaires. For installation of these products, please
refer to the Rack Bay / Area Bay instruction leaflets supplied with the luminaires.
For guidance on sensor settings, please refer to the separate ‘HBREM’ remote control
instructions.
Sensor variants:
• PIR sensor (HBPIR)
• Microwave sensor (HBMWS)
• Daylight sensor (HBDLS)
Installation
1. Begin installing the Area Bay / Rack Bay luminaire as per the instructions supplied with
these products.
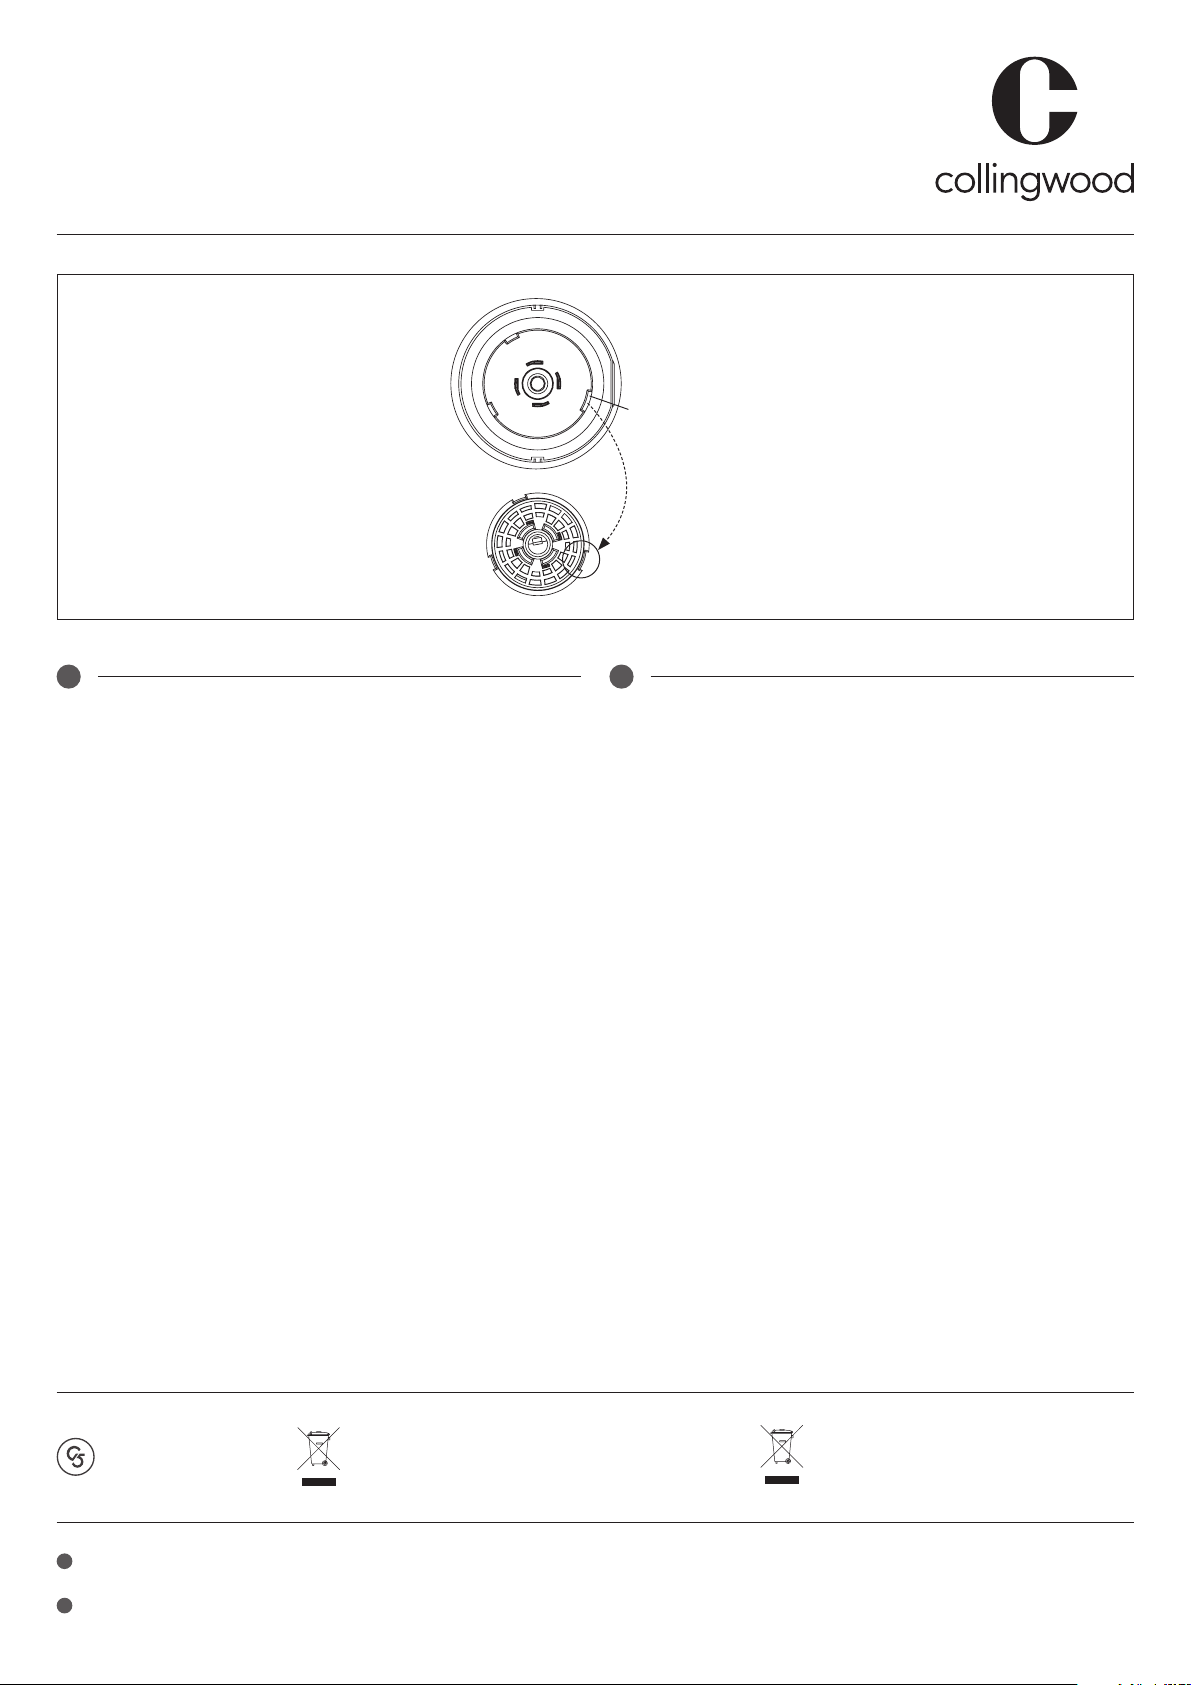
2. To install the sensor, remove the central front cover on the luminaire by rotating
anti clockwise and pulling away. Align the larger locking tooth with the corresponding slot
on the product (fig. 1).
3. Push the sensor towards the luminaire and rotate clockwise to lock into position.
Cette notice d’utilisation concerne les détecteurs à montage central, conçus pour être utilisés
avec les luminaires de rayonnage / zone d’entrepôt Collingwood. Veuillez vous reporter aux
notices d’utilisation fournies pour l’installation de ces luminaires.
Pour des conseils sur le réglage du détecteur, veuillez vous référer aux instructions séparées
de la commande à distance “HBREM”.
Variantes de détecteur :
• Détecteur PIR (HBPIR)
• Détecteur hyperfréquence (HBMWS)
• Détecteur de lumière du jour (HBDLS)
Installation
1. Commencez à installer le luminaire de rayonnage / zone d’entrepôt conformément aux
instructions fournies avec ces produits.
2. Pour installer le détecteur, enlevez le couvercle central avant sur le luminaire en le
tournant dans le sens inverse des aiguilles d’une montre et en tirant. Alignez la plus
grande dent de verrouillage avec l’encoche correspondante sur le produit (fig. 1).
3. Poussez le détecteur vers le luminaire et tournez dans le sens des aiguilles d’une montre
pour le verrouiller en position.
5 year warranty
5 ans de garantie
en fr
Fig 1.
Large locking tooth
on sensor /
Grande dent de
verrouillage sur le
détecteur
Disposal of this product should be separate from household waste.
Please separate these items from other types of waste and recycle
them responsibly to promote the sustainable reuse of material
resource. Household users should contact their local government
office for details of where and how they can take these items for
environmentally safe recycling.
Ce produit ne doit pas être éliminé avec les ordures ménagères.
Merci de le séparer des autres déchets et de le recycler de manière
responsable afin de promouvoir la réutilisation des ressources
matérielles. Les consommateurs doivent contacter leurs autorités
locales pour plus d’information quant aux lieux et méthodes de
recyclage en accord avec la protection de l’environnement.