COLORRGB SMD 5050 User manual

Brighter your home ,Brighter your life
User manual
ForLEDStripLightsCustomer support:
1. All our product with 18month warranty.
2.If you are caught in some problems when using our products,feel free to contact us at any time

1
Thank you for choose colorRGB led light strip, for proper installation and use-age of the
product,please read this user Manuel carefully
Download APP“Happylighting-Life With Smart”For More Information

2
Specification:
LED Type: SMD 5050(Has white light )
LED Quantity: 300 leds (30 leds/m)
Working Input Voltage: DC12V
Working Temperature: -20 ° ~ 60 °
Beam angle: 120°
Lifespan: over 50 000 hrs
Power: 0.2w/led; 60w/300 leds
Color temperature:6000K
Package include:
LED Strip Lights 44key IR Remote Controller
IR Receiver Power Supply
LED Strip Hooks User manual
WithBack-adhesive
INSTALLATION

3
INSTALLATION STEPS
NOTES:Please make sure the surface smooth,dry and clean.
DON NOT stick the led strip on the rough surface ,such as
knitted/wool fabrics,dust wall,rough plastic surface,frosted glass.
STEP 1:Clean and dry the installation surface.
Please be careful not to tear off the adhesive tape
STEP2:Tear off the plastic on the adhesive tape and stick the strip to the clean installation surface
STEP3: Stick the LED strip and press with force, and then press the whole LED strip repeatedly.
NOTES:You can also buy led strip hooks and screws to fix the led strip
if you want to apply the strip to uneven walls or ceilings where the
tapes often fails to work
STEP4: Installation finished. Use the IR remote to turn on and operate the lights
Please pull out the transparent chip from the bottom of
the IR remote to ensure that the battery is powered properly
Make sure the IR remote aims at he IR receiver within the
sensing distance. The angle of the IR receiver is 120"and
the sensing distance is 25ft.Please remotely control within
the sensing range
Warmly Note Before Use

4
Do not connect to the power supply before installation
Please spread out the light strip before connecting the power supply
IR REMOTE INSTUCTION
44-key Bluetooth Remote
①Power On/Off
②Pause/Resumption Button
③Decrease Brightness
④20 Color Options
⑤DY Function
⑥Jump Change 3 Colors
⑦Gradual change 7 colors
⑧Speed Up To Color Changing
⑨Slow Down Color Changing
⑩Auto-change Colors and Models
⑪Flash On and Off
⑫Gradual change 7 Colors
⑬Gradual Change 3 Colors

5
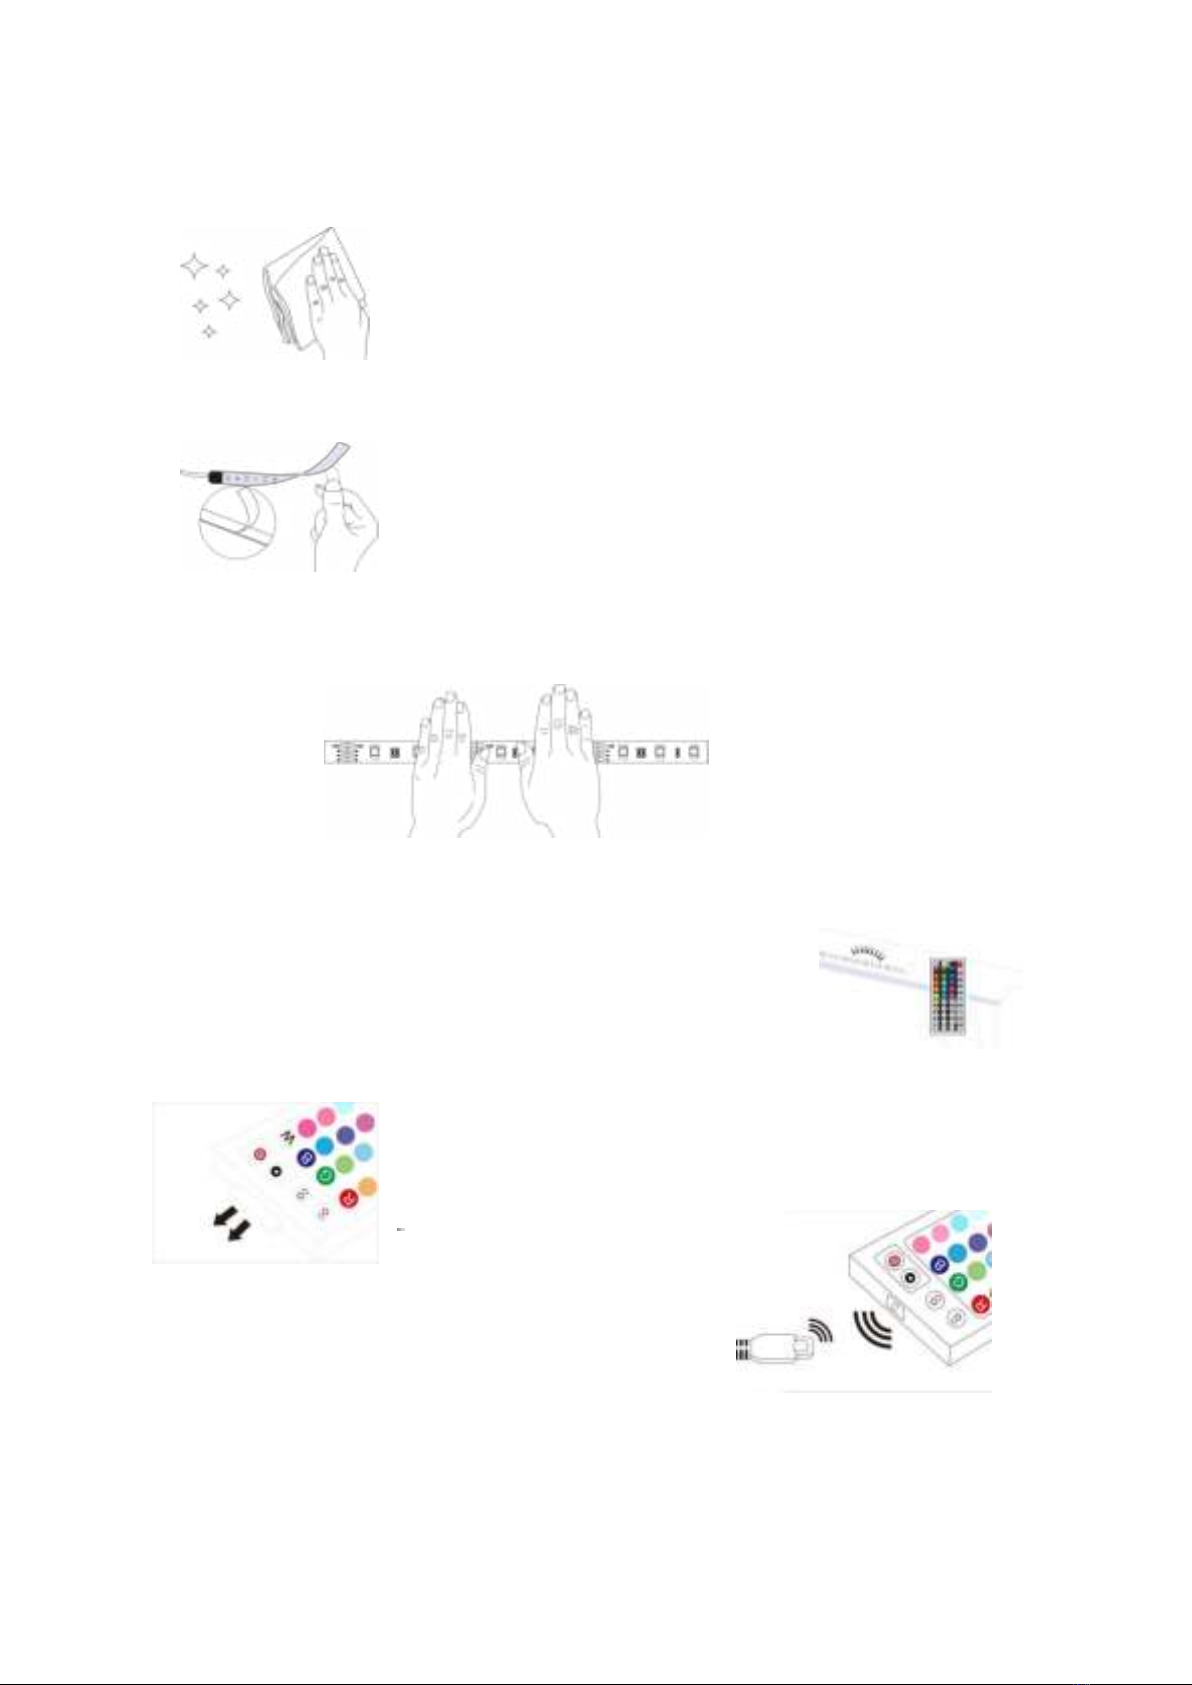
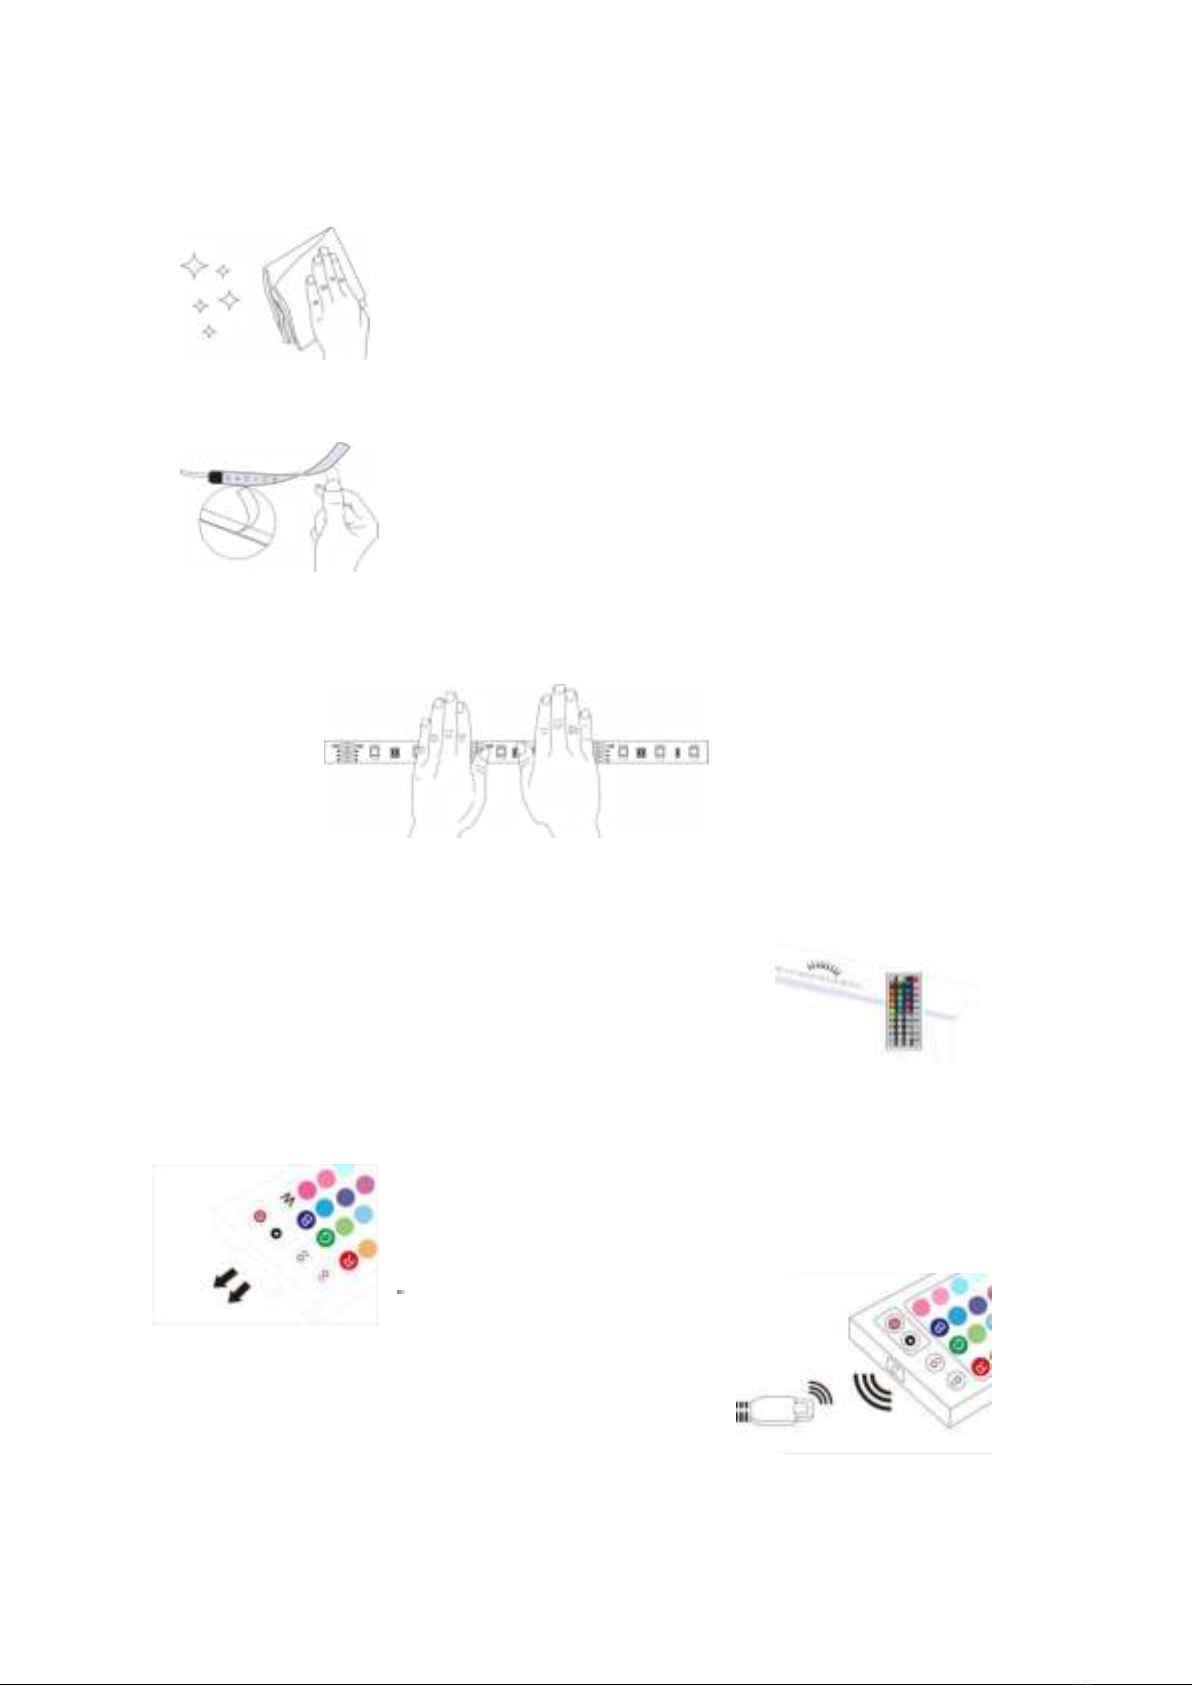
How to use DIY function of remote controller?
DIY Colors: When you press a DIY button, the led light strip will be white color.since white is made
up of red ,blue and green,you can use the "↑" "↓ "to adjust the brightness of red, green, blue to
get other colors
For example , if you want to get the pink color through DIY,press a DIY button,like DIY 1 button,the
color of led light strip will be white at first,then you need to keep pressing "↓ "green button , the
white led light strip will gradually turn to pink color.
if you want to storage the pink color,press the DIY 1 button again, it will show the pink color the
next time you pressed the DIY 1 button.other DIY buttons have the same functions too
About DIY keys: There are 6 DIY keys , 6 colors you preferred can be saved at the same time ,they
all independent, have no affection on each other
Application:
Widely used for decorating your Dining room, Bed room, Upstairs, Kitchen, Porch, Computer desk,
and Living rooms, especially great for Holidays and Events like Christmas

Освети свой дом, освети свою жизнь
Руководство
Для светодиодных лент
Служба поддержки:
1. Весь наш продукт с гарантией 18 месяцев.
2.Если вы столкнулись с некоторыми проблемами при использовании наших продуктов, обратитесь к нам
в любое время

1
Благодарим Вас за выбор цветной светодиодной ленты, чтобы правильно установить и использовать
продукт, внимательно прочитайте руководство.
Скачать приложение «Happylighting-Life With Smart» для получения дополнительной
информации

2
Спецификация:
Тип светодиода: SMD 5050 (имеет белый свет)
Количество светодиодов: 300 светодиодов (30 светодиодов / м)
Рабочее входное напряжение: DC12V
Рабочая температура: -20 °С ~ 60 °С
Угол луча: 120 °
Продолжительность жизни: более 50 000 часов
Мощность: 0,2 w / светодиод; 60 w / 300 светодиодов
Температура цвета: 6000 К
Включает в себя:
Светодиодные ленты IR-пульт дистанционного управления 44 кнопки
IR приемник Зарядник
Крючки для светодиодных лент Руководство
С обратным клеем
УСТАНОВКА

3
ШАГИ УСТАНОВКИ
ПРИМЕЧАНИЯ: убедитесь, что поверхность гладкая, сухая и чистая. НЕ
наклеивайте светодиодную ленту на шероховатую поверхность, такую как
трикотажные / шерстяные ткани, пыльная стена, шероховатая пластиковая
поверхность, матовое стекло.
ШАГ 1: Очистите и высушите поверхность установки.
Будьте осторожны, чтобы не оторвать клейкую ленту
ШАГ 2: оторвите пластик от клейкой ленты и приклейте полоску к чистой установочной поверхности
ШАГ 3. Заклейте светодиодную ленту и нажмите с усилием, а затем повторно нажмите всю светодиодную
ленту.
ПРИМЕЧАНИЯ: вы также можете купить крючки и винты
для крепления светодиодной ленты, если вы хотите применить ленту
к неровным стенам или
потолкам.
ШАГ 4: Установка завершена. Используйте IR-пульт для включения и управления огнями
Вытяните прозрачный чип со дна IR-пульт дистанционного управления для
обеспечения правильного питания батареи
Убедитесь, что IR-пульт направлен на IR-приемник в пределах
расстояния считывания. Угол IR-приемника составляет 120 о,
а расстояние считывания составляет 25 футов.
Дистанционно управляйте в пределах диапазона считывания

4
Советы перед использованием
Не подключайте к источнику питания перед установкой
Разложите ленту перед подключением блока питания
ИНСТРУКЦИЯ Инфракрасного дистанционного управления
Bluetooth-пульт с 44 кнопками
①Включение / выключение
②Кнопка Пауза / Возобновление
③Уменьшить яркость
④20 вариантов цвета
⑤Функция DY
⑥Прыгучий Изменить 3 цвета
⑦Постепенное изменение 7 цветов
⑧Ускорить изменение цвета
⑨Замедлить изменение цвета
⑩Авто-изменить цвета и модели
⑪Вкл. и выкл.Вспышки
⑫Постепенное изменение 7 цветов
⑬Постепенное изменение 3 цвета

5
Как использовать функцию DIY пульта дистанционного
управления?
Цвета DIY: когда вы нажмете кнопку «DIY», светодиодная лента будет белого цвета. Так как белый
состоит из красного, синего и зеленого, вы можете использовать «↑» «↓» для регулировки яркости
красного, зеленого, синий, чтобы получить другие цвета
Например, если вы хотите получить розовый цвет с помощью DIY, нажмите кнопку «DIY», например
кнопку «DIY 1», цвет светодиода сначала будет белым, затем вам нужно нажимать зеленую кнопку «↓»,
белый цвет постепенно станет розового цвета.
Если вы хотите сохранить розовый цвет, снова нажмите кнопку «DIY 1», он будет отображать розовый
цвет при следующем нажатии кнопки «DIY 1». Другие кнопки «DIY» также имеют те же функции
О кнопках DIY: есть 6 кнопки DIY, 6 цветов, вы можете сохраненить 6 цветов одновременно, все они
независимы, не влияют друг на друга
Применение:
Широко используется для украшения вашей столовой, спальни, гостиной, кухни, веранды, компьютерного
стола и гостиных, особенно подходит для праздников и событий, таких как Рождество

Más brillante su hogar, Más brillante su vida
Manual de Usuario
Para Tiras de Luces LED
Atención al cliente:
1. Todo nuestro producto tienen 18 meses de garantía.
2. Si tiene algún problema al utilizar nuestros productos, no dude en contactarnos en cualquier momento

1
Gracias por elegir la tira de luz LED de color RGB, para una instalación y uso adecuados del producto, lea este
Manual de usuario detenidamente.
Descargue la APP "Happylighting-Life With Smart" para obtener más información

2
Especificación:
Tipo de LED: SMD 5050 (tiene luz blanca)
Cantidad de LED: 300 leds (30 leds/m)
Voltaje de entrada de trabajo: DC12V
Temperatura de trabajo: -20° ~ 60°
Ángulo de haz: 120 °
Vida útil: más de 50 000 horas
Potencia: 0,2w/led; 60w/300 leds
Temperatura de color: 6000K
El paquete incluye:
Tiras de luces LED Control remoto IR de 44 teclas
Receptor IR Fuente de alimentación
Ganchos de Tira de LED Manual de usuario
Con adhesivo de espalda
INSTALACIÓN
PASOS DE INSTALACIÓN

3
NOTAS: Asegúrese de que la superficie sea lisa, seca y limpia.
NO pegue la tira de led en la superficie rugosa, como
tejidos de punto/lana, pared de polvo, superficie de plástico rugosa, vidrio esmerilado.
PASO 1: Limpie y seque la superficie de instalación.
Tenga cuidado de no rasgar la cinta adhesiva.
PASO 2: rasgue el plástico de la cinta adhesiva y pegue la tira a la superficie de instalación limpia
PASO 3: pegue la tira de LED y presione con fuerza, y luego presione la tira de LED completa repetidamente.
NOTAS: También puede comprar ganchos y tornillos para tiras de led para fijar la
tira de led si desea aplicar la tira a paredes o techos irregulares donde las cintas a
menudo no funcionan
PASO 4: Instalación finalizada. Use el control remoto IR para encender y operar las luces
Extraiga el chip transparente de la parte
inferior del control remoto IR para
asegurarse de que la batería esté alimentada
correctamente
Asegúrese de que el control remoto IR apunte al receptor IR dentro de la distancia de detección. El ángulo del
receptor IR es de 120"y la distancia de detección es de 25 pies. Controle de forma remota dentro del rango de
detección
Tenga en cuenta antes de usar
No lo conecte a la fuente de alimentación antes de la instalación

4
Extienda la tira de luz antes de conectar la fuente de alimentación
INSTRUCCIONES DE CONTROL REMOTO IR
Control remoto Bluetooth de 44 teclas
①Encendido/Apagado
②Botón de pausa / reanudación
③Disminuir el brillo
④20 Opciones de color
⑤Función DY
⑥Cambio de 3 colores
⑦Cambio gradual de 7 colores
⑧Velocidad a cambio de color
⑨Cambio de color lento
⑩Cambio automático de colores y modelos
⑪Flash encendido y apagado
⑫Cambio gradual de 7 colores
⑬Cambio gradual de 3 colores
¿Cómo usar la función DIY del control remoto?
Colores DIY: cuando presiona un botón DIY, la tira de luz LED será de color blanco. Dado que el blanco está
compuesto de rojo, azul y verde, puede usar el "↑" "↓" para ajustar el brillo del rojo, verde, azul para obtener otros
colores
Por ejemplo, si desea obtener el color rosa a través de DIY, presione un botón DIY, como el botón DIY 1, el color
de la tira de luz led será blanco al principio, luego debe seguir presionando el botón verde "↓", el blanco la tira de
luz led se convertirá gradualmente en color rosa

5
Si desea almacenar el color rosa, presione el botón DIY 1 nuevamente, se mostrará el color rosa la próxima vez
que presione el botón DIY 1. Otros botones DIY también tienen las mismas funciones
Acerca de las teclas DIY: hay 6 teclas DIY, 6 colores que prefieres se pueden guardar al mismo tiempo, todos son
independientes, no tiene afecto el uno al otro
Aplicación:
Ampliamente utilizado para decorar su comedor, dormitorio, piso de arriba, cocina, porche, escritorio de
computadora y salas de estar, especialmente ideal para vacaciones y eventos como Navidad

Plus lumineuse votre maison, plus claire votre vie
Manuel d’Instructions
Pour Bandes Lumineuses LED
Service clientèle:
1. Tous nos produits profitent d’une garantie de 18 mois.
2. Si vous avez des problèmes au cours de l'utilisation de nos produits, n'hésitez pas à nous contacter à tout
moment.
Merci d'avoir choisi les bandes lumineuses colorées RGB LED. Pour installer et utiliser ce produit correctement,
veuillez lire soigneusement ce manuel d'instructions.

1
Veuillez télécharger l’APP "Happylighting-Life With Smart" pour en savoir plus.
Fabriqué en Chine
Table of contents
Languages:
Popular Lighting Equipment manuals by other brands

Nicols
Nicols TWIN LASER GB user guide

Larson Electronics
Larson Electronics WAL-TL-2X12W-C-SP instruction manual

Nicols
Nicols X-RAY LASER user manual

Glamcor
Glamcor REVOLUTION X quick start guide

Altman
Altman Spectra-Strip Series Installation and instruction manual

LED Group
LED Group ROBUS R3011LED240CW-13 quick start guide