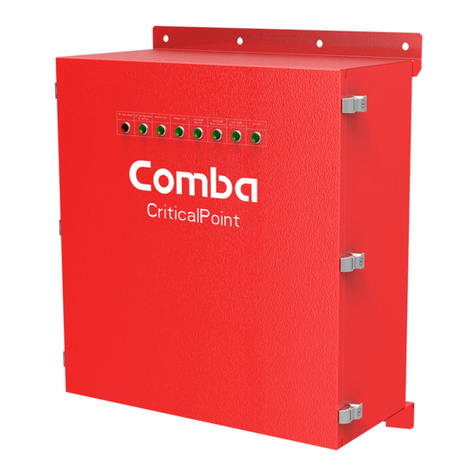
COMBA CriticalPoint BBU V1 User manual

©20
2
1
Comba Telecom. All Rights
Reserved
.
568 Gibraltar Drive, Milpitas, CA 95035 | +1 408 526 0180 Ext 3 | www.combausa.com
1
Version 1.0.4
1.16.23
Annunciator Panel
Quick Installation Guide
Version 1.0.4
BBU Software Firmware Requirements:
BBU V1 (CPBBUV1-48055-UL): V8B01 or newer
(Newest Firmware Rev: V8E01)
BBU V2 (CPBBUV2-48100-UL): V8101 or newer
(Newest Firmware Rev: V8501)
See BBU Manual for updating BBU Firmware

©20
2
1
Comba Telecom. All Rights
Reserved
.
568 Gibraltar Drive, Milpitas, CA 95035 | +1 408 526 0180 Ext 3 | www.combausa.com
2
Version 1.0.4
1.16.23
Contents
Cabling ..................................................................................................................................................................................... 3
Alarms and Dry Contact Output .......................................................................................................................................... 6
Software Configurations ......................................................................................................................................................... 7
Alarm Setting....................................................................................................................................................................... 8
Troubleshooting ...................................................................................................................................................................... 9
BBU Measurements ............................................................................................................................................................ 9
Annunciator Panel Measurements ................................................................................................................................... 10
Revision History .................................................................................................................................................................... 11

©20
2
1
Comba Telecom. All Rights
Reserved
.
568 Gibraltar Drive, Milpitas, CA 95035 | +1 408 526 0180 Ext 3 | www.combausa.com
3
Version 1.0.4
1.16.23
Cabling
The Comba’s CriticalPoint Annunciator Panel is powered and controlled by the Comba V1 or V2 Battery
Backup Unit. A three-wire communication cable is required between the Comba BBU and the
annunciator panel.
1. Switch off the AC/DC power supply in the BBU and the power switch in annunciator panel before
performing any cabling.
2. Communication Cable
Connect the communication pigtail cable, located in the annunciator panel accessories kit, to the BBU V1
MCU/control board. The 3-pin header is located at the bottom of the MCU/control board and to the far
right, see picture below (NOTE: The annunciator panel pigtail is not required for the V2 BBU MCU/control
board since it incorporates a three slot phoenix connector). Extend the three-wire pigtail cable to the
annunciator panel (extension provided by the system integrator). Note: Max distance using 24-gauge
wire is 2000 feet. Max distance using 18-gauge wire is 4000 feet.
From Annunciator
Panel Accessories
BBU V1 MCU Bottom Side
to Annunciator Panel
BBU V2 MCU Bottom
Side

©20
2
1
Comba Telecom. All Rights
Reserved
.
568 Gibraltar Drive, Milpitas, CA 95035 | +1 408 526 0180 Ext 3 | www.combausa.com
4
Version 1.0.4
1.16.23
At the annunciator panel, connect the communication cable extension as shown below. Be sure to note RED (A),
BLUE (B) and BLACK (GND) when configuring the pigtail/extension to the phoenix connector located in the
annunciator panel.
3. Power Cable
For BBU V1, the power will be provided from one of three LOAD outputs. Choose an open load output
and connect the power cable to the + and – ports. The same communications extension cable can be
used for power (for example, CAT5 cable, with 3 wires for communication and 2 for power).
For the BBU V2, power can be sourced from the MCU/control board 12VDC, 24VDC or Load Terminals
to Annunciator Panel
BLACK (GND)
RED (A)
BLUE (B)
From BBU
Annunciator Panel

©20
2
1
Comba Telecom. All Rights
Reserved
.
568 Gibraltar Drive, Milpitas, CA 95035 | +1 408 526 0180 Ext 3 | www.combausa.com
5
Version 1.0.4
1.16.23
At the annunciator panel:
Power Connections from BBU V1
BBU V1
Connection
Annunciator
Panel
Connection
Load + V_IN+
Load
-
V_IN
-
Power Connections from BBU V2
BBU V2
Connection(s)
Annunciator
Panel
Connection
+12VDC, +
24V
DC
or Load + V_IN+
0V or Load - V_IN-
4. Power on the BBU and switch on power at annunciator panel
From BBU

©20
2
1
Comba Telecom. All Rights
Reserved
.
568 Gibraltar Drive, Milpitas, CA 95035 | +1 408 526 0180 Ext 3 | www.combausa.com
6
Version 1.0.4
1.16.23
Alarms and Dry Contact Output
The annunciator panel dry contact alarms and visual annunciation will always be synchronized to the
Battery Backup Unit. The alarm configuration is done in BBU. (Refer to Battery Backup Unit user manual)
There is an audio buzzer equipped on the annunciator panel.
Silencing the audio
ON – Silence the audio.
The annunciator panel audio will be un-silenced every 24 hours. If you have a persistent alarm, silencing
will keep this quite for 24 hours. After 24 hours, to silence again, slide to the “OFF” position and back to
“ON”.
OFF – Audio is not silenced.
Dry Contact Output
The annunciator panel supports a duplicate set of dry contact outputs for numbers 1 through 7 – these
are identical to the BBU dry contact outputs. An additional dry contact output (No.8) can be configured
as well – typically, this would be used to monitor the annunciator panel or cable integrity between the
BBU and the annunciator panel (as a communication fault alarm). This can also be set to trigger on an
over temperature alarm. This is software configurable via the BBU GUI.
DC 1
DC 2
DC 3
DC 4
DC 5
DC 6
DC 7
DC 8

©20
2
1
Comba Telecom. All Rights
Reserved
.
568 Gibraltar Drive, Milpitas, CA 95035 | +1 408 526 0180 Ext 3 | www.combausa.com
7
Version 1.0.4
1.16.23
Software Configurations
Log into the Battery Backup Unit (follow the BBU QIG for instructions) and activate the BBU to AP
communications. This is done in the “Settings” tab, “Panel NO.”, “Config Value” select “1”, then click on
“Modify”/ “Refresh” and verify “1” is now showing as “Current Value”. If two annunciator panels are
being used in parallel, repeat the process, and select “2”, see NOTE below.
NOTE: The RS-485 A/B/GND communications circuit MUST be wired in parallel when using two
annunciator panels. A DIP switch, located on the annunciator panel circuit board under the silence
switch, is used to determine the annunciator panel configuration. The annunciator panel is factory
defaulted as a primary unit (OFF+OFF) and must be manually configured as (OFF+ON) when used in
parallel as a secondary unit, see DIP switch example below.

©20
2
1
Comba Telecom. All Rights
Reserved
.
568 Gibraltar Drive, Milpitas, CA 95035 | +1 408 526 0180 Ext 3 | www.combausa.com
8
Version 1.0.4
1.16.23
On the “Panel” Page:
Dev Info: This shows the device information, including device temperature, firmware version and the
serial number. If using a second annunciator panel, click on the “Panel 2” tab and verify the information
is populated.
Alarm Setting
The alarm indications on the annunciator panel(s) will always be synchronized with the Battery Backup
Unit. Users cannot change the first 7 dry contact alarms.
There are two other alarms “Comm Fault” and “Over TEMP”. They can be enabled or disabled and can be
configured to trigger “Dry Contact Alarm 8” from annunciator panel(s)
Note: Many jurisdictions require that you monitor the integrity of the circuit for the dry contact alarms.
“Comm. Fault ALM” will fulfill this requirement.
Firmware: Upgrade the firmware, if necessary. If using two annunciator panels, be sure to update both
of them.
To upgrade firmware: Click on “Add File”, select the new firmware file from your file explorer, then click
on “Upgrade”. The device should upgrade then reboot.

©20
2
1
Comba Telecom. All Rights
Reserved
.
568 Gibraltar Drive, Milpitas, CA 95035 | +1 408 526 0180 Ext 3 | www.combausa.com
9
Version 1.0.4
1.16.23
Troubleshooting
If annunciator does not power on or does not appear in BBU GUI after wiring has been confirmed, use a multimeter to
check the following pins for resistance and voltage according to the below instructions.
BBU Control Board Measurements (note BBU version when testing)
1. Turn on the BBU
2. Measure voltage from 1->3 and 2->3
1 to 3 ~ 1.65 VDC
2 to 3 ~ 1.65 VDC
1. Turn off the BBU
2. Unplug the three-wire jumper (V1 BBU) or disconnect the three data wire (V2 BBU) on the BBU control board
that feeds the annunciator panel
3. Measure the resistance from 1->3, 2->3, and 1->2
BBU V1
BBU V2
1 to 3 ~ 450 Ohms
1 to 3 ~ 2.2k Ohms
2 to 3 ~ 450 Ohms
2 to 3 ~ 2.2k Ohms
1 to 2 ~ 50 Ohms
1 to 2 ~ 130 Ohms
BBU V1
BBU V2

©20
2
1
Comba Telecom. All Rights
Reserved
.
568 Gibraltar Drive, Milpitas, CA 95035 | +1 408 526 0180 Ext 3 | www.combausa.com
10
Version 1.0.4
1.16.23
Annunciator Panel Measurements
1. Turn ON the annunciator panel
2. Measure voltages across 1->3 and 2->3
Voltage should be around 1.65V +- 0.05V
1 to 3 ~ 1.65 VDC
2 to 3 ~ 1.65 VDC
1. Turn off power to the annunciator panel.
2. Disconnect the three data cables at the annunciator panel control board
3. Measure the resistance from 1->3, 2->3, and 1->2
1 to 3 ~ 2.2k Ohms
2 to 3 ~ 2.2k Ohms
1 to 2 ~ 130 Ohms
Annunciator Panel Control Board

©20
2
1
Comba Telecom. All Rights
Reserved
.
568 Gibraltar Drive, Milpitas, CA 95035 | +1 408 526 0180 Ext 3 | www.combausa.com
11
Version 1.0.4
1.16.23
Revision History
Version
Date
Comments
1.0.0
1/18/21
Document Creation
1.0.1
6/13/22
Updated for firmware change to BBU & AP
1.0.2
6/28/22
Updated with R232 troubleshooting
1.0.3
1/
13
/23
Updated
for
dual
annunciator panel
operation
and
Comba Support contact information
1.
0
.
4
1/16/23
Updated RS232 troubleshooting
guide
to include BBU V2
control board
connection
Other manuals for CriticalPoint BBU V1
1
This manual suits for next models
3
Table of contents
Other COMBA Conference System manuals
Popular Conference System manuals by other brands

Avaya
Avaya Virtual Services Platform 9000 installation manual

Viessmann
Viessmann VITOCONNECT 100 Installation and service instructions

PEIKER CEE
PEIKER CEE CEE COACH manual

Shure
Shure DCS 6000 user manual

Avaya
Avaya Scopia XT Executive 240 Quick setup guide

Hubbell
Hubbell GAI-TRONICS ICS/SP2 Page/Party manual