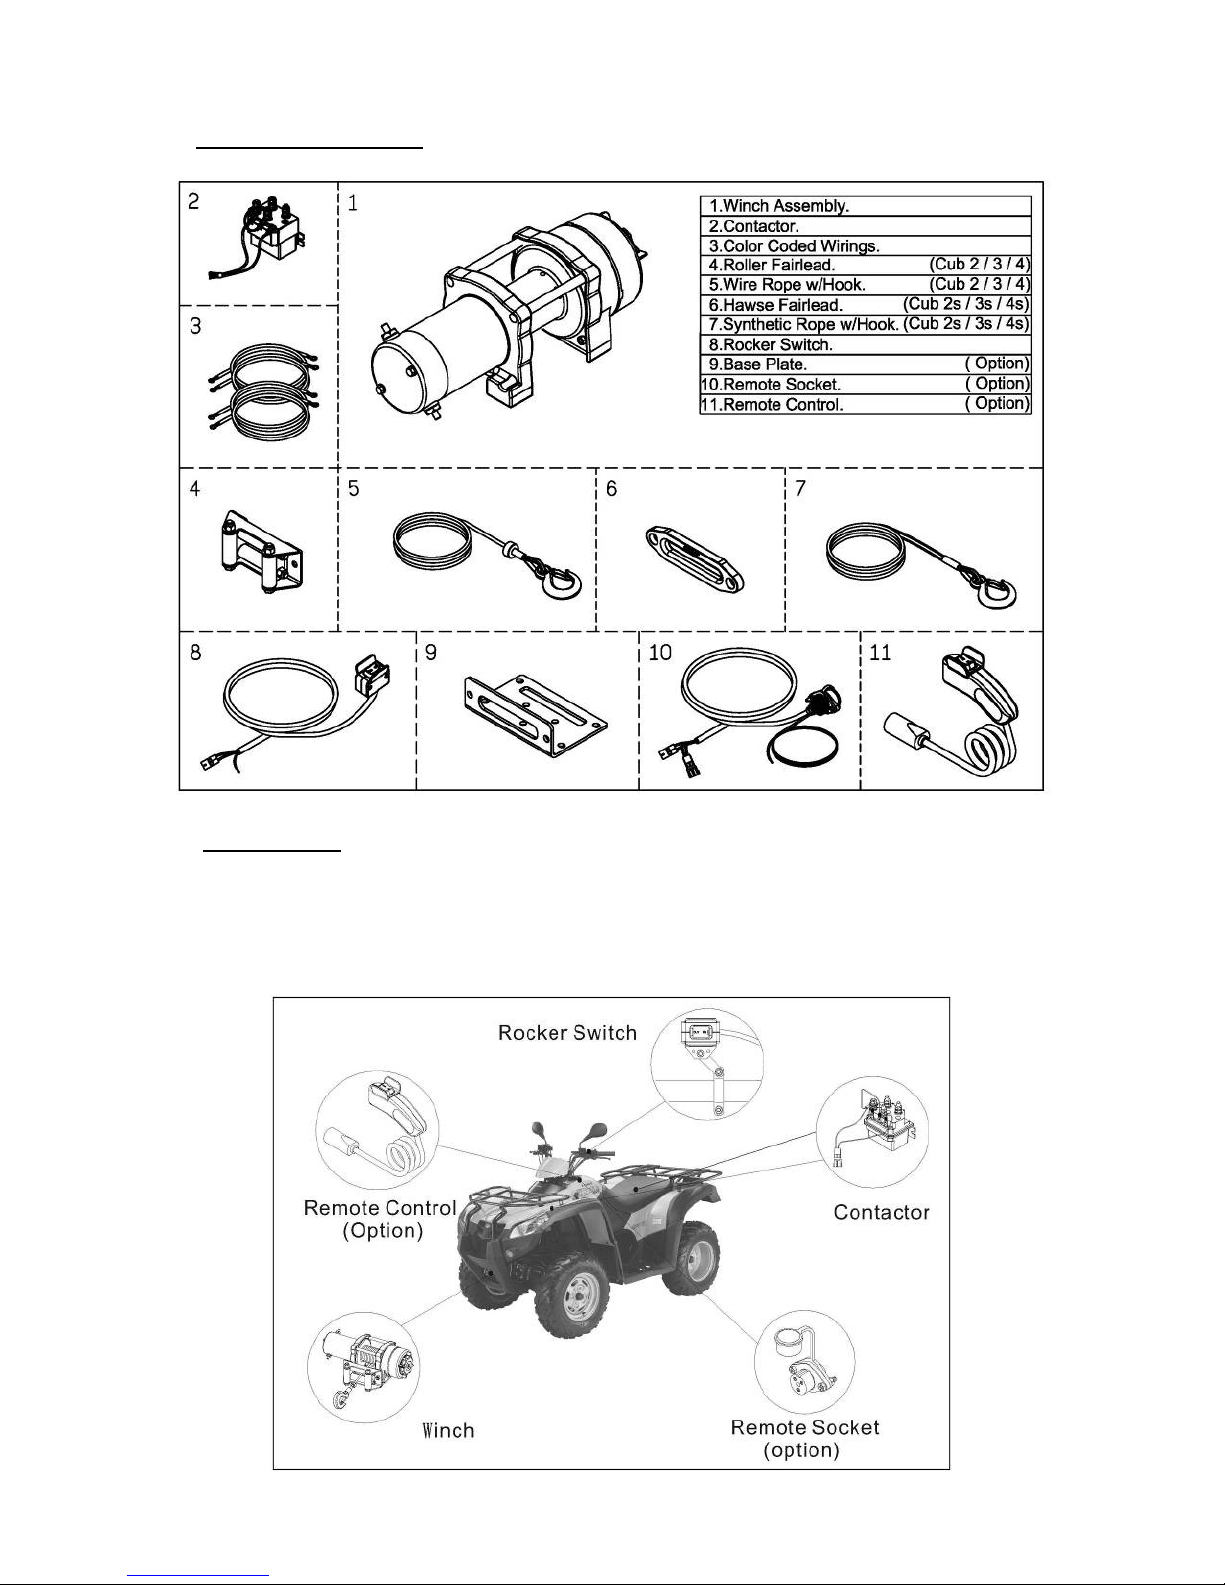
Comeup CUB 2 User manual

1

2
Powersports Winch
Thank you for purchasing a Winch. This manual covers operation and maintenance of
the winch. All information in this publication is based on the latest production information available at
the time of printing. We reserve the right to make changes without notice because of continued product
improvement.
It has been designed to give safe and dependable service if operated according to the instructions.
Read and understand this manual before installation and operation of winch. Careless winch operation
can result in serious injury or property damage.
When requesting information or ordering replacement parts, always give the following information:
1. Winch model
2. Serial Number
3. Item. No. and Part Number
4. Part Description
1. The winch is rated for intermittent-periodic duty.
2. The winch is not to be used to lift, support or otherwise transport personnel.
3. A minimum of five (5 wraps of rope or of ten (10 wraps of synthetic rope around the drum is
necessary to support the rated load.
4. The rated line pull of the winch must be powerful enough to overcome the added resistance
caused by whatever the vehicle is stuck in.
5. Never operate the winch under water.
6. Operate the winch cable in and cable out at no load after a winch was penetr
ated
by
water.
WARNING

3
I .Safety Requirement
WARNING: FAILURE TO READ AND FOLLOW THE SAFETY INSTRUCTIONS IN THIS
OWNER’S MANUAL BEFORE INSTALLING OR USING YOUR ATV/UTV WINCH COULD
RESULT IN DAMAGE TO YOUR WINCH AND SERIOUS OR FATAL INJURY!!
►General Rules
Check all safety and environmental conditions prior to and during use.
Before use, ensure that you are familiar with all winching performance and operation such as speed
& direction.
A wire/synthetic rope should be replaced if it shows signs of excessive wear, broken strands,
corrosion or any other defects.
The winches’ duty rating is S3 (intermittent – periodic
If the winch fails to pull a load under normal conditions, stop the operation within 30 seconds
otherwise motor damage may occur.
Ensure that the winch is connected to the correct voltage of 12vdc only.
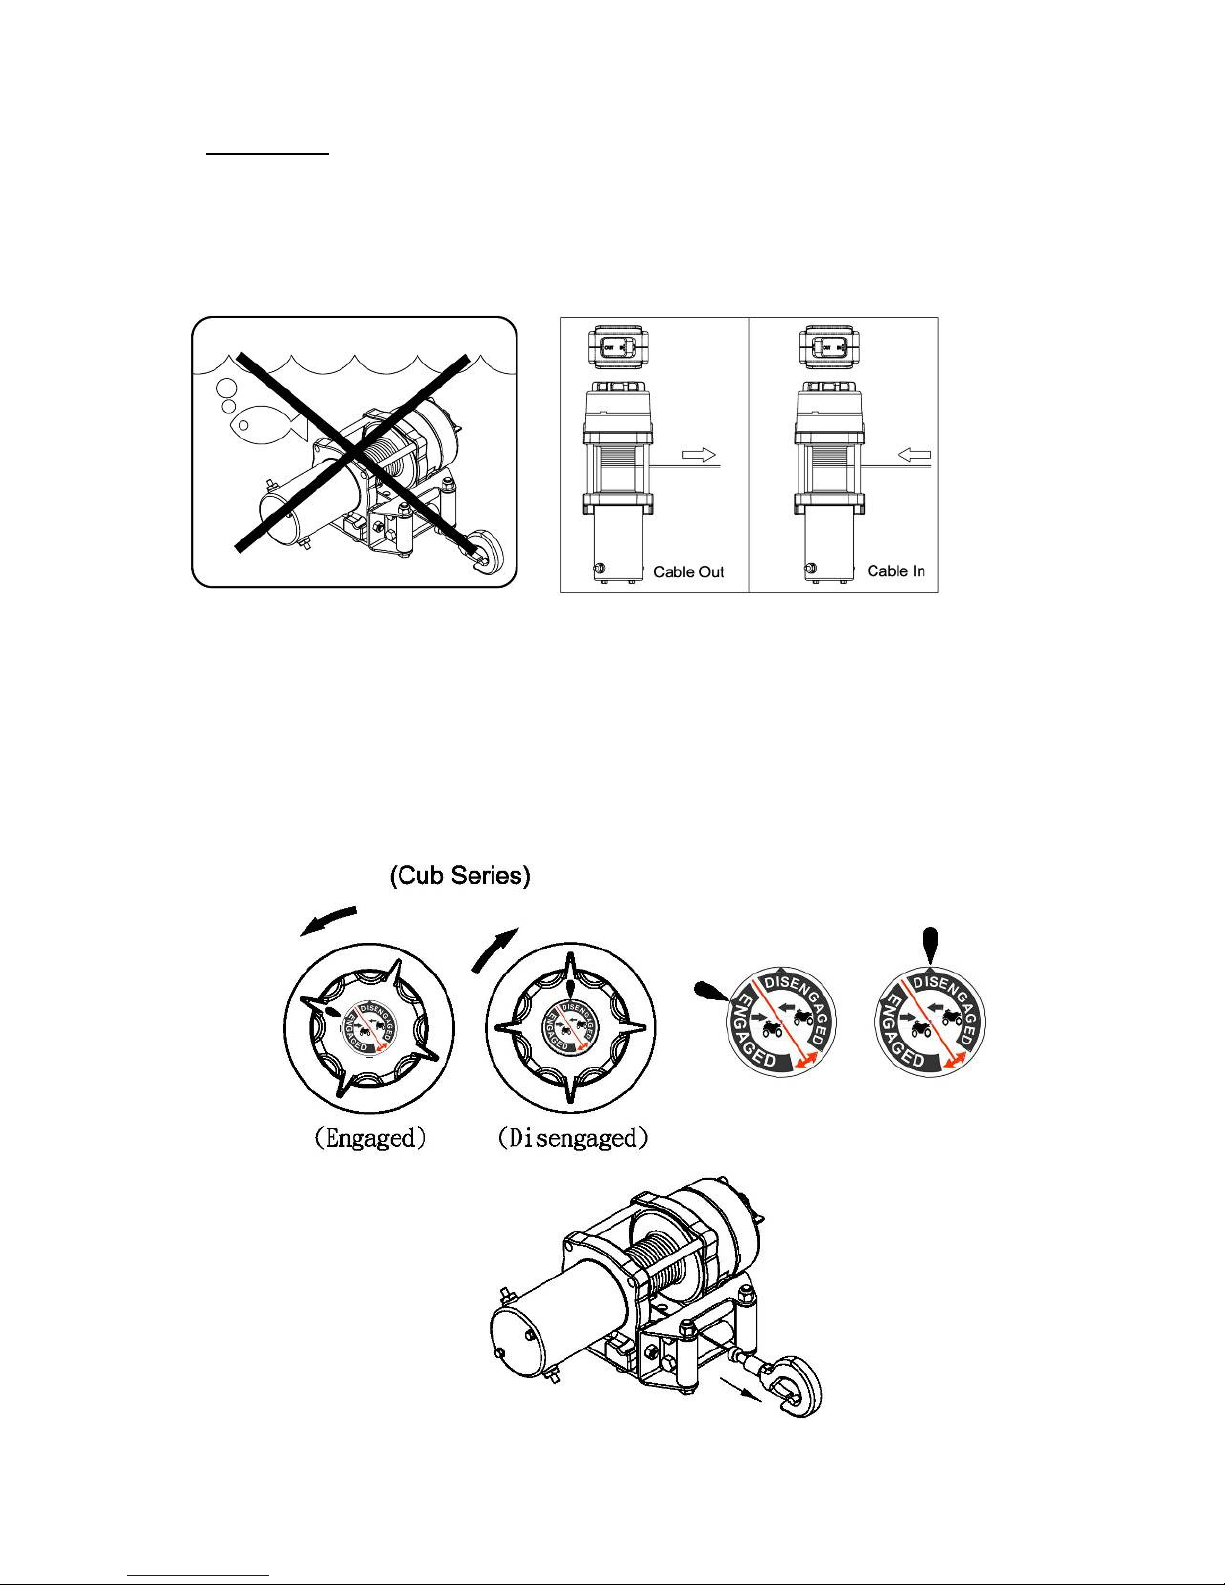
Check that the clutch shifter is in the “Engaged” position during and after use.
Remove the remote control from the winch when not in use.
Do not wrap the wire/synthetic rope around the load and back onto itself. Always use a strap to
ensure that the wire/synthetic rope does not fray or kink.
Keep hands and clothes away from the winch, wire/synthetic rope, and fairlead during operation.
Never unplug the remote control and battery leads when winching a load.
To avoid insufficient power when winching a load, the vehicle should be running and in neutral.
When winching a heavy load, lay a heavy blanket or jacket over the wire/synthetic rope near to the
hook end
If excessive noise or vibration occurs when running, stop the winch immediately and return it for
repair.
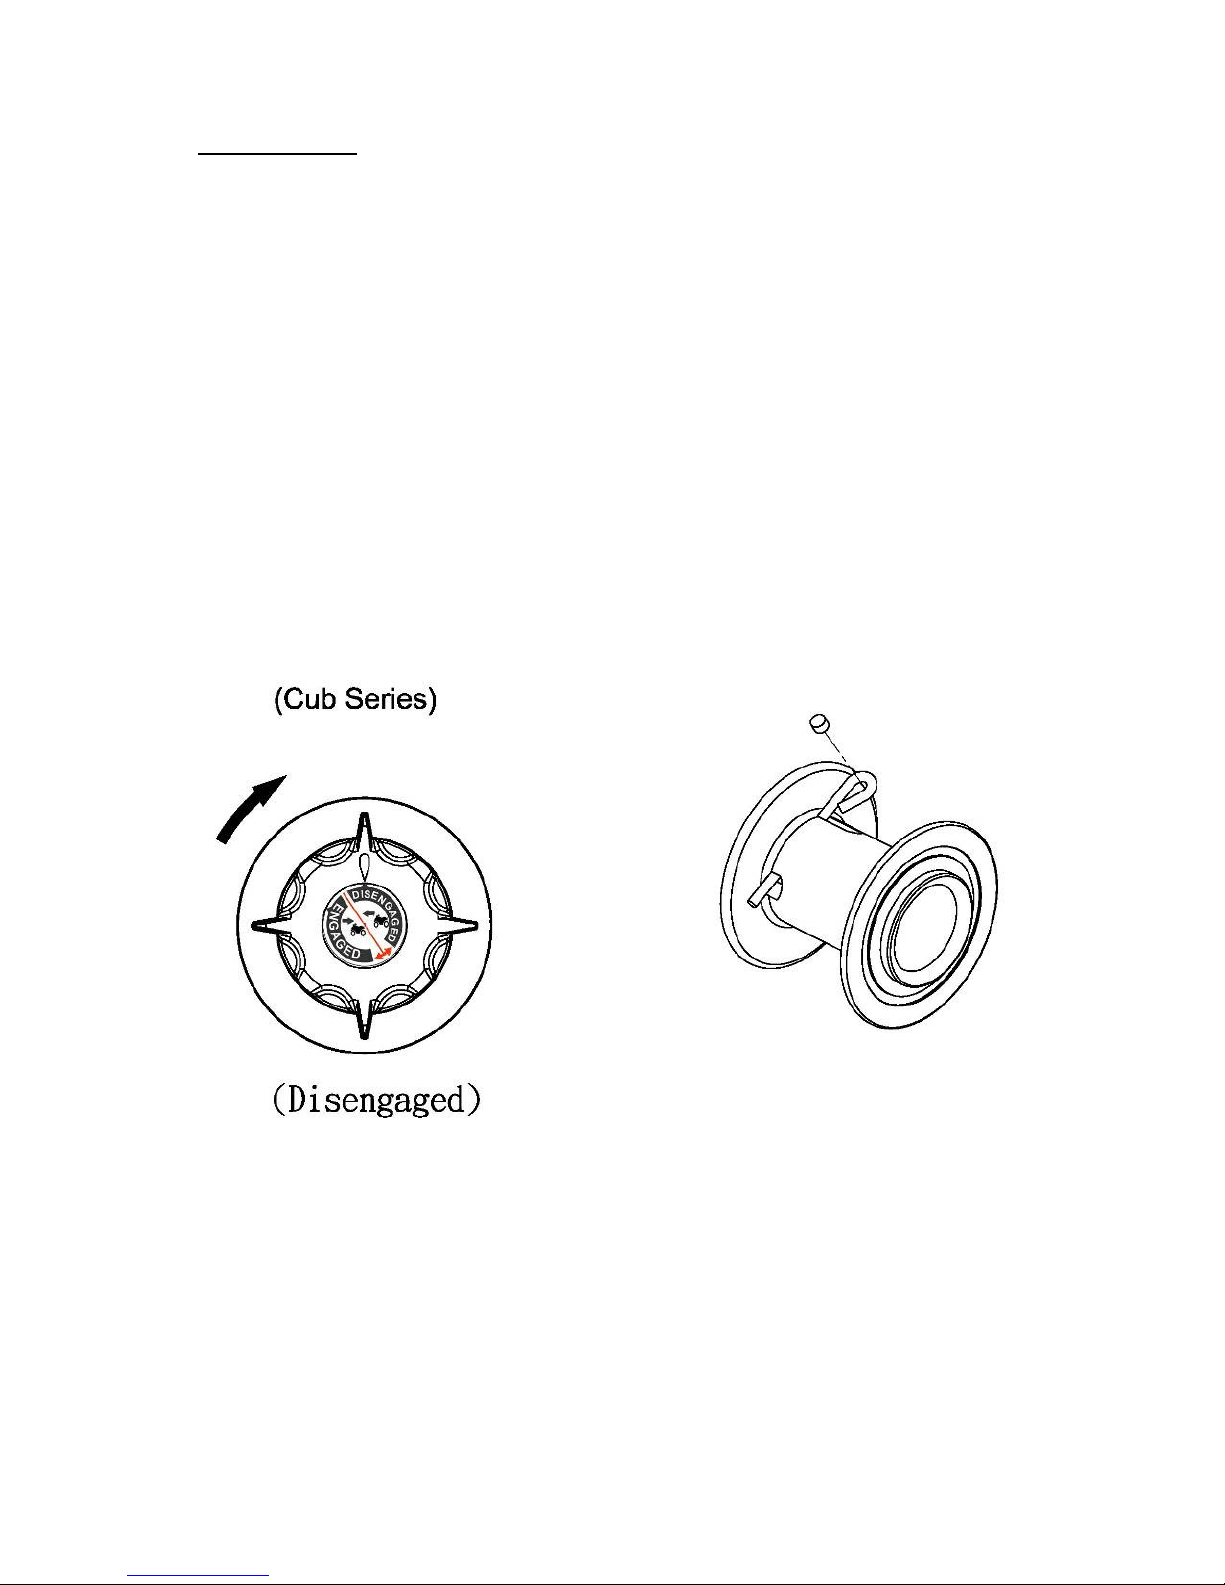
If a clutch can’t be properly locked in the “Engaged” position, rotate the drum to have the clutch
coupled to the gear train
. It is very important that the winch shall be mounted on a flat surface, with the wire/synthetic rope
feeding form the bottom of the drum.

4
II. Main Components
III. Installation
Complete Kit Installation
To install the complete kit, you need to mount the winch, roller fairlead/hawse fairlead, contactor,
rocker switch, remote socket (option and remote control (option . Read and understand the
following instruction to choose the proper mounting locations.

5
Winch & Roller Fairlead/Hawse Fairlead
Mountin
1. It is very important that the winch shall be
mounted on a flat hard surface in order to make
sure the motor, drum and gearbox housing are
aligned correctly.
2. If a different mounting plate is used, the
thickness shall be at least 5 mm (3/16” . If
different hardware is used, it must be SAE
grade 8 minimum.
3. Four (4 M8x 25L Grade 8.8 High Tensile Steel
Bolts (supplied must be used for
securing the
winch on the mounting plate in order to sustain the loads imposed on the winch mounting.
4. Two (2 M8 x 20L Grade 8.8 High Tensile Steel Bolts (supplied must be used for
securing the
roller/hawse fairlead on the mounting plate.
Contactor Mountin
1. It disconnects your winch from the power source when the vehicle is not in use.
2. It should be mounted close to the battery and keep the location from all metal structures.
Battery Recommendations
A fully charged battery and good connections are essential for the proper operation of your winch. The
minimum requirement for battery is 500 cold cranking amp.

6
Remote Socket Mountin (Option)
1. Determine the mounting location for the
remote socket.
2. Drill three holes on a plate and install.
Rocker Switch Mountin
Handlebar mounted rocker switch can be operated without removing your hand from the grip.
Wirin Dia ram

7
IV. Operation
Cable In and Out
1 .To “Winch or Cable - Out”, rocker → out
2 .To “Winch or Cable - In”, rocker ← in
To stop winching, release the rocker
Clutch Function
The clutch allows rapid pay-out of the wire/synthetic rope for hooking onto a load or anchor
points and is operated by a clutch shifter located on the end of the winch.
1 . To engage the clutch, turn the clutch shifter counter-clockwise to the “Engaged” position. The
winch is now ready for pulling.
2 . To disengage the clutch, turn the clutch shifter clockwise to the “Disengaged” position.
Wire/synthetic rope can now be free spooled off the drum.

8
V. Maintenance
Wire/Synthetic Rope Replacement
Before installing a new wire/synthetic rope, wrap the end of the wire/synthetic rope with tape to
prevent fraying. Wind the wire/synthetic rope on the drum by pulling a force to keep the tension
constant. Never use a wire/synthetic rope of a different size or material.
1 . Disengage the clutch.
2 . Have horizontal roller and bolts apart from the roller fairlead, then Spool the old wire/synthetic
rope, and then remove it from the drum.
3 . Place the replacement wire/synthetic rope through the roller/hawse fairlead throat, pass it below
the drum. Insert rope into pocket opening and through wedge pocket.
4 . Loop rope end around wedge and feed rope back through wedge pocket.
5 . Once slack is taken up, the wire/synthetic rope is properly installed.
6 . Tighten the horizontal roller of the roller fairlead and bolts of the roller/hawse fairlead
7 . Wear leather gloves and use a strap when guiding the wire/synthetic rope off the drum.
8 . Rewind wire/synthetic rope on the drum correctly, it is necessary to keep a slight load on the
wire/synthetic rope while cable in.
Lubrication
All moving parts in the winch are permanently lubricated at the time of kit. Under normal
conditions factory lubrication will suffice. If re-lubrication is necessary after repair, please use
marine type grease.

9
Maintenance Schedule
Carry out all inspections below on schedule. All inspections are performed by Daily, Monthly and
Quarterly basis. Clean all connections because corrosion on electrical connections will reduce
performance or may cause a short.
Classification of check
Item Checking method
Checking reference
Daily
Periodical
Monthly
Quarterly
Complete winch
Operate the winch
in and out
Minimum corrosion
of the internal motor
components
Installation Mounting bolts &
alignment
Bolts tension &
wear
Tightened and
aligned
Control /
Switch
Working Manual Reasonable
actuation
Wearing in
contact points Visual Free of wear or
damage
Wire/
Synthetic
rope
Broken strands Visual, measuring
Less than 10%
Decrease in rope
diameter Visual, measuring
7% of nominal
diameter max
Deforming or
corrosion and
fastening
condition of end
Visual No existence of
abnormalities
Clutch kit Damaged clutch
kit
Visual evidence of
wear
Free of wear or
damage.
Motor Staining, damage
Visual evidence of
wear
No existence of
abnormalities
Brake
Wearing of lining
Visual evidence of
wear
Free of wear or
damage
Performance Visual Reasonable
actuation
Gear train Damage, wearing
Visual evidence of
wear
Free of wear or
damage and
distortion

10
VI. Trouble Shootin
When the winch fails to operate after several attempts, or if there is any fault operation while
winching, check followings.
Symptom Possible Cause Remedy
Winch will not
operate
Cut circuit or loosing Check battery lead.
Weak battery or insufficient power Recharge or replace battery
Damaged over-load protector Replace over-load protector
Loose connection of wirings Checking all wirings
Damaged or stuck contactor Replace contactor
Defective remote control Check winch operation with an auxiliary
switch
Damaged motor Replace motor
Motor runs in one
direction.
Broken wiring or bad connection Reconnect or replace wiring
Damaged or stuck contactor Replace contactor
Switch inoperative Replace switch
Drop or loosen wiring Replace wiring and tighten.
Drum will not
clutch
Clutch does not disengage Engaged clutch
Damaged brake or clutch kit Replace brake or clutch kit
Damaged drum bushing Replace drum bushing
Damaged gear box Replace gear box
No brake
Damaged or inoperative pressed spring Replace pressed spring
Disengaged clutch Engaged
Damaged 3
rd
stage carrier Replace 3
rd
stage carrier
Damaged 1
st
shaft Replace 1
st
shaft
Brake distance is
too long Worn or damaged brake Replace or adjust brake
Winch runs in
opposite direction
Motor leads crossed Reverse electrical connections to motor
Contactor control crossed Reverse black and red wires on the
contactor
Remote control or rocker switch crossed
Reverse electrical connections
Motor runs
extremely hot
Long period of operation Stop operation to have it cooled
Over-load Reduce load
Damaged or inoperative brake Replace or repair brake

11
This manual suits for next models
3
Table of contents
Popular Automobile Accessories manuals by other brands

Stoneridge
Stoneridge SE5000-8 RG quick start guide

Bestop
Bestop 29291 Installation Instructions and Technical Information

Roost
Roost BED SYSTEM END USER ASSEMBLY AND INSTALLATION INSTRUCTION MANUAL

Metec
Metec 828450 Mounting instructions

WINK
WINK 93503 quick guide

CrimeStopper
CrimeStopper PARK-EMCU installation manual