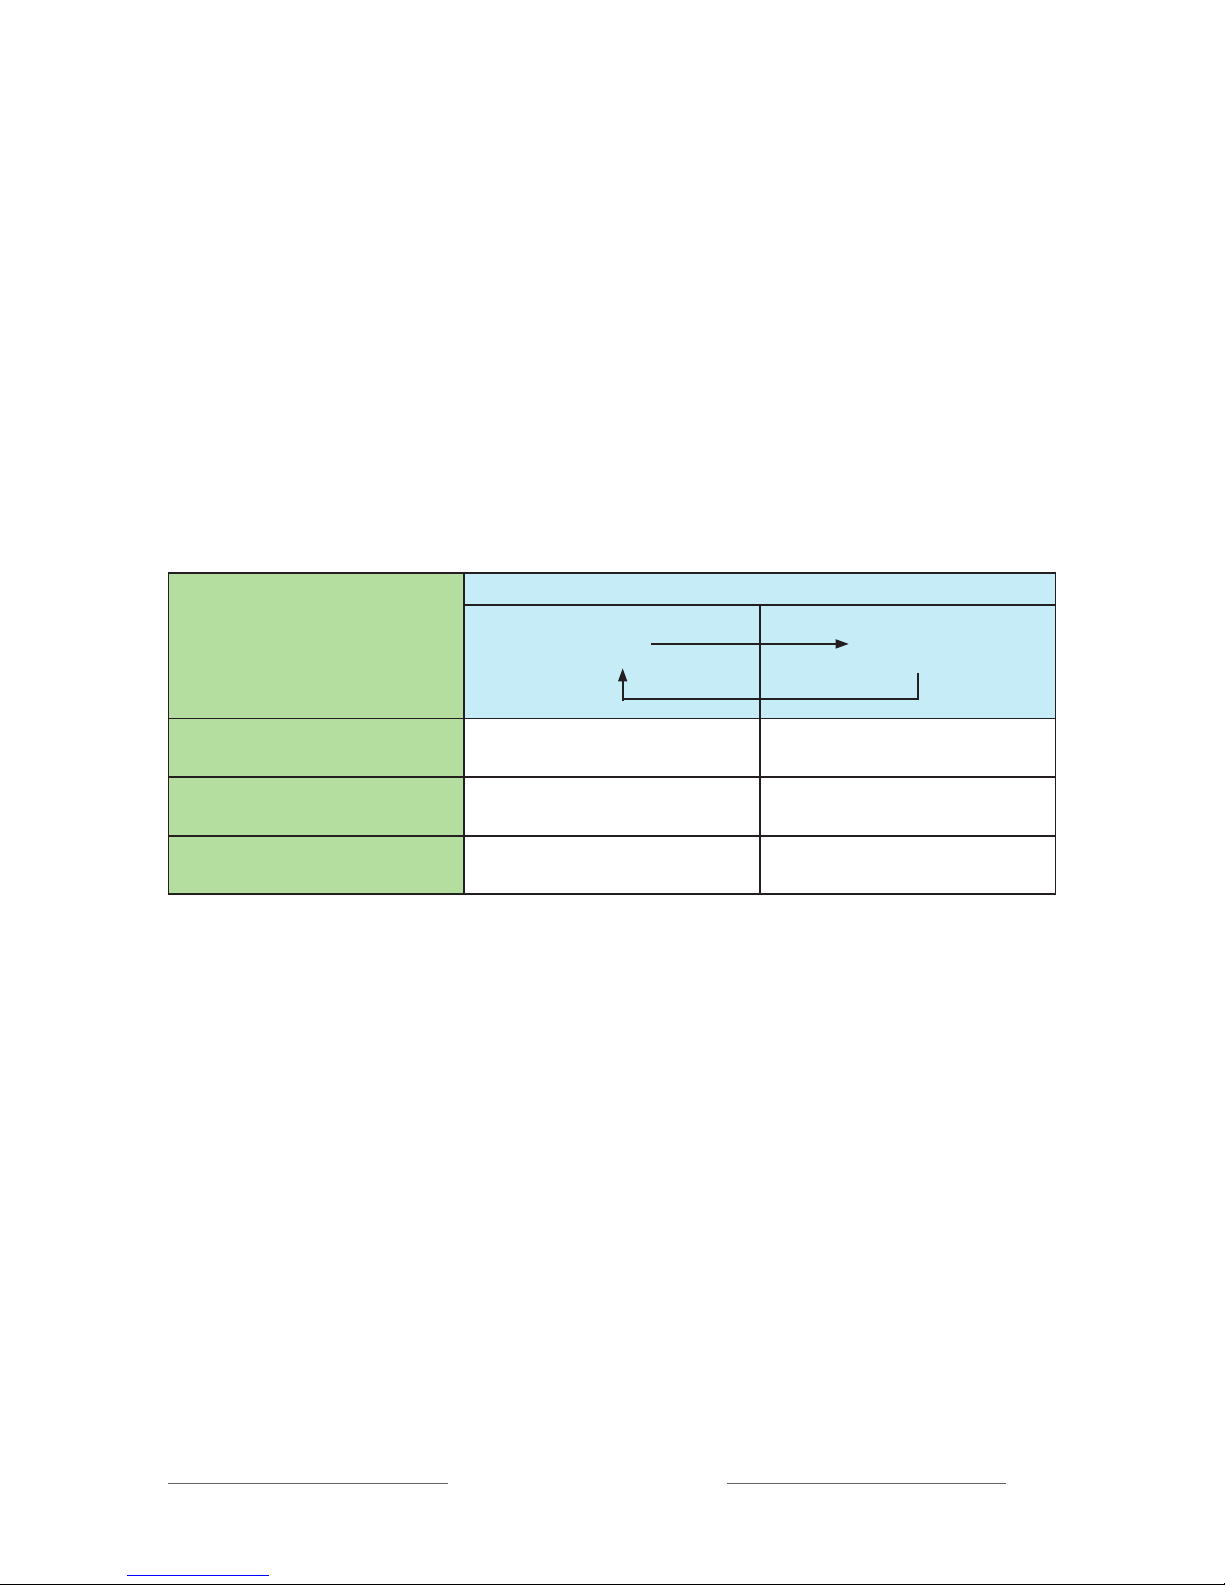
Acoustic indication, sound signals
The following is a description of the acoustic indications (sound signals). The
sound signals consist of various combinations of two different tones: one high
pitch tone (1000 Hz) and one low pitch tone (500 Hz), and two different tone
lengths.
Action: Sound signal: Indicate this:
Button pressed Short high pitch • Selecting mode
briefly or turning on
Button pressed Short high pitch x 2 ••—Turning off
briefly + long low pitch
Button pressed Short low pitch ••Pairing mode
2 sec. + short high pitch
Pairing Short high pitch x 2 •• Successful pairing
Pairing Long high pitch —— Pairing failed
+ long low pitch
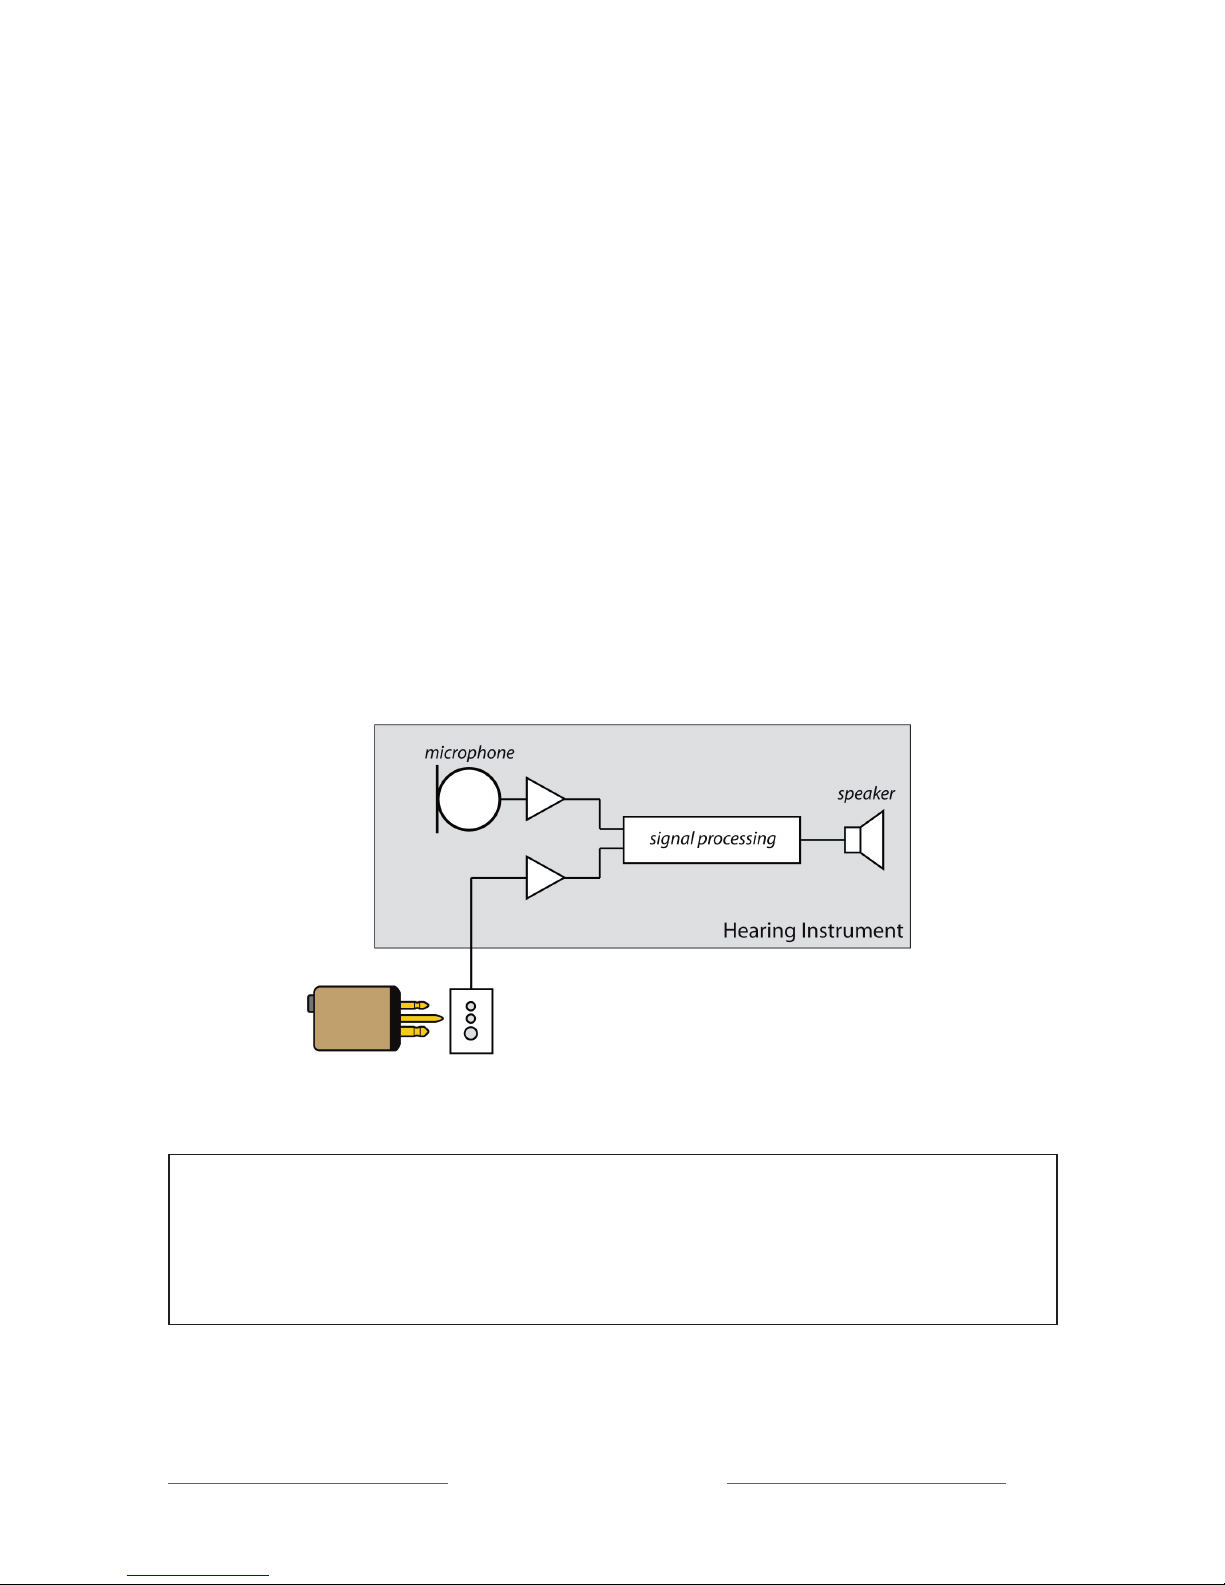
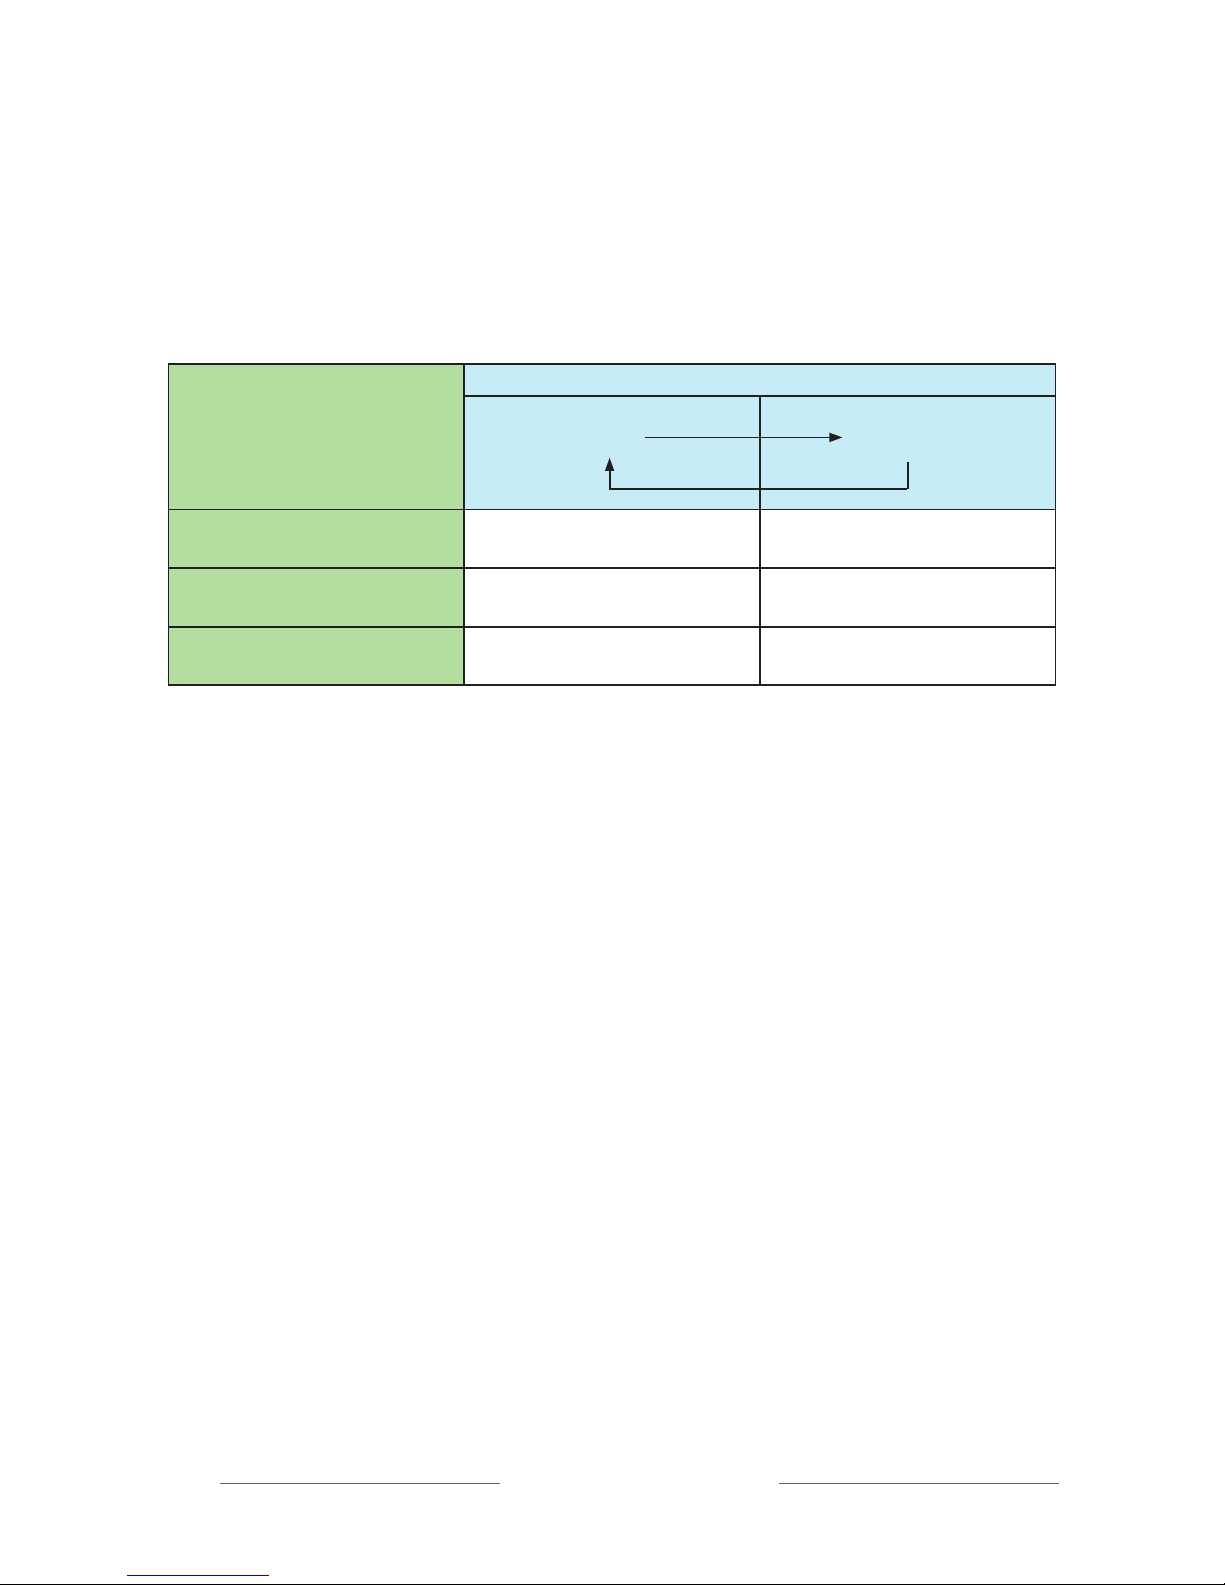
Listening modes in the Micro Receiver DT20
The available listening modes in the Micro Receiver DT20 can be setup in
different configurations:
RDefault setting
R+M Setup with Programmer DT20 is necessary
Rand R+M Setup with Programmer DT20 is necessary
The Programmer DT20 is used to configure and enable or disable different
listening modes in the Micro Receiver DT20. The push-button on the Micro
Receiver DT20 is used to toggle between the activated listening modes.
It is also possible to disable the push-button completely.