manuals.online logo
Brands
  1. Home
  2. •
  3. Brands
  4. •
  5. Comfortaire
  6. •
  7. Air Conditioner
  8. •
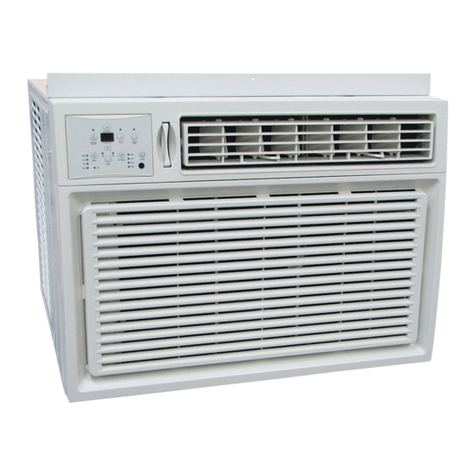
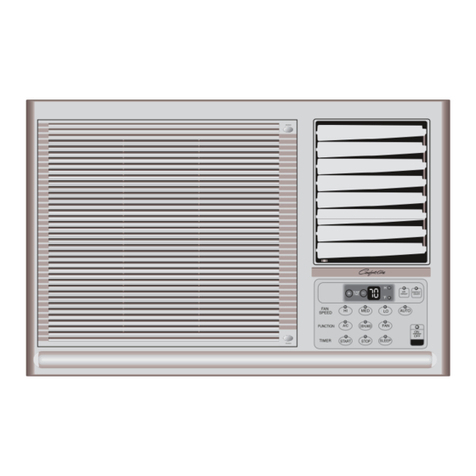
  9. Comfortaire Comfort-Cure RG-61A User manual

Comfortaire Comfort-Cure RG-61A User manual

C M Y CM MY CY CMY K
0010562911
TEMPERATURE
1
2
3
4
10
9
8
7
65
FAN ONLY
MIN
COOL
MAX
COOL
SPEED
LOWHI
OFFON
Wa t 3 M nutes Before
Restart ng
POWER
RG-61A
C M Y CM MY CY CMY K
1
C M Y CM MY CY CMY K
1
1
2
4
4
5
5
6-7
8-13
8
8-13
14-18
15
15
16-18
19-20
20-21
C M Y CM MY CY CMY K
Test power plug before each use:
1. Press reset button.
2 . Press test button, unit should trip.
. Press reset button again for use .
Do not use if above test fail.
In the event this device trips , the cause of the malfunction is to
be corrected before further use of the device .
Important:
C M Y CM MY CY CMY K
5
5
C M Y CM MY CY CMY K
6
2-way
airflow
control paneleasy access filters
MODEL: RG-61A
TEMPERATURE
1
2
3
4
10
9
8
7
65
FAN ONLY
MIN
COOL
MAX
COOL
SPEED
LOWHI
OFFON
Wa t 3 M nutes Before
Restart ng
POWER
2. MODE S t Switch
5. How Th Unit Drains
C M Y CM MY CY CMY K
7
Fig. # 1
TEMPERATURE
1
2
3
4
10
9
8
7
65
FAN ONLY
MIN
COOL
MAX
COOL
SPEED
LOWHI
OFFON
POWER
C M Y CM MY CY CMY K
8
Also wh n you shut off th air condition r wait for 3 minut s
b for turning it on again.
POWER Turns air conditioner off.
SPEED "LOW" Low speed fan operation with cooling or not.
SPEED "HI" High speed fan operation with cooling or not.
This automatically controls the temperature of indoor air. Turn the knob
so that arrow points to the cooler marks for more moderate cooling.
Normal Fan
1. Turn the SPEED mode switch to the "HI" or the "LOW" setting.
2. Set the thermostat control to the temperature mark "FAN ONLY".
Normal cooling
1. Turn the SPEED mode switch to the "HI" or the "LOW" setting.
2. Set the thermostat control to the desire temperature (the mid-point
is a good starting position).
If the room temperature is not satisfactory after a reasonable time, adjust
the control to a warmer or cooler setting, as appropriate.
Maximum cooling
1. Turn the SPEED mode switch to the "HI" setting
2. Set the thermostat control to the MAX COOL temperature mark.
Qui t r op ration
1. Turn the SPEED mode switch to the "LOW" setting.
2. Set the thermostat control as needed.
CAUTION:
1
2
C M Y CM MY CY CMY K
9
C M Y CM MY CY CMY K
10
window seal gasket
short screws 1 / 2"
wood screws 1/ 2"
Model:RG-61A
top rail
C M Y CM MY CY CMY K
11
Insert the side curtains into the
top and bottom rails of the air
conditioner. Fasten the curtains
to the unit with 8 short screws
1 / 2".
Install top rail with short
screws1 / 2".
ASSEMBLE
CURTAINS/TOP RAIL
TEMPERATURE
1
2
3
4
10
9
8
7
65
FAN ONLY
MIN
COOL
MAX
COOL
SPEED
LOWHI
OFFON
Wat 3 M nutes Before
Restartng
POWER
RG-61A
12
5
1
8
6
22
12 7
16
18 9
16
1411
16
5
25
1
2
C M Y CM MY CY CMY K
12
1. This unit is designed for installation in standard double hung windows
with actual opening widths of 22 to 6 . The upper and lower sash
must open sufficiently to allow a clear vertical opening of 14 from the
bottom of the sash to the window sill.
2. If storm window presents interference, fasten a 2 wide wood strip(not
included) (OUTER SILL) to the inner window sill across the full width of
the sill. The wood strip should be thick enough to raise the height of
the window sill so that the unit can be installed without interference by
the storm window frame (STORM WINDOW FRAME) or wood strip
(OUTDOORS) to help condensation to drain properly to the outside.
. Install a second wood strip (approximately 6 long by 1-1/2 wide
and same thickness as first strip) in the center of the outer sill flush
against the back off the inner sill. This will raise basepan angle .
4. If the distance between STORM WINDOW FRAME and WOOD STRIP
MOUNTED ON TOP OF INNER SILL is more than 1 , two of wood
strip are not necessary.
INNER
SILL
OUTER
SILL
I
N
D
O
O
R
S
O
U
T
D
O
O
R
S
WOOD STRIP
MOUNTED ON
TOP OF INNER SILL
WOOD STRIP
FOR BASEPAN
ANGLE
STORM
WINDOW FRAME
1 MAX.
/4 CLEARANCE
I
N
D
O
O
R
S
O
U
T
D
O
O
R
S
INNER
SILL
OUTER
SILL
LOCATING UNIT IN
WINDOW
Open the window and mark center line on the
center of the inner sill.
CENTER LINE
INNER SILL
INDOOR SIDE
ATTACH BASEPAN
ANGLE
CENTER LINE
SHORT SCREW1 / 2"
INNER SILL
OUTER SILL
SHORT SIDE
BASEPAN ANGLE
8
8
OUTSIDE
INSIDE
Install the basepan angle behind the inner window sill, with
the short side of basepan angle as shown. Use the 2 short
screws1 / 2" provided.
The basepan angle helps to hold unit securely in place.
Be sure to place basepan angle edge flush against back
of inner sill.
2
C M Y CM MY CY CMY K
13
INSTALL THE AIR CONDITIONER
IN THE WINDOW
Carefully lift the air conditioner and slide it into the open
window. Make sure the bottom guide of the air conditioner
drops into the notches of the basepan angle.
While steadying the air conditioner ,carefully bring the
window sash down behind the upper guide of the air
conditioner.
WINDOW FRAME
UPPER GUIDE
BOTTOM GUIDEBASEPAN ANGLE
ABOUT 1/4
INSTALL THE SEAL GASKET
AND SASH LOCK
Extend the side curtains to fill the
window opening using 4 wood screws
1/ 2" to secure them.
Cut the seal gasket to the window
width. Stuff the sash seal between the
glass and the window to prevent air
and insects from getting into the room.
Fasten the basepan angle, using a
short screw1 / 2".
BASEPAN ANGLE WINDOW SEAL GASKET
SHORT SCREW1 / 2"
WOOD SCREW 1/ 2"
C M Y CM MY CY CMY K
14
Th air filt r b hind th front grill should b ch ck d and
cl an d at l ast onc v ry 2 w ks or mor oft n if n c ssary.
To remove:
1. Open the inlet grille downward by pulling out the top of the inlet grille.
2. Remove the air filter from the front grille assembly by pulling the air filter
up slightly.
. Clean the filter with warm, soapy water below 40oC(104oF).
4. Rinse and gently shake the water from the filter and let it dry before replacing
it.
Always us a soft cloth damp n d with wat r or mild soap
and wat r solution to wip th front of th cabin t.
To cl an th front pan ls or th cabin t DO NOT us harsh
ch micals, abrasiv s, ammonia, chlorin , bl ach, conc ntrat d
d t rg nts, solv nts or m tal scouring pads.
DO NOT us your air condition r without th air filt r in plac .
Always unplug your air condition r b for cl aning.
TEMPERATURE
PEED
LOW
OFF
POWER
1
2
3
4
10
9
8
7
65
FAN ONLY
MIN
COOL
MAX
COOL
C M Y CM MY CY CMY K
15
C M Y CM MY CY CMY K
16
(see page 8)
(see page 18)

Other manuals for Comfort-Cure RG-61A

1

This manual suits for next models

5

Other Comfortaire Air Conditioner manuals
Comfortaire B-VMH18UU-1 User manual

Comfortaire

Comfortaire B-VMH18UU-1 User manual

Comfortaire RADS-181A User manual

Comfortaire

Comfortaire RADS-181A User manual

Comfortaire DMC24DB-1 User manual

Comfortaire

Comfortaire DMC24DB-1 User manual

Comfortaire RAD-303A User manual

Comfortaire

Comfortaire RAD-303A User manual

Comfortaire Comfort-Cure RG-61A User manual

Comfortaire

Comfortaire Comfort-Cure RG-61A User manual

Comfortaire RG-51-5 User manual

Comfortaire

Comfortaire RG-51-5 User manual

Comfortaire CD-101J User manual

Comfortaire

Comfortaire CD-101J User manual

Comfortaire BGE-123A User manual

Comfortaire

Comfortaire BGE-123A User manual

Comfortaire CMA18SB-1 Instruction manual

Comfortaire

Comfortaire CMA18SB-1 Instruction manual

Comfortaire Century VMH-SV Series User manual

Comfortaire

Comfortaire Century VMH-SV Series User manual

Comfortaire BG-81P User manual

Comfortaire

Comfortaire BG-81P User manual

Comfortaire PS-81D Repair manual

Comfortaire

Comfortaire PS-81D Repair manual

Comfortaire RAD-101B User manual

Comfortaire

Comfortaire RAD-101B User manual

Comfortaire Room Air Conditioners User manual

Comfortaire

Comfortaire Room Air Conditioners User manual

Comfortaire Comfort-Cire AMC 25 Manual

Comfortaire

Comfortaire Comfort-Cire AMC 25 Manual

Comfortaire RAD Series User manual

Comfortaire

Comfortaire RAD Series User manual
Comfortaire CD-81 User manual

Comfortaire

Comfortaire CD-81 User manual

Comfortaire COMFORT AIRE RADS-151A User manual

Comfortaire

Comfortaire COMFORT AIRE RADS-151A User manual

Comfortaire FCA18 series User manual

Comfortaire

Comfortaire FCA18 series User manual

Comfortaire PE-121A User manual

Comfortaire

Comfortaire PE-121A User manual
Comfortaire RADS-61R User manual

Comfortaire

Comfortaire RADS-61R User manual

Comfortaire CD-81Q User manual

Comfortaire

Comfortaire CD-81Q User manual

Comfortaire Room Air Conditioners User manual

Comfortaire

Comfortaire Room Air Conditioners User manual

Comfortaire Century VMH09SU Series User manual

Comfortaire

Comfortaire Century VMH09SU Series User manual

Popular Air Conditioner manuals by other brands

Midea EWK06CW5 user manual

Midea

Midea EWK06CW5 user manual

SPT WA-1511S user manual

SPT

SPT WA-1511S user manual

Daikin FFQ09Q2VJU Operation manual

Daikin

Daikin FFQ09Q2VJU Operation manual

Honeywell CL30XC owner's manual

Honeywell

Honeywell CL30XC owner's manual

Soleus Air GB-PAC-08E4 operating instructions

Soleus Air

Soleus Air GB-PAC-08E4 operating instructions

Gree E-TAC Installation and operation instructions

Gree

Gree E-TAC Installation and operation instructions

Samsung AR**HV5D series User's installation guide

Samsung

Samsung AR**HV5D series User's installation guide

Hitachi RAM-55QH4 Service manual

Hitachi

Hitachi RAM-55QH4 Service manual

Thermal CS011126 User's & technical manual

Thermal

Thermal CS011126 User's & technical manual

MrCool Signature Series Owners & installation manual

MrCool

MrCool Signature Series Owners & installation manual

ALPATEC AC 12 FIT user manual

ALPATEC

ALPATEC AC 12 FIT user manual

Technibel KPAFP165R5IA Series installation manual

Technibel

Technibel KPAFP165R5IA Series installation manual

Sharp AH-AP18DR Service manual

Sharp

Sharp AH-AP18DR Service manual

Gree Neo COZY9K owner's manual

Gree

Gree Neo COZY9K owner's manual

Convair ClimateMaster CM12RW instruction manual

Convair

Convair ClimateMaster CM12RW instruction manual

Haier HSU-10VNJ17 Operation manual

Haier

Haier HSU-10VNJ17 Operation manual

Samsung SH18BW6 Series user manual

Samsung

Samsung SH18BW6 Series user manual

Mitsubishi Mr.Slim PKA-A-GA installation manual

Mitsubishi

Mitsubishi Mr.Slim PKA-A-GA installation manual

manuals.online logo
manuals.online logoBrands
  • About & Mission
  • Contact us
  • Privacy Policy
  • Terms and Conditions

Copyright 2025 Manuals.Online. All Rights Reserved.