Fitting the Soundbar
Fitting the Soundbar to the bracket and connecting it to the panel
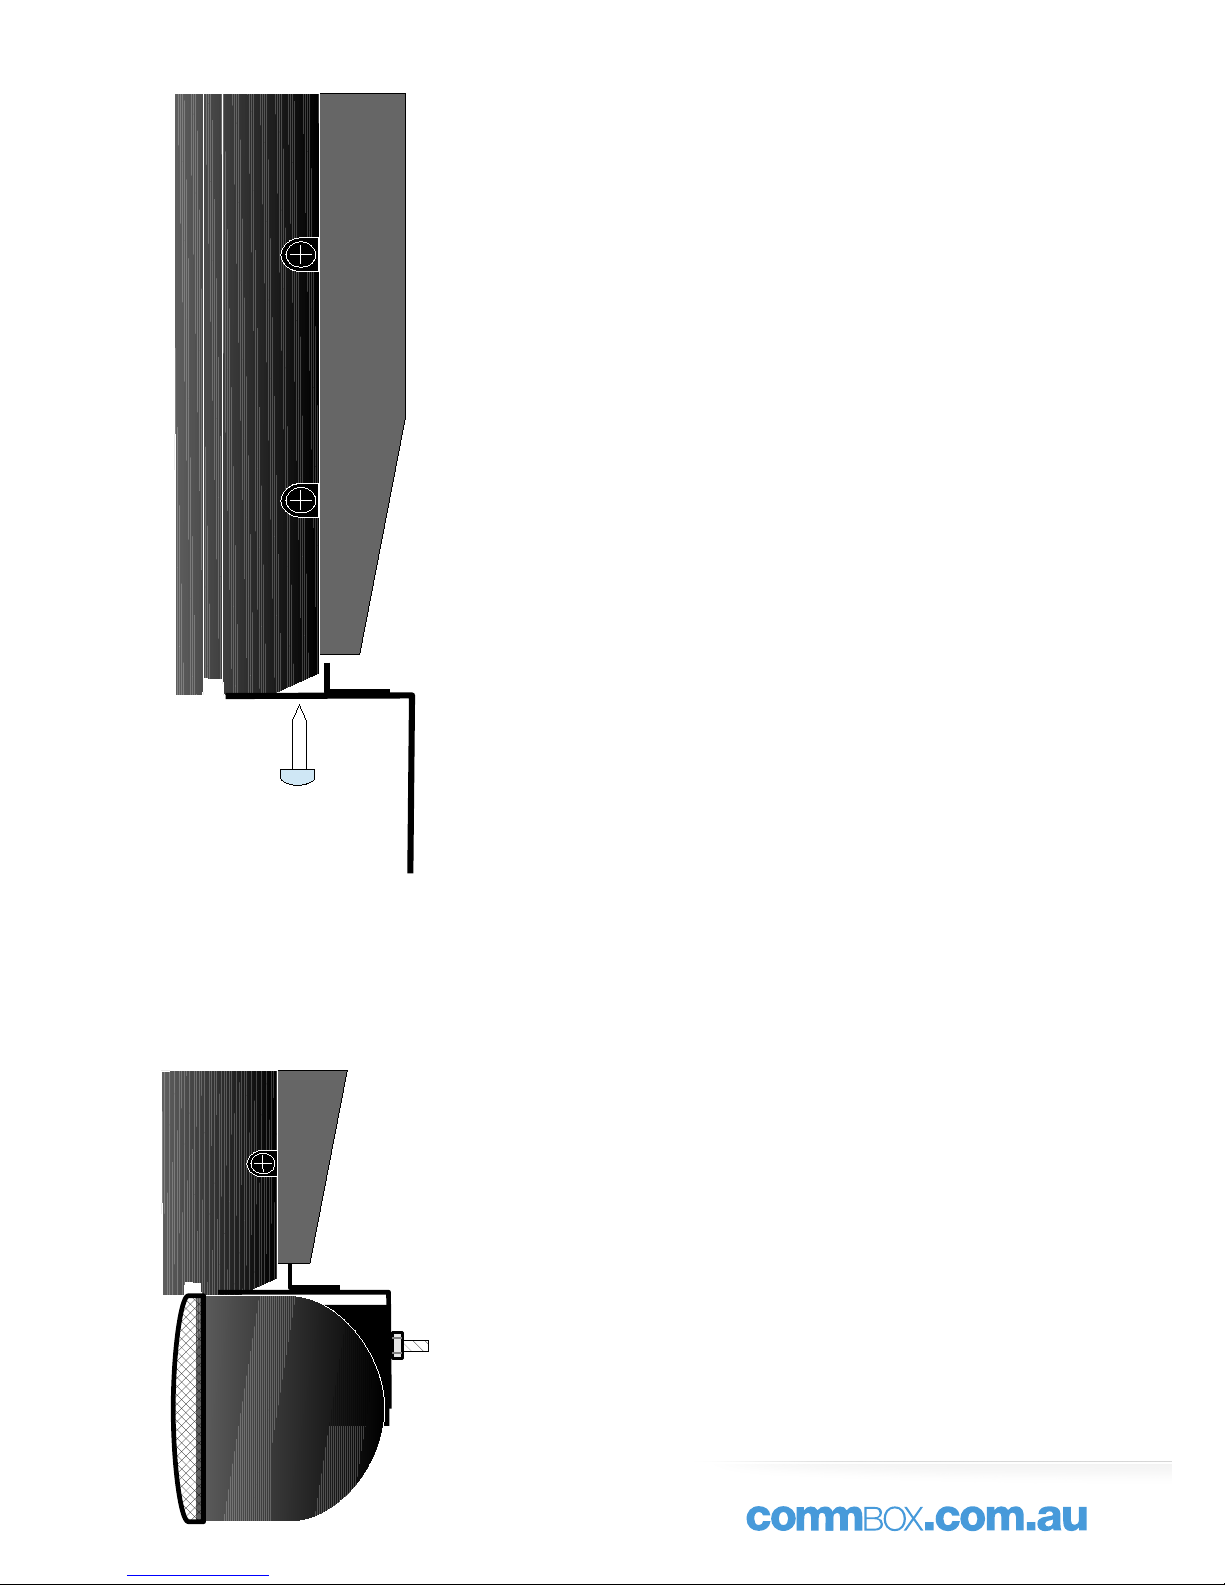
Fit the supplied self-tapping screws to replace M4 screws removed
in the first step. Tighten firmly, but do not over-tighten as you
could strip the internal thread in the panel.
Fit the heads of the supplied M4 screws to the keyhole
slots in the soundbar fixing feet.
Pass the threaded ends of the screws through the
matching holes in the mounting bracket and fit the two
M4 wingnuts.
Tighten the wingnuts so that the edge of the soundbar
engages with the groove in the panel's surround.
Using the supplied cables, connect the soundbar to the
SPEAKER OUT terminals on the panel.
8# self tapper
Fit the supplied self-tapping screws to replace M4
screws removed in the rst step. Tighten rmly, but
do not over-tighten as you could strip the internal
thread in the panel.
Fitting the Soundbar to the bracket
and connecting it to the panel
Fit the heads of the supplied M5 screws together with the star
washers to the keyhole slots in the soundbar xing feet.
Pass the threaded ends of the screws through the matching
holes in the mounting bracket and t the two M5 wingnuts
and at washers.
Tighten the wingnuts so that the edge of the soundbar
engages with the groove in the panel’s surround.
Using the supplied cables, connect the soundbar to the
SPEAKER OUT terminals on the panel.
Fitting the Soundbar
Fitting the Soundbar to the bracket and connecting it to the panel
Fit the supplied self-tapping screws to replace M4 screws removed
in the first step. Tighten firmly, but do not over-tighten as you
could strip the internal thread in the panel.
Fit the heads of the supplied M4 screws to the keyhole
slots in the soundbar fixing feet.
Pass the threaded ends of the screws through the
matching holes in the mounting bracket and fit the two
M4 wingnuts.
Tighten the wingnuts so that the edge of the soundbar
engages with the groove in the panel's surround.
Using the supplied cables, connect the soundbar to the
SPEAKER OUT terminals on the panel.
8# self tapper