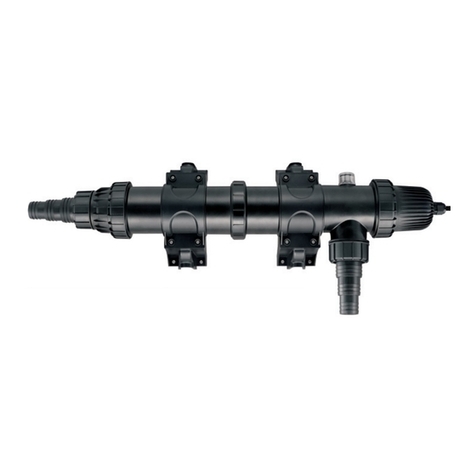
Commodity Axis ViaAqua Terminator UVS 5 User manual

WARNING
Buyer/User assumes all responsability for safety and proper
use not in accordance with the directions and sately labels.
»Quartz PL UV bulb
»Quartz Sleeve
»Water resistant ballast
»For use indoors or outdoors
»For use in salt and freshwater environment
TERMINATORTM
UV Sterilizer

FEATURES
The ViaAqua® Terminator™ UV Sterilizer features a quartz glass PL bulb. The
sterilizer uses quartz sleeve that maintains the bulb temperature thus allowing 95%
of the UV radiation to sterilize the water. Produce more UV radiation than comparable
UV units. The internal burning chamber is design for maximum contact time. As the
water is redirected by the baffles in the internal burning chamber a vortex will occur.
The increased contact time exposes virtually all organic, single celled algae and
eradicates most harmful microorganisms to maximum UV radiation exposure.
PRECAUTION AND SAFEGUARD
WARNING
»The UV lamp used in this unit produces harmful ultraviolet radiation.
Never look directly at lamp as damage to eyes will occur. Always
disconnect the power supply before opening the unit for service.
Failure to do so will expose the user to harmful UV radiation.
»This product may contain chemicals known to the State of California
to cause cancer and/or birth defects or other reproductive harm.
Wash you hand after handling the product.
»It is your sole responsability to verify that the plug and receptacle are
clean/free of moisture and salt build up at all times. The receptacle
must be free of water, salt, calcium, and magnesium. Failure to do so
may cause re and/or loss of life.
»Do not plug into an extension cord or power strip.
»A drip loop must be used when plug into any electrical devices. A
drip loop is part of the cord hanging below the receptacle.
»The national code requires all aquarium equipment to be plugged into
a G.F.C.I. (Ground Fault Circuit Interrupter) electrical outlet. If you do
not have a G.F.C.I., have an electrician install one prior to operating
any aquarium components.

* Read and follow all precautions, safeguards and
instructions.
* Use this product for its intended use only
* Never yank or pull the cord from the electrical
outlet.
* Do not operate if the plug or wire is damaged.
* Do not operate without water.
* The ultraviolet sterilizer must be turned off
prior to shutting off the water to the ultraviolet
sterilizer.
* Verify that hands are dry prior to disconnected
the power.
* To reduce the risk of electrocution keep all
connections dry.
* If the product is to fall into the water, unplug the
unit rst then retrieve the unit from the water. If
any of the electrical components get wet unplug
immediately.
* Although the ballast is water resistant do not place the ballast in
area where it can come in contact with water.
Drip
Loop
GFCI
ONLY

INSTALLATION OF THE UV STERILIZER
1. Follow all safeguards and warning
2. Since the ultraviolet light does not come with a pump, a water supply
needs to be installed. To do this a powerhead, external water pump or a
canister filter can be used. The pump supplying water to the ultraviolet
sterilizer must be pre-filtered. Pre-filtering the water will limit buildup on
the quartz sleeve thus allowing maximum UV penetration.
3. Use the chart provided for optimum performance. Note: Slow water
flow (GPH) will increase the duration the water will be in contact with
ultraviolet radiation. The only variable which increases contact time is the
speed of water flow (GPH) not the way water is channeled in the reaction
chamber.
4. Find a place for the ultraviolet chamber where as it can not come in
contact with water and when the tubing is installed there will not be any
kinks in the tubing.
5. Installation for inline applications: Model number 9w, 13w, 24w, 36w and
55w.
a. Place the UV in an area where as it will not come in contact with
water or in direct contact with elements, such as rain, direct sunlight,
or flooding.
b. Now install the barbed tubing fittings.
6. Place the gasket onto the flange of the barbed tubing fittings. The use of
silicone o-ring lubricant aids in creating a good seal.
7. Place the barbed tubing fitting/gasket onto the threaded opening on the
ultraviolet chamber. Now slide the threaded nut over the barbed tubing
fitting and tighten. Hands tighten only. If the threaded nut is to tight the
fitting may leak.
8. Repeat step 2 for the discharge. Do not reduce the discharge tubing. The
discharge tubing must be at least as large as the intake tubing.
Note: When using larger tubing it may be necessary to saw off the smaller adapters.
A. Secure the flexible tubing with hose clamps.
B. Turn on water supply.
C. Plug the ultraviolet sterilizer into a GFCI electrical outlet only.

INSTALLATION OF UV PL BULB
1. Follow all safeguards and warnings
2. Unscrew the threaded PL bulb cap on the end of the ultraviolet sterilizer.
Once unscrewed the inside of the cap will reveal the PL light bulb socket.
3. Remove the PL ultraviolet bulb from the box. Important: Do not touch the
quartz part of the bulb. If needed use a clean cloth to handle the bulb.
4. Align the pins with the holes in the bulb socket. Press the bulb directly
into the holes in the bulb socket. Avoid all angles; failure to do so may
cause permanent damage to the bulb and/or the bulb socket.
5. Screw cap back onto the UV sterilizer.
PART LIST
1. Cap and PL bulb socket
2. PL UV bulb
3. Quartz sleeve
4. Main body
5. Compression nut (2)
6. 1 1/4” barbed fitting with gasket (2)
7. 1-2” - 1” barbed fitting with gasket (2)
8. Ballast
9. Mounting bracket (2)

MAINTENANCE
Before doing any maintenance on the ultraviolet sterilizer, the power supply and water
supply must be disconnected. Only in rare situations does the quartz sleeve ever
have to be removed. If necessary use a coin or a large flat head screw driver to gently
and carefully remove the quartz sleeve. If excess force is used the quartz sleeve will
break. After removed use a soft clean cloth to gently remove any excess grim and/or
debris. Reassemble using a small amount of silicone o ring lubricant placed on the o
ring prior to sliding into the main body of the ultraviolet sterilizer.
The PL ultraviolet bulb needs to be replaced every 8,000-9,000 hours. This will insure
optimum performance.
A. Follow all safeguards and warnings
B. Unscrew the threaded PL bulb cap on the end of the ultraviolet sterilizer.
Once unscrewed the inside of the cap will reveal the PL light bulb socket.
C. Remove the PL UV bulb from the box. Important: Do not touch the quartz
part of the bulb. If needed use a clean cloth to handle the bulb.
D. Align the pins with the holes in the bulb socket. Press the bulb directly into
the holes in the bulb socket. Avoid all angles; failure to do so may cause
permanent damage to the bulb and/or the bulb socket.
E. Screw cap back onto the UV sterilizer.
F. Replacement quartz sleeves and quartz bulbs are available at your
independent dealer.
Note: The efficiency of the Terminator UV Sterilizer depends on the duration the UV
light is contact with the water. Thus the rate of water flow not the way the water travels
will relate to the efficiency of the UV sterilizer.
Specication of the Terminator UV Sterilizer:
Item no. Capacity Max. water ow Wattage Case Lot UPC #0069037
UVS 5 60 gal. 200 GPH 5 watt 6 1398 6
UVS 9 100 gal. 500 GPH 9 watt 6 1160 9
UVS 13 200 gal. 600 GPH 13 watt 6 1156 2
UVS 18 300 gal. 750 GPH 18 watt 6 1518 8
UVS 24 400 gal. 1,000 GPH 24 watt 6 1519 5
UVS 36 500 gal. 1,250 GPH 36 watt 6 1520 1

Replacement UV Bulb:
Item no. Wattage Case Lot UPC #0069037
UVS 5B 5 watt 12 2066 3
UVS 9B 9 watt 12 2367 1
UVS 13B 13 watt 12 2900 0
UVS 18B 18 watt 12 2903 1
UVS 24B 24 watt 12 1492 1
UVS 36B 36 watt 12 1510 2
LIMITED WARRANTY
Commodity Axis Inc. warrants that the Terminator™ UV Sterilizer is free from defects
for a period of one year from the initial date of purchase shown in the original cash
register receipt. Commodity Axis Inc. disclaims all other warranties of merchantability
and/or fitness for a particular purpose. Although this limited warranty gives you specific
rights, you may have other rights that may vary from state to state. This Warranty is void
if the failure of the Terminator™ UV Sterilizer or any part, sealant or component there
of is due to (i) misuse, (ii) tampering, (iii) negligence, (iv) misapplication, (v) abuse,
(vi) accident and/or (vii) failure to properly (a) maintain, (b) clean, (c) proper bulbs, (d)
reassemble, (e) keep unit from coming in contact of water and/or use the Terminator™
UV Sterilizer with a Ground Fault Circuit Interrupter (G.F.C.I.).
CONSUMER REMEDIES
Commodity Axis Inc. entire Liability and your sole exclusive remedy be, either repair
or replacement of the Terminator™ UV Sterilizer only if you return the defective
Terminator™ UV Sterilizer directly to Commodity Axis Inc. with the original receipt in this
original box along with fifteen dolars ($15.00) for shipping and handling. Do not send the
Terminator™ UV Sterilizer by insured mail. The Terminator™ UV Sterilizer may be sent
by UPS requiring signature upon arrival. Any replacement Terminator™ UV Sterilizer
will be warranted for remaining of the original warranty period. In not event shall any
shipping charges be reimbursed. In no event will Commodity Axis Inc. be liable for any
consequential or incidental damages including, but not limited to, loss of life, personal
injury, property damage, damaged equipment, lost profits, lost wages, lost savings, lost
income, etc. arising out of the use of the Terminator™ UV Sterilizer. Some states do not
allow for the limitation or exclusion of liability for incidental or consequential damages,
so the above exclusion may not apply to you.

Please ll out this warranty card and mail it with PROOF OF Purchase within 15
days of purchase to: Commodity Axis Inc.,
300 South Lewis Rd. Unit J. Camarillo CA 93012, USA
Name Date
Product Name Mode No
Address
City State Zip Code
Country Home Phone
Cell Phone Email
Date of Purchase Seller (Retail Name)
Seller’s Location Phone
IMPORTANT: Please make a copy of this warranty card and retain it for your records. Warranty
policy is subject to change without notice.
REGISTRATION CARD
ONE (1) YEAR WARRANTY CARD
Bringing Products to Life
300 South Lewis Rd. Unit J. Camarillo CA 93012
Fax: (888) 989 0878
www.ViaAquaOceanpure.com
This manual suits for next models
11
Table of contents
Other Commodity Axis Laboratory Equipment manuals