Company NA Diginet Micro User manual

Diginet Micro
Useful information for user manual from Company NA

Dimensions:

Overview:

Menu map.
Level 1
Level 2
Level 3
Level 4
Explanation
DMX port 1
menu
DMX port 2
menu
Universe
VALUE
Set the universe value (0 - 32767)
Confirm
Back
Direction
DMX Port 2 direction
IN
OUT
RDM
Port 2 RDM settings
Enabled
Disabled
Priority
Set the Art-Net priority.
VALUE
Set the value (0-200)
Confirm
Back
Setup menu
Protocol setup
Protocol
Choose out of the 2 possible data
processing protocols.
Art-Net
Art-Net protocol
sACN
sACN protocol
Easy priority
ON
OFF
Source loss
action
Hold values
Blackout
Disable
DMX
Source loss
timeout
VALUE
Set the source loss timeout value (5
- 120 seconds)
Confirm
Back
DMX rate
Adaptive
20 Hz
30 Hz
40 Hz

ArtNet Idle
resend
0.5s
1.0s
2.0s
4.0s
ArtNet Idle
resend
Base16
Hex
Decimal
ABC
Network setup
Set the IP address of IQ
IP address
VALUE
Mask
Set the subnet mask of IQ
VALUE
Easy IP
This setting will ensure that software
will search for all masks, not only for
a specified subnet mask
VALUE
Node setup
Info
Information about the node
LCD/ LED
brightness
Adjust LCD and LED brightness
settings for your needs.
Off
Dimmed
Full
Configuration
User cfg. 1
(node name)
User configuration profile 1
Load
Button for loading the configuration
settings
Confirm
Back
Record
Button for recording the
configuration settings
Confirm
Back
Delete
Button for deleting the configuration
settings
Confirm
Back
User cfg. 2
(node name)
User configuration profile 2
Load
Button for loading the configuration
settings

Confirm
Back
Record
Button for recording the
configuration settings
Confirm
Back
Delete
Button for deleting the configuration
settings
Confirm
Back
Defaults
Port defaults
This setting will restore port defaults
Load
Confirm
Back
Protocol
defaults
This setting will restore protocol
defaults
Load
Confirm
Back
Reset all
settings
This setting will restore factory
defaults (will reset ALL settings)
Reset
Confirm
Back

Main menu overview.
When device is powered ON, this will show up as main menu:
At the left side window user can see:
Port 1 direction ( output in example);
Data activity status (no data in example)
Universe number (0 in example);
RDM status (ON in example)
At the right side window user can see:
Port 2 direction (input in example);
Data activity status (data input with above 50% activity);
At the bottom window user can see:
The name of the device and assigned IP address.
DMX port activity LED overview:
The Diginet Micro has RGBW activity LEDs at each output port.
Explanation of each color:
If the DMX port status LED is red, then then there is no DMX signal from network incoming.
If the DMX port status LED is orange (full power) then the port is configured as DMX output
and DMX signal is active.
If the DMX port status LED is orange (dim) then the port is configured as DMX output and
there is no active DMX signal.
If the DMX port status LED is blue (full power) then the port is configured as DMX input and
DMX signal is active.
If the DMX port status LED is blue (dim) then the port is configured as DMX input and there is
no active DMX signal.
If the DMX port status LED is green (periodically), then the port has active RDM packets.

Configuration menu:
By pressing <OK> button while "Config" windows selection is selected, configuration setup
submenu will open:
Using the <UP> and <DOWN> buttons, the selection will move up and down.
By pressing the <OK> or <RIGHT> button, a selected sub-menu will open.
By pressing the <LEFT> button, previous menu will open.
There are 4 pages of setup options.
Protocol setup;
Network setup;
Node setup;
Configuration;

1) PROTOCOL SETUP:
Protocol menu overview.
Protocol: By pressing the "Protocol" button, a new window will pop up.
You can select Art-Net or sACN (e1.31).

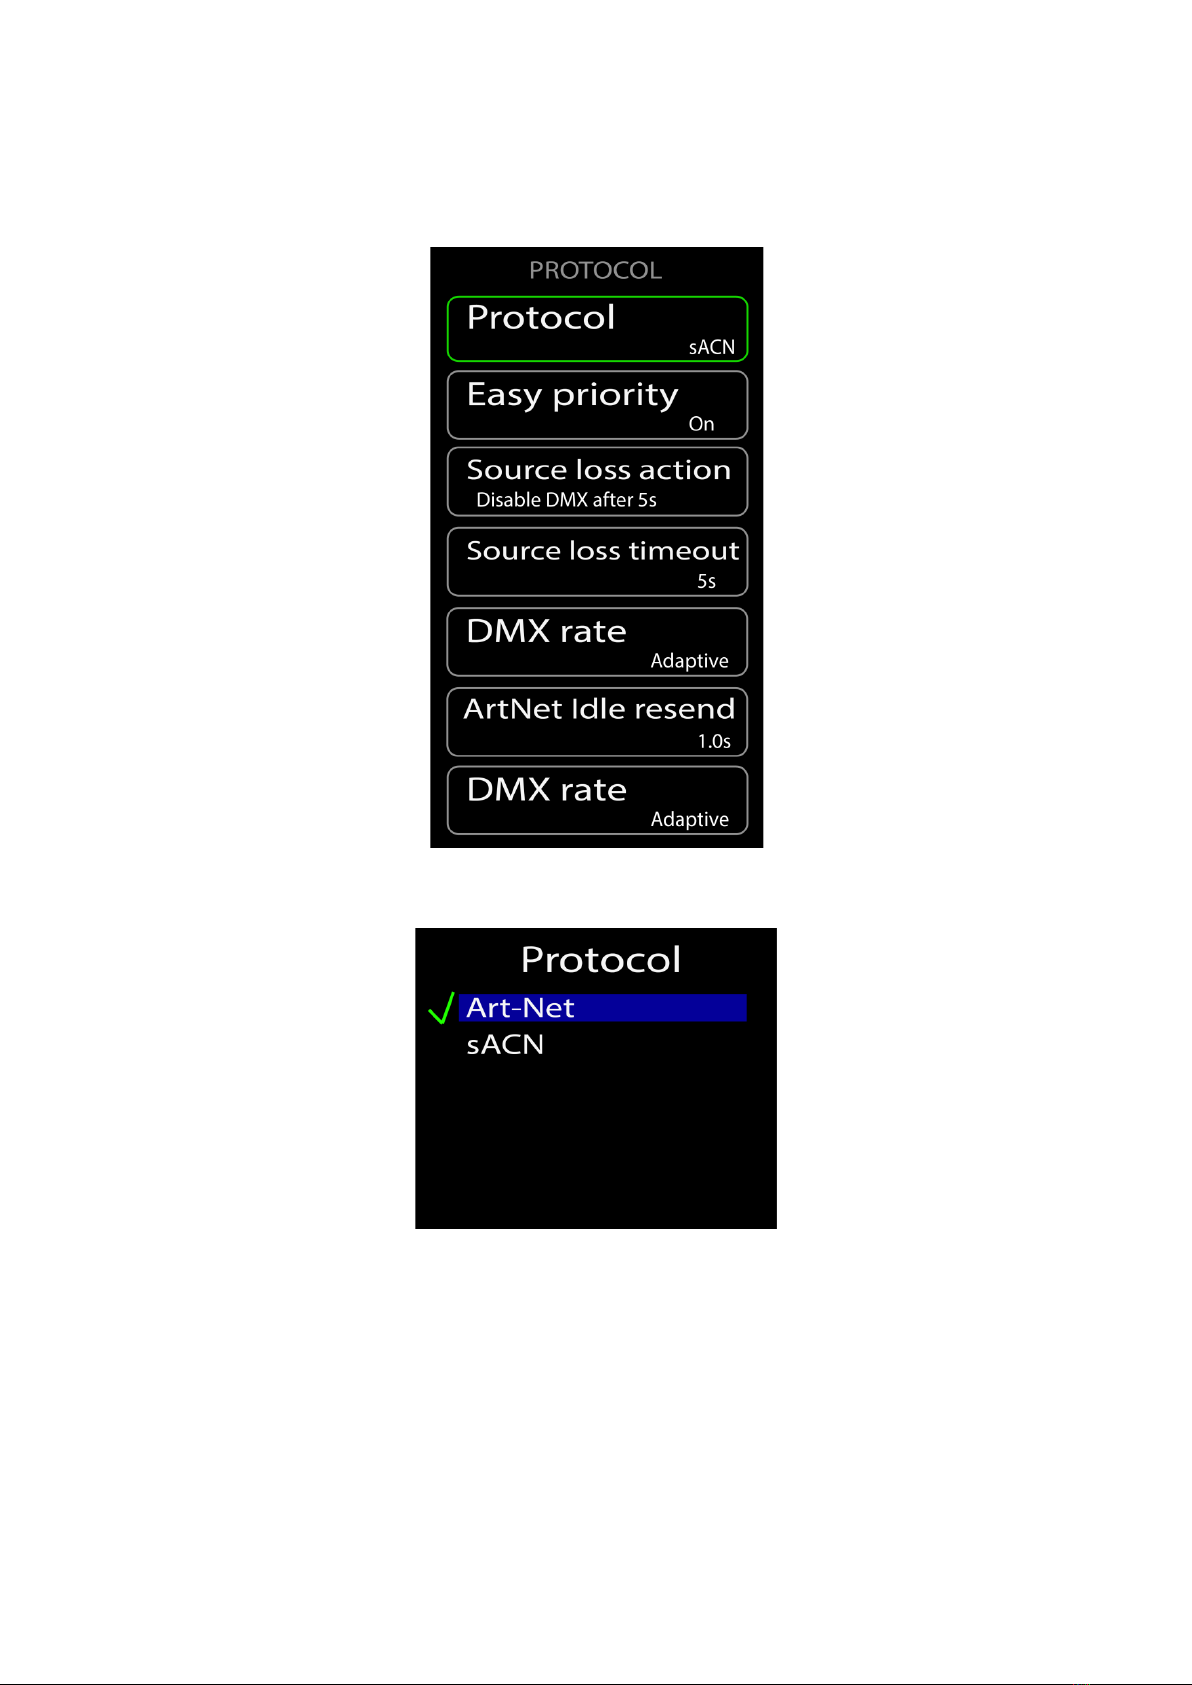
What is Art-Net and what is sACN?
Art-Net is an Ethernet protocol based on the TCP/IP protocol suite. Its purpose is to
allow transfer of large amounts of DMX512 data over a wide area using standard
networking technology.
Streaming ACN (sACN) is a protocol to efficiently transport DMX universes over the
network. It is comparable to Art-Net in many aspects. An advantage of sACN is the
multicast option allowing very easy and efficient network and DMX universe
configuration. Streaming ACN (sACN) is a popular protocol to control large numbers
of universes and RGB dmx devices.
Both Art-Net and Streaming ACN are Ethernet based DMX protocols designed to
transport DMX universes over a network. Art-Net allows the RDM protocol to be
transported within the Art-Net Protocol. Streaming ACN is currently finishing their
addition of the RDM Protocol, however it is not finished, so RDM over sACN is
currently not supported. When the sACN is ratified to include the RDM protocol, a
simple software update of your Diginet Micro Node will add this functionality. The
sACN protocol does not allow a universe “0”, therefore the first selectable sACN
universe is universe “1”.
MERGING
What happens with more than one source of DMX, Art-Net or Streaming ACN?
The IQ series of nodes can merge multiple instance of the same universe number coming
from multiple sources.
The IQ Micro will automatically merge HTP, any universes coming from multiple sources that
have the same priority. Art-Net sources, by default have the same priority so they will be
merged HTP unless Easy Priority is set to ON. Streaming ACN has priority built into the
protocol by default. If the priority of two or more sources is the same, HTP merging will occur
unless Easy Priority is set to ON. DMX inputs have a “Port Priority” setting which can assign
priority to DMX ports in INPUT mode. If two or more ports have the same INPUT priority,
HTP merging will occur.

Easy priority: By pressing the "Easy priority" button, a new window will pop up.
You can turn the Easy Priority ON or OFF.
What is Easy Priority?
When easy priority is ON, when two or more of the same Art-Net/ sACN universes
are coming into the Diginet Micro node, the console with the higher channel 512 on a
universe value will have control over that universe.

Source loss action: By pressing the "Source loss action" button, a new
window will pop up.
When the "Hold values" setting is chosen, after the source DMX is lost, the IQ Micro
holds the last DMX values it has recieved and continues to output these values until
incoming DMX has been restored.
When the "Blackout" setting is chosen, after the source DMX is lost, all DMX values
will change to 0 and be held at this value until incoming DMX is restored.
When the "Stop DMX" setting is chosen, afterthe source DMX is lost, the IQ Micro
will stop outputting any DMX. When the DMX source is restored, the IQ Micro will
continue outputting the source dmx.
Source loss timeout:
By pressing the "Source loss timeout" button, a new window will pop up.
This setting determines how long the IQ Micro will wait before using the Source
Loss setting. This time is set in seconds. (5-120). Once the source loss timeout time
has been reached, the IQ Micro will revert to the Source Loss timeout setting.

DMX rate:
By pressing the "DMX rate" button, a new window will pop up.
You can select one of 4 options for DMX out refresh rate.
(Adaptive, 20hz, 30hz, 40hz).
The DMX refresh rate setting controls how many times per second the
IQ Micro outputs DMX over 5 pin XLR connectors. Some DMX
devices work better using different refresh rate settings.
In the cases of high speed devices like LED walls and displays, using
the “Adaptive” option can improve response time by matching the
incoming refresh rate of dmx coming from the source.

2) NETWORK SETUP:
IP address:
By pressing the "IP setup" button, a new window will pop up.
Here you can set the IP address for the Diginet Micro.
Subnet mask:
By pressing the "Subnet mask" button, a new window will pop up.
Here you can set the Subnet mask of the Diginet Micro. To change the assigned
subnet mask, replace the current network subnet mask with the desired network
subnet mask.
NOTE: In case when Easy IP setting is set as "ON", you will not be able to change
the subnet mask settings.

Easy IP:
By pressing the "Easy IP" button, a new window will pop up.
This setting will ensure that software will search for all masks, not only for a specified
one.
In the case the Easy IP setting is turned ON, you will not be able to change the
subnet mask.
Easy IP is very useful for most networking situations where subnet filtering isn’t
required. The IQ Micro will automatically find and output Art-Net and sACN
information regardless of IP or Subnet Mask settings. Turning off Easy IP is usefull
when using subnet filtering to help separate different areas of a network when used
in conjunction with a managed switch network. An example of this would be multiple
TV studios having independant networks all attached to one console.
Universe format:
By pressing the "Universe format" button, a new window will pop up.
In this window you can choose the universe format. By default, the universe format is
set at Hex (hexadecimal) but you can change it to Base 16, incremental decimal
counting system or alphanumeric counting system.

3) NODE SETUP:
Info:
By pressing the "Info" button, a new window will pop up.
This is basic informative window where information about device can be seen.
LCD/ LED brightness:
By pressing the "LCD/ LED brightness" button, a new window will pop up.
You can select one of 3 settings: (OFF, Dimmed and Full.)

4) CONFIGURATION:
In this menu you can load the system defaults and reset system settings:
Port defaults will reset all DMX port related settings
Protocol defaults will reset all protocol related settings (sACN/ Art-Net settings)
Reset all settings will reset all settings and restart the system.
After pressing the Load/ Reset buttons, there will be a new confirmation window:
Where you will need to press "OK" to confirm your choice or "X" to return the to
previous screen.

User config:
By pressing "User config 1" or "User config 2" button, a new window will pop up:
There are 3 options available:
Record will record all the configuration settings on the device except DMX data.
Load will load the saved settings recorded with "Record" button.
Delete will delete the recorded setting.
If you will press the "Load", "Record" or "Delete" button, a confirmation window will
appear where you will need to press "✓" to confirm your choice or "X" to return to the
menu.
Defaults
Port defaults will reset all DMX port related settings (configuration as IN/OUT/ RDM
settings/ etc);
Protocol defaults will reset all protocol related settings (sACN/ ArtNet settings);
Reset all settings will reset all settings and restart the system.
After pressing <OK> button, there will be a confirmation window:
Where you will need to press "✓" to confirm your choice or "X" to return to the menu.

DMX PORT SETUP:
By using the <UP>, <DOWN>, <LEFT>, <RIGHT> buttons, select the DMX port you want to
select.
By pressing the <OK> button, a DMX port setup menu will open:
There are 4 pages of setup options.
Universe;
Direction;
RDM;
Priority.

Universe:
By pressing this button, a new window will pop up:
Here the user can set the universe (from 0 to 32767) for the selected DMX port.
(example shows “Decimal” as the Universe Format).
Direction:
By pressing this button, a new window will pop up:
Here the user can set the DMX port direction whether it is an input or output.
RDM OFF/ON:
Here the user can set the RDM settings for selected Ethernet to DMX universe. (this
applies to all connectors that have been switched to this universe)
Table of contents
Popular Media Converter manuals by other brands

Inovonics
Inovonics 510 Operating and maintenance instruction manual

Cross Technologies
Cross Technologies 2017-93 instruction manual

Tews Technologies
Tews Technologies TAMC900 user manual

Pepperl+Fuchs
Pepperl+Fuchs EVS58-PZ manual

Lorex
Lorex LW2290B user guide

Optical Systems Design
Optical Systems Design OSD2167M Series Operator's manual