CompUSA 343177 Operation manual
PCI TV Tuner Card
with Wireless Remote
SKU: 343177
080742-100138
Rev. 061113

2
FCC Radiation Norm
FCC
This equipment has been tested and found to comply with limits for Class B digital device pursuant
to Part 15 of Federal Communications Commission (FCC) rules.
FCC Compliance Statement
These limits are designed to provide reasonable protection against frequency interference in
residential installation. This equipment generates, uses, and can radiate radio frequency energy,
and if not installed or used in accordance with the instructions, may cause harmful interference to
radio communication. However, there is no guarantee that interference will not occur in television
reception, which can be determined by turning the equipment off and on. The user is encouraged
to try and correct the interference by one or more of the following measures:
Reorient or relocate the receiving antenna
Increase the separation between the equipment and the receiver
Connect the equipment into an outlet on a circuit different from that to which the receiver is
connected to.
CAUTION!
The Federal Communications Commission warns the user that changes or modifications to the
unit not expressly approved by the party responsible for compliance could void the user’s authority
to operate the equipment.

3
PACKAGE CONTENTS:
- PCI TV Tuner Card
- Wireless Remote Control
- Remote Receiver Unit
- External Audio Cable
- Multi Video Input Cable
- Driver/Software CD
- User’s Manual
SYSTEM REQUIREMENTS:
- Windows®ME, 2000, XP
- Intel®Pentium®II 400MHz CPU or Higher
- Integrated Audio or Sound Card
- 128MB SDRAM or Above
- DirectX®9 or Above
- UHF/VHF Antenna or CATV Cable (not included)
- 2 AAA Size Batteries (not included)
- An Available PCI Slot
- At Least 4 GB of HDD Space for Every 20 Minutes of Captured Video is Required for
Recording
- CD-ROM Drive (for driver and software installation)
SYSTEM SPECIFICATIONS:
- Supports DVD, VCD, SVCD, AVI, and WMV Formats
- PCI Bus 2.1 Compliant
- Supports Composite and S-Video Inputs
- Wireless Remote Control

4
CABLES AND PORTS:
PRIOR TO INSTALLATION:
For Windows®ME, 2000, XP
To avoid any hardware conflict and/or error, please visit www.windowsupdate.com and install the
most recent updates for your operating system. Please also visit your motherboard manufacturer’s
website and install the most recent updates available for your video and sound card.

5
HARDWARE INSTALLATION:
NOTE: To avoid any damage to your computer due to static electricity, please make sure you are
properly grounded before touching any electronic device(s) inside your computer. An anti-static
wrist strap is recommended to achieve proper grounding. Consult your computer’s manufacturer
for more details.
To properly install your new PCI TV Tuner Card, please follow the instructions below:
1. Turn off your computer.
2. Remove the side cover of your computer case, and then locate an available PCI slot for
your PCI TV Tuner Card.
3. Slide your PCI TV Tuner Card into the available PCI slot, then secure the card with a
mounting screw.
4. Replace the side cover of your computer case.
5. Connect the enclosed Multi Video Input Cable to the AUX port.
6. Connect an antenna or CATV cable to the TV port.
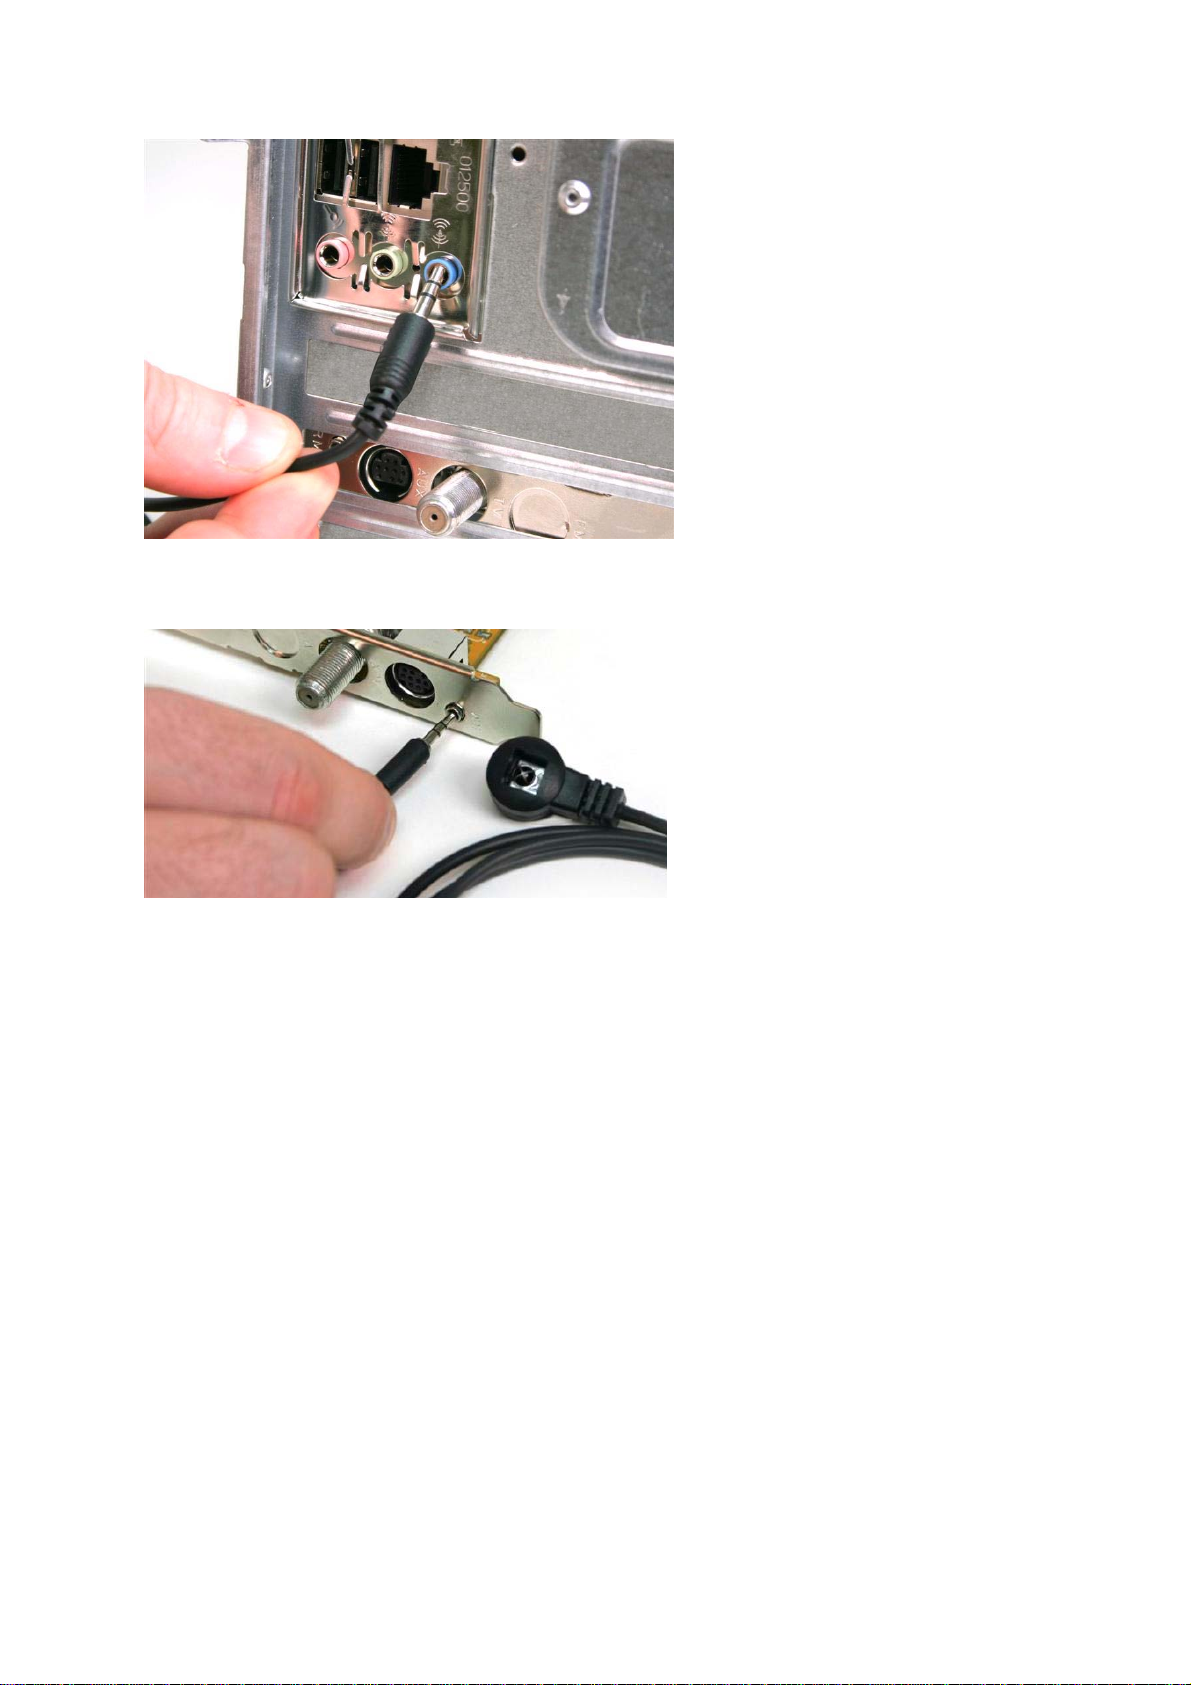
7. Connect the green Audio Out cable on the Multi Video Input Cable to the enclosed External
Audio Cable.
6
8. Connect the other end of the enclosed External Audio Cable to the blue Line In port on your
sound card (or Integrated Audio Device).
9. Connect the enclosed Remote Receiver to the RM port on your card.
SOFTWARE INSTALLATION:
Before you install the software for your PCI TV Tuner Card, please make sure the card is properly
installed. If you need help installing your PCI TV Tuner Card, please refer to the Hardware
Installation section in this manual.
NOTE: You must install DirectX® 9 before you install the drivers.
Microsoft®DirectX®
To install DirectX®9 on your computer, please follow the instructions below:
1. Turn on your computer.
2. Your computer will detect your PCI TV Tuner Card and the New Hardware Wizard will start.
If the hardware wizard appears, click “Cancel” to close it.
3. Place the enclosed Driver CD into the CD-ROM drive of your computer.
4. The setup menu will open automatically. If not, click “Start”, then “Run…”, type
“D:\Autorun.exe” into the dialog box (NOTE: “D:\” represents the drive letter assigned to
the optical drive you are using. If Dis not the letter assigned to your optical drive, replace D
with the appropriate drive letter.), then click “OK”.
7
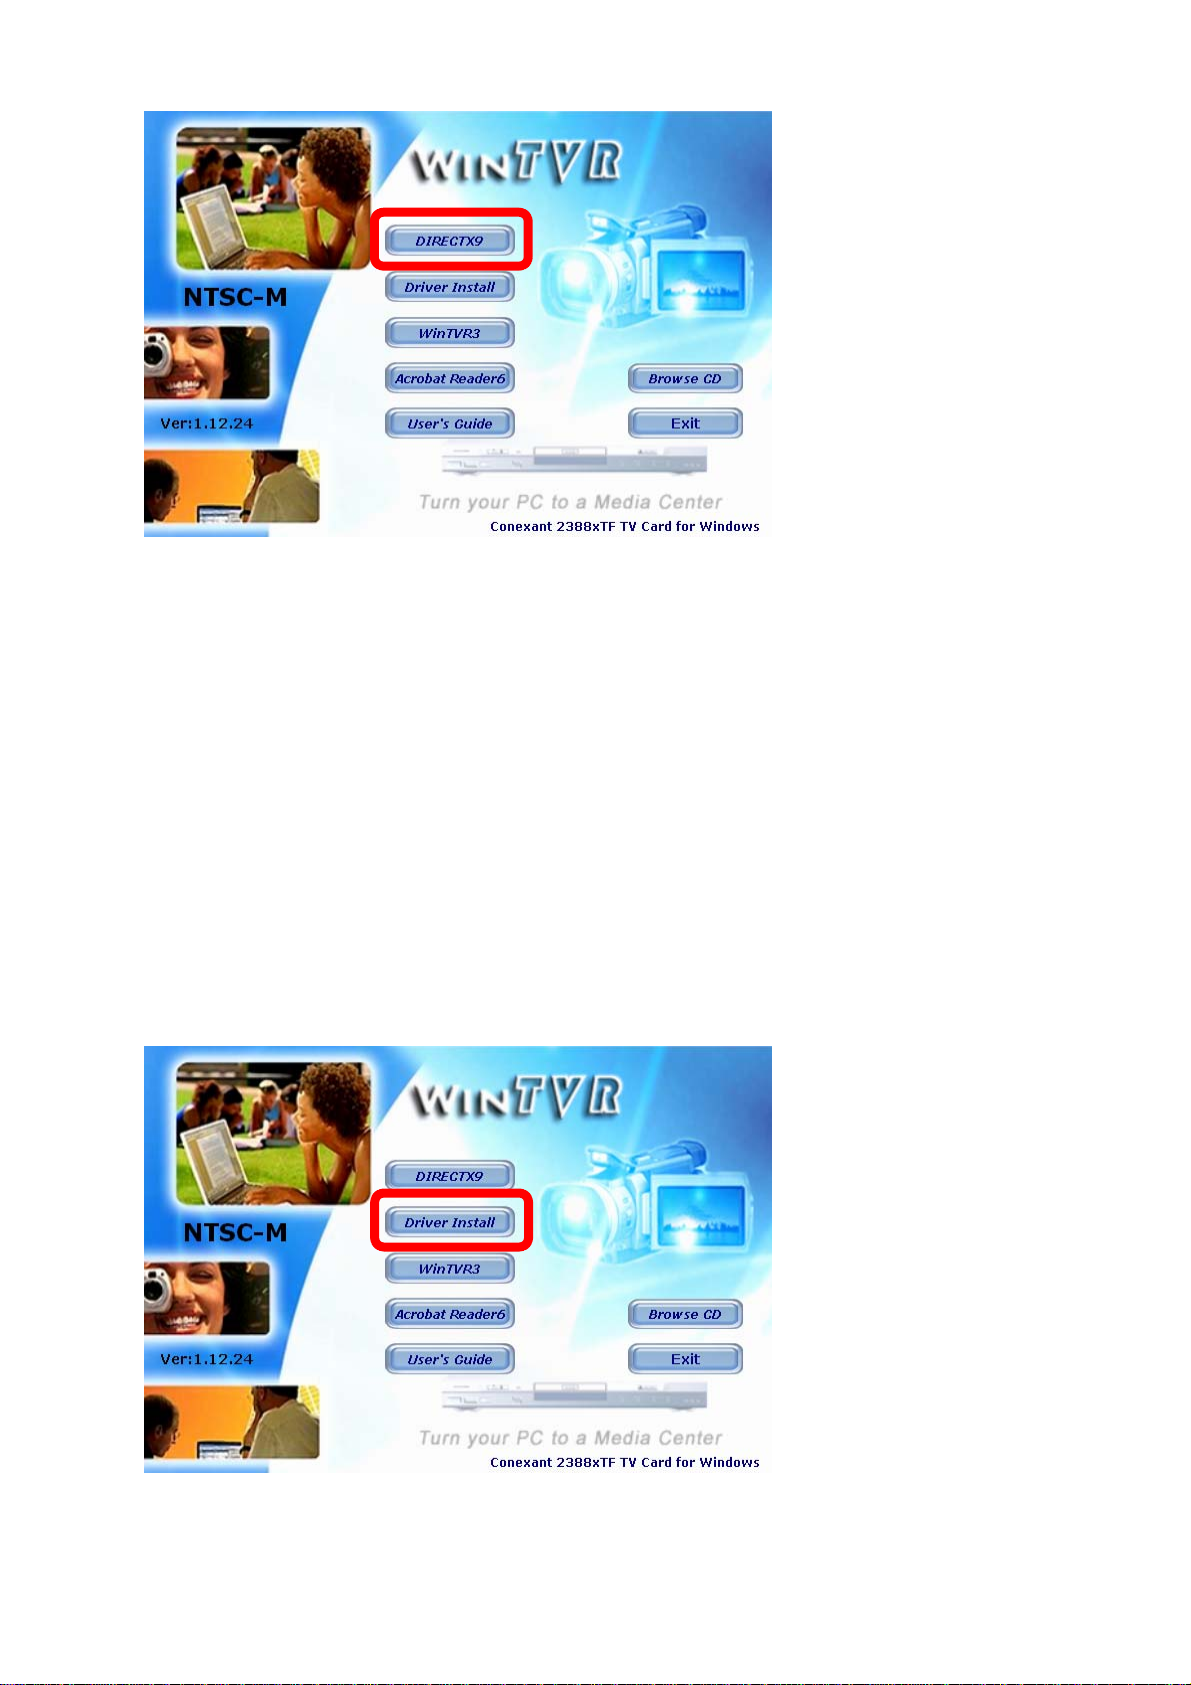
5. Click “DIRECTX9” to start the installation.
6. Follow the onscreen instruction to complete the installation. After the installation is complete,
click “Finish” to close the wizard and restart your computer (NOTE: If your computer
already have DirectX®9 or above installed before you run this installation, it is not required
to restart your computer before you proceed to the next step).
Driver Installation for All Windows®Operating Systems
1. After your computer has restarted, your computer will detect your PCI TV Tuner Card and
the New Hardware Wizard will start. If the hardware wizard appears, click “Cancel” to
close it.
2. With the enclosed Driver CD still in your CD-ROM Drive, click “Start”, then “Run…”, type
“D:\Autorun.exe” into the dialog box (NOTE: “D:\” represents the drive letter assigned to
the optical drive you are using. If Dis not the letter assigned to your optical drive, replace D
with the appropriate drive letter.), then click “OK”.
3. Click the “Driver Install” button to start the driver setup screen.
8
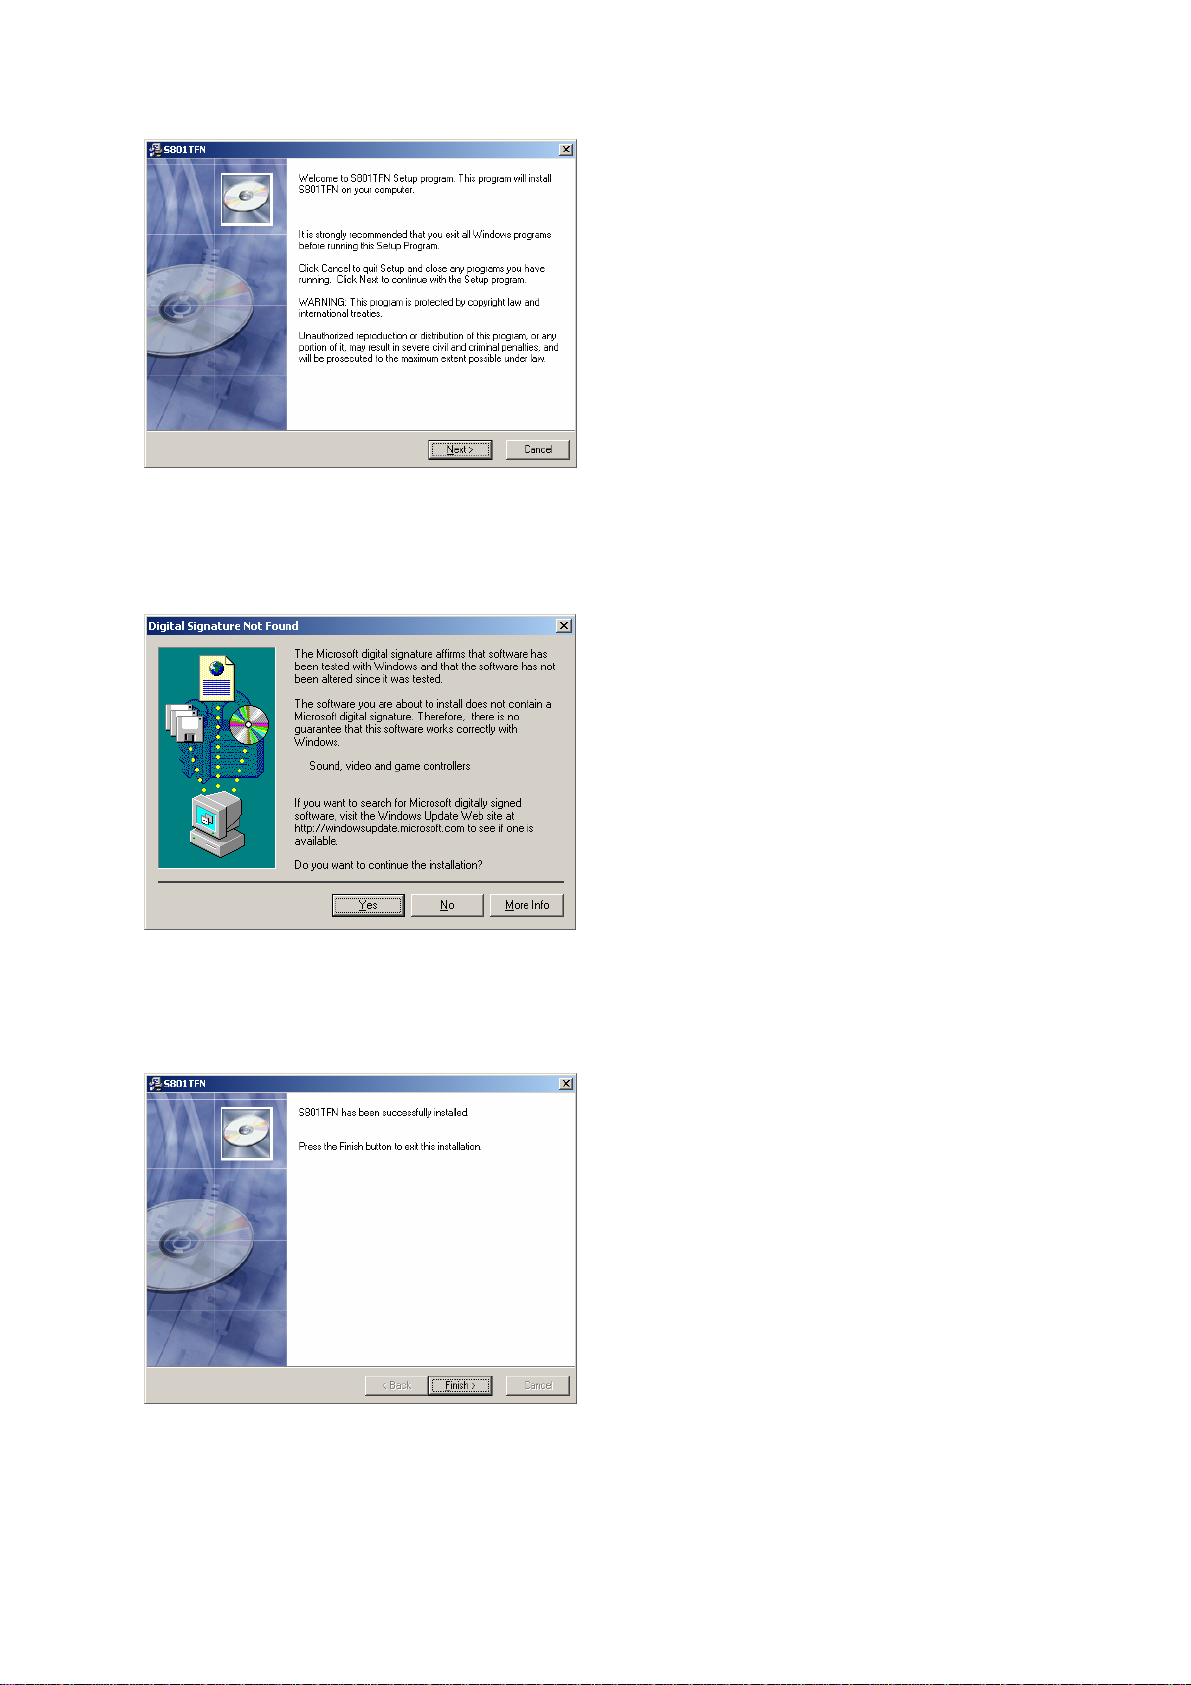
4. At the driver setup screen, click “Next” to continue. Follow the onscreen instructions to
install the driver for your PCI TV Tuner Card.
5. During the installation, your computer may notify you that the software you are installing
does not have a Windows®digital signature. If this occurs, click “Yes” to continue (for
Windows®XP users, click “Continue Anyway”).
*NOTE: This screen is for demonstration purposes only. Your screen may look different but with the similar
information.
6. Click “Finish” to close the wizard.
7. For Windows®XP users, Windows®will detect the “Conexant 23880 Video Capture
(NTSC)” device and the “Found New Hardware Wizard” will appear. Click “Next” and then
follow the onscreen instruction to complete the driver installation.

9
WinTVR 3 Software
To install the WinTVR 3 Utility onto your computer, please follow the instructions below:
1. Turn on your computer.
2. Place the enclosed Driver CD into the CD-ROM drive of your computer. The setup menu
will open automatically; If not, click “Start”, then “Run…”, type “D:\Autorun.exe” into the
dialog box (NOTE: “D:\” represents the drive letter assigned to the optical drive you are
using. If Dis not the letter assigned to your optical drive, replace Dwith the appropriate
drive letter.), then click “OK”.
3. Click the “WinTVR3” button to start the driver setup screen.
4. A dialog box will appear, select your language from the drop-down list, and then click “OK”
to continue.
5. Follow the onscreen instructions accepting the defaults to complete the WinTVR installation.
The WinTVR installation includes the following components:
- Windows®Media Tools
- Windows®Media Format 9 Series Runtime (recommended for Windows®2000 & XP
users)
- WinTVR software
6. After the WinTVR installation is complete, restart your computer.
7. Your PCI TV Tuner Card is now ready to be used.

10
USING WINTVR 3:
You can now enjoy your favorite TV shows right from your computer. This section provides
detailed instructions on how to use the WinTVR 3 software with your PCI TV Tuner Card.
WinTVR 3 Display Panel
1 Minimize/Full Screen/Close 9 Take a Snapshot
2 Channel Selection Keypad 10 Settings
3 Step Backward/Step Forward 11 16 Channel Preview
4 Record/Time-Shifting 12 Auto Scan TV Channels
5 Stop 13 Mute
6 Pause 14 Volume Control
7 Play 15 Recording Schedule
8 Open Movie Clip 16 Current Status
Table of contents


