Concept2 Model B User manual

concept2.com 800.245.5676
1207
heart rate assembly
installation and use
FOR INDOOR ROWER MODELS B, C, AND D

2
1207
PN 1761
3 J-clips and Heart Rate (HR) receiver w/cable
installing heart rate interface on a model b
If signal is not picked up, place the receiver on
the floor under the middle of the monorail.
Thread wire into holders.
OFF
6.
1.
3.
5.
7.
2.
4.
HR receiver
J-clip
J-clip
J-clip
J-clip
J-clip
J-clip
HR receiver
J-clip

3
1207
OFF
*A. Routing for machines built before Oct. 1, 1997.
*B. Routing for machines built after Oct. 1. 1997.
Note for storage: Before you disconnect monorail from front end, remove
receiver from VELCRO©patch and remove cable from framelock area.
*A. *B.
1.
3.
5.
7.6.
2.
4.
*B.
*A.
Route wire through
the framelock.
For machines
built before 7-1-95.
For machines
built after 7-1-95
21”/53cm
J-clip
HR receiver
J-clip
J-clip
J-clip
J-clip
J-clip
PN 1761
3 J-clips and Heart Rate (HR)
receiver w/cable
installing heart rate interface on a model c

4
1207
NOTE FOR STORAGE: Before disconnecting monorail from front end, remove receiver from
VELCRO®patch and remove cable from framelock area.
21”/53 cm
2
PN 1761
3 J-clips and Heart Rate (HR)
receiver w/cable
J-clip
J-clip
J-clip
HR receiver
3. Cable Routing Detail for Model D Indoor Rowers
purchased BEFORE August 1, 2006.
1
5
4
3
6
installing heart rate interface on a model d
3. Cable Routing for Model D Indoor Rowers
purchased AFTER August 1, 2006.
cable plug in
6. Monitor Arm Routing Detail

5
1207
1. WET THE ELECTRODE AREAS OF ELASTIC CHEST BELT
Wet the electrode area (the two rectangular areas on the underside of the chest belt transmitter) thoroughly
under running water.
2. ATTACH THE CONNECTOR TO THE ELASTIC CHEST BELT
Position the letter L on the connector next to the word LEFT on the chest belt and snap the fastener.
3. SECURE THE ELASTIC CHEST BELT
Center the chest belt flat against your skin, as high under the pectoral muscles (breasts) as is comfortable.
Snap the second fastener. The chest belt should fit snugly and comfortably and allow for normal breathing.
4. ROW!
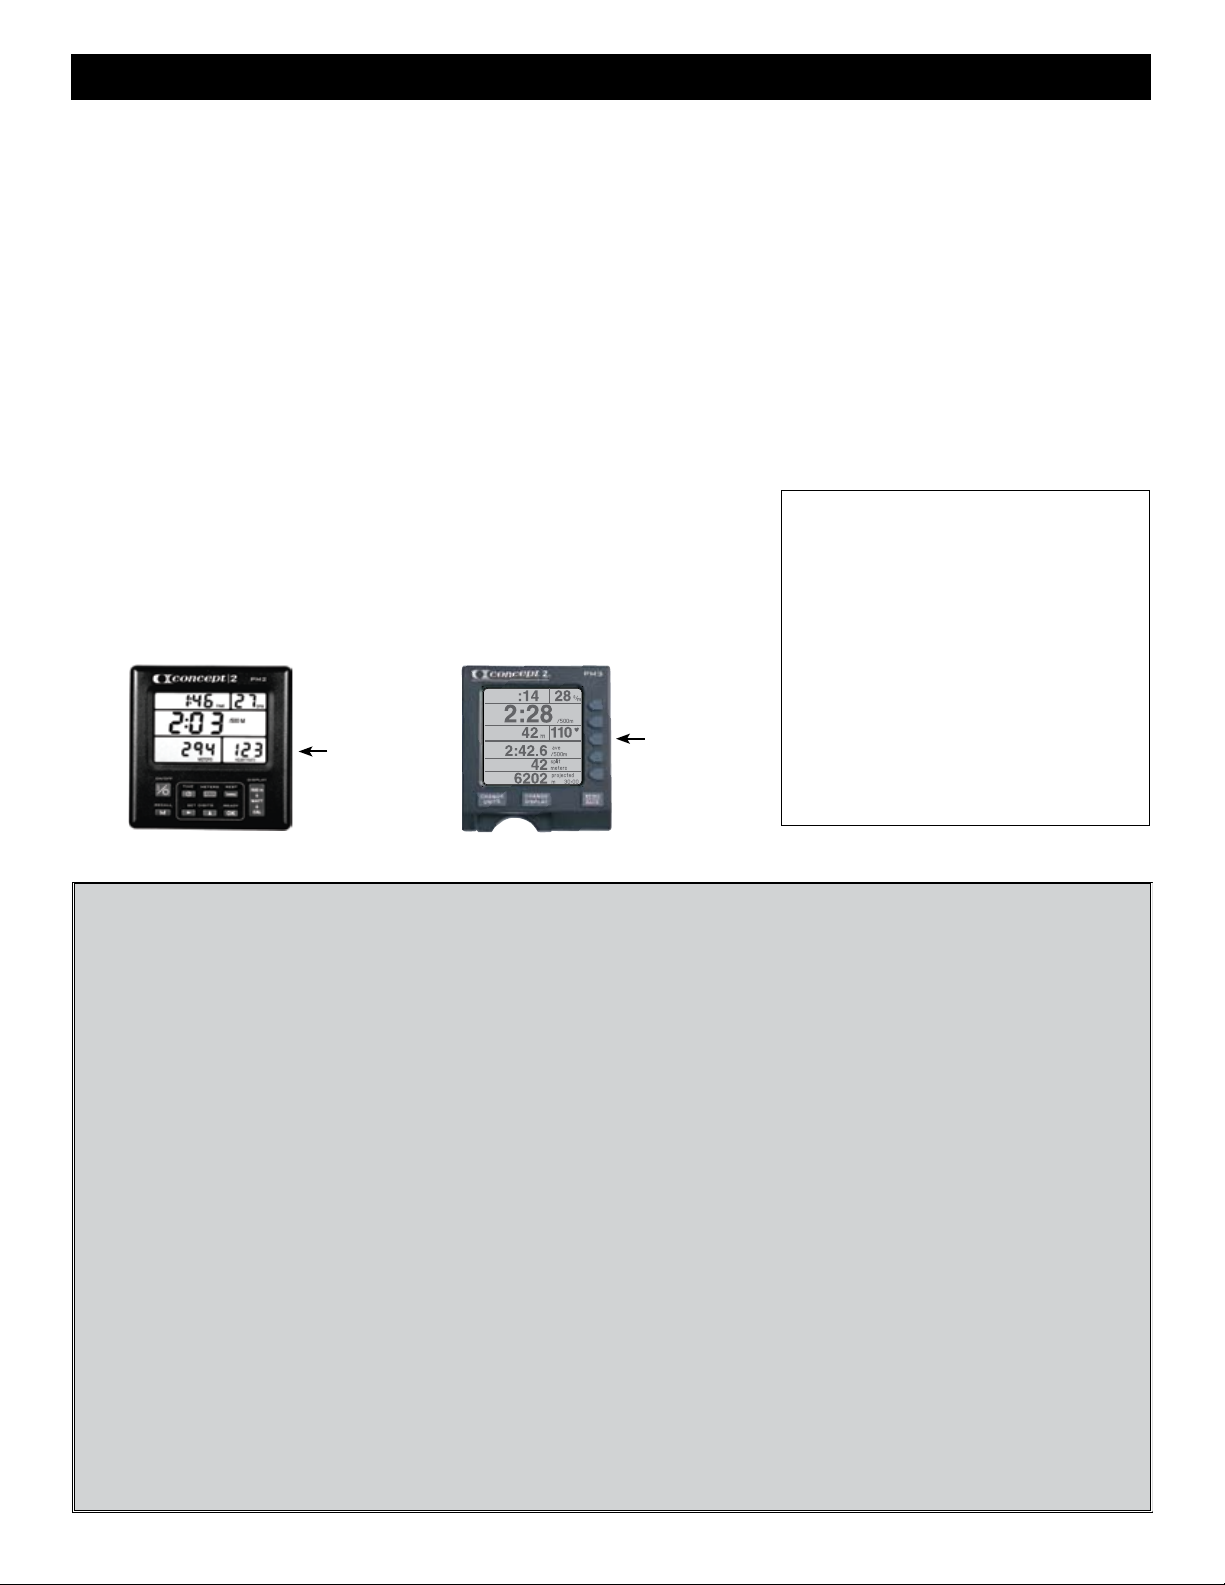
If you have a PM2 or PM2+your heart rate will be dispalyed in the lower right display in all display modes. If
you have a PM3 or PM4 your heart rate will be dispalyed in the center right display in all display modes. See
photos below.
NOTE: It sometimes takes a few minutes of exercise to achieve a
consistent heart rate signal.
TROUBLESHOOTING
how to wear polar™ (or polar compatible) heart rate monitor
Precautions
• ThoroughlywipeyourPolarelasticchest
belt and connector dry after each use.
• Donotstoreinanon-breathableorplastic
bag where moisture may become trapped.
Store in a warm dry place.
• Donotexposeyourheartratemonitorto
direct sunlight, extreme heat above 50˚
Celsius (122˚ Fahrenheit) or extreme cold
below -10˚ Celsius
(14˚ Fahrenheit).
• Donotbendorstretchtheelectrodestrips
on your elastic chest belt, especially when
storing.
TROUBLESHOOTING
What if the heart rate reading is erratic or totally
absent?
NOTE: Occasionally the heart rate monitor will
pick up bad data for a number of reasons. When
the monitor recognizes bad data, the display will
go blank rather than show the bad data. It will take
five seconds or longer to re-establish and display
accurate readings.
1. Repeat the electrode wetting procedure as
described above. The electrodes must be wet to
pick up accurate heart rate readings.
2. Make sure the connector is centered with
electrodes flat against your skin, as high under
the pectoral muscles as is comfortable.
3. Wash your elastic chest belt with mild soap and
water, if you have not been doing so regularly.
4. Make sure your receiver is within the proper
range to receive transmission (1 meter/3 feet
from your chest belt).
5. Check the connection where the receiver cable
plugs in. On a PM2 or PM2+the receiver cable
Read heart
rate here.
Read heart
rate here.
PM2 and PM2+PM3 and PM4
plugs into the back of the monitor. On a PM3 or PM4
the receiver cable plugs into the underside of the
monitor. Check the connection between the cable and
the receiver.
6. If you are exercising within range of strong
electromagnetic signals the heart rate readings may
elevate to abnormal levels. Common sources of
electromagnetic signals are televisions, computers,
cars, TV antennas, high voltage power lines and motor
driven exercise equipment.
7. Signals from more than one HR monitor within the
transmission range (1 meter/3 feet) may also cause
incorrect readings. Check your surroundings and move
away from the source of interference if possible.
NOTE: Two indoor rowers with heart rate hardware
must be at least four feet (1.22 meters) apart to avoid
interference.
If further troubleshooting assistance is
needed, call Concept2 at 1.800.245.5676.

6
1207
Medical authorities use the term “target zone” to describe the amount of physical activity which is enough to
achieve fitness but not too much to exceed safe limits. This target zone is the level of activity which produces
a heart rate of from 70-85% of the maximum attainable heart rate during all-out effort. (A rough formula for
estimating your maximum heart rate is to subtract your age from 220.) Put in simple terms, your own heart
rate can be used as a “speedometer” that tells you how much exercise your body needs for optimal physical
fitness.
The following Target Range Chart, provided by Polar Electro, Inc., is based on averages and can only be used as
a guideline. For more accurate information, consult your doctor.
Note: Before beginning any type of exercise program, consult your doctor if you are over 35 years of age, have
not been following a regular exercise program, smoke, have high blood pressure or high cholesterol, or use a
pacemaker.
TARGET RANGE CHART
When you begin your exercise program, try to stay at
the lower end of your target zone. As your fitness level
improves, vary your exercise duration and intensity.
Choose your target zone according to your personal fitness
goals. If your goal is weight management, high intensity, hard
exercise is not necessary to burn fat effectively. (See the
WEIGHT MANAGEMENT ZONE)
Exercising in the INCREASED performance ZONE (above
85% of your maximum heart rate) is only necessary for
competitive athletes.
exercise duration and frequency
Fitness experts advise that workouts should last approximately 30 to 40 minutes and be done at least three
times a week. Your workouts should be spread throughout the week to let your body recover properly. Polar
heart rate monitors guide you through your workout giving you continuous ECG-accurate heart rate readings.
TARGET ZONE EXERCISE PATTERN
(40-year-old person)
Begin each workout slowly and give your body a chance
to warm up at least five minutes below your target zone.
Gradually increase the intensity of your exercise until you
are in your target zone. Remain in your target zone for 20 to
30 minutes. Gradually reduce the intensity of your exercise
and let your heart rate fall below your target zone with a five
minute cool down period.
80
100
120
140
160
180
200
65605550454035302520
Age
INCREASED PERFORMANCE ZONE
IMPROVED FITNESS ZONE
WEIGHT MANAGEMENT ZONE
MODERATE ACTIVITY ZONE
Heart rate in beats per minute
182
155
130
120
100
TARGET ZONE
FAT BURNING ZONE
Max
85% maximum
55% maximum
Warm Up
5–10 min.
Target Zone Exercise
20–30 min.
Cool
Down
5–10 min
RestingResting
Start Exercise
Heart rate in beats per minute
The charts and information in this section have been reprinted with permission from Polar Electro, Inc.
DISCLAIMER
• Thematerialinthismanualisforinformationpurposesonly.Theproductsitdescribesaresubjectto
change without prior notice, due to the manufacturer's continuous development program.
• PolarElectroInc./PolarElectroOymakesnorepresentationsorwarrantieswithrespecttothismanualor
with respect to the product described herein.
• PolarElectroInc./PolarElectroOyshallnotbeliableforanydamages,losses,costsorexpenses,direct,
indirect or incidental, consequential or special, arising out of, or related to the use of this material or the
products described herein.
Copyright © 2005 Polar Electro Inc.
monitoring heart rate to determine training intensity
This manual suits for next models
2
Table of contents
Other Concept2 Home Gym manuals

Concept2
Concept2 D User manual

Concept2
Concept2 D User manual

Concept2
Concept2 Dynamic User manual

Concept2
Concept2 E User manual

Concept2
Concept2 SkiErg User manual

Concept2
Concept2 D Use and care manual

Concept2
Concept2 ROWERG User manual

Concept2
Concept2 D1 User manual

Concept2
Concept2 ROWERG User manual

Concept2
Concept2 D Use and care manual