M6 UNIVERSAL MAGNETIC
CAR HOLDER
USER MANUAL
1Features
Universal holder for mobile phones and navigation
Compatible with most of phones of screen size 3.5”– 6”
For use of navigation we recommend only with 3M lm
Possibility of mounting on the dashboard or windshield
360° degree rotation
Material: plastic and magnet
2Package
1. Magnetic holder
2. Arm with a suction cup
3. Two magnetic plates (with and without 3M adhesive tape)
4. User manual
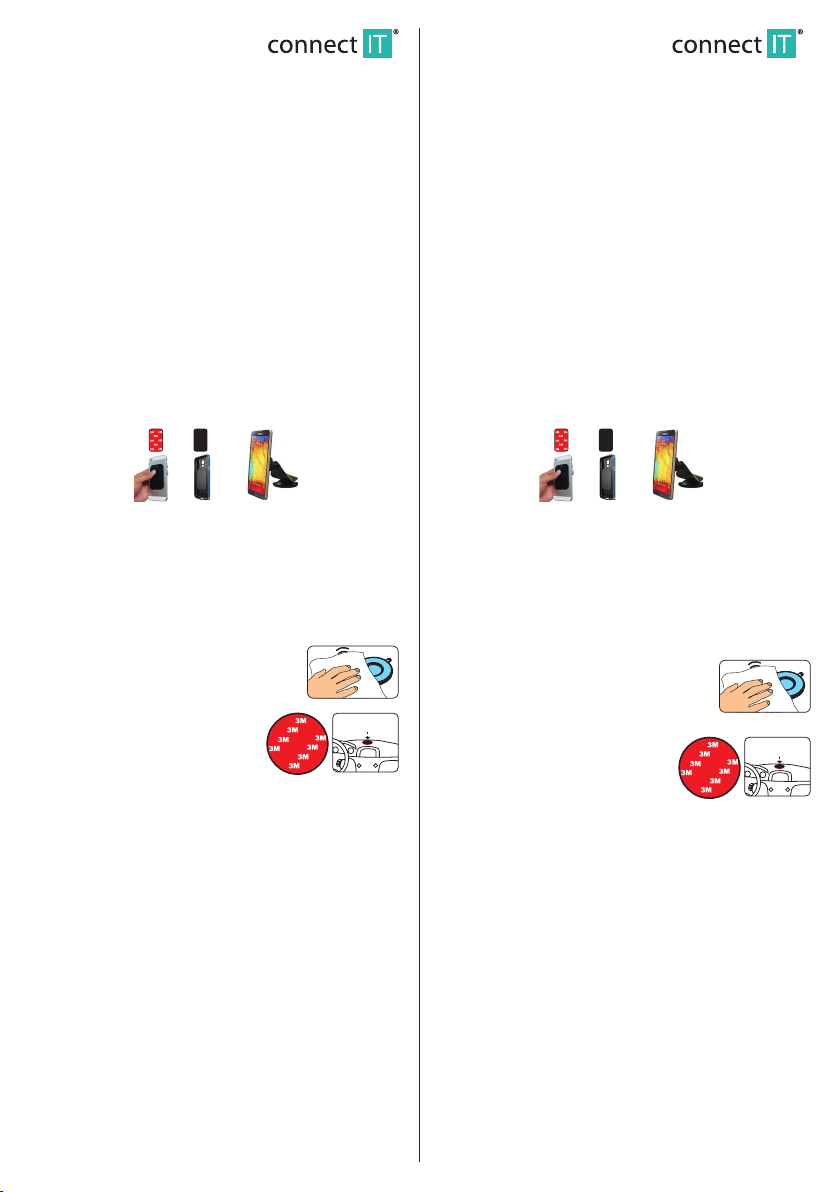
3Installation
1. Insert the magnetic plate (without 3M) to the mobile wallet or stick the
magnetic plate (with 3M) to the rear side of the mobile phone.
2. Mount the magnetic holder on the joint of the arm equipped with a suction
cup and secure it in the required position by tightening the xing nut.
3. Before attaching the suction cup, the operating lever of the suction cup
must be at a right angle to the suction cup surface. Place the suction cup to
the desired location and turn the operating lever down.
4. After taking o the holder turn the operating lever to the right angle
position to the suction cup surface and use the lag for lifting the edge of
the suction cup and equalizing the pressure. If suction is too strong, you can
help by slight pulling the holder arm.
5. Mount the phone with magnetic plate to the magnet of the holder.
Repeatedly usable gel suction cup
As to preserve adhesion, after the use you will wipe
the gel suction cup with a wet cloth and let it dry
completely.
3M Film
For xing to a permeable or rough,uneven
surface that does not make possible the xing
by a gel suction cup, use 3M Film.
Notice:
Suction cup can leave an oval spot.
Do not install the holder near the airbag.
For taking the holder o, turn the operating lever to a right angle position to
the suction cup surface and use the lag for lifting the edge of the suction cup
and equalizing the pressure.
If you take the holder o improperly you can damage the surface, on which
the holder has been installed.
Suction cup does not work on a permeable surface. For its optimum function
it is necessary that the suction cup must have a perfect contact to the
surface.
For optimum function we recommend you to use 3M lm.
Before you change the holder position, loosen the xing lever, otherwise it
could come to its damage.
If you do not use the holder, leave the operating lever of the suction cup in
the open position.
If you do not use the holder, use the protective foil to protect the suction
cup against dirt.
M6 UNIVERSAL
AUTOHALTERUNG MAGNET
BENUTZERHANDBUCH
1Eigenschaften
Universelle Kfz-Halterung für Handys und Navigationsgeräte
Kompatibel mit den meisten Handys mit einer Bildschirmgröße von 3,5”– 6”
Bei Navigationsgeräten wird die Verwendung nur mit einem 3M-Film
empfohlen
Möglichkeit der Anbringung am Armaturenbrett oder am Glas
360° Gelenkrotation
Material: Kunststo und Magnet
2Packungsinhalt
1. Magnetische Halterung
2. Arm mit Saugnapf
3. Zwei Magnetplättchen (mit und ohne 3M Klebeband)
4. Bedienungsanleitung
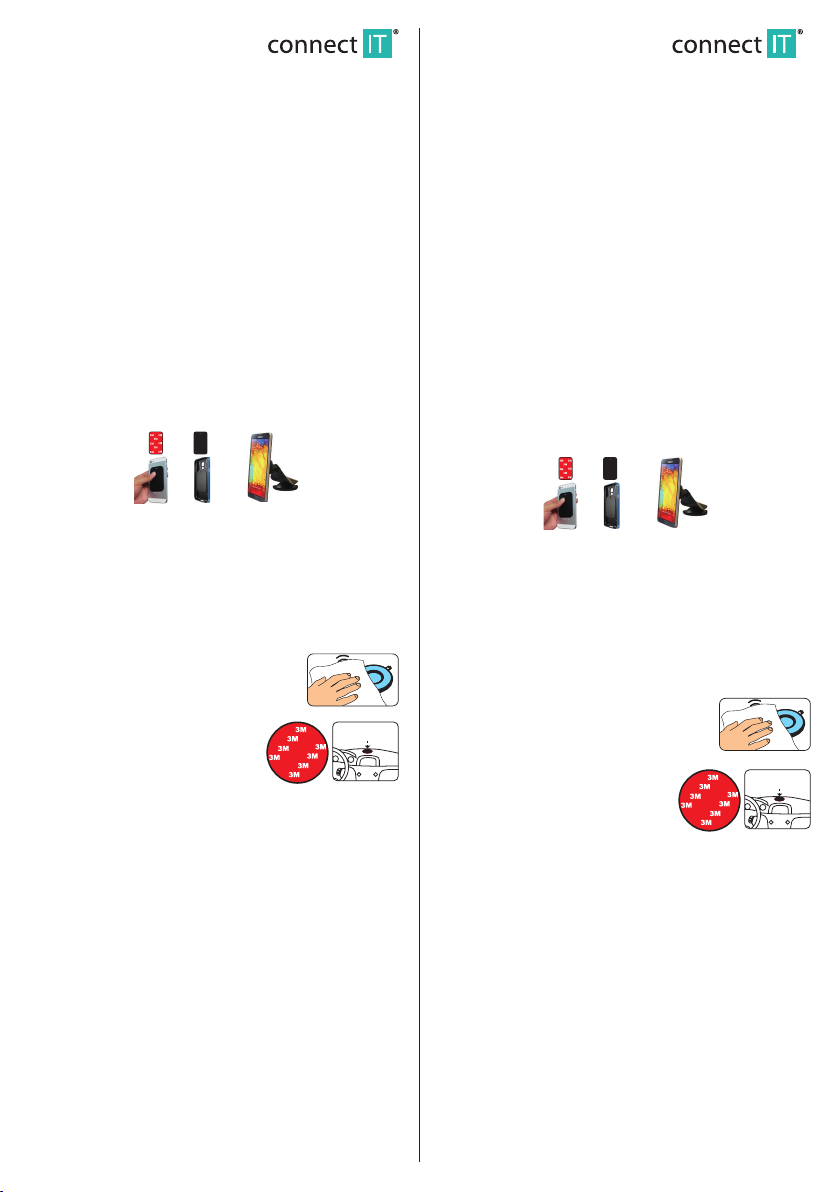
3Installation
1. Legen Sie das Magnetplättchen (ohne 3M) in die Hülle Ihres Handys ein
oder kleben Sie das Magnetplättchen (mit 3M) an die Hinterseite des
Handys.
2. Setzen Sie die magnetische Halterung auf das Gelenk am Arm mit dem
Saugnapf auf und sichern Sie es durch Festziehen der Spannmutter in der
geforderten Lage.
3. Vor dem Festsaugen des Saugnapfs muss der Steuerhebel des Saugnapfs
senkrecht zur Fläche des Saugnapfs positioniert sein. Bringen Sie den Saug-
napf an die gewünschte Stelle und klappen Sie den Steuerhebel zu.
4. Zum Entfernen der Halterung drehen Sie den Steuerhebel in die senkrechte
Position zur Fläche des Saugnapfs und verwenden Sie den Vorsprung für
das Anheben des Saugnapfrandes und zum Druckausgleich.
5. Setzen Sie das Handy mit dem Magnetplättchen auf den Magneten der
Halterung auf.
Wiederverwendbarer Gelsaugnapf
Für die Beibehaltung der Haltfähigkeit wischen Sie nach
der Verwendung den Gelsaugnapf mit einem feuchten
Tuch ab und lassen Sie ihn vollständig trocken werden.
3M Film
Für die Anbringung auf eine luftdurchlässige
oder grobe unebene Oberäche, die das Fest-
saugen des Gelsaugnapfs nicht ermöglicht,
verwenden Sie den 3M-Film.
Hinweise:
Der Saugnapf kann einen ovalen Fleck hinterlassen.
Befestigen Sie die Halterung nicht in der Nähe des Airbags.
Zum Entfernen der Halterung drehen Sie den Steuerhebel in die senkrechte
Position zur Fläche des Saugnapfs und verwenden Sie den Vorsprung für das
Anheben des Saugnapfrandes und zum Druckausgleich.
Bei fehlerhaftem Entfernen der Halterung können Sie die Oberäche, auf der
die Halterung angebracht war, beschädigen.
Auf einer luftdurchlässigen Oberäche funktioniert der Saugnapf nicht. Für
eine optimale Funktion ist es erforderlich, dass der Saugnapf mit der Oberä-
che vollkommen in Kontakt ist.
Für eine optimale Funktion wird die Verwendung des 3M-Films empfohlen.
Vor der Änderung der Position der Halterung lockern Sie die Klemmhebel,
damit Sie die Halterung nicht beschädigen.
Falls Sie die Halterung nicht benutzen, lassen Sie den Steuerhebel des Saug-
napfs in der oenen Position.
Falls Sie die Halterung nicht benutzen, verwenden Sie eine Schutzfolie, damit
eine Verunreinigung des Saugnapfs verhindert wird.
CI-504 CI-504