manuals.online logo
Brands
  1. Home
  2. •
  3. Brands
  4. •
  5. Connevans
  6. •
  7. Receiver
  8. •
  9. Connevans fmGenie Tx User manual

Connevans fmGenie Tx User manual

This Fast Track Guide takes you through the basic steps required to
get an fmGenie transmitter working with a Phonak MLx receiver.
The fmGenie transmitter is worn by the teacher/tutor and their voice is
transmitted to the MLx receiver which attaches to a direct input shoe
and then to the user’s own direct input hearing aid.
Part 1 Batteries
The fmGenie uses standard size AA batteries. Rechargeable batteries are
the recommended option and, once fitted, are charged ‘in situ’ – just like
a mobile phone.
Rechargeable batteries – nickel metal hydride (NiMH)
New rechargeable batteries require charging before use.
1 To fit the batteries, slide open the battery
cover and insert as shown. The technique is a
combination of ‘squeeze, thumb and wiggle’–
you won’t break it and the firm fit stops the
battery cover accidentally falling off.
2 Do NOT turn on the fmGenie.
3 Plug one lead from the twin tail charger into the
socket marked ‘Chg’, rolling battery bars should be
visible on the right of the status display.
The spare lead from the twin tail charger can be left dangling
or neatly coiled and secured with a rubber band.
4 The equipment will be given an initial 4 hour
charge – enough for a few days’ use.
5 When display goes blank, fmGenie is ready for use.
After this initial charge, your fmGenie will automatically
take either a full or top up charge as required.
Alkaline batteries
The fmGenie can also be used with alkaline AA batteries
– which can be useful in an emergency – you could even
borrow some from your TV remote controls!
The performance is the same whatever type of AA battery is used.
fmGenie Tx & Phonak MLx
Fast Track Guide
Page 53 – User Guide (2nd Edition)
fmGenie/MLx Fastrack Guide Version 2.0 1
Version 2.0 fmGenie/MLx Fastrack Guide fmGenie/MLx Fastrack Guide Version 2.0
fm
G
enie
/MLx
fm
G
enie
/MLx
32
fm
G
enie
/MLx
fm
G
enie
/MLx
2 Reset the fmGenie transmitter default channel to match an MLx,
follow the instructions on page 11 of this Fast Track guide – but
you must choose the correct channel scheme first or you will get
an E1 error message.
European channel frequencies
All new fmGenies are now supplied on the 50KHz channel grid.
If your MLx is channel no. H02 or H06 then do nothing except set
your fmGenie to the correct channel:
MLx on H02=fmGenie on 39. MLx on H06=fmGenie on 63.
For use with any other MLx channel numbers: you will need to
adjust your fmGenie to the pre-2004 UK channel scheme by
changing the under flash switch settings 1 & 2 to ‘DOWN, DOWN’ –
then choose the appropriate fmGenie channel from the table above.
See page 12 of this Fast Track
1 Connect either an aerial or lapel
microphone into the fmGenie transmitter
external microphone socket (Ext mic).
Part 2a fmGenie transmitter
– connecting up and turning on
Part 2b Setting the channels
1 Check the channel number shown on the side of
your MLx receiver and then set your fmGenie
transmitter to the appropriate fmGenie channel.
It is the actual frequency that is being matched rather than the
channel numbers.
Eg: MLx channel H02 is using the frequency 173.400 MHz so it needs
to be used with an fmGenie transmitter set to channel 39 (or 01).
2 Turn on the transmitter by pressing and
holding the ON/OFF button until the
display turns on and the alert indicator
flashes.
...or
with a
lapel mic
MLx channel number
Pages 34-36 – User Guide (2nd Edition) Pages 36 and 78 – User Guide (2nd Edition)
Either with
an aerial to
use the
internal
mic ...
4 Check that there are 4 aerial bars on the left.
(3 bars = normal range and 4 bars = long
range). The transmitter should be set to long
range for use with MLx receivers
– see page 11 to change.
3 Set the channel number of the
fmGenie transmitter to the
channel used by your MLx.
Remember that the H prefix
MLx channel number will differ
from the fmGenie channel
number – see next page.
Channel
number
Alert
indicator
Aerial bars
Frequency channel coding comparisons
MHz fmGenie MLx
173.400 39/01 H02
174.120 11 H16
174.415 15 H20
174.600 63/17 H06
174.770 19 H08
The fmGenie transmitter and the MLx receiver
both have to use the same frequency channel.
fm
G
enie
/MLx
fm
G
enie
/MLx
fm
G
enie
/MLx
fm
G
enie
/MLx
54 fmGenie/MLx Fastrack Guide Version 2.0Version 2.0 fmGenie/MLx Fastrack Guide
Part 3 – MLx configuration
The MLx receiver module has two possible mounting
orientations – crosswise and lengthwise.
It is very important to have the correct orientation for
your aid to optimise the performance of the internal
antenna – otherwise you will unnecessarily limit the
operating range.
For best sensitivity the MLx should be set so that the
Phonak logo is facing to the side and the switch moves
from front to back.
An easy way to check the orientation is to simply fit the hearing aid and
shoe together and then plug in the MLx – an even easier way is to note
the orientation under the icon for your shoe in section 2 of the
Connevans Catalogue!
Lengthwise
Crosswise
User’s own
hearing aid
fitted to direct
input shoe
and MLx
receiver
MLx switch moves
from front to back
Battery power for the MLx
As the MLx receiver takes its power from the hearing aid battery it is
very important that the battery is in good condition. A low battery will
result in increased hiss and reduced range – the normal life of a hearing
aid battery will be more than halved when used with an MLx, if in doubt
fit a new battery.
Does the switch move from front to
back? If it does, then no adjustment
is required; if it does not then it is
necessary to re-orientate.
Orientation instructions are supplied
with MLx units, adjustment is by
removing two very small screws,
splitting open the casing and gently
rotating the pins and their base
through 90°.
Part 4 – MLx operational features
Select ‘FM+M’ (zz) when both FM input and environmental
sound from the hearing aid microphone is required. This
position allows both the hearing aid microphone and FM
signal to be heard simultaneously at the same level.
Variations between different makes of hearing aid may
affect the balance of the two signals.
Select ‘FM’ (z) to reduce the pickup of ambient noise from
around the hearing aid by 20dB.
For hearing aids where the microphone and audio input are
decoupled – typical for hearing aids with dual microphones
and some programmable instruments – the principal of
microphone attenuation will not work. For these
instruments the MLx should always be set to ‘FM+M’ (zz).
The MLx takes its power from the hearing aid, typically
1.8mA, so the battery life of the aid is reduced by more
than half. When switched to ‘off’ (|) position the MLx goes
into a low current sleeping mode drawing typically 40
μ
A.
The Phonak MicroLinktm receiver has one 3 position switch. This
switch selects the two operating modes ‘FM’ (z), ‘FM+M’ (zz) and
‘off’ (|).
Note: It should be emphasised that different hearing aids (from different
manufacturers) will respond differently – we are not aware that this is
documented so you will need to confirm for yourself exactly how your
hearing aid performs.
Wearing the MLx receiver
The MLx receiver fits to the hearing aid itself via a direct
input shoe and therefore needs no leads or pouches.
It is, however, fair to note the small size of the MLx does
mean that care must be taken not to lose it!
Connevans Catalogue – section 2
,
Hearing Aid Direct Input Shoes
fm
G
enie
/MLx
fm
G
enie
/MLx
fm
G
enie
/MLx
fm
G
enie
/MLx
76 fmGenie/MLx Fastrack Guide Version 2.0Version 2.0 fmGenie/MLx Fastrack Guide
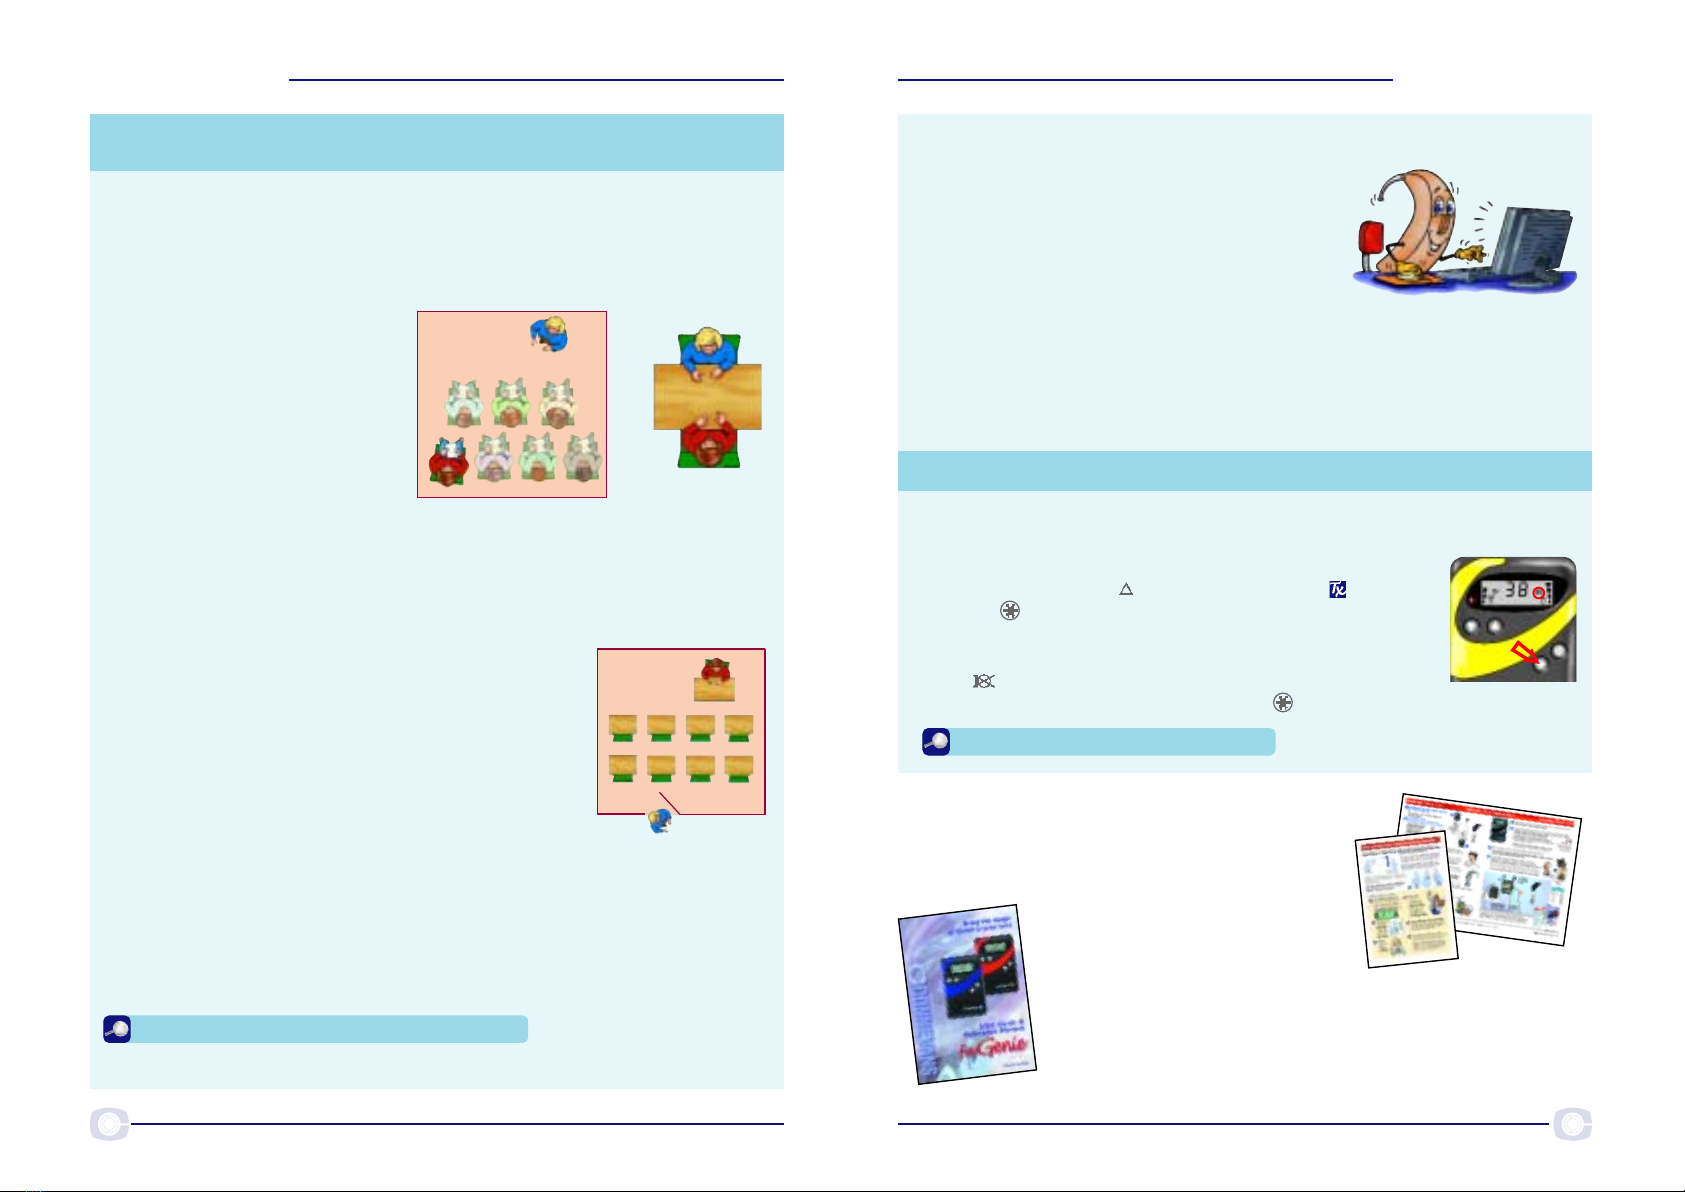
Further information
For day to day help, refer to the encapsulated
cards –‘Tutor Courtesy Card’ and ‘Morning &
Evening Check List’.
For detailed information on all
aspects of the fmGenie refer to the
fmGenie Information Booklet &
Operating Guide.
All this information is also available for you to download
from our information website www.connevans.com
In an ideal world testing system performance would be done with the
help of an audiologist who would follow our fmAdvantage procedure
using a hearing aid test box (yes you can test an MLx fm system in a
text box), however it is also possible for a good listener to adequately
test the system themselves.
The objective is very simply
that the sound heard at a
distance through the MLx
should be slightly louder than
the sound heard from the
hearing aid on its own at close
range in
a quiet room.
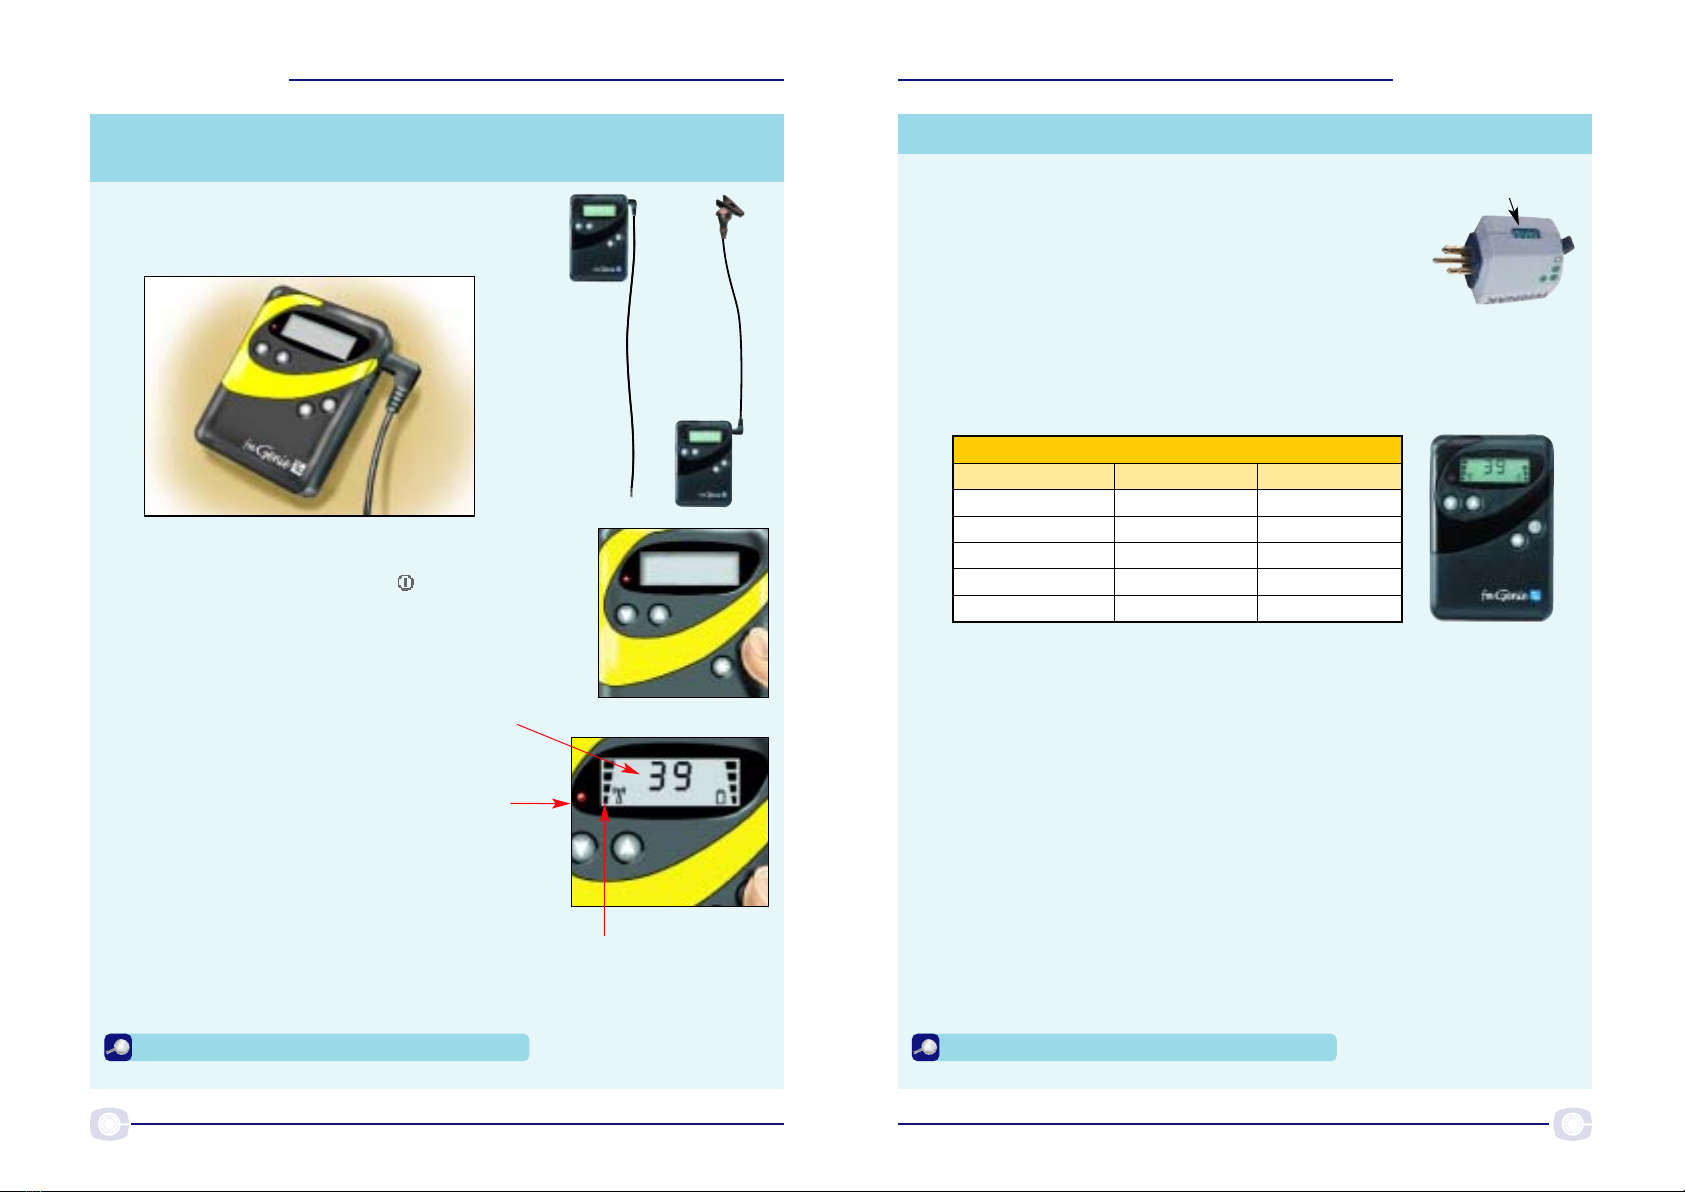
1 Initially establish a satisfactory listening level with the hearing aid(s)
alone, at arm’s length from somebody talking to you.
2 Turn on the fmGenie & MLx system, give the transmitter to your
helper and ask them to walk away whilst
talking.
3 You should now listen to the hearing aids but
this time through the Mlx receiver. Check that
the transmitter volume is similar in quality but
slightly louder than the original listening level.
4 Try the different switch positions on the MLx
to confirm how your particular hearing aid
operates. Do not forget to listen and
understand how the different switch positions affect the general
room/own voice sound. Make sure that you and the system user
both understand and are happy with how the system performs.
NOTE: whilst you cannot directly adjust the listening level of an MLx it is still
important to ensure that the sound from it via the hearing aid is acceptable. See
following page regarding digital or programmable hearing aids.
Part 5 – Testing for a listening advantage
=
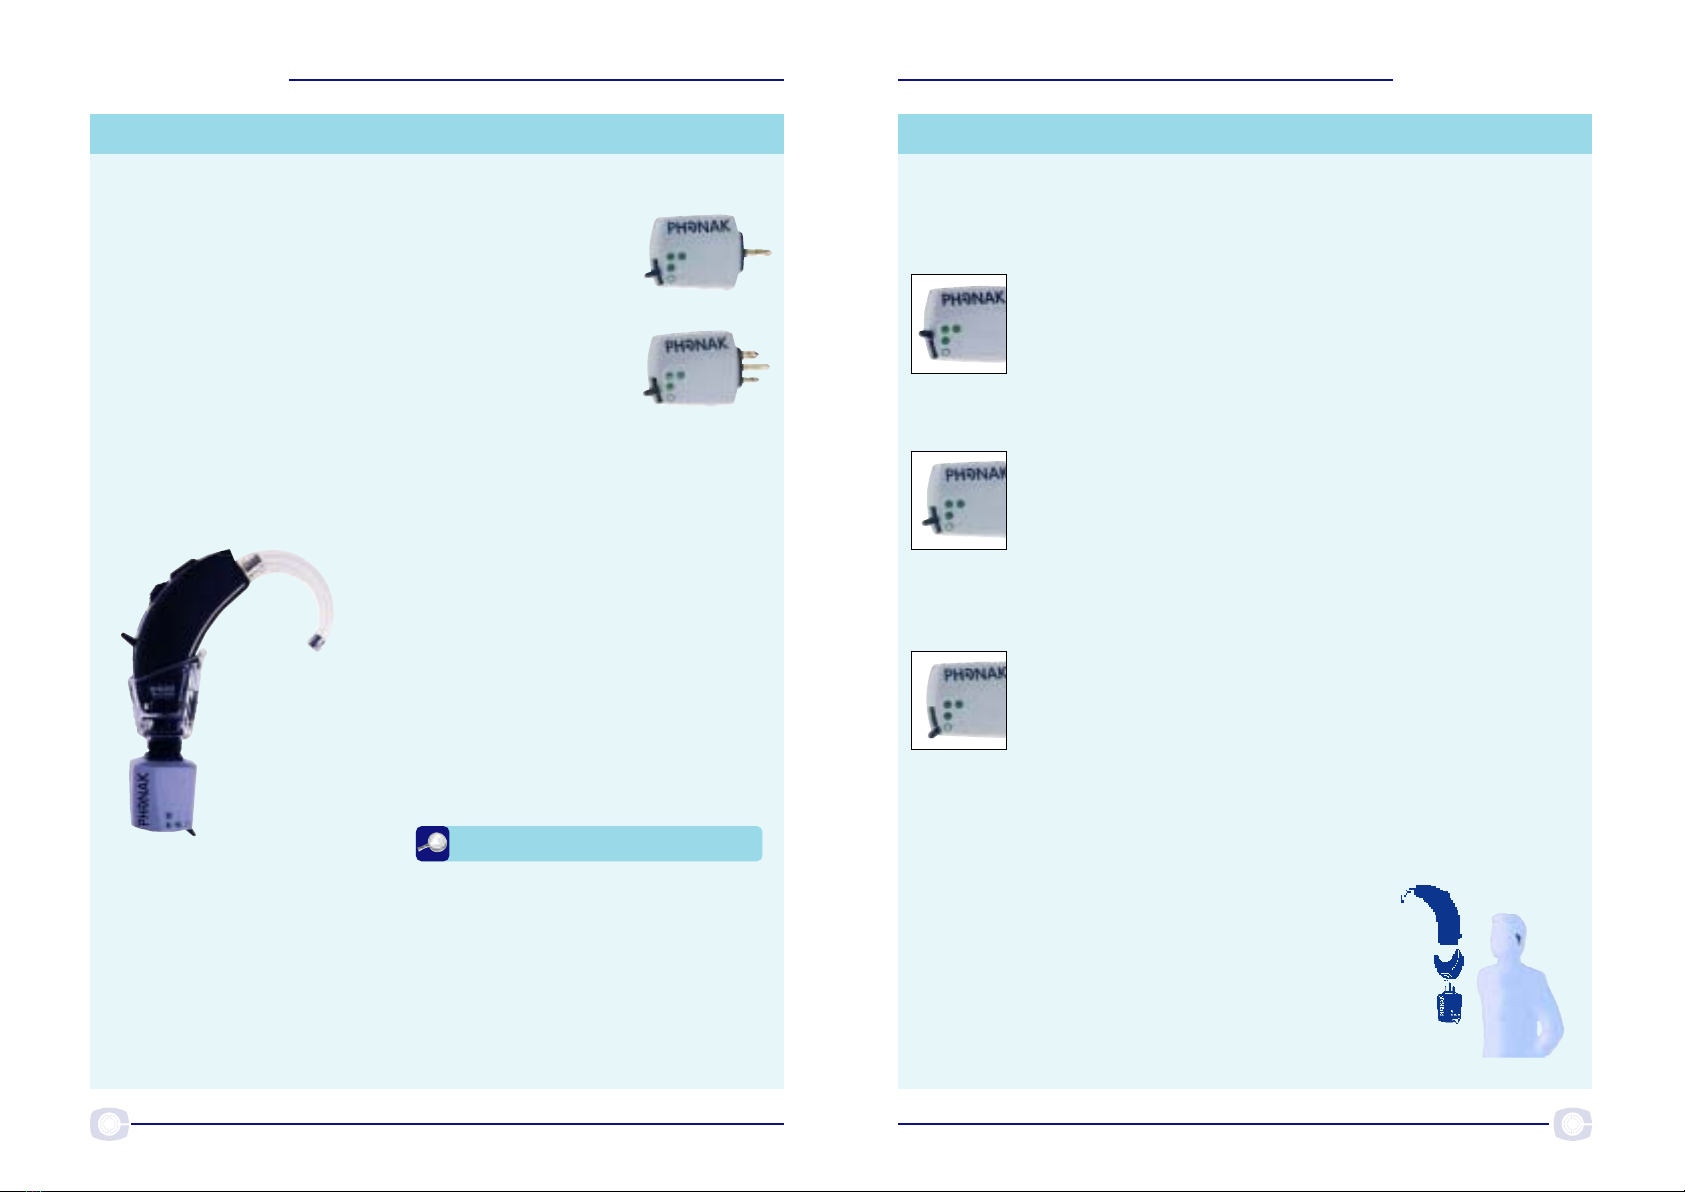
Programmable hearing aids – all digital and some analogue
The programming of a hearing aid will affect the
way that an MLx unit works. At the most basic
level, if the direct input facility is not enabled or
turned on at the hearing aid programming
stage then the MLX will not work!
Many digital hearing aids have more than one
programme, is the direct input facility actually enabled in all of them?
There is no volume control adjustment for an MLx receiver, however it
may well be possible for the hearing aid programmer to change the
volume level for direct input or alternatively to set a specific programme
for use with MLx.
Pages 62-63 – User Guide (2nd Edition)
The microphone mute is a useful facility for making discreet aside
comments without being overheard or for use when the tutor is talking
to people other than the fmGenie user.
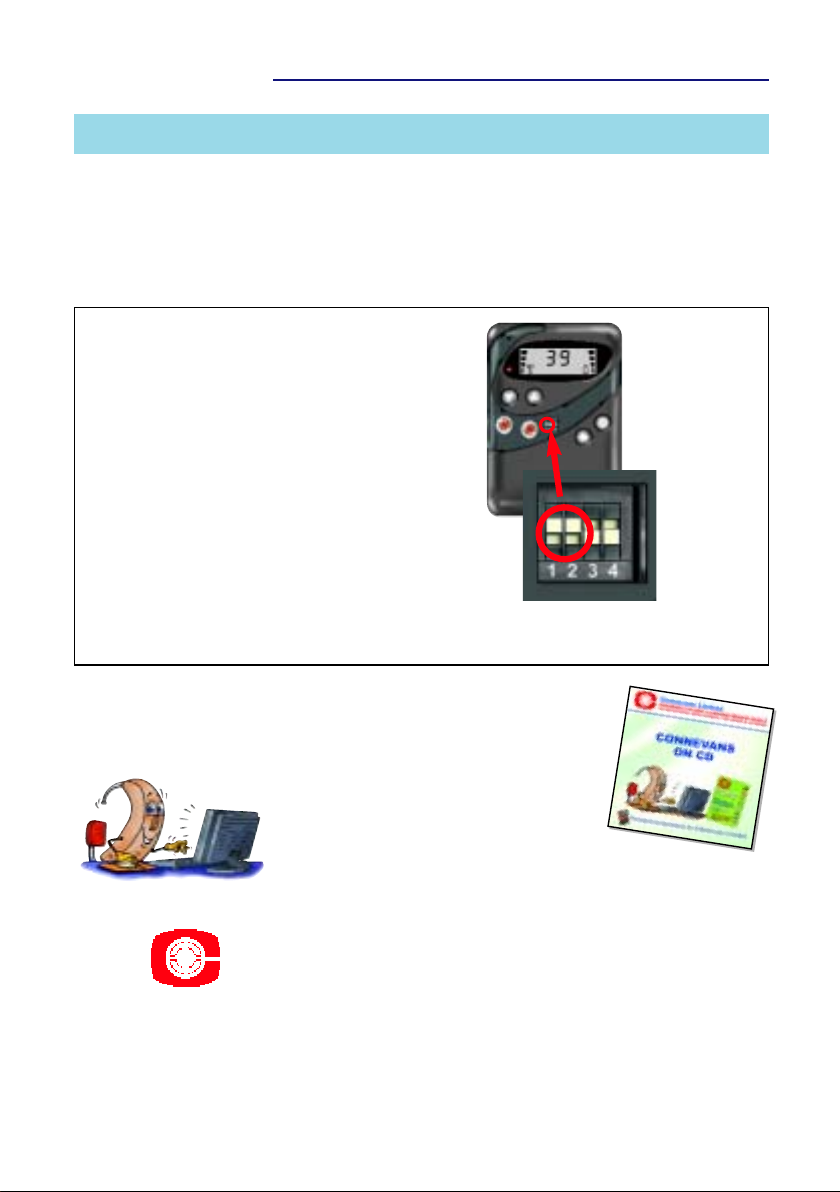
If there is no flashing , a short press of the star
function button will mute the transmitter microphone
– as long as the facility has not been disabled.
If the feature is active the alert indicator and microphone
mute symbol will flash (as a reminder that users
cannot hear you). Another press of the button returns to normal.
Transmitter microphone muting (Default setting: enabled)
Pages 35 & 82 – User Guide (2nd Edition)
fm
G
enie
/MLx
fm
G
enie
/MLx
fm
G
enie
/MLx
fm
G
enie
/MLx
98 fmGenie/MLx Fastrack Guide Version 2.0Version 2.0 fmGenie/MLx Fastrack Guide
fmGenie transmitter and accessory options
Please refer to the Instruction Booklet for full information, however the following
illustrations will give you a quick guide to some alternatives.
Using fmGenie
Transmitter with
integral microphone
fmGenie
Transmitter
Part No.
FMG110
Sound input
fmGenie aerial
supplied with
transmitter,
fits into
external
microphone
socket (Ext Mic)
Lapel microphone
Black stub
microphone head
Part No. FMG211
Lapel clip for black
stub mic head
Part No. FMG212
fmGenie stub
microphone lead
Part No. FMG21L600
The microphone pack (Part no. FMG2136)
contains 3 items; a microphone head,
lead and lapel clip.
The microphone head plugs
directly into the lead with
a push on fitting.
Using fmGenie
Transmitter
with lapel
microphone
Sound input
fmGenie
Transmitter
with lapel
mic
fmGenie Information
Booklet – Page 28
Page 34 – User Guide
(2nd Edition)
Page 20 – User Guide
(2nd Edition)
Pages 22-25– User Guide (2nd Ed.) and
Connevans Catalogue – section 1
Tx
with
pouch
Tx
with
neck
pouch
External audio equipment
plugs in here – see below
Using an fmGenie
Transmitter with
conference
microphone
Wearing the fmGenie transmitter Connecting an fmGenie
transmitter to a TV
Connecting an fmGenie Tx or Rx
to external equipment
SCART plug to phono sockets
Part Nos

A121BA

and

T114

An fmGenie can be directly connected
to a TV SCART socket
TV
Pages 67-68 – User Guide
(2nd Edition)
Pages 64-66 – User Guide (2nd Ed.) and
Connevans Catalogue sections 1 & 11
fmGenie transmitter
stereo input adaptor
Part No. FMG81
A transmitter input adaptor allows you
to connect an fmGenie Tx (or Rx) to
other equipment such as hi-fi or
computer
Tx and conference microphone in
centre of table
Conference mic plugged into
receiver, presenter wearing
transmitter
Pack of stereo audio leads
Part No. FMG81PK
2.5mm plug
into ‘Ext mic’
3.5mm
stereo
plug
into
‘Aux in’
Tx with
pouch &
modular
waist
harness
Tx
with
hip
pouch
fm
G
enie
/MLx
fm
G
enie
/MLx
fm
G
enie
/MLx
fm
G
enie
/MLx
1110 fmGenie/MLx Fastrack Guide Version 2.0Version 2.0 fmGenie/MLx Fastrack Guide
Tips for maintaining radio system reliability
Don't scrunch or
wind up your
leads when not in
use – they will
break more
quickly.
Save time by not unplugging leads
more often than
really necessary,
leave them
connected – this
helps reliability
too.
Don't remove shoes
by pulling on the
leads – unclip the
shoe itself.
Stetoclip listener and variable attenuator
Stetoclip is used to listen to the
hearing aid either through the
earmould or direct to earhook.
Pages 57-58 – User Guide (2nd Edition) and Connevans Catalogue
– section 1 fmGenie & section 6 for separate items and spares
Daily testing should cover the
overall system and
include the hearing
aids, shoes and leads.
It is not necessary
to change the
HI/LO switch in
the battery
compartment
during routine
testing.
max release
Stetoclip listener and
variable attenuator
Part No.
22880F
Variable attenuator has a
roller wheel to allow
hearing aids to be listened
to at a comfortable level.
The fmGenie default settings can be easily changed – the 2nd edition of the
fmGenie User Guide & Reference Manual has a lot of improved and clearer
information including clear diagrams for activating or changing fmGenie
features. Turn off fmGenie when making changes to settings.
Connevans tip: we advise using the bent out end of a paperclip to change switch settings; we
can sell you a magnifying glass too, if you need one!
Default channel setting – Tx
fmGenie user facility settings
Tx underflash
default switch settings
UP, UP, DOWN, DOWN
To change the resident channel
reselect using the tool supplied
tens units
Normally the default channel should be set to match the users MLx channel. Be relaxed
about changing channel, if an invalid channel is chosen by mistake the display will show an
‘E1’ error message to alert you.
Phonak MLx/MLxS receivers & Cochlear implant processors
– fmGenie transmitter settings
The fmGenie transmitter works well with Phonak MLx receivers.
The normal fmGenie transmitter features are available – but the Tx must
be set to Long Range.
Channel settings: page 78 and Error messages:
page 92 – User Guide (2nd Edition)
fm
G
enie
/MLx
fm
G
enie
/MLx
FMG14FMLX fmGenie/MLx Fastrack Guide – Version 2 April 2004
54 Albert Road North, Reigate, Surrey RH2 9YR
Switchboard 01 737 247571 Text/Minicom 01 737 243134 Fax 01 737 223475
Email [email protected]
Information website: www.connevans.com
Online shopping: www.DeafEquipment.com
Connevans Limited
CONNEVANS ON CD – the entire catalogue on CD plus
lots of other useful information including Powerpoint
presentations for fmGenie users.
Please ask Customer Services if you would like
a free copy with your next order.
Order spares online at:
www.DeafEquipment.co.uk
Euro channel frequencies
From January 2004, all new radio aid equipment has to be supplied on
the new 50KHz Euro channel frequencies.
ALL fmGenies ever made are able to use these frequencies, but from
January 2004 all new fmGenies are supplied factory set to the new Euro
frequency channels.
Older fmGenies can be reset to the new
channels by setting the under flash
switches 1 & 2 to UP/UP as shown.
New fmGenies being used in conjunction
with MLx receivers on channels other
than 02 or 06 must be changed over to
the ‘traditional’ frequencies.
To change to the ‘traditional’ frequency
channels, set switches 1 & 2 to
DOWN/DOWN.
It is important that you only use one
set of channel frequencies on any site.
For more information see www.connevans.com/fmGenie
Switch 1 & 2:
UP, UP
= Euro channels
(MLx 02 or 06)
DOWN, DOWN
= traditional
(all other
MLx channel
numbers)

This manual suits for next models

1

Other Connevans Receiver manuals

Connevans Roger Easy Pen User manual

Connevans

Connevans Roger Easy Pen User manual

Connevans FmGenie User manual

Connevans

Connevans FmGenie User manual

Connevans Sonumaxx 2.4 User manual

Connevans

Connevans Sonumaxx 2.4 User manual

Connevans FmGenie User manual

Connevans

Connevans FmGenie User manual

Popular Receiver manuals by other brands

espn audio XDS Pro4 troubleshooting guide

espn audio

espn audio XDS Pro4 troubleshooting guide

Cair Notifier Programming guide

Cair

Cair Notifier Programming guide

Panarex Electronics 4500 user guide

Panarex Electronics

Panarex Electronics 4500 user guide

Chamberlain TriCode TCR1 owner's manual

Chamberlain

Chamberlain TriCode TCR1 owner's manual

Panasonic SAXR55P - A/V RECEIVER Service manual

Panasonic

Panasonic SAXR55P - A/V RECEIVER Service manual

LG HT904SC manual

LG

LG HT904SC manual

NAD L 70 Service manual

NAD

NAD L 70 Service manual

ViseeO CARK 11 user manual

ViseeO

ViseeO CARK 11 user manual

Gadmei VC108 user manual

Gadmei

Gadmei VC108 user manual

NAD T 748 owner's manual

NAD

NAD T 748 owner's manual

Harman Kardon AVR 247 Software upgrade instructions

Harman Kardon

Harman Kardon AVR 247 Software upgrade instructions

LEGRAND 5739 00 Technical sheet

LEGRAND

LEGRAND 5739 00 Technical sheet

Yamaha RX-V3800 - AV Receiver owner's manual

Yamaha

Yamaha RX-V3800 - AV Receiver owner's manual

Hyro 3000FTA user manual

Hyro

Hyro 3000FTA user manual

Onkyo TX-SR603X instruction manual

Onkyo

Onkyo TX-SR603X instruction manual

Hi-Target V100 Getting started

Hi-Target

Hi-Target V100 Getting started

SEPTENTRIO PolaRx3e Hardware manual

SEPTENTRIO

SEPTENTRIO PolaRx3e Hardware manual

Bosch LR 1 Professional Instuction manual

Bosch

Bosch LR 1 Professional Instuction manual

manuals.online logo
manuals.online logoBrands
  • About & Mission
  • Contact us
  • Privacy Policy
  • Terms and Conditions

Copyright 2025 Manuals.Online. All Rights Reserved.