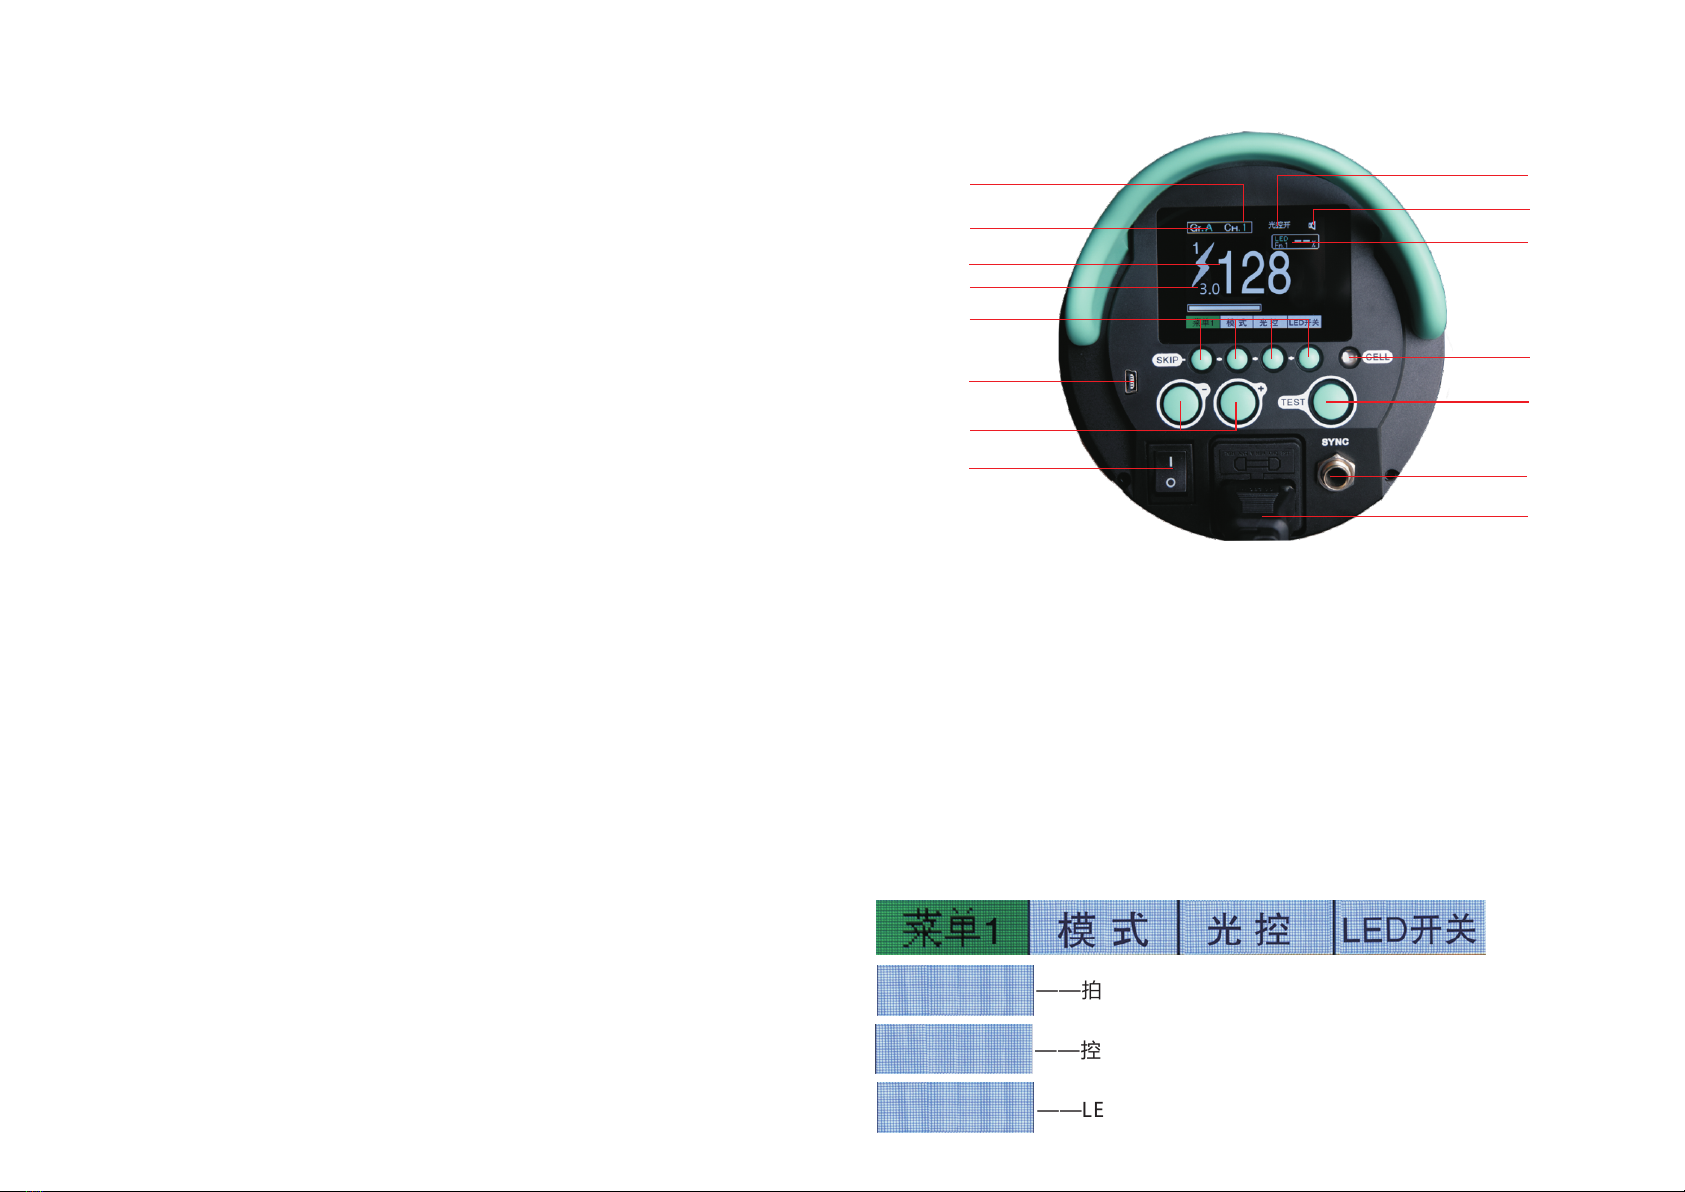
CH Channel ID Display (1-9)
Gr Remote Control Group Display
Power Display
Corresponding Function Button
USB Socket
+/- Buttons
Power Switch
Voice Prompt
LED Size
Light Sensor
Test Button
Sync Hole
Power Socket
Part Name
Panel
Instructions
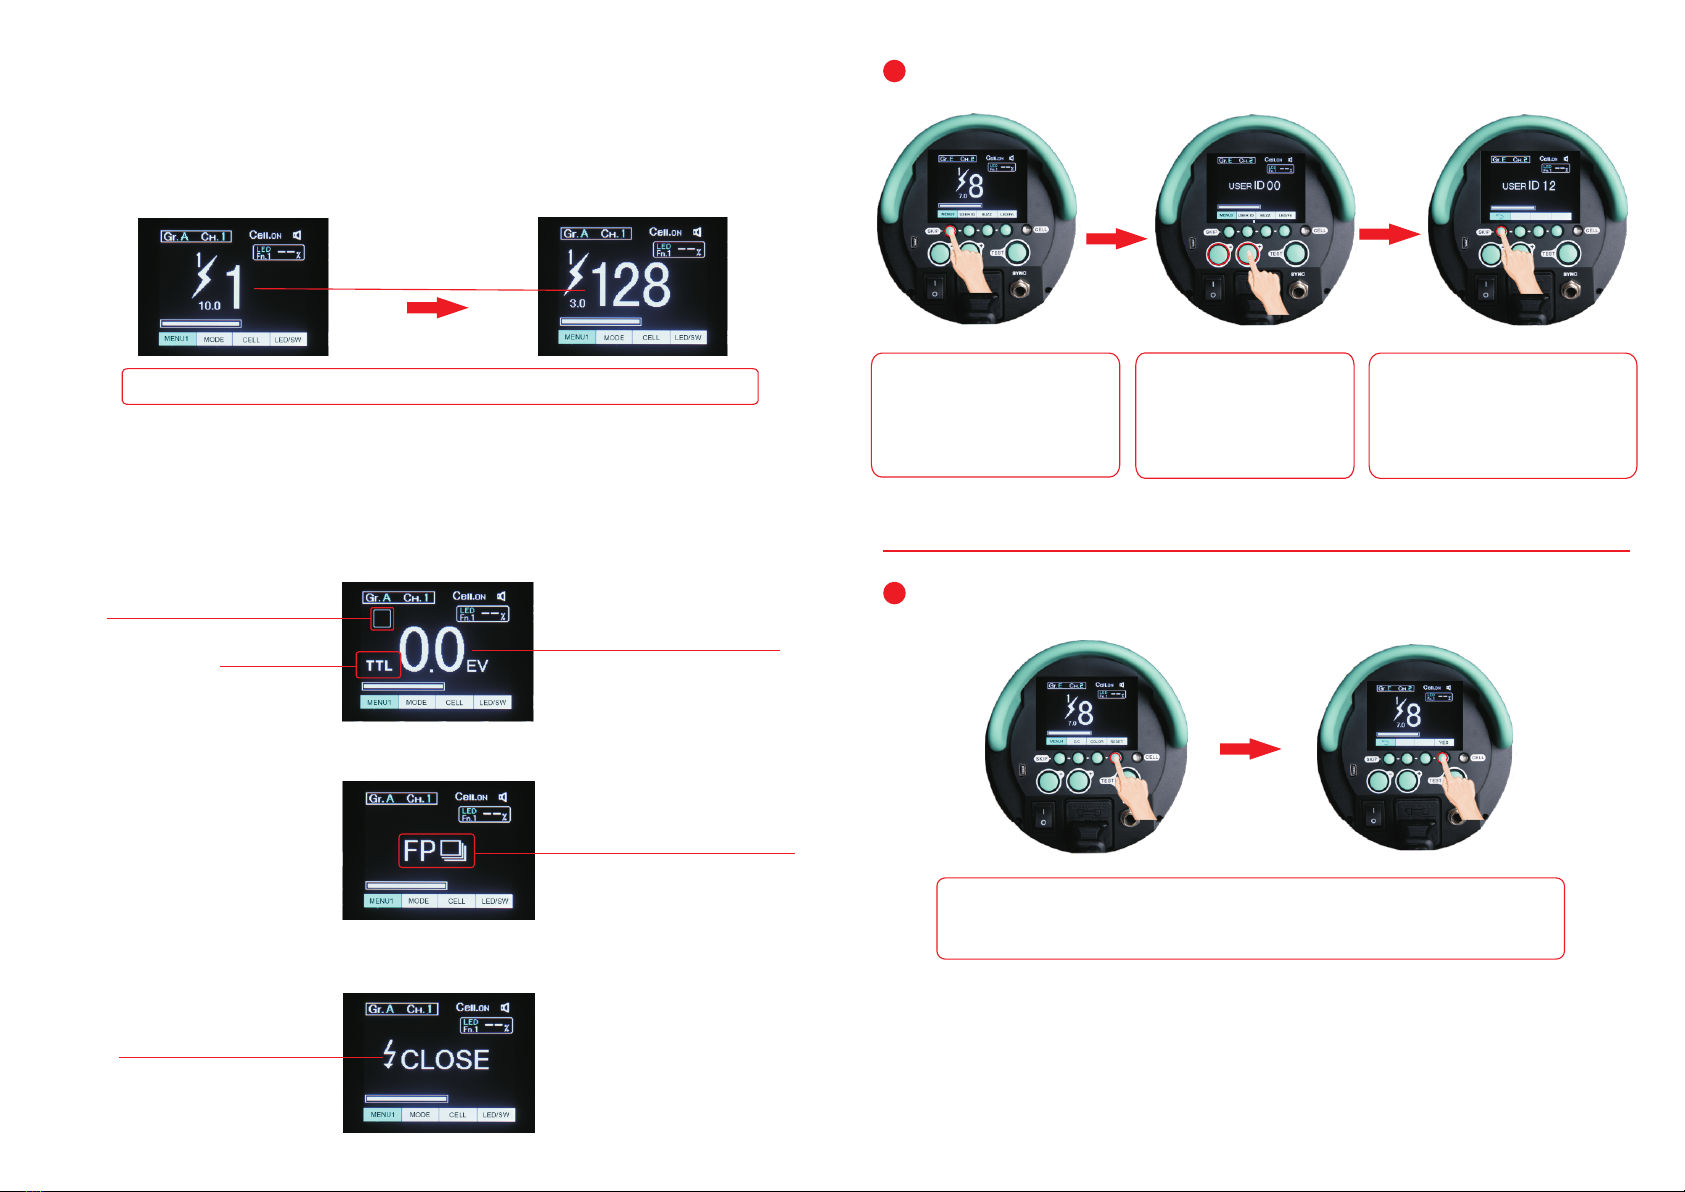
——Shooting modes switching: manual mode / TTL mode /
FP mode / flash modes turn off
——Optical slave switch button
——LED on/off
①
⑬
⑭
⑮
⑯
⑰
⑱
(A/B/C/D/E)
②
③
MENU1 MODE CELL LED/SW
MODE
—— elect channelS (1-9)
——Control buzzer on/off
——Select LED mode (Fn1/Fn2/Fn3/Fn4)
Fn-1
Fn-2
Fn-3
Fn-4
——Select English/Chinese display
——Set the color, then press the plus or minus button to
select the color (default / bright / black and white).
——Click to confirm to reset
7
Gr CH
MENU2 LED/PCT
——Select group (A/B/C/D/E)
——Click to set the LED power, then press the plus or minus
button to adjust the LED power.
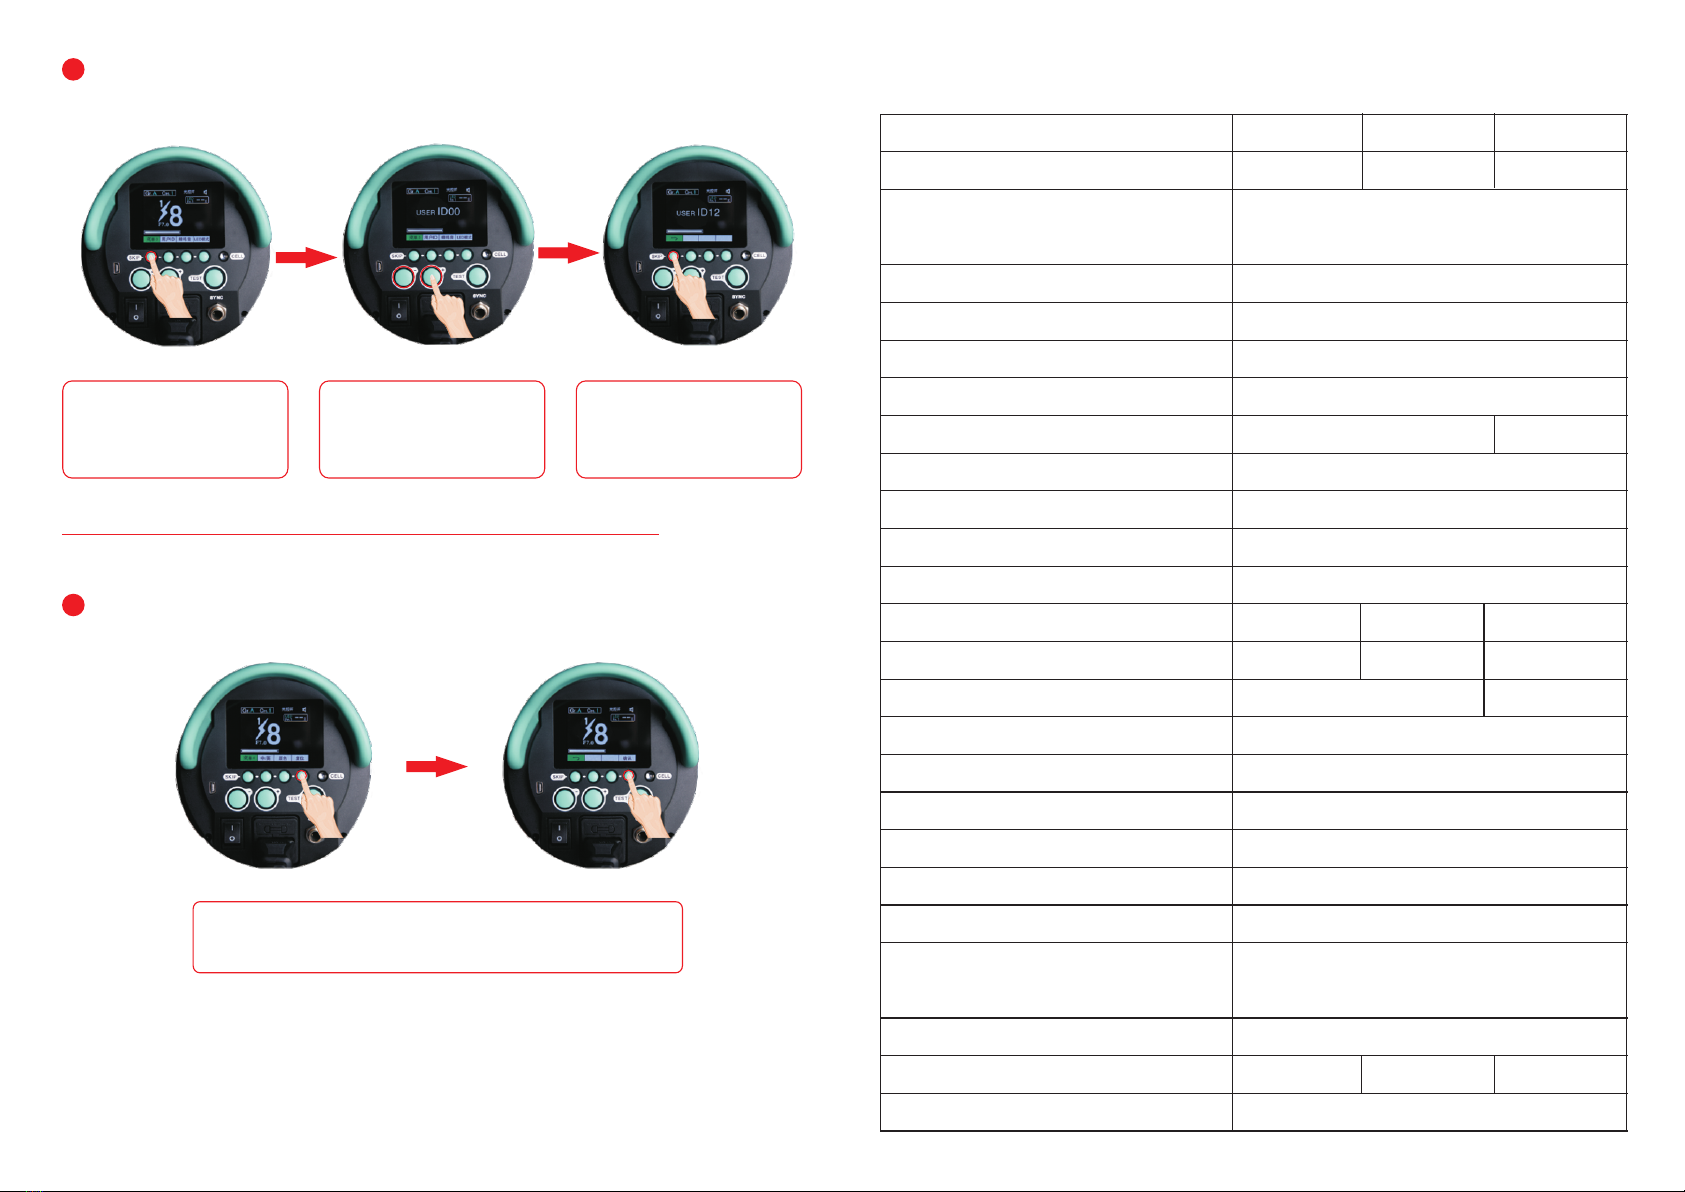
MENU3 USER ID BUZZ LED/Fn
——Click to set the user ID, then press the plus or minus
button to adjust the value (00-99)
The brightness of the modeling lamp is independently adjusted.
When flashing, [None] momentarily extinguished.
The brightness of the modeling lamp changes with the power
adjustment. When flashing, [None] momentarily extinguishes
the prompt.
The brightness of the modeling lamp changes with the power
adjustment. When flashing, [Yes] instantly turns off the prompt.
Modeling
light mode
list
MENU4 E/C COLOR RESET
——Click to reset factory settings
COLOR
RESET
8
① ② ③
⑨
⑩⑪
⑫
⑲
⑬
⑭
⑮
⑯
⑰
⑱
⑤⑥⑦⑧
④
⑤⑥⑦⑧
⑨
⑩⑪
⑫
④Aperture Level
⑲
Optical Slave turns on with display
(When it turns off without display)
The brightness of the modeling lamp is independently adjusted.
When flashing, [Yes] momentarily extinguished.
CELL
LED/SW
Gr
CH
LED/PCT
USER ID
BUZZ
LED/Fn
E/C
YES