5
oMaximum CAT5/6 Exte sio Cable Ru Le gth: 90 meters or 300 feet (1000 feet whe
co ected via dry co tact i puts).
oRadio uclide = Am-241
oType of substa ce (sealed / u sealed) = It is sealed
oPhysical form (solid / liquid / gas) = Solid.
oActivity i Becquerel’s? = Less tha 37,000 Becquerel’s.
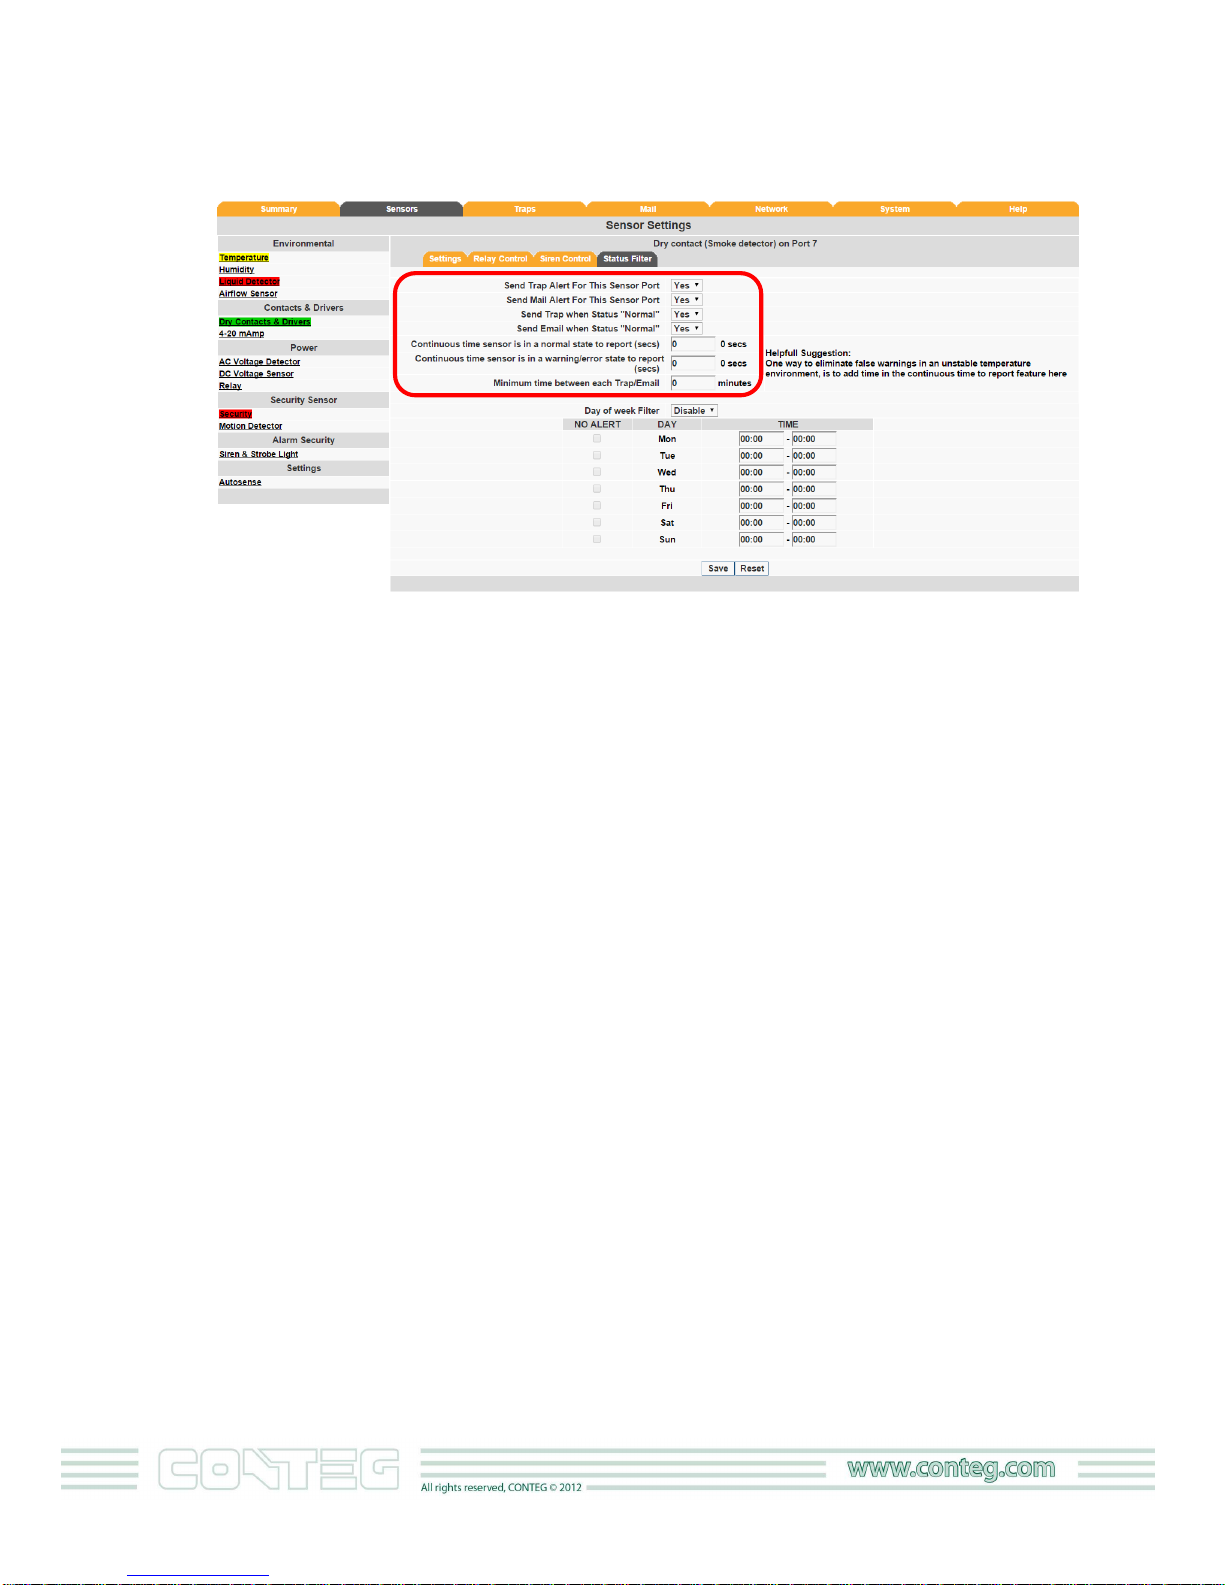
1.4. Smoke Detector OIDs:
oFor ormal state, retur value = 2
oFor alarm state, retur value = 4
oNote: You ca test the smoke detector by holdi g dow the test butto u til the audible
alarm occurs - about 5 sec. The smoke detector will the se d a alarm sig al to the u it.
Im ortant: The Web i terface setti gs for the smoke detector are:
Direction: I put
Normal State: Ope /+5 Volts
2. Im ortant Safety Information
Observe a d follow all local a d atio al electrical a d buildi g codes for i stallatio .
This smoke detector is desig ed to be used i side a si gle room o ly. I multi-room buildi gs, each
i dividual room should have its ow smoke detector. This smoke detector is ot a substitute for a
complete fire alarm system.
Smoke may ot reach the smoke detector for ma y reaso s. For example, if a fire starts i a remote
part of a buildi g or home, o a other level, wall, roof, or o the other side of a closed door, smoke
may ot reach the smoke detector i time to alert perso el. I other words the smoke detector will
ot promptly detect a fire except i the area or room i which it is i stalled.
The smoke detectors ca o ly sou d their alarms whe they detect smoke. The smoke detectors
detect combustio particles i the air. They do ot se se heat, flame or gas. This smoke detector is
desig ed to give a audible war i g of a developi g fire. However, ma y fires are fast-bur i g,
explosive, or i te tio al. Others are caused by careless ess or safety hazards. So always keep i mi d
that smoke may ot reach the smoke detector alarm QUCKLY ENOUGH.
The smoke detectors have limitatio s. This smoke detector is ot foolproof a d is ot warra ted to
protect lives or property from fire. Smoke alarms are ot a substitute for i sura ce. Busi ess ow ers
are respo sible for i suri g their ow lives a d property. I additio it is possible for the smoke alarm
to fail at a y time. For this reaso , you must test the smoke detectors weekly a d replace them every
10 years.