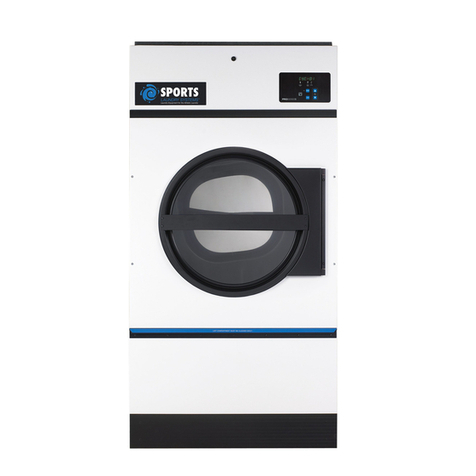
Continental Girbau CG20 User manual

WARNING: Foryoursafetytheinformationin
thismanual mustbe followedto minimizethe
riskof fireor explosionor toprevent property
damage,personalinjury or death.
— Donot storeoruse gasolineor other flammable
vapors and liquids in the vicinity of this or any
otherappliance.
— WHATTODO IFYOU SMELLGAS:
• Donottryto lightanyappliance.
• Donottouch anyelectricalswitch;do not
useanyphoneinyourbuilding.
• Cleartheroom, buildingorareaofall
occupants.
• Immediatelycallyourgassupplierfrom a
neighbor’sphone. Followthe gas supplier’s
instructions.
• Ifyoucannotreach yourgassupplier, call
thefiredepartment.
— Installationand servicemustbe performedby a
qualified installer, service agency or the gas
supplier.
AVERTISSEMENT: Assurez-vous de bien
suivrelesinstructionsdonnéesdanscettenotice
pourréduire auminimumle risqued’incendie
ou d’explosion ou pour éviter tout dommage
matériel,touteblessureou lamort.
— Ne pas entreposer ni utiliser d’essence ni
d’autres vapeurs ou liquides inflammables à
proximité de cet appareil ou de tout autre
appareil.
— QUEFAIRESIVOUSSENTEZUNEODEUR
DEGAZ:
• Nepastenter d’allumerd’appareils.
• Netouchez àaucun interrupteur. Nepas
vousservirdes téléphonessetrouvant dans
lebâtiment.
• Évacuezlapièce,le bâtimentoulazone.
• Appelezimmédiatementvotrefournisseur
degazdepuisunvoisin. Suivez les
instructionsdufournisseur.
• Sivousnepouvezrejoindrelefournisseur
degaz,appelez leservicedes incendies.
— L’installationetl’entretiendoiventêtreassuréspar
uninstallateurou unserviced’entretienqualifié
ouparle fournisseurdegaz.
101602GS/mcronan
051503JRB/wmarelli
CG20
Installation Manual
For replacement parts, contact the distributor
from which the dryer was purchased or
ContinentalGirbau,Inc.®
2500State Road44
Oshkosh WI 54904
Telephone:(920)231-8222 / Fax:(920)231-4666
www.cont-girbau.com
CGIPartNo.A113392

Retain This Manual In ASafe Place For Future Reference
Continental Girbau, Inc.®product embodies advanced concepts in engineering, design, and safety. If this product is
properly maintained, it will provide many years of safe, efficient, and trouble free operation.
ONLY qualified technicians should service this equipment.
OBSERVE ALL SAFETY PRECAUTIONS displayed on the equipment or specified in the installation manual included with
the dryer.
The following “FOR YOUR SAFETY” caution must be posted near the dryer in a prominent location.
CG20
“IMPORTANTNOTETOPURCHASER”
Informationmustbeobtainedfromyourlocalgassupplierontheinstructions
tobefollowed iftheusersmells gas. Theseinstructionsmustbepostedina
prominentlocationnearthedryer.
FORYOUR SAFETY
Donot storeor usegasoline or
otherflammablevaporsor
liquidsinthevicinityofthisor
anyotherappliance.
We have tried to make this manual as complete as possible and hope you will find it useful. Manufacturer reserves the right
to make changes from time to time, without notice or obligation, in prices, specifications, colors, and material, and to change
or discontinue models.
Important
For your convenience, log the following information:
DATE OFPURCHASE ____________________________ MODEL NO. __________________________________________
DISTRIBUTOR’SNAME ___________________________________________________________________________________
Serial Number(s) ________________________________________________________________________________________
________________________________________________________________________________________
________________________________________________________________________________________
Replacement parts can be obtained from your distributor or Continental Girbau, Inc.®Please specify the dryer model
number and serial number in addition to thedescription and part number, so that your order is processed accurately and
promptly.
POURVOTRESÉCURITÉ
Nepas entreposer niutiliserd’essence
nid’autresvapeursouliquides
inflammablesàproximitédecet
appareilou detoutautre appareil.

IMPORTANT
YOUMUSTDISCONNECTANDLOCKOUTTHEELECTRICSUPPLYANDTHEGAS
SUPPLY OR THE STEAM SUPPLY BEFORE ANY COVERS OR GUARDS ARE
REMOVED FROM THE MACHINE TO ALLOW ACCESS FOR CLEANING,
ADJUSTING, INSTALLATION, OR TESTING OF ANY EQUIPMENT PER OSHA
(OccupationalSafetyand HealthAdministration)STANDARDS.
WARNING
CHILDRENSHOULDNOTBEALLOWEDTOPLAYONORNEARTHEDRYER(S).
CHILDRENSHOULDBESUPERVISEDIFNEARDRYERSINOPERATION.
CAUTION
DRYERSSHOULDNEVERBELEFTUNATTENDEDWHILEINOPERATION.
FORYOURSAFETY
DONOTDRYMOPHEADSINTHEDRYER.
DONOTUSEDRYERINTHEPRESENCE OFDRYCLEANINGFUMES.
WARNING
UNDERNOCIRCUMSTANCESshouldthedryermaindoorswitch,lintdrawerswitch,
or the heat circuit devices ever be disabled.
“Caution: Label all wires prior to
disconnection when servicing controls. Wiring
errors can cause improper operation.”
«Attention: Au moment de l’entretien des
commandes,étiqueteztous les filsavantde
les débrancher. Des erreurs de câblage
peuvent entraîner un fonctionnement
inadéquatetdangereux.»

WARNING
The dryer must never be operated with any of the back guards, outer tops, or service
panelsremoved. PERSONALINJURYORFIRECOULDRESULT.
IMPORTANT
PLEASEOBSERVEALLSAFETYPRECAUTIONSdisplayedontheequipmentand/or
specified in the installation manual included with the dryer.
WARNING
DRYERMUSTNEVERBE OPERATEDWITHOUTTHELINTFILTER/SCREENIN
PLACE,EVENIFANEXTERNALLINTCOLLECTIONSYSTEMISUSED.
Dryer mustnotbe installed or stored in an area where it willbe exposed to water or weather.
The wiring diagram for the dryer is located in the front electrical control box area.
IMPORTANT
Dryer must be installed in a location/environment, which the ambient temperature
remains between 40° F (4.44° C) and 130° F (54.44° C).

Table of Contents
SECTIONI
IMPORTANTINFORMATION ........................................................................................................ 2
A. ReceivingandHandling ................................................................................................................. 2
B. SafetyPrecautions ........................................................................................................................ 3
SECTIONII
SPECIFICATIONS.............................................................................................................................. 6
A. Specifications ............................................................................................................................. 5
SECTIONIII
INSTALLATION PROCEDURES ..................................................................................................... 7
A. Unpacking/SettingUp ................................................................................................................. 7
B. LocationRequirements ............................................................................................................... 8
C. DryerEnclosureRequirements .................................................................................................... 9
D. FreshAirSupplyRequirements ................................................................................................. 10
E. ExhaustRequirements ............................................................................................................... 11
F. ElectricalInformation ................................................................................................................ 13
G. GasInformation ........................................................................................................................ 19
H. Preparation ForOperation/Start-Up ......................................................................................... 23
I. PreoperationalTests ................................................................................................................. 24
J. ShutdownInstructions............................................................................................................... 25
SECTIONIV
SERVICE/PARTSINFORMATION................................................................................................ 26
A. Service ..................................................................................................................................... 26
B. Parts ........................................................................................................................................ 26
SECTIONV
WARRANTYINFORMATION ....................................................................................................... 27
A. ReturningWarrantyCards......................................................................................................... 27
B. Warranty .................................................................................................................................. 27
SECTIONVI
ROUTINEMAINTENANCE........................................................................................................... 28
A. Cleaning ................................................................................................................................... 28
SECTIONVII
DATALABELINFORMATION ...................................................................................................... 30
A. DataLabel ............................................................................................................................... 30
SECTIONVIII
SENSORACTIVATED FIREEXTINGUISHING(S.A.F.E.) SYSTEM ........................................ 32
Installation ...................................................................................................................................... 33
SensorActivatedFireExtinguishing(S.A.F.E.)SystemTheoryofOperation .................................... 36
SystemReset.................................................................................................................................. 36
S.A.F.E. Parts BreakDown............................................................................................................ 37

2
SECTIONI
IMPORTANTINFORMATION
A. RECEIVINGAND HANDLING
The dryer is shipped in a protective stretch wrap cover with protective cardboard corners and top cover (or
optional box) as a means of preventing damage in transit. Upon delivery, the dryer and packaging, and wooden
skid should be visually inspected for shipping damage. If any damage whatsoever is noticed, inspect further
before delivering carrier leaves.
Dryers damaged in shipment:
1. ALL dryers should be inspected upon receipt and before they are signed for.
2. If there is suspected damage or actual damage, the trucker’s receipt should be so noted.
3. If the dryer is damaged beyond repair, it should be refused. Those dryers, which were not damaged in a
damaged shipment, should be accepted, but the number received and the number refused must be noted
on the receipt.
4. If you determine that the dryer was damaged after the trucker has left your location, you should call the
delivering carrier’s freight terminal immediately and file a claim. The freight company considers this
concealed damage. This type of freight claim is very difficult to get paid and becomes extremely difficult
when more than a day or two passes after the freight was delivered. It is your responsibility to file freight
claims. Dryer/parts damaged in transit cannot be claimed under warranty.
5. Freight claims are the responsibility of the consignee, andALL claims must be filed at the receiving end.
Continental Girbau, Inc.®assumes no responsibility for freight claims or damages.
6. If you need assistance in handling the situation, please contact the Continental Girbau, Inc.®Traffic
Manager at (920) 231-8222 Ext. 16.
IMPORTANT: Thedryer mustbetransported and handledinan upright positionatALLtimes.

3
B. SAFETY PRECAUTIONS
WARNING: Foryoursafety,theinformationinthismanualmustbefollowedto minimize theriskof
fireorexplosion ortopreventproperty damage,personalinjury,orloss oflife.
WARNING: The dryer mustnever beoperated withtheback guardremoved. PERSONAL
INJURYORFIRECOULDRESULT.
1. DO NOT store or use gasoline or other flammable vapors and liquids in the vicinity of this or any other
appliance.
2. Purchaser/user should consult the local gas supplier for proper instructions to be followed in the event the
user smells gas. The instructions should be posted in a prominent location.
3. WHAT TO DO IF YOU SMELL GAS...
a. DO NOT try to light any appliance.
b. DO NOT touch any electrical switch.
c. DO NOT use any phone in your building.
d. Clear the room, building, or area of ALL occupants.
e. Immediately call your gas supplier from a neighbor’s phone. Follow the gas supplier’s instructions.
f. If you cannot reach your gas supplier, call the fire department.
4. Installation and service must be performed by a qualified installer, service agency, or gas supplier.
5. Dryer(s) must be exhausted to the outdoors.
6. Although Continental Girbau, Inc.®produces a very versatile dryer, there are some articles that, due to
fabric composition or cleaning method, should not be dried in it.
WARNING: Dry only water washed fabrics. DONOT dryarticles spottedor washedin dry
cleaningsolvents,acombustibledetergent,or“allpurpose”cleaner.
EXPLOSIONCOULDRESULT.
WARNING: DONOT dry rags orarticles coatedorcontaminated withgasoline, kerosene, oil,paint,
orwax.
EXPLOSIONCOULDRESULT.
WARNING: DONOTdrymopheads. Contamination bywaxor flammablesolventswill createa
firehazard.
WARNING: DONOT useheat for dryingarticles thatcontainplastic, foam,spongerubber,or
similarlytexturedrubbermaterials. Dryinginaheatedbasket (tumbler)may damage
plasticsor rubberand may bea firehazard.

4
7. A program should be established for the inspection and cleaning of lint in the exhaust ductwork and area
around the back of the dryer. The frequency of inspection and cleaning can best be determined from
experience at each location.
WARNING: Thecollectionof lint intheexhaustductworkcan createa potentialfirehazard.
8. For personal safety, the dryer must be electrically grounded in accordance with local codes and/or the
National Electrical Code ANSI/NFPA NO. 70-LATEST EDITION or in Canada, the Canadian Electrical
Codes Parts 1 & 2 CSA C22.1-1990 or LATEST EDITION.
NOTE: Failureto dosowillVOIDTHEWARRANTY.
9. UNDER NO CIRCUMSTANCES should the dryer main door switch, lint drawer switch, or the heat
circuit devices ever be disabled.
WARNING: PERSONALINJURYOR FIRECOULD RESULT.
10. This dryer is not to be used in the presence of dry cleaning solvents or fumes.
11. Remove articles from the dryer as soon as the drying cycle has been completed.
WARNING: Articlesleftin the dryerafterthedryingand cooling cycleshavebeencompletedcan
createa firehazard.
12. READ AND FOLLOW ALL CAUTION AND DIRECTION LABELS ATTACHED TO THE
DRYER.
WARNING: YOUMUSTDISCONNECTANDLOCKOUTTHEELECTRICSUPPLYAND
THEGAS SUPPLYBEFOREANYCOVERS ORPANELSAREREMOVED
FROMTHEMACHINETOALLOWACCESS FORCLEANING,
ADJUSTING,INSTALLATION,ORTESTINGOFANYEQUIPMENTPER
OSHA(Occupational Safetyand HealthAdministration)STANDARDS.
IMPORTANT: Dryer mustbe installedin alocation/environment, whichtheambient
temperatureremains between40ºF (4.44ºC)and 130ºF (54.44ºC).

5
SECTIONII
SPECIFICATIONS
A. SPECIFICATIONS
NOTE: Manufacturerreservestherightto make changesinspecificationsatanytimewithout notice or
obligation.
MAXIMUM CAPACITY (DRY WEIGHT) 20 lbs 9 kg
BASKET (TUMBLER) DIAMETER 25.75” 65.4 cm
BASKET (TUMBLER) DEPTH 24” 60.95 cm
BASKET (TUMBLER) MOTOR 1/4 HP 0.19 kw
BLOWER MOTOR 1/8 HP 0.1 kw
BASKET (TUMBLER) VOLUME 7.5 cu. ft. 0.21 cu. m.
VENT CONNECTION 4” 10.2 cm
CABINET WIDTH 27” 68.6 cm
CABINET DEPTH 30.59” 77.7 cm
CABINET HEIGHT 42.59” 108.2 cm
S.A.F.E. WATER CONNECTION 1/2”M.N.P.T.
VOLTAGE AVAILABLE 120v/60 Hz/1ø, 240v/60 Hz/1ø,
240v/50 Hz/1ø
HEAT INPUT 40,000 btu/hr 10,080 kcal/hr
AIRFLOW 230 cfm 6.51 cmm
INLET PIPE CONNECTION 3/8” N.P.T.
OVEN SIZE 1ø
3ø 5.4 kw
8.1 kw
VOLTAGE AVAILABLE 240v/60 Hz/1ø, 240v/50 Hz/1ø,
416v/50 Hz/3ø
Shaded areas are stated in metric equivalents
Gas
Electric
040403

6
NOTE: Manufacturerreservestherightto make changesinspecificationsatanytimewithout notice or
obligation.
Specifications
CG20

7
SECTIONIII
INSTALLATIONPROCEDURES
Installation should be performed by competent technicians in accordance with local and state codes. In the
absence of these codes, the installation mustconformto applicableAmerican National Standards:ANSI Z223.1-
LATEST EDITION (National Fuel Gas Code) orANSI/NFPANO. 70-LATEST EDITION (National Electrical
Code) or in Canada, the installation must conform to applicable Canadian Standards: CAN/CGA-B149.1-M91
(Natural Gas) or CAN/CGA-B149.2-M91 (Liquid Propane [L.P.] Gas) or LATEST EDITION (for General
Installation and Gas Plumbing) or Canadian Electrical Codes Parts 1 & 2 CSAC22.1-1990 or LATESTEDITION
(for Electrical Connections).
A. UNPACKING/SETTING UP
Remove protective shipping material (i.e., plastic wrap and optional shipping box) from dryer.
IMPORTANT: Dryermustbetransported andhandledinan uprightpositionat ALLtimes.
The dryer can be moved to its final location while still attached to the skid or with the skid removed. To unskid
the dryer, locate and remove the two (2) bolts securing the base of the dryer to the wooden skid.
With the skid removed, to make it easier to slide the dryer into its final position, slightly lower ALL four (4)
leveling legs, so that the dryer will slide on the legs instead of the base frame.

8
B. LOCATION REQUIREMENTS
Before installing the dryer, be sure the location conforms to local codes and ordinances. In the absence of such
codes or ordinances the location must conform with the National Fuel Gas Code ANSI.Z223.1 LATEST
EDITION, or in Canada, the installation must conform to applicable Canadian Standards: CAN/CGA-B149.1-
M91 (Natural Gas) or CAN/CGA-B149.2-M91 (Liquid Propane [L.P.] Gas) or LATESTEDITION (for General
Installation and Gas Plumbing).
1. The dryer must be installed on a sound level floor capable of supporting its weight. Carpeting must be
removed from the floor area that the dryer is to rest on.
IMPORTANT: “Thedryermustbeinstalledon noncombustible floorsonly.”
2. The dryer must not be installed or stored in an area where it will be exposed to water and/or weather.
3. The dryer is for use in noncombustible locations.
4. Provisions for adequate air supply must be provided as noted in this manual (refer to Fresh Air Supply
Requirements in Section D).
5. Clearance provisions mustbemade from combustible construction as noted in this manual (refer to Dryer
Enclosure Requirements in Section C).
6. Provisions must be made for adequate clearances for servicing and for operation as noted in this manual
(refer to Dryer Enclosure Requirements in Section C).
7. Dryer must be exhausted to the outdoors as noted in this manual (refer to Exhaust Requirements in
Section E).
8. Dryer must be located in an area where correct exhaust venting can be achieved as noted in this manual
(refer to Exhaust Requirements in Section E).
IMPORTANT: Dryershouldbelocatedwhere aminimumamountof exhaustductwillbe necessary.
9. The dryer must be installed with a proper exhaust duct connection to the outside.
10. The dryer must be installed with provisions for adequate combustion and make-up air supply.
CAUTION: Thisdryer producescombustiblelint andmustbeexhausted tothe outdoors. Every6
months,inspecttheexhaustductingandremoveanylintbuildup.
IMPORTANT: Dryer mustbe installedin alocation/environment, whichtheambient
temperatureremains between40ºF (4.44ºC)and 130ºF (54.44ºC).

9
C. DRYER ENCLOSURE REQUIREMENTS
NOTE: Allowancesmustbemadefor openingthecontrol door.
X = 12-inch (30.48 cm) minimum, 24-inches (60.96 cm) is suggested for ease of maintenance.
NOTE: Airconsiderationsareimportant for properandefficientoperation.
Dryers may be positioned sidewall to sidewall. However, a 1/16” (1.5875 mm) minimum allowance must be
made for the opening and closing of the control door and the lint door. It is suggested that the dryer be positioned
about 2 feet (0.61 meters) away from the nearest obstruction for ease of installation, maintenance, and service
(to be measured from the back guard). Refer to the illustration above for details.

10
D. FRESH AIR SUPPLYREQUIREMENTS
The CG20 air supply (make-up air) must be given careful consideration to assure proper performance of each
dryer. An unrestricted source of air is necessary for each dryer. As a general rule, an unrestricted air entrance
from the outdoors (atmosphere) of a minimum of 1/4 square feet (0.23 square meters) is required for each dryer.
If registers or louvers are installed over the openings, then the area must be increased. It is not necessary to
have a separate make-up air opening for each dryer. Common make-up air openings are acceptable. However,
they must be set up in such a manner that the make-up air is distributed equally to the dryers. The dryer must
be installed with provisions for adequate combustion and make-up air supply.
EXAMPLE: For a bank of eight (8) dryers, two (2) unrestricted openings measuring 1 foot by 1
foot (0.31 meters by 0.31 meters), (1 square foot [0.93 square meters]) are
acceptable.
IMPORTANT: Make-up airopenings should notbe locatedin anarea directlynear whereexhaust
ventsexitthebuilding.
Allowances must be made for remote or constricting passageways or where dryers are located at excessive
altitudes or predominantly low pressure areas.
IMPORTANT: Make-up airmustbeprovided from asourcefree ofdrycleaning solventfumes.
Make-upairthatiscontaminatedbydrycleaningsolventfumeswillresultin
irreparabledamage tothemotors andotherdryer components.
NOTE: ComponentfailureduetodrycleaningsolventfumeswillVOIDTHEWARRANTY.

11
E. EXHAUST REQUIREMENTS
DO NOT use a nonmetal flexible vent, use a metal vent that is smaller than 4” (10.2 cm) in diameter or exhaust
hoods with magnetic latches.
DO NOT exhaust dryer into a chimney, furnace, cold air vent, attic, crawl space, or any other vent used for
venting.
DO NOT install flexible vent in enclosed walls, ceilings, or floors.
IMPORTANT: ObserveALLgoverning codesandordinances.
Exhaust your dryer to the outside. Moisture and lint indoors may cause:
1. Lint to gather around the dryer where it can be fuel for a fire.
2. Moisture damage to woodwork, furniture, paint, wallpaper, carpet, etc...
3. Housecleaning problems and health problems.
A 4” (10.2 cm) diameter vent is required. Arigid or flexible metal vent must be used. DO NOT use a plastic
or a foil covered vent.
Use a heavy metal vent. DO NOT use a plastic or metal foil vent. A rigid metal vent is recommended to
prevent crushing and kinking. Aflexible metal vent must be fully extended and supported when the dryer is in
its final position. Remove excess flexible vent to avoid sagging and kinking that may result in reduced airflow.
If using an existing exhaust system, clean lint from entire length of system and make exhaust hood is not plugged
with lint. Replace any vinyl or metallized plastic foil vent with rigid metal or flexible metal vent.
Use duct tape to seal ALL joints. DO NOT use screws or other fastening devices that extend into the interior
of the vent to secure vent.
Service check: Back pressure in any exhaust system used must be no less than 0 and must not exceed 0.6
inches (1.49 mb) water column (W.C.) measured with an incline manometer at the point that exhaust vent
connects to the dryer.
IMPORTANT: Itis recommendedthat exhaustor boosterfans notbeused inthe exhaustductwork
system.
NOTE: Asper theNationalFuel GasCode, “Exhaustductsfor type2 clothesdryersshall be
constructedofsheetmetal or othernoncombustiblematerial. Suchductsshallbe equivalent in
strengthandcorrosion resistancetoductsmade ofgalvanizedsheetsteel not lessthan
0.0195-inches(26 gauge [0.05mm])thick.”

12
IMPORTANTVENTINGREMINDERS
1. Ductwork size and installation should be done by a qualified professional.
2. The dryer must be exhausted to the outdoors.
3. Ductwork should be routed as short as possible to the outdoors with as few elbows as possible.
4. Avoid 90° turns, use 30° or 45° turns instead.
5. The inside of the ductwork should be as smooth as possible with no projections from sheet metal screws.
Ducts added should overlap the duct to which it is to be connected.
6. ALL ducts should be taped to prevent moisture and lint from escaping into the building.
7. Inspection or clean out doors should be installed throughout strategic points in the ductwork for periodic
inspection and cleaning.
8. Whenever the ductwork passes through combustible materials, the opening must be 2-inches (5.08 cm)
larger than the duct (all the way around). The duct must be centered within this opening.
9. The outside of the ductwork mustbe protected from the weather. A90° elbow must be used for horizontal
run and when vertically through a roof by using a 180° turn to point the opening downward. The distance
between the exhaust duct and the nearest obstruction (i.e., roof or ground) must be twice the diameter of
the duct.
10. DO NOT use screens, louvers, or caps on the outside opening of the exhaust ductwork.
11. Exhaust back pressure measured by a manometer at the dryer exhaust duct area must be no less than 0
and must not exceed 0.6 inches (1.49 mb) of water column (W.C.).
WARNING: DRYER MUST NEVERBE OPERATEDWITHOUTTHELINT FILTER/SCREEN
IN PLACE, EVEN IFAN EXTERNALLINT COLLECTION SYSTEM IS USED.
12. Exhaust ductwork outlets should not be located in an area directly where the make-up air openings are
located.
IMPORTANT: Itisrecommended thatexhaust orbooster fansnotbe usedin theexhaust ductwork
system.

13
F. ELECTRICAL INFORMATION
1. Electrical Requirements
It is your responsibility to have ALL electrical connections made by a properly licensed and competent
electrician to assure that the electrical installation is adequate and conforms to local and state regulations or
codes. In the absence of such codes, ALL electrical connections, materials, and workmanship must
conform to the applicable requirements of the National Electrical Code ANSI/NFPA NO. 70-LATEST
EDITION or in Canada, the Canadian Electrical Codes Parts 1 & 2 CSAC22.1-1990 or LATEST EDITION.
IMPORTANT: Failureto complywiththesecodesor ordinances,and/ortherequirementsstipulated
inthismanualcanresultinpersonalinjury orcomponentfailure.
NOTE: ComponentfailureduetoimproperinstallationwillVOIDTHEWARRANTY.
IMPORTANT: Eachcircuit mustbeconnectedto anindependentlyprotectedbranch circuit.
IMPORTANT: USE ONLYCOPPER CONDUCTORCABLE of properampacity andinsulation in
accordancewithelectriccodes formakingserviceconnections.
NOTE: TheuseofaluminumwirewillVOIDTHEWARRANTY.
IMPORTANT: A separate circuitservicingeach dryermustbeprovided.
2. Electrical Service Specifications
a. Electric Service
1) Gas Models ONLY
IMPORTANT: The data label is affixed to the rear upper left back area of the dryer which can be
viewedeitherthroughthe openingsin thedryersbackpanel/guard,or by removingthis
backpanel/guard.
IMPORTANT: USE ONLYCOPPER CONDUCTORCABLE of properampacity andinsulation in
accordancewithelectriccodes formakingserviceconnections.
NOTE: Componentfailureduetoimpropervoltageapplication willVOIDTHEWARRANTY.

14
2) Electric Models ONLY
ALL electrically heated dryers must be connected to the electric service shown on the dryer’s
data label, which is affixed to the upper left area of the inner back panel. The connecting wires
must be properly sized to handle the rated current.
NOTE: Electricallyheated service (amperage) specifications/requirementsarenotavailable at the time
ofprinting. Contactfactory forupdate.
NOTE: Componentfailureduetoimpropervoltage applicationwillVOIDTHEWARRANTY.
3. Grounding
A ground (earth) connection must be provided and installed in accordance with state and local codes. In
the absence of these codes, grounding must conform to applicable requirements of the National Electrical
CodeANSI/NFPANO. 70-LATEST EDITION, or in Canada, the installation must conform to applicable
Canada Standards: Canadian Electrical Codes Parts 1 & 2 CSA C22.1-1990 or LATEST EDITION. The
ground connection may be to a proven earth ground at the location service panel.
For added personal safety, when possible, it is suggested that a separate ground wire (no. 18 minimum) be
connected from the ground connection of the dryer to a grounded cold water pipe. DO NOT ground to a
gas pipe or hot water pipe. The grounded cold water pipe must have metal to metal connection ALL the
way to the electrical ground. If there are any nonmetallic interruptions, such as, a meter, pump, plastic,
rubber, or other insulating connectors, they must be jumped out with no. 4 copper wire and securely
clamped to bare metal at both ends.
IMPORTANT: For personalsafety andproper operation,the dryermustbe grounded.
Provisions are made for ground connection in each dryer at
the electrical service connection area.
4. Electrical Connections
A wiring diagram is located inside the rear electric box.
NOTE: ACIRCUITSERVICINGEACHDRYER
MUST BE PROVIDED.
The electrical input connections on ALLdryers are made
into the rear service box located at the upper right area
of the dryer.

15
If local codes permit, power to the dryer can be made by the use of a flexible U.L. listed power
cord or pigtail (wire size must conform to rating of dryer), or the dryer can be hard wired directly
to the service breaker panel. In both cases, a strain relief must be installed where the wiring enters
the dryer.
a. Gas Models Only
1) Single-Phase (1ø) Wiring Connections/Hookup

16
b. Electric Models Only
1) Single-Phase (1ø) Wiring Connections/Hookup
If local codes permit, power to the dryer can be made by the use of a flexible U.L. listed power
cord or pigtail (wire size must conform to rating of dryer), or the dryer can be hard wired directly
to the service breaker panel. In both cases, a strain relief must be installed where the wiring enters
the dryer.
Table of contents
Other Continental Girbau Dryer manuals

Continental Girbau
Continental Girbau L28STK30G User manual

Continental Girbau
Continental Girbau CG75-85 User manual

Continental Girbau
Continental Girbau DL2X30CG Series User manual

Continental Girbau
Continental Girbau CG115-25 III User manual

Continental Girbau
Continental Girbau L36USS36G User manual

Continental Girbau
Continental Girbau CG30-40 User manual

Continental Girbau
Continental Girbau CG50-60 User manual

Continental Girbau
Continental Girbau CG75-85 User manual

Continental Girbau
Continental Girbau CG145-55 User manual

Continental Girbau
Continental Girbau CG115-25 User manual