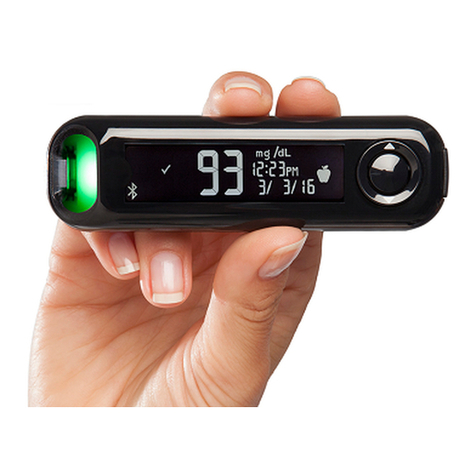
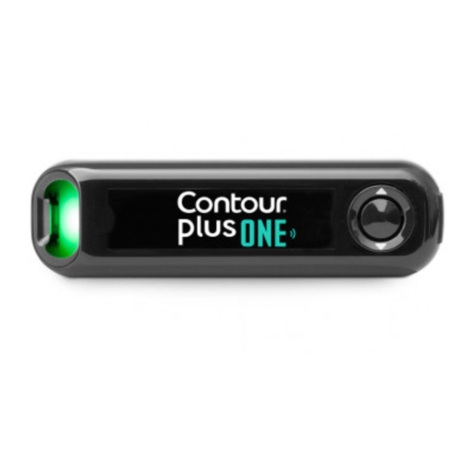
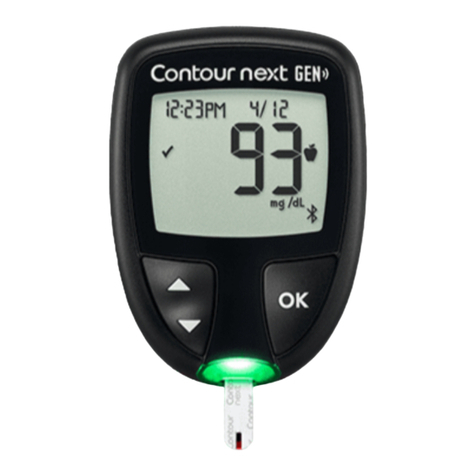
Contour NEXT ONE User manual

Blood Glucose Monitoring System
USER GUIDE
Uses only CONTOUR®NEXT
blood glucose test strips.
Works with free CONTOUR®DIABETES app.
Warranty information and online meter registration
available at www.diabetes.ascensia.com/warranty
or call our Customer Service.

Table of Contents
1 GETTING STARTED
Your meter display
Meter symbols
The CONTOUR DIABETES app
Initial setup
2 TESTING
ÏÃÆÊÅÃÉż¿½¾ƭÅ͸ÂÅź½Â˹ÅÉ»
Fingertip testing
Add a Meal Marker to a blood glucose result
Understand test results
3 LOGBOOK
View test results
4 SETTINGS
Change the Time and Date
ËÈÄŮÅËĺ
ËÈÄÄƭŮ»·Â·ÈÁ»È»·ÊËÈ»
View Target Ranges
ËÈÄŮÉ÷ÈÊʷȽ»ÊȷĽ»¿Äº¿¹·ÊÅÈ
ËÈÄÄƭŮÂË»ÊÅÅʾ»·ÊËÈ»
Put your meter in pairing mode
5 HELP
Clean and disinfect your meter
Replace meter batteries
Test with control solution
6 TECHNICAL INFORMATION
Error messages
Order meter kit supplies
Accuracy and Precision
»Ê»ÈÉÆ»¹¿Ű¹·Ê¿ÅÄÉ
Èź˹ʷ¸»Â¿Ä½ÏøÅÂÉ

INTENDED USE
The CONTOUR®NEXT ONE blood glucose monitoring system
is intended to be used for the quantitative measurement of
½Â˹ÅÉ»¿Ä¼È»É¾¹·Æ¿Â·ÈÏ;Å»¸ÂÅźºÈ·ÍļÈÅÃʾ»ŰĽ»ÈÊ¿ÆÉ
or palm. The CONTOUR NEXT ONE blood glucose monitoring
system is intended to be used by a single person and should not
be shared. The CONTOUR NEXT ONE blood glucose monitoring
system is intended for self-testing outside the body (in vitro
diagnostic use) by people with diabetes at home as an aid in
ÃÅÄ¿ÊÅȿĽʾ»»Ů»¹Ê¿Ì»Ä»ÉÉż·º¿·¸»Ê»É¹ÅÄÊÈÅÂÆÈŽȷÃƔ
The CONTOUR NEXT ONE blood glucose monitoring system
should not be used for the diagnosis of or screening for
diabetes or for neonatal use. Alternative site testing (palm)
should be done only during steady state times (when glucose
is not changing rapidly). The CONTOUR®NEXT test strips are
for use with the CONTOUR®NEXT ONE blood glucose meter to
quantitatively measure glucose in fresh capillary whole blood
ºÈ·ÍļÈÅÃʾ»ŰĽ»ÈÊ¿ÆÉÅÈÆ·ÂÃƔ
The system is intended for in vitro diagnostic use only.
NOTE: This document uses the term ‘blood glucose’ to mean
‘blood sugar.’
1

IMPORTANT SAFETY INFORMATION
WARNING
If your blood glucose reading is under the critical
level you have established with your health care
professional, follow their advice immediately.
If your blood glucose reading is over the recommended
limit set by your health care professional:
1. Wash and dry your hands well.
2. Retest with a new strip.
If you get a similar result, follow your health care
professional’s advice immediately.
Talk to Your Health Care Professional:
• Before setting any Target Ranges in your meter or in
compatible software.
• Before changing your treatment or medication based on
test results.
• If you obtain test results that are not consistent with the
way you feel.
• About whether Alternative Site Testing (AST) is appropriate
for you.
• Before making any other decision of medical relevance.
2

Potential Biohazard
• Always wash your hands with soap and water and dry
them well before and after testing or handling the meter,
lancing device, or test strips.
• If your meter is being operated by a second person who is
providing testing assistance to you, the meter and lancing
device should be disinfected prior to use by the second
person.
• All parts of the kit are considered biohazardous and can
potentially transmit infectious diseases, even after you
have performed cleaning and disinfection.
• For complete instructions on cleaning and disinfecting your
meter and lancing device, see Section 5 HELP: Cleaning
and Disinfection.
• For more information about cleaning and disinfecting
your meter or lancing device see: “US Food and Drug
ºÃ¿Ä¿ÉÊÈ·Ê¿ÅÄƔɻżŰĽ»ÈÉÊ¿¹Áº»Ì¿¹»ÉÅÄÃÅÈ»
than one person poses risk for transmitting bloodborne
pathogens: initial communication. US Department of
Health and Human Services; update 11/29/2010.”
http://wayback.archive-it.org/7993/20170111013014/http://
www.fda.gov/MedicalDevices/Safety/AlertsandNotices/
ucm224025.htm
“Centers for Disease Control and Prevention. Infection
Prevention during Blood Glucose Monitoring and Insulin
Administration. US Department of Health and Human
Services; update June 8, 2017.”
http://www.cdc.gov/injectionsafety/blood-glucose-
monitoring.html
3
• The meter and lancing device are for single-patient use.
Do not share them with anyone including other family
members! Do not use on multiple patients.1,2
• The lancing device usually provided with your kit should
not be used for assisted blood draws by health care
professionals or at health care provision sites.
• Always dispose of used test strips and lancets as medical
waste or as advised by your health care professional.
• All products that come in contact with human blood
should be handled as if capable of transmitting infectious
diseases.
• Keep out of reach of children.This kit contains small parts
ʾ·Ê¹Å˺¹·ËÉ»ÉËŮŹ·Ê¿ÅÄ¿¼·¹¹¿º»ÄÊ·ÂÂÏÉÍ·ÂÂÅÍ»ºƔ
• Keep batteries away from children. Many types of
batteries are poisonous. If swallowed, immediately
contact your poison control center.
• This device is not intended for use in healthcare or assisted-
ËɻɻÊʿĽÉÉ˹¾·É¾ÅÉÆ¿Ê·ÂÉƑƾÏÉ¿¹¿·ÄÅů¹»ÉƑÅÈ
long-term care facilities because it has not been cleared by
FDA for use in these settings, including for routine assisted
testing or as part of glycemic control procedures.
•Use of this device on multiple patients may lead to
ÊÈ·ÄÉÿÉÉ¿ÅÄżË÷ÄÃÃËÄź»Ű¹¿»Ä¹Ï¿ÈËÉ
ƺƻƑ»Æ·Ê¿Ê¿É¿ÈËÉƺƻƑ»Æ·Ê¿Ê¿É¿ÈËÉ
ƺƻƑÅÈÅʾ»È¸ÂÅź¸ÅÈĻƷʾŽ»ÄÉƔ
4

Limitations
•Serious Illness: The system should not be used to test
critically ill patients and should not be used by persons with
È»ºË¹»ºÆ»È¿Æ¾»È·Â¸ÂÅźŲÅÍƔÄ·¹¹ËȷʻȻÉËÂÊÉ÷ÏŹ¹ËÈ
in severely hypotensive individuals or patients in shock.
Inaccurate low results may occur for individuals experiencing a
hypoxia state, or a hyperglycemic-hyperosmolar state, with or
without ketosis.3,4
•Meter Operating Temperature Range: 41°F–113°F.
•Control Testing Temperature Range: 59°F–95°F.
•Test Strip Storage Conditions: 41°F–86°F, 10%–80%
Relative Humidity (RH).
•Second-Chance sampling conditions: Temperature Range
59°F–95°F, Hematocrit 20%–55%.
•Meter Operating Humidity Range: 10% RH–93% RH.
•·ÃÆÂ»ÅÂËûƓʷƔʽǹƔ
•Measuring Range:ʹʷýƭºƯʽʷʷýƭºÅ¼½Â˹ÅÉ»¿Ä¸ÂÅźƔ
•Altitude: This system has not been tested at altitudes higher
than 20,674 feet (6301 meters).
•Alternative Site Testing: See Section 2 TESTING: Alternative
Site Testing (AST): Palm.
•Hematocrit: CONTOUR NEXT test strip results are not
É¿½Ä¿Ű¹·ÄÊÂÏ·Ů»¹Ê»º¸Ï¾»Ã·ÊŹȿÊ»̻ÂÉ¿Äʾ»È·Ä½»
of 20% to 60%.
•Xylose: Do not use during or soon after xylose
absorption testing. Xylose in the blood will cause an
interference.
•Neonatal Use: The CONTOUR NEXT ONE meter is not
indicated for neonatal use.
5

PRECAUTIONS
•Read your CONTOUR NEXT ONE user guide, the
lancing device package insert, if provided, and all
instructional materials provided in your meter kit before
testing. Follow all instructions for use and care exactly as
described to help avoid inaccurate results.
• Examine the product for missing, damaged, or broken parts.
If the test strip packaging is open or damaged, do not use
those strips.
For replacement parts, contact Customer Service. See
Contact Information or the carton.
• Your CONTOUR NEXT ûʻÈÍÅÈÁÉͿʾ
CONTOUR NEXT test strips and CONTOUR®NEXT control
solution.
• Always keep the CONTOUR NEXT test strips in their original
bottle or foil packet. Tightly close the bottle immediately
after removing a test strip. The bottle is designed to keep
the test strips dry. Do not place or store other items or
medications in the test strip bottle. Avoid exposing meter
and test strips to excessive humidity, heat, cold, dust, or
dirt. Exposure to room humidity by leaving the bottle open
or not storing the strips in their original bottle or foil packet
can damage your test strips. This could lead to inaccurate
results. Do not use a test strip that appears damaged or
has been used.
6

• Do not use expired materials. Using expired material can
cause inaccurate results. Always check the expiration
dates on your test materials.
NOTE: ¼Ê¾¿É¿Éʾ»ŰÈÉÊʿûÏÅË·È»ÅÆ»Ä¿Ä½Ê¾»¹ÅÄÊÈÅÂ
solution, write the date on the bottle.
• Do not use control solution that is more than 6 months past
ʾ»º·Ê»ÏÅËŰÈÉÊÅÆ»Ä»ºÊ¾»¸ÅÊÊ»Ɣ
• If your control solution test result is out of range, contact
Customer Service. See Contact Information. Do not use
the meter for blood glucose testing until you resolve this
issue.
• The meter is designed to give accurate blood testing
results at temperatures between 41°F and 113°F. If the
meter or test strip is outside this range, you should not
test until the meter and test strip are within this range.
Whenever the meter is moved from one location to
another, allow approximately 20 minutes for the meter
to adjust to the temperature of the new location before
performing a blood glucose test.
• Do not attempt to perform a blood glucose test when the
CONTOUR NEXT ONE meter is connected to a computer.
• Use only approved equipment (for example, USB cable)
¼ÈÅÃʾ»Ã·Ä˼·¹ÊËÈ»ÈÅȹ»ÈÊ¿Ű»º¸ÅºÏÉ˹¾·ÉƑƑ
TUV, or CE.
7

• Your CONTOUR NEXT ONE meter has been preset and
ÂŹÁ»ºÊź¿ÉÆÂ·ÏÈ»ÉËÂÊÉ¿Äýƭºƺÿ¿½È·ÃÉż½Â˹ÅÉ»
per deciliter of blood).
»ÉËÂÊÉ¿ÄýƭººÅÄÅʾ·Ì»·º»¹¿Ã·ÂÆÅ¿ÄÊƔ
»ÉËÂÊÉ¿ÄÃÃÅÂƭºÅ¾·Ì»·º»¹¿Ã·ÂÆÅ¿ÄÊƔ
Example:
93
or
52
Check your display screen to be sure the results are
shown correctly. If not, contact Customer Service. See
Contact Information.
• The CONTOUR NEXT ONE blood glucose monitoring system
¾·É·Ã»·ÉËȿĽȷĽ»Å¼ʹʷýƭºÊÅʽʷʷýƭºƔ
ÅÈÈ»ÉËÂÊÉËĺ»ÈʹʷýƭºÅÈÅÌ»ÈʽʷʷýƭºƓ
|If your meter does not display a value and displays the
LO screen, contact your health care professional
immediately.
|If your meter does not display a value and displays the
HI screen, wash your hands or the test site and repeat
the test with a new strip. If the meter again displays
the HI screen, follow medical advice immediately.
8

GETTING STARTED
Your CONTOUR NEXT ONE meter and
CONTOUR NEXT test strip
Grey Square End:
Insert this end into the test strip port
Sample Tip: Blood sample pulled in here
Test Strip Port
Up Button
Press to scroll up
Press and hold
to keep scrolling
Down Button
Press to scroll down
Press and hold
to keep scrolling
OK Button
Press and hold to turn
the meter On or Off
Press to accept a selection
To exit from the Logbook or the last Settings screen and return
to Home, press OK.
NOTE: The meter screen dims after 30 seconds of inactivity.
Press any button to bring up the screen.
1
9

Your CONTOUR NEXT ONE meter Screen
Test Strip
Port
smartLIGHT
TimeTest Result in Target
Meal Marker
Date
Your Meter Symbols
Symbol What the Symbol Means
»ÂÂÅÍ¿½¾ÊƓÊ»ÉÊÈ»ÉËÂÊ¿Éabove Target Range.
È»»Ä¿½¾ÊƓÊ»ÉÊÈ»ÉËÂÊ¿Éin Target Range.
»º¿½¾ÊƓÊ»ÉÊÈ»ÉËÂÊ¿Ébelow Target Range.
Blood glucose test result is in Target Range.
ÂÅź½Â˹ÅɻʻÉÊÈ»ÉËÂʿɷ¸ÅÌ»ʽʷʷýƭºƔ
ÂÅź½Â˹ÅɻʻÉÊÈ»ÉËÂʿɸ»ÂÅÍʹʷýƭºƔ
Blood glucose test result is above Target Range.
Blood glucose test result is below Target Range.
Logbook entry.
Meter Settings.
Fasting marker.
Before Meal marker.
After Meal marker.
10

Symbol What the Symbol Means
No marker selected.
A Target Range or Target setting.
Target Light (smartLIGHTTM) setting.
Meter is ready to test.
Add more blood to strip.
Control solution result.
Bluetooth®symbol: indicates the Bluetooth
setting is On; the meter can communicate with a
mobile device.
Indicates low batteries.
Indicates dead batteries.
Indicates a meter error.
Your Meter Features
Second-Chance®sampling allows you to apply more blood
ÊÅʾ»É·Ã»Ê»ÉÊÉÊȿƿ¼Ê¾»ŰÈÉʸÂÅÅºÉ·ÃÆÂ»¿ÉÄÅÊ»ÄÅ˽¾Ɣ
Your test strip is designed to easily ‘sip’ the blood into the
É·ÃÆÂ»Ê¿ÆƔÅÄÅʺÈÅÆ¸ÂÅźº¿È»¹ÊÂÏÅÄʾ»Ų·ÊÉËȼ·¹»Å¼
the test strip.
11

The CONTOUR DIABETES app
for Your ONE meter
Your CONTOUR NEXT ONE meter was designed to work with
the CONTOUR®DIABETES app and your compatible smartphone
or tablet.
You can do the following with your CONTOUR DIABETES app:
• Perform your initial meter setup.
• Add Notes after testing that help to explain your results.
• Set testing reminders.
• Access easy-to-read graphs of test results over a day or over a
period of time.
• Share reports.
• Review your Fasting, Before Meal, After Meal, and Overall
results on a daily graph.
• Change meter settings, as necessary.
The CONTOUR DIABETES app:
• Automatically stores your results.
• Saves your Notes in My Readings.
• Displays your Trends and test results as they compare
with your targets.
Download the CONTOUR DIABETES app
1. On your smartphone or tablet, go to the App Store®or the
Google PlayTM store.
2. Search for the CONTOUR DIABETES app.
3. Install the CONTOUR DIABETES app.
12

Initial Setup from the
CONTOUR DIABETES app
The easiest way to set up your new meter is to download the
CONTOUR DIABETES app to your smartphone or tablet and follow
the instructions in the app.
If you do not pair your meter with the CONTOUR DIABETES app,
follow the instructions in Initial Setup from the Meterʾ»ŰÈÉÊʿû
you turn on your meter.
Initial Setup from the Meter
OK Button
Press and hold OK for 3 seconds until the meter turns on.
The screen displays the Power On Self Test.
CAUTION: The CONTOUR NEXT ONE meter has not been
tested for use with any software other than compatible
Ascensia Diabetes Care software. The manufacturer is not
responsible for any erroneous results from the use of other
software.
13

ÂÂÉÏøÅÂÉÅÄʾ»É¹È»»Ä·ÄºÊ¾»Í¾¿Ê»ÉÊÈ¿ÆÆÅÈʸȿ»ŲÏ¿½¾ÊËÆƔ
It is very important to verify that 8.8.8 displays fully and that the
white light from the test strip port is visible.
If there are missing characters or if the strip port light is a color
Åʾ»Èʾ·Ä;¿Ê»Ƒ¹ÅÄÊ·¹ÊËÉÊÅûȻÈÌ¿¹»Ɣ¾¿ÉÃ·Ï·Ů»¹Êʾ»
way you see your results. See Contact Information.
ʸ¿»Í̻ȷ·Ƚ»Ê·Ä½»
Initial setup begins with a view of the Overall Target Range.
The meter displays a pre-set
Overall Target Range. You can
change this pre-set Target Range
from the CONTOUR DIABETES app
after initial setup.
To move to the next screen,
press OK.
Continue to Set the Time.
2 Set the Time
The hour is blinking.
1. To change the hour, press the or button on the outer ring.
Outer Ring
14

2. To set the hour and move to
minutes, press OK.
3. To change the minutes, press
the or button on the outer
ring, then press OK.
For a 12-hour format, select AM or PM, press the or button,
then press OK.
Continue to Set the Date.
3 Set the Date
The year is blinking.
1. To change the year, press the or button, then press OK.
2. To change the month, press the or button,
then press OK.
3. To change the day, press the or button, then press OK.
4 Setup Is Complete
¾»Ã»Ê»È¸È¿»ŲϺ¿ÉÆÂ·ÏÉÏÅËÈÉ·Ì»ºÉ»ÊʿĽÉƑʾ»Ä¸»»ÆÉ·Äº
turns OFF.
Setup is complete. You are ready to test your blood.
15

TESTING
Get Ready to Test
Read your CONTOUR NEXT ONE user guide, the lancing
device package insert, if provided, and all instructional materials
provided in your meter kit before testing.
Examine the product for missing, damaged, or broken parts. If
the test strip packaging is open or damaged, do not use those
test strips. For replacement parts, contact Customer Service.
See Contact Information.
Fingertip Testing
Ensure that you have the materials you need before you begin
testing:
•CONTOUR NEXT ONE meter.
•CONTOUR NEXT test strips.
•·Ä¹¿Ä½º»Ì¿¹»·ÄºÂ·Ä¹»ÊɼÈÅÃÏÅËÈÁ¿ÊƑ¿¼ÆÈÅÌ¿º»ºƔ
To perform a quality control check, see Section 5 HELP: Control
Solution Testing.
Some supplies are sold separately. See Section 6 TECHNICAL
INFORMATION: Customer Service Checklist.
2
CAUTION: Your CONTOUR NEXT ONE meter works only
with CONTOUR NEXT test strips and CONTOUR NEXT control
solution.
16

High / Low Blood Glucose (Sugar)
Symptoms of High or Low Blood Glucose
You can better understand your test results by being aware of
the symptoms of high or low blood glucose. According to the
American Diabetes Association (www.diabetes.org), some of
the most common symptoms are:
Low blood glucose (Hypoglycemia):
• shakiness
• sweating
• fast heartbeat
• blurred vision
• confusion
• passing out
• seizure
• irritability
• extreme hunger
• dizziness
WARNING: Potential Biohazard
• All parts of the kit are considered biohazardous and can
potentially transmit infectious diseases, even after you
have performed cleaning and disinfection. See Section
5 HELP: Cleaning and Disinfection.
• Always wash your hands with soap and water and dry
them well before and after testing or handling the meter,
lancing device, or test strips.
• If your meter is being operated by a second person who
is providing testing assistance to you, the meter and
lancing device should be disinfected prior to use by the
second person.
• For complete instructions on cleaning and disinfecting
your meter and lancing device, see Section 5 HELP:
Cleaning and Disinfection.
17

High blood glucose (Hyperglycemia):
• frequent urination
• excessive thirst
• blurred vision
• increased fatigue
• hunger
Ketones (Ketoacidosis):
• shortness of breath
• nausea or vomiting
• very dry mouth
For additional information and a complete list of symptoms,
contact your health care professional.
WARNING
If you are experiencing any of these symptoms,
test your blood glucose. If your test result is under
the critical level you have established with your
health care professional or over the recommended
limit, follow your health care professional’s advice
immediately.
18
Other manuals for NEXT ONE
6
Table of contents
Other Contour Blood Glucose Meter manuals

Contour
Contour NEXT EZ User manual

Contour
Contour NEXT EZ User manual

Contour
Contour PLUS ONE User manual

Contour
Contour NEXT ONE User manual

Contour
Contour NEXT ONE User manual

Contour
Contour NEXT ONE User manual

Contour
Contour NEXT EZ User manual

Contour
Contour NEXT ONE User manual

Contour
Contour PLUS ONE User manual

Contour
Contour TS User manual