Converters.TV CM-345T User manual

PAL to XGA PC Tuner Box
(CM-345T) ID#64
Operation Manua

Introduction
This unit is capable of converting from numerous inputs, including
composite video, S-Video, YCbCr, to XGA output. t also accommodates
bypass, TV aerial input, as well as stereo and PC audio input.
Features
• The unit is a high quality video scaler with a TV tuner.
• Extensive video, audio and PC inputs: CV/SV/YCrCb /PC bypass/TV
aerial as
well as stereo and PC audio.
• Supports PC output up to XGA (1024x768).
• 50/60 Hz frame rate conversion ensures glitch-free display of PAL
source on any
monitor.
• ncludes additional TV video out for recording or viewing on TV.
• 3D motion adaptive de-interlacing ensures jaggy-free picture.
• Adaptive non-linear noise reduction.
• Adaptive scan rate conversion.
• Movie mode reverse 3:2 pull down.
• Luminance/Color Transient mprovement.
• Video over VGA Picture-on-Picture.
• Antenna/Cable auto programming and channel memory.
• PLL frequency synthesizer/full channel memory.
• MTS/SAP Stereo.

Operation Contro s
and Functions
Top Pane
1. Power- This is the power button used to switch the unit on or off.
2. Input- This is the input selection button. Press the button repeatedly and
it will toggle through five input sources available for your selection. The
sequence of selection is- TV (RF)- Composite Video- S-Video- YCbCr-
PC Bypass.
3. Menu- Press this button to enter into OSD menu or to confirm your
selection of the highlighted parameter.
4. CH - ▲▼ When not in OSD menu mode, press this button to increase
or decrease the TV channel number.
When in OSD mode, press the button to move up or down the highlight
bar to your desired parameter. Or after a parameter has been selected by
the Menu/Enter button, press the button to alter the value of your selected
parameter.
5. Menu and “CH + and –“- Press these two buttons simultaneously to
increase or decrease the audio volume.

Rear Pane
1. Power- DC 12V 800mA Center positive - This is the power supply
input port.
2. RF-In- Terrestrial VHF/UHF Antenna input or CATV coaxial cable
input.
3. C-Video Input- This is the Composite Video input port.
4. S-Video input- This is the S-Video input port.
5. YCbCr input- This port connects to the YCbCr output of source device
such as
DVD or Set-top box.
6. PC In- 15-pin D-Sub PC VGA input.
7. Audio- This is the stereo audio input port.
8. PC Audio In- This is the 3.5mm PC audio input port.
9. Audio Out- This is the 3.5mm PC audio output port.
10. VGA Out- 15-pin D-Sub VGA output.
11. TV out- This is the video and stereo output for TV/Cable input.
Insta ation
Power up the unit:
1. Plug the power jack into the power socket on the back of the unit, the
power LED will illuminate in red colour (Standby mode).
2. Press the power button, power LED will turn into a green light.
3. Press the power button again and it will return to standby mode.
When the unit is first powered up the default input to the unit is TV (RF)
input. When you have changed the input source and later power down the
unit, the last input source that you selected will be memorized by the unit.
When you re-power the unit the memorized input will be recalled as input
source.

OSD Operation:
1. After you have powered on the unit, press the menu button in order to
bring up the main menu page. Use channel up and down arrows in order
to move up or down the highlight bar to your desired parameter. When a
parameter is selected, its colour will be inverted.
Press the Menu/Enter button to confirm your selection.
To adjust the setting value of your selected parameter: press the volume +
or volume – button in order to increase or decrease the value of your
parameter.
2. On the source sub-menu you can choose input from TV, CV, SV,
YCbCr and PC pass through.
3. Picture adjustment menu: Use channel up or down arrows to select
your desired adjustment parameter.
Brightness- Use volume +/- to increase or decrease the brightness level
(1~100).
Contrast- Use volume +/- to increase or decrease the contrast level
(1~100).
Co our- Use volume +/- to increase or decrease the level of colour
saturation
(1~100).
Sharpness- Use volume +/- to increase or decrease the level of picture
sharpness
(1~16).
Tint- NTSC ONLY- Use volume +/- to increase or decrease the tint level
(-50~+50).
Reset- This button is used to recall the preset default values.
Exit- This allows you to return to the last menu page.
4. On the sound sub-menu, you can adjust the volume of the audio out
or you can mute audio out.
You can also select:
Mono: L + R on both left and right channel.
SAP: Second Audio Program.
Stereo: Audio Output in stereo L/R
Exit
5. On the channe sub-menu, select TV for receiving Terrestrial
VHF/UHF broadcasting channel. Select CATV if the unit is connected to
a CATV coaxial cable.
Autoscan- The unit will search through all channels contained in the RF
cable.
Once a channel is found it will be stored in the memory and can be
recalled later by pressing channel up or down button or by pressing
channel number directly.
De ete channe - To remove a channel from your channel up-down
memory list.
Once a channel is deleted it will be skipped from your channel up/down
selection.

The only way to recall the channel is to press its channel number
directly, or to add it back to the channel list.
Add channe - To add a channel into your up-down memory list. Once a
channel has been added to the list, it can be called up by pressing channel
up/down button.
Exit- Return to the last menu page.
Note- Channe De ete and Add on y work after channe search is
carried out.
6. n the reso ution sub-men, you can select output resolution from:
640 x 480
800 x 600
1024 x 768
7. On the TV system sub-menu, find out what aerial or CATV systems are
available at your premise and make sure your antenna/cable are
connected ot the RF input. Select the correct system and type that
corresponds to the country in which you are located.
8. On the Other sub-menu there are three parameters for adjustment:
P P- To turn on or off the P P on the screen.
Sleep- Set a pre-determined time for machine to automatically turn off
when timing is up.
Display- Set on to display the input/output information on the screen.
Remote Contro

1. Input- Press the button repeatedly to select desired input source from
TV, Composite Video, S-Video, YCbCr or PC.
2. TV/CATV- Press the button to select either aerial channel or cable
channel.
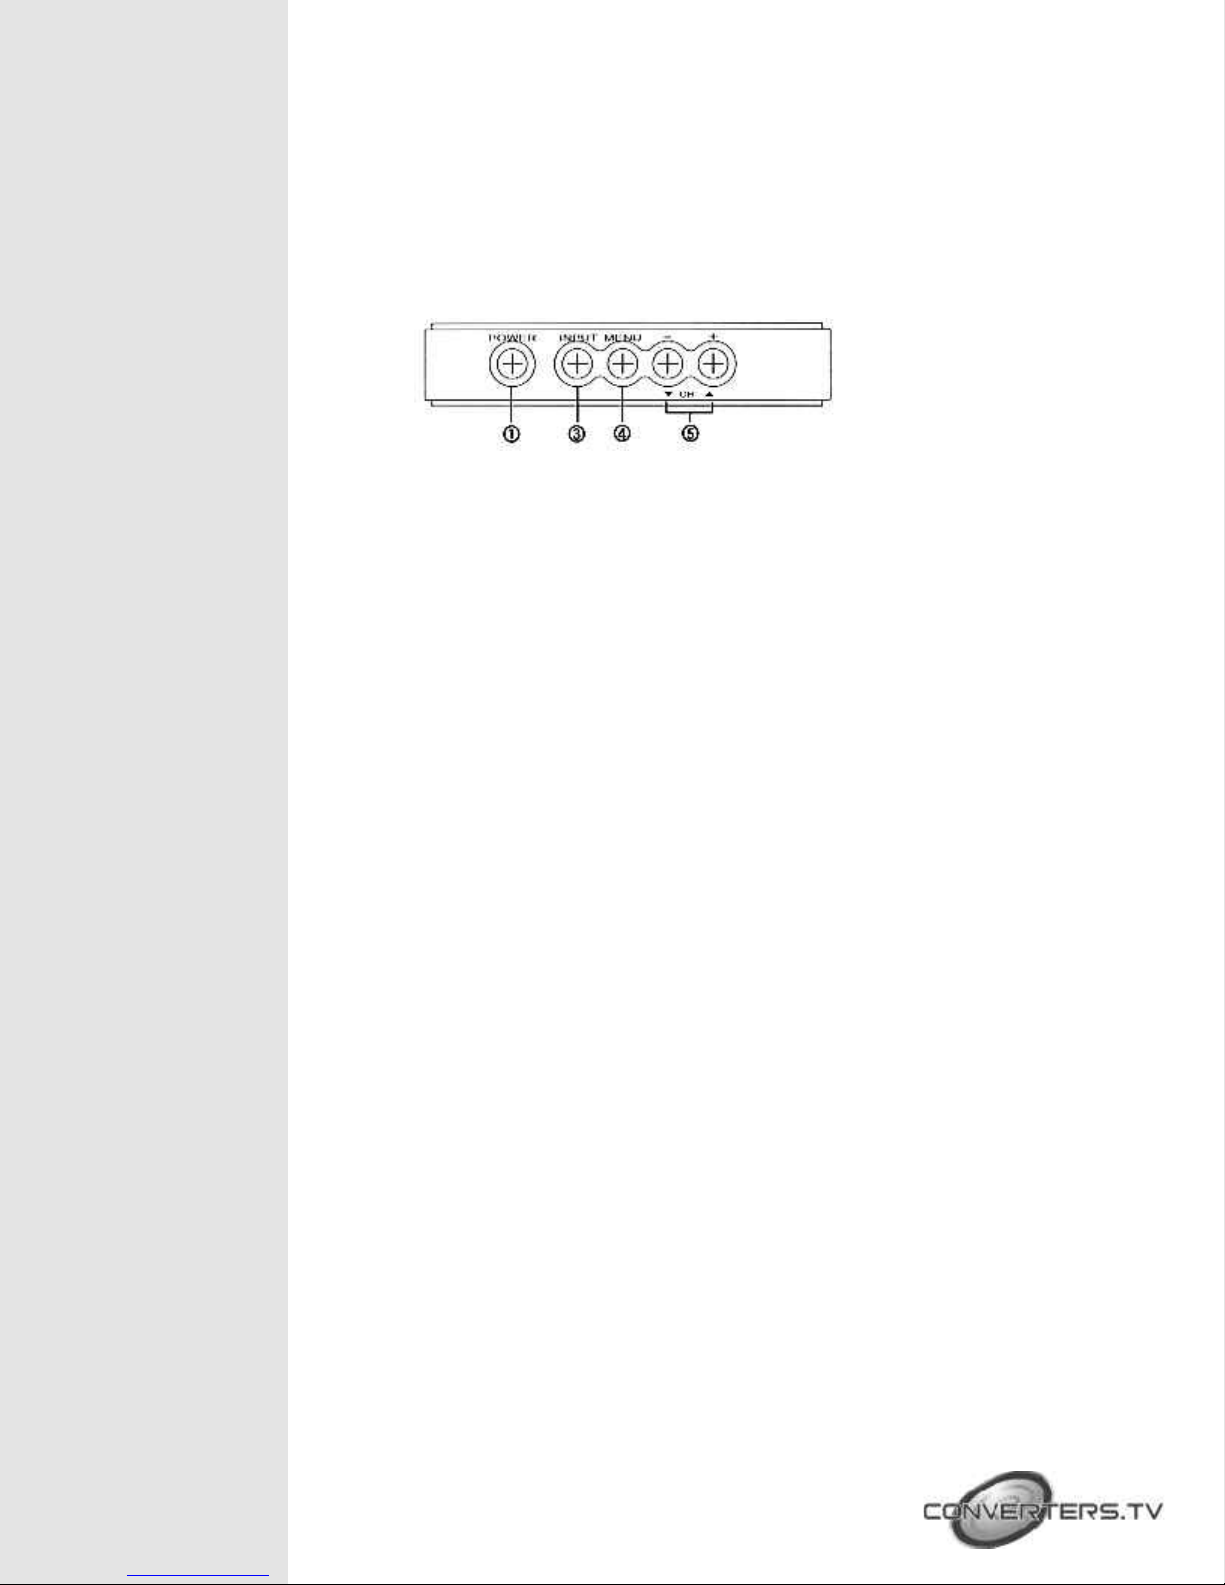
3. Disp ay- Press the button to turn on or off OSD display of input source
on the screen.
4. Power- This is the power on or off button.
5. 0~100- Press numerical keys to select desired TV/CATV channel
directly.
6. TV-PC- Press the button for a quick switch between TV and PC.
7. Reca - Press the button to recall last memory.
8. Mute- Press the button to mute the audio.
9. Vo ume ▲▼ - Press the up and down buttons to increase or decrease
the audio volume.
10. Channe ▲▼ - Press the up and down buttons to increase or decrease
the channel number.
11. S eep- press the button to set a predetermined time (10-120 minutes)
for automatically turning off the machine.
12. Reso ution- Select between 640 x 480 VGA, 800 x 600 SVGA and
1024 x 768 XGA.
13. MTS- Press the button to choose stereo, SAP or mono audio.
14. PIP-Zoom- Press the button to choose the size of sub-window (P P).
P P size can be made to1/4, 1/9 and 1/16 of the screen.
15. PIP-Input- Press the button to select desired input source from TV,
Composite Video, S-Video, YCbCr to be displayed on the sub-window.
16. Pip-Audio- For the sub-window, press the button to select audio input
source from TV, Composite-Video, S-Video, YCbCr. The audio of sub-
window can be swapped between video and PC.
17. Menu- Press the button to enter into OSD menu.
18. Exit- Press the button to exit OSD.
19. Enter- Press the button to confirm your seleciton of the desired
parameter.
20. Up, down, eft and right buttons- These buttons are used for OSD
ajdusment of P P window position.

Connection and
Insta ation
The AC adaptor power unit should not be plugged into a wall outlet until
all connections are complete.
●Connect your Audio Amp to the Audio Out port (Number 9 on rear
panel).
●Using the appropriate connector cable connect your PC to the PC
Audio n port (Number 8 on the rear panel) as well as to the PC n
port (Number 6 on the rear panel).
●Using the appropriate connector cable connect your PC monitor or
projector to the Audio out port (number 9 on the rear panel) as well
as to the VGA Out port (Number 10 on the rear panel).
●Using the appropriate connector cable connect your DVD or VCR
to the Audio n port (Number 7 on the rear panel) as well as to the
Video n porteither Composite Video or S-Video (Number 3 or 4 on
the rear panel).
●Connect your DVD or Set-top box to the YCbCr input port
(Number 5 on the rear panel).
● Connect your TV antenna or CATV RF cable to the RF n port
(Number 2 on the rear panel).
Once all connections are complete please connect the power supply
provided to the power socket.

Specifications
Input Connectors Composite Video: RCA
S-Video: 4 pin, mini Din
YCbCr: 3 x RCA
PC loop through: 15-pin D-Sub
Antenna: F connector
Output Connectors 15-pin D-Sub, Female type
Output Format 640 x 480
800 x 600
1024 x 768
@ 60 Hz refresh rate
Table of contents
Other Converters.TV TV Tuner manuals