Cook's essentials K43782/EAF-15 User manual

12Qt. DIGITAL OIL-FREE AIR FRYER
MODEL: EAF-15
INSTRUCTION MANUAL
Before operating your new appliance, please read all instructions carefully and keep for future
reference.

TABLE OF CONTENTS
2important safeguards
4parts identification
5how to use the control panel
6quick menu chart
6introduction
7preparing your air fryer for use
7how to use your air fryer
8 - rotisserie fork assembly
8 - basket assembly
9 - how to manually program frying time/temp
9 - how to select a quick menu function
9 - rotation function
9 - during the cooking/frying process
10 - when cooking/frying is complete
11 cleaning and maintenance
12 cooking time chart
13 hints and tips
14 troubleshooting guide
1

IMPORTANT SAFEGUARDS
When using electrical appliances, basic safety precautions should always be followed, including the
following:
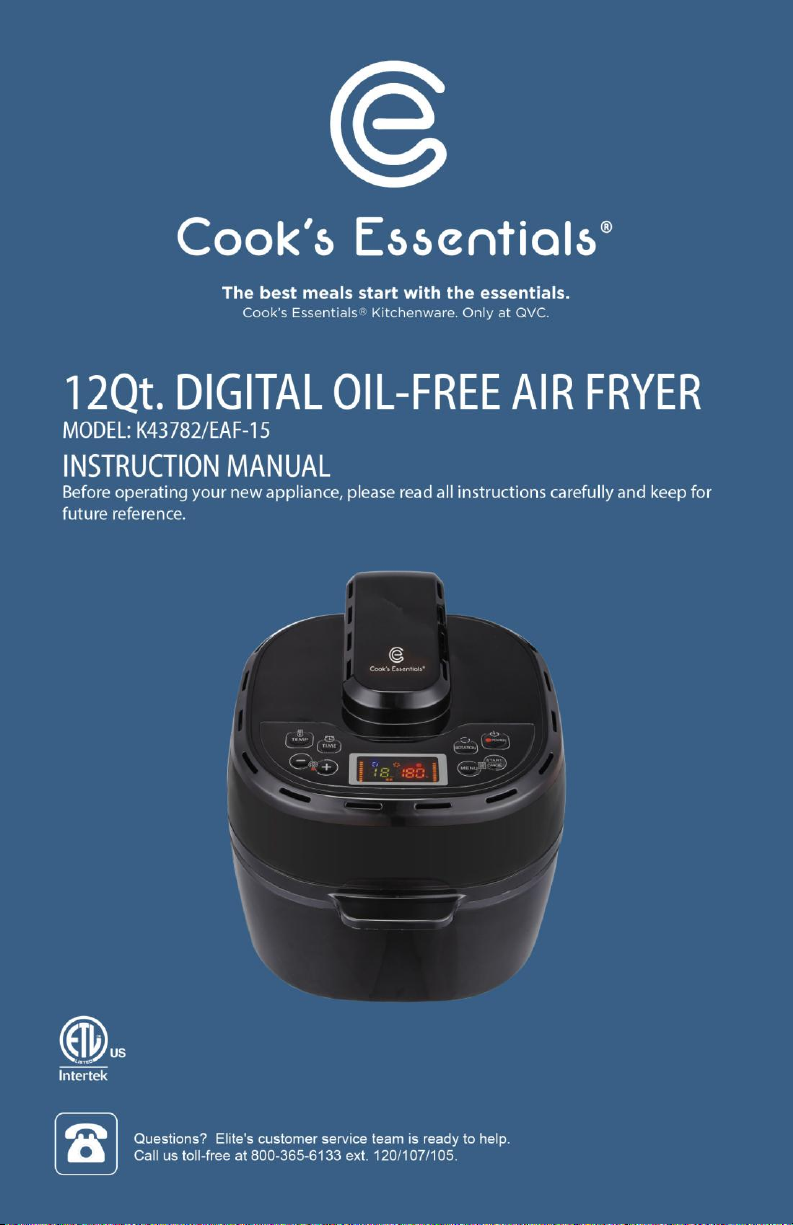
1. Read all instructions before using your Cook's Essentials Air Fryer.
Danger
2. Never immerse the power cord, plug or housing in water or under the tap.
3. Make sure no liquid enters the appliance to prevent electric shock or short-circuit.
4. Do not cover the air inlet and outlet of the appliance during operation.
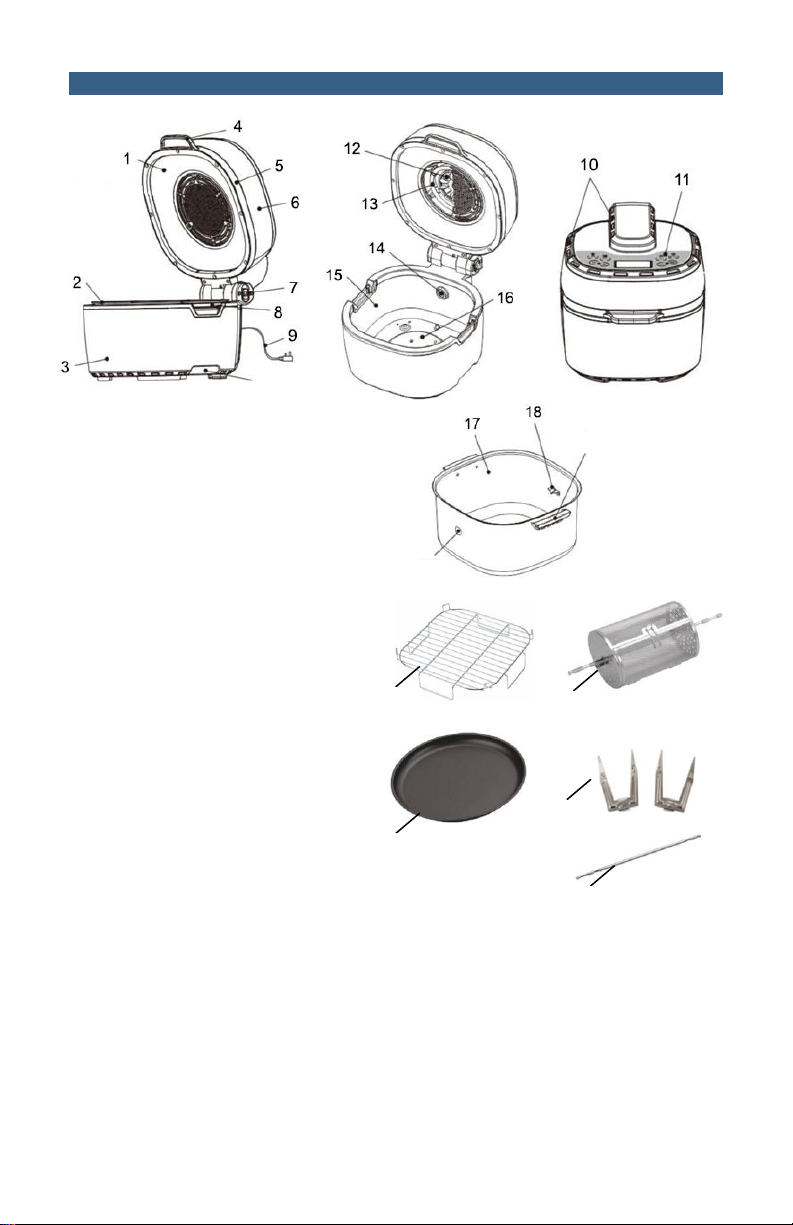
5. Always place foods to be cooked in the basket, foods should never come into direct contact
with the heating elements.
6. Never fill the main body with oil as this may cause a fire hazard and damage to the appliance.
7. Never touch the inside of the appliance during operation (pot, basket, etc.)
Warning
8. Make sure that your output voltage corresponds to the voltage stated on the rating label of
the appliance.
9. If the supply cord is damaged, it must be replaced by a special cord or assembly available
from the manufacture or its service agent.
10. It is recommended to regularly inspect the appliance to avoid a hazard. Do not operate any
appliance with a damaged cord or plug or after the appliance malfunctions or has been
damaged in any manner. Return appliance to the nearest authorized service facility for
examination, repair, or adjustment.
11. Never attempt to repair the appliance yourself, otherwise the warranty becomes invalid.
12. This appliance is not intended for use by persons (including children) with reduced physical,
sensory or mental capabilities, or lack of experience and knowledge, unless they have been
given supervision or instruction concerning use of the appliance by a person responsible for
their safety.
13. Close supervision is necessary when appliance is used near children.
14. NEVER ALLOW A CHILD TO USE THIS PRODUCT.
15. DO NOT let the power cord hang over the edge of the table or work-top, and keep it away
from any hot surfaces.
16. Do not plug in the appliance or operate the control panel with wet hands.
17. Do not place or use the appliance on or near combustible materials, such as a table-cloth,
curtains or wallpaper.
18. Only connect the appliance to a grounded wall socket. Always make sure that the plug is
inserted into the wall socket properly.
19. Never connect this appliance to an external timer switch in order to avoid a hazardous
situation.
20. Never leave appliance unattended.
21. Appliance surfaces may become hot during use.
22. The appliance should be placed on a horizontal and stable surface when using. Do not place
on plastics, board or any other easy-wear surface.
23. Do not place the appliance against wall or other appliances, leave around 4 inches of space
from nearby objects. Do not place anything on the top of appliance.
24. Do not use the appliance beyond the specification of this manual.
25. During operation, hot steam will exhaust through the back side air outlet. Keep your hands
and face at a safe distance from the steam and the air outlet openings. Also be careful of hot
steam and air when you remove the inner pot from the appliance.
26. If food burns and dark smoke releases from the air outlet, unplug immediately and wait for
smoke release to stop, then clean the food and oil from the inner pot.
2

IMPORTANT SAFEGUARDS (cont.)
Caution
27. After use, turn off power to the appliance then unplug from the wall outlet.
28. Unplug the appliance from outlet when it is not in use or before cleaning. Allow it to cool
down first before cleaning.
29. Do not use any accessories that have not been provided with the appliance.
30. This appliance is intended to be used indoors. Do not use outdoors.
31. Clean and wipe and dry the inner pot and accessories before placing food inside.
32. Do not power on the Air Fryer when the Top Lid is open.
33. Always unplug the appliance when not in use.
34. Some countertop and table surfaces, such as Corian®, wood and / or laminates, are not
designed to withstand prolonged heat generated by certain appliances. It is recommended
by countertop manufacturers and Maxi-Matic that a hot pad or trivet be placed under your
appliance to prevent possible damage to the surface.
35. Please use the bottom handles when moving the product.
36. Do not place food up to the lid, leave at least 1-inch of space to avoid over-heating.
37. After cooking, please use an oven mitt when touching the cage, inner rack or high rack. Allow
foods to cool slightly before serving to prevent scalding.
38. Stop using when product cannot start or transparent cover deforms or the appliance does not
perform normally, also please contact customer service.
SAVE THESE INSTRUCTIONS
HOUSEHOLD USE ONLY
GROUNDING INSTRUCTIONS: This appliance must be grounded. It is equipped with a 3-pronged
cord having a grounded plug. The plug must be plugged into an outlet which is properly installed
and grounded.
Warning: Improper use of the grounded cord can result in the risk of electric shock. Consult a
qualified electrician if necessary. Do not attempt to defeat this safety feature by modifying plug.
A short power-supply cord is provided to reduce the hazards resulting from entanglement or
tripping over a longer cord. If it is necessary to use an extension cord, it should be positioned such
that it does not drape over the counter or tabletop where it can be pulled on by children or tripped
over and:
A. Use only 3-pronged extension cord with 3-blade grounding plug.
B. The marked rating of the extension cord must be equal to or greater than the
rating of this appliance. The electrical rating is listed on the bottom of this
unit.
3

PARTS IDENTIFICATION
1. Inner Glass Cover
2. Inner Pot
3. Main Body
4. Lid Handle
5. Top Cover
6. Outer Plastic Cover
7. Lid Unlock Button
8. Inner Pot Handle
9. Power Cord
10. Vents
11. Control Panel
12. Fan
13. Halogen Tube
14. Shaft Support Hole
15. Inner Body
16. Heater
17. Inner Pot
18. Shaft Bracket
19. Shaft Assembly Hole
20. Bottom Base Handle
21. Wire Rack
22. Bake Tray
23. Basket
24. Rotisserie Forks
25. Skewer
NOTE: The Inner pot
consists of a non-stick
surface. To avoid
scratching the non-stick
surface, please use
wooden or plastic
utensils.
20
21
22
23
24
25
8
19
4

HOW TO USE THE CONTROL PANEL
POWER BUTTON: Powers the Digital Air Fryer ON/OFF.
START/CANCEL BUTTON: Starts or Cancels selected cooking function.
MENU BUTTON: Use this button to cycle through and select a QUICK MENU function - CUSTOM,
FROZEN FRIES, FRESH FRIES, CHICKEN WINGS, ROTISSERIE CHICKEN, STEAK, FISH FILLET, FROZEN
SNACKS.
TEMP BUTTON: Use this button to adjust Cook Temperature (from 176°F ~ 464°F).
TIME BUTTON: Use this button to adjust Cook Time (from 1 minute up to 99 minutes)
-/+ BUTTON: Use these buttons to decrease/increase the Time and/or Temperature settings.
Temperature button Time button Rotate button
Quick Menu button
Heating Indicator
Quick Menu Function Indicator
5

QUICK MENU CHART
Menu
Default
Temperature
Default
Cook Time
Recommended
Cooking
Temperature
Recommended
Cooking Time
Range
Range
CUSTOM
0°F
0 min
176°F ~ 464°F
1 ~ 99min
1 min increments
FROZEN FRIES
464°F
20 min
392°F ~ 464°F
15 ~ 25min
1 min increments
FRESH FRIES
356°F
27 min
320°F ~ 392°F
6 ~ 27min
1 min increments
CHICKEN WINGS
464°F
15 min
392°F ~ 464°F
12 ~ 25min
1 min increments
ROTISSERIE
CHICKEN
464°F
33 min
392°F ~ 464°F
33 ~ 60min
1 min increments
STEAK
464°F
7 min
392°F ~ 464°F
5 ~ 18min
1 min increments
FISH FILLET
464°F
9 min
392°F ~ 464°F
5 ~ 14min
1 min increments
FROZEN SNACKS
464°F
25 min
392°F ~ 464°F
10 ~ 30min
1 min increments
*The ROTATION symbol indicates that the QUICK MENU function is pre-programmed with the
ROTATION function. To turn the ROTATION function ON or OFF, press the ROTATION button
anytime during cooking.
INTRODUCTION
Thank you for purchasing the Cook's Essentials Digital Air Fryer. Your new Digital Air Fryer has a
variety of functions to handle a wide array of cooking tasks. With its easy to use digital display and
8 Quick Menu functions, you can fry, cook, or even bake your favorite meals and snacks with ease!
Best of all you will be cooking healthier without the addition of oil. Not only can you cook foods
without the mess of oil but you can cook faster which saves you time and energy. Unlike most
conventional deep fryers, the Digital Air Fryer's unique heating system combined with circulating
hot air will make foods crispier and of course healthier without oil. We hope you enjoy your new
Cook's Essentials Digital Air Fryer and start cooking healthier today!
6

PREPARING YOUR AIR FRYER FOR USE
1. Before using your Digital Air Fryer for the first time, carefully remove all packaging material.
2. Remove the parts from the box and wash the Inner pot (2), Wire rack (21), Bake Tray (22),
Basket (23), Rotisserie Forks (24), and Skewer (25) with warm, soapy
water and a non-abrasive sponge. IMPORTANT: DO NOT IMMERSE
THE MAIN HOUSING IN WATER. Wipe the interior and exterior of
appliance clean with a damp cloth.
IMPORTANT: THIS IS NOT A DEEP FRYER. DO NOT FILL THE APPLIANCE
OR ITS INNER POT WITH OIL OR FRYING FAT.
3. Place the appliance on a flat, horizontal and stable surface (make
sure surface is heat-resistant). Place away from walls and other
appliances. Leave approximately 4 inches of space from nearby
objects (See Figure 1).
4. Lift the Lid Handle (4) as shown in Figure 2 and open the Top Cover
(5) (you will hear 3 "CLICKS" as you lift up the lid) to the position
shown in Figure 3. The Top Cover (5) will remain open and locked
into place.
5. Grasp Inner Pot Handles
(8) to lift out Inner Pot
(2) (See Figure 4).
HOW TO USE YOUR AIR FRYER
NOTE: Make sure the unit is unplugged from the electrical outlet before assembling for use. Ensure
that all parts are thoroughly dry before plugging the product into the electrical outlet and before
operating it.
1. Place ingredients onto the Wire rack (21) or the Bake Tray (22) and
place into the Inner Pot (2) or place ingredients directly into Inner
Pot (2) and place Inner Pot (2) into the Main Body (3) of the unit by
holding the Handles (8) and making sure the Bracket (18) on the
Inner Pot (2) is in front (See Figure 5).
2. To close the Top Cover (5), hold the Lid Handle (4) with one hand
and use your other hand to push up on the Lid Unlock Button (7).
Slowly lower the Lid (5) down until it fully closes (See Figure 6).
TIP: Always be sure to have a firm hold on the Lid Handle (4) before
pressing the Lid Unlock Button (7). Do not allow Top Cover (5) to
forcefully drop down onto Main Body (3).
CAUTION: Do not touch the Inner Pot (2) during and immediately after
use as it gets very hot. Only holdthe Inner Pot (2) by the Handles (8).
NOTE: The initial 15minutes of usemay result in minimal smell and
smoke. This is normal and harmless and comes from the protective
substance applied to the heating elements during manufacturing.
Figure 1
Figure 2 Figure 3 Figure 4
Figure 5
Figure 6
7

HOW TO USE YOUR AIR FRYER (cont).
ROTISSERIE FORK ASSEMBLY
1. Screw one Rotisserie fork (24) onto one end of the Skewer (25) as shown in Step ❶.
2. Push the Skewer (25) through the center of the chicken or meat you wish to cook (see Step
❷) until the Rotisserie fork (24) pierces the food.
3. Place the second Rotisserie fork (24) onto the other end of the Skewer (25) and push it along
the rod until it pierces the other end of the chicken and then tighten the screw in place as
shown in Step ❸.
4. Place the assembled Rotisserie fork (24) into the Inner pot (2) making sure that the longer
squared section at the end of the Skewer (25) engages with the Shaft assembly hole (19) on
the main body of the Cooker. Place the shorter squared section on the Shaft Bracket (18) (see
Steps ❹and ❺).
CAUTION: Always check that there is sufficient space above and below for food to rotate freely
without causing an obstruction.
BASKET ASSEMBLY
1. Place the Skewer (25) through the Basket (23) and fix in position with the two screws (see
Steps ❶and ❷).
2. Place food into the Basket (23) and close the cover of the Basket (23).
3. Do not overfill the Basket (23). Allow space for fries to move freely when the Basket (23) is
rotating for even frying.
4. Place the assembled Basket (23) into the Inner pot (2) making sure that the longer squared
section at the end of the Skewer (25) engages with the Shaft Assembly Hole (19) on the main
body of the Cooker. Place the shorter squared section on the Shaft Bracket (18) (see Step ❸).
8

HOW TO USE YOUR AIR FRYER (cont).
HOW TO MANUALLY PROGRAM FRYING TIME AND TEMPERATURE:
1. Plug Power Cord (9) into an electrical outlet. The appliance will be in standby mode.
2. Press the POWER button.
3. Press the MENU button once and the CUSTOM function will flash on the display. Press the
TIME button and 00 will flash on the display. Use the -/+ buttons to program the air frying
time. Hold down the - or + button for rapid decrease/increase of time in 5 min. increments.
4. Once you have selected your air fry time, press the TEMP button and 000°F will flash on the
display.
5. Use the -/+ buttons to program the air frying temperature.Hold down the - or + button for
rapid decrease/increase of temperature in 9°F increments.
6. Once you have selected your air frying temperature, press START.
NOTE: The unit will not allow you to press START if the Top Cover (5) is in the open position.
TIP: It is recommended to pre-heat the air fryer on empty for 3 min. if the appliance is cold.
HOW TO SELECT A QUICK MENU FUNCTION:
1. Plug Power Cord (9) into an electrical outlet. The appliance will be in standby mode.
2. Press the POWER button.
3. Press the MENU button to select one of the 8 Quick Menu functions.
NOTE: Each Quick Menu function is pre-programmed with a default time, temperature and
ROTATION function (reference the QUICK MENU CHART on page 6).
4. To manually adjust the Times and Temperatures for each Quick Menu function, press the TIME
button while the Quick Menu function is flashing.
5. The display will flash the default air fry time. Use the -/+ buttons to adjust the time up or
down. Hold down for rapid increase/decrease of time in 5 min. increments.
6. Once you have selected your air fry time, press the TEMP button and the display will flash the
default temperature.
7. Use the -/+ buttons to adjust the temperature up or down. Hold for rapid increase/decrease
of temperature.
NOTE: Please reference the QUICK MENU CHART on page 6, for the recommended ranges of time
and temperature for each Quick Menu function.
8. Once you have selected your air fry temperature press START.
NOTE: The unit will not allow you to press START if the Top Cover (5) is in the open position.
TIP: It is recommended to pre-heat the air fryer on empty for 3 min. if the appliance is cold.
ROTATION FUNCTION:
1. Press the ROTATION button to turn on the ROTATION function at anytime. The rotation
indicator light will be solid when it is rotating.
NOTE: Some QUICK MENU functions will be pre-programmed with the ROTATION function. Check
the QUICK MENU CHART on page 5 for which functions use the ROTATION function. You can turn
the ROTATION function OFF by pressing the ROTATION button at anytime during cooking.
DURING THE COOKING/FRYING PROCESS:
1. Once you press START, the Timer will begin counting down and the Heating Indicator will
illuminate.
NOTE: You will notice that during the hot air frying process, the Heating Indicator will periodically
go on and off. This indicates that the heating element is maintaining the set temperature.
9

HOW TO USE YOUR AIR FRYER (cont).
2. Some recipes require stirring/mixing the contents mid-way through cooking (see Cooking
Time Chart on page 12). You can do this in the middle of the cooking process by grasping the
Lid handle (4) and lifting the Top Cover (5) which will PAUSE the cooking process. Allow the
Top Cover (9) to click and lock into position and remain open on its own. Grasp the Inner Pot
Handles (8) and lift out of fryer. Shake or stir the contents of the Inner Pot (2) using a non-
metallic utensil and then place Inner Pot (2) back into the Main Body (3).
TIP: If you set the timer to half the required cook time, you will hear the timer indicator when you
have to stir the ingredients. However, this means that you will need to set the timer again to the
remaining cook time after stirring.
3. To resume the air frying process, close the Top Cover (5) by holding the Lid handle (4) with
one hand and using your other hand to push up on the Lid Unlock button (7). Slowly lower
the Lid (5) down until it fully closes.
4. CAUTION: During cooking, the Inner Pot (2) will be very hot, only use the cool-touch handles with
oven mitts.
WHEN COOKING/FRYING IS COMPLETE:
1. When the timer completes its countdown, the air fryer will turn off heating and begin the fan
cool down process. This will take approximately 1-minute and will beep when cool down
stops - this signals it is time to remove your food.
NOTE: You can also switch off the appliance manually by pressing CANCEL at any time during the
cooking process.
2. Open the Top Cover (5) and allow it to click and lock into position and remain open on its
own. Using oven mitts, grasp the Inner Pot Handles (8) and lift out of the fryer. Place it onto a
flat, heat-resistant surface.
CAUTION: When opening the Top Cover (5), be careful of hot air and steam. Keep hands and face
away from the opening.
CAUTION: After cooking, the Inner Pot (2) and any accessories used will be extremely hot to the
touch. Do not touch surfaces of the Inner Pot (2) or accessories directly. Always use oven mitts
when handling the Inner Pot (2), Wire Rack (21), Bake Tray (22), Basket (23), Rotisserie Forks (24)
or Skewer (25).
3. Check that your foods are ready. If not, then place the Inner Pot (2) back into the Main Body
(3) and set the timer for a few more minutes.
4. Empty the contents of the Inner Pot (2) into a bowl or onto a plate. If necessary, you can also
use non-metal tipped tongs to remove foods from the Inner Pot (2).
5. When the next batch of ingredients is ready, the air fryer is instantly ready to use again.
6. When cooking is complete, press the POWER button to shut down
and remove the Power cord (9) from the electrical outlet (See Figure
7).
Figure 7
10

CLEANING AND MAINTENANCE
The Digital Air Fryer should be cleaned thoroughly after every use.
1. Make sure the Power cord (9) is disconnected from the electrical outlet and that the appliance
has cooled down before attempting to clean.
2. The Inner Pot (2) has a nonstick coating. Do not use metal utensils or abrasive cleaning
materials on them, as this can damage the non-stick coating.
3. Wipe the outside of the appliance with a damp cloth.
CAUTION: Do not allow water to seep into the LED control panel as that may damage the
appliance.
4. Clean the Inner Pot (2), Wire Rack (21), Bake Tray (22), Basket (23), Rotisserie Forks (24) and
Skewer (25) with hot water, dishwashing soap and a non-abrasive sponge.
5. You can use a degreaser to remove any stuck-on residue.
NOTE: The Inner Pot (2), Wire Rack (21), Bake Tray (22), Basket (23), Rotisserie Forks (24) and
Skewer (25) are dishwasher-safe (top rack only).
6. Clean the inside of the appliance with hot water and a non-abrasive sponge.
7. Never immerse the power cord, plug or the appliance body in water or any other liquids.
8. Dry all parts after each use, re-assemble and store in a cool, dry location.
11

COOKING TIME CHART
The chart on this page helps you to program basic times and temperatures for common foods.
Please note that all of the information below is for your reference only andcan be adjusted according to
the user’s preference. They are approximations only as foods differ in size anddensity so cooking times
and temperatures cannot be guaranteed.
Min-max
Amount
(ounces)
Time
(min.)
Temp
(°F)
Stir
Notes
Potatoes & fries
Thin frozen fries
15 ~ 25
16-25
392
Stir
Thick frozen fries
15 ~ 25
20-27
392
Stir
Home-made fries (0.3" x
0.3")
15 ~ 30
15-20
392
Stir
add 1/2 tbsp of oil
Home-made potato
wedges
15 ~ 30
20-22
356
Stir
add 1/2 tbsp of oil
Home-made potato cubes
15 ~ 25
14-22
356
Stir
add 1/2 tbsp of oil
Home-made potato chips
10
9-15
320
Meat & Poultry
Steak
6 ~ 18
9-16
356
Pork chops
6 ~ 18
11-25
356
Hamburger
6 ~ 18
8-20
356
Drumsticks
6 ~ 18
19-35
356
Chicken Wings
15 ~ 20
16-30
392
Chicken Strips
6 ~ 18
12-20
356
Snacks
Egg rolls
6 ~ 18
9-10
392
Stir
Use oven-ready
Frozen chicken nuggets
6 ~ 18
10-20
392
Stir
Use oven-ready
Frozen fish sticks
6 ~ 14
7-15
392
Use oven-ready
Fish fillet in batter
6 ~ 18
8-14
356
Stir
Battered shrimp
6 ~ 18
8-13
356
Stir
Frozen bread-crumbed
cheese sticks
6 ~ 14
9-15
356
Use oven-ready
Stuffed vegetables
6 ~ 14
10
320
Mushrooms
6 ~ 14
10
320
Onion Rings
6 ~ 18
8-17
356
Baking
Cake
10
20-25
320
Use oven-safe baking dish
(not included)
Quiche
15
20-22
356
Use oven-safe baking dish
(not included)
Muffins
10
15-18
392
Use oven-safe muffin cups
(not included)
Sweet snacks
15
20
320
Use oven-safe baking dish
(not included)
12

HINTS AND TIPS
TIPS
- Smaller cuts of foods usually require a slightly shorter cooking time than larger foods.
- A larger amount of foods only requires a slightly longer cooking time and a smaller amount
of foods only requires a slightly shorter cooking time.
- Stirring or shaking smaller foods mid-way through the cooking process will improve the end
result and can help cook more evenly.
- Adding a small amount of oil to fresh potatoes can result in a crispier result. Cook your ingredients
in the air fryer within a few minutes after adding the oil.
- Do not air fry extremely greasy foods such as sausages in the airfryer.
- Snacks that can be prepared in an oven can also be prepared in the air fryer.
- The optimum amount for air frying crispy fries is 17.5 ounces or a little over 1 lb.
- Use pre-made dough to prepare foods with fillings quickly and easily. Pre-made dough also
requires a shorter cooking time than home-made dough.
- The air fryer can also reheat foods. To reheat foods, set the temperature to
302°F for up to 10 minutes.
- To cook frozen foods, add an additional 3-5 minutes to your cook time.
Note: When cooking/baking foods that rise (i.e. cakes, quiches or muffins) the Inner Pot (2) should not
be filled more than halfway.
Note: Add 3 minutes to the cooking time if you begin cooking while the air fryer is still cold.
BAKING CAKES/QUICHES OR STEAMING FOODS
- Place an oven-safe dish (not included) into the air fryer Inner Pot (2) if you want to bake a
cake/quiche, steam foods or if you want to air fry delicate foods or foods with fillings.
- If the oven-safe dish is too large for the Inner Pot (2), you can place the Wire Rack (22) onto the
bottom of the Inner Pot (2) and place the oven-safe dish onto the wire rack.
- For steaming foods, generally, 1-2 cups of water provides approximately 5-10 minutes of steam
time. Add water to the Inner Pot (2). Place Wire Rack (21) into the Inner Pot (2). Place food into an
oven-safe dish (not included) and place dish onto the Wire Rack (21).
HOME-MADE FRENCH FRIES
When making your own french fries, follow these steps:
1. Peel potatoes and slice them into strips.
2. Wash and dry them thoroughly.
3. Mix potato strips in a bowl with ½ tablespoon of olive oil, make sure they are evenly coated.
4. Using your hands or tongs, place the potato strips into the Basket (23).
NOTE: Do not pour the potato sticks from the bowl into the Basket (23) to avoid transferring any
excess oil into the Basket (23).
13

TROUBLESHOOTING GUIDE
Problem
Possible cause
Solution
The airfryer does
not work.
The appliance is not
plugged in.
Plug the power cord (9) into an electrical
outlet.
You did not press START button.
The appliance is defective.
Contact customer service at 800-365-
6133 ext. 120/107/105
Food not completely
cooked/fried.
There is too much food in the Inner
Pot (2).
Use smaller batches of food in the Inner
Pot (2). Small batches of food will cook
more evenly.
The cooking temperature is set too
low.
Increase the temperature setting. Check
"Cooking Time Chart" found in this
manual.
The cooking time is too short.
Increase the time setting. Check
"Cooking Time Chart" found in this
manual.
Food cooked is uneven.
Certain foods need to be
stirred/mixed mid-way through the
cooking process.
Foods that overlap inside the Inner Pot
(2) need to be stirred mid-way through
cooking. Go to section: 'During the
Cooking/Frying Process' in this manual.
Fried snacks are not crispy.
You used a type of snacks meant to
be prepared in a traditional deep
fryer.
Use oven snacks or lightly brush some oil
onto the snacks for a crispier result.
I cannot close the Top
Cover (5) properly.
The Inner Pot (2) is too full.
Remove some food from the Inner Pot
(2).
The Inner Pot (2) is not aligned
correctly.
Make sure the Inner Pot Handles (8) are
flush with the Main Body (3).
White smoke is emitted out
of the appliance during
use.
You are preparing food with a high
oil content.
When cooking with oily foods, oil will
drain into the bottom of the Inner Pot (2).
When the air fryer heats up, the pan
heats up the oil and produces white
smoke. This does not adversely affect the
air fryer or your cooking process.
The pan has built-up
oil residue from
previous uses.
White smoke is caused by oil leftover in
the Inner Pot (2). Make sure to
thoroughly clean the Inner Pot (2) after
every use.
Home-made french fries
are coming out unevenly
cooked.
Your potatoes are not fresh or are
frozen.
Make sure to use fresh and firm potatoes.
Not frozen potatoes for home-made
french fries.
Potato strips were not thoroughly
rinsed prior to frying.
Thoroughly rinse sliced potato to remove
all starch prior to frying.
Your home-made french
fries are not crispy after air
frying.
Crispy results are directly linked to
the amount of oil and water content
of the fresh potato strips.
Potato strips need to be thoroughly dried
before adding oil.
Slice potato strips thinner if you want
them crispier.
Use a bit more oil on the potato strips
prior to frying if you want crispier results.
14

15
Table of contents
Other Cook's essentials Fryer manuals