CookTek MB061-D User manual

I STALLATIO ● OPERATIO
OW ER’S MA UAL
650 Watt Buffet Warming System
Models MB061-D, MB062-D, MB061-S,
MB062-S, MB062-R
Part umbers 633900, 634200,
634500, 634900, 634200
CookTek Induction Systems, LLC
Toll Free: +1 (888) COO TE
Toll Free Fax: +1 (888) COO FAX
Phone: +1 (312) 563-9600
Fax: +1 (312) 432-6220
www.cooktek.com
CookTek Induction Systems, LLC
Toll Free: +1 (888) COO TE
Toll Free Fax: +1 (888) COO FAX
Phone: +1 (312) 563-9600
Fax: +1 (312) 432-6220
www.cooktek.com
Manual 650W 90327_A USI TL
103490

18
●Não toque na placa de cerâmica (no cimo do Cooktop) imediatamente depois
da sua utilização. O calor emitido pelo tabuleiro será transferido para a placa
de cerâmica, fazendo com que esta fique quente ao toque.
●A assistência técnica deste produto só pode ser realizada por um agente de
assistência técnica autorizado ou por pessoal da CookTek. Não tente abrir a
unidade nem efectuar assistência técnica de qualquer tipo. Para informações
referentes à assistência técnica, por favor entre em contacto com a CookTek
pelo telefone 1-312-563-9600.
●O aparelho deve estar ligado à terra. Ligue apenas a uma tomada
correctamente ligada à terra. Antes de funcionar com o aparelho, leia as
instruções relativas à ligação à terra e os Requisitos para Instalação Eléctrica
na Página 3 deste folheto. Não utilize um cabo de extensão.
Antes de utilizar el anafe (cooktop), realice lo siguiente:
●Retire todo el material de embalaje.
●Coloque la unidad sobre una superficie seca, plana, dura, estable y no
inflamable.
●Mantenga la unidad alejada de otras fuentes de calor y deje un margen de al
menos 5 cm para que el aire circule por los lados y las partes anterior y
posterior de la unidad.
Por su seguridad, nunca corte, quite ni inutilice la conexión eléctrica (tierra) del
enchufe. No utilice nunca el anafe con un enchufe adaptador ni un cable
prolongador.
ADVERTE CIA: Se puede producir un choque eléctrico por un enchufe
conectado a tierra de manera incorrecta. Si tiene alguna duda relacionada
con las instrucciones de conexión a tierra, póngase en contacto con un
electricista cualificado.
Antes de comenzar:
Asegúrese de que el cable eléctrico está unido firmemente a la unidad CookTek
ANTES de conectar la unidad a la electricidad y antes de intentar utilizarla.
●No toque la placa cerámica (situada en la parte superior del anafe)
inmediatamente después de utilizarla. El calor de la cazuela se transferirá a la
placa cerámica y hará que ésta se caliente.
●La revisión de este producto únicamente puede realizarla un operario de
mantenimiento autorizado o el personal de CookTek. No intente abrir la unidad
ni realizar ninguna labor de mantenimiento. Para obtener información sobre el
mantenimiento, póngase en contacto con CookTek llamando al 1-312-563-
9600.
●Este aparato se debe conectar a tierra. Enchúfelo únicamente a una toma
conectada a tierra de manera adecuada. Antes de utilizarlo, lea las
instrucciones de conexión a tierra y los “Requisitos de la instalación eléctrica”
de la página 3 de este folleto. No utilice cables prolongadores.
SPA ISH
Manual 650W 90327_A USI TL

Before operating your buffet, do the following:
●Remove all packing material and save for subsequent shipment or in case of
concealed shipping damage.
●eep unit away from other heat sources and allow at least two (2) inches
clearance for air circulation at sides, front and rear of the unit. If either the air
intake or exhaust outlet is blocked, the internal temperature will rise, causing an
error code to occur.
Grounding Instructions:
The buffet must be properly grounded. In the event of an electrical short circuit,
grounding reduces the risk of electric shock by providing a safe path for the electric
current. The buffet has a power cord with a 3-prong grounding plug, which must be
used in a compatible and properly grounded outlet. It is the owner’s responsibility
to replace any 2-prong wall outlet with a properly grounded 3-prong wall receptacle.
For your safety, never cut, remove, or disable the electrical (ground) connection
from the plug. Never use an adapter plug or an extension cord with the buffet.
WAR I G: Electric shock can result from an improperly grounded plug. Please
consult a qualified electrician if you have any questions about these grounding
instructions.
Before you begin:
Please make sure that this power cord is firmly attached to your CookTek unit
BEFORE plugging the unit into the power receptacle and before attempting
operation.
Every installation site has different electrical wiring. Because many different local
codes exist, it is the Owner and Installer’s responsibility to comply with those
codes. CookTek is not responsible for any consequential damages as a result of
failure to comply with installation requirements.
●Read all installation instructions carefully before starting installation.
●Remove buffet carefully from carton.
●Remove all loose packaging and accessories and save for subsequent
shipment or in case of concealed shipping damage.
●It is the responsibility of the installer to comply with all federal, state and local
codes.
●Any installation not matching the specifications discussed in this manual
automatically voids the product’s warranty.
●Insert the unit in the counter cutout and, if desired, caulk around the seam to
seal.
●Plug one end of the control cable into the unit and thread the cable through the
cutout for the control box.
●Plug the other end of the control cable into the control box and mount the
control box with four screws in the desired location.
PREPARI G YOUR COOKTEK BUFFET U IT FOR USE
17 2
ELECTRICAL I STALLATIO REQUIREME TS
Dla bezpieczeństwa użytkownika nie wolno nigdy przecinać, wyjmować ani
wyłączać połączenia elektrycznego (uziemienia) z wtyczki. Stosując urządzenie
Cooktop nie wolno używać złącza pośredniego ani przedłużacza.
OSTRZEŻE IE: iewłaściwe uziemienie wtyczki może spowodować
porażenie prądem elektrycznym. W przypadku wątpliwości dotyczących
instrukcji uziemienia należy skontaktować się z wykwalifikowanym
elektrykiem.
Przed rozpoczęciem używania:
Należy sprawdzić, czy przewód zasilania jest pewnie przymocowany do modułu
CookTek PRZED podłączeniem urządzenia do gniazdka zasilania i przed
rozpoczęciem jego używania.
●Nie dotykać płyty ceramicznej (lub wierzchniej części urządzenia Cooktop)
bezpośrednio po zakończeniu jego używania. Wysoka temperatura patelni
może przenosić się na płytę ceramiczną, stwarzając możliwość oparzenia w
przypadku jej dotknięcia.
●Obsługa serwisowa tego produktu może być prowadzona jedynie przez
upoważnionego pracownika serwisu lub przez personel firmy CookTek. Nie
podejmować samodzielnej próby otwarcia urządzenia ani nie wykonywać
żadnych napraw. Aby uzyskać informacje dotyczące obsługi serwisowej, należy
skontaktować się z firmą CookTek pod numerem 1-312-563-9600.
●Niniejsze urządzenie wymaga uziemienia. Podłączać jedynie do właściwie
uziemionego gniazda. Przed użyciem należy przeczytać instrukcję dotyczącą
uziemienia oraz część „Wymogi instalacji elektrycznej” na stronie 3 niniejszej
ulotki. Nie używać przedłużacza.
Antes de funcionar com o seu Cooktop, faça o seguinte:
●Retire todo o material de embalagem.
●Coloque a unidade numa superfície seca, nivelada, rígida, estável e não
inflamável.
●Mantenha a unidade afastada de outras fontes de calor e deixe um espaço de
pelo menos 5 cm nos lados, frente e traseira da unidade, para circulação do ar.
Para sua segurança, nunca corte, retire nem desactive a ligação eléctrica (terra) da
ficha. Nunca utilize uma ficha adaptadora nem cabo de extensão com o Cooktop.
ADVERTÊ CIA: Uma ficha incorrectamente ligada à terra pode provocar
choque eléctrico. Se tiver alguma questão sobre estas instruções de ligação
à terra, por favor consulte um electricista qualificado.
Antes de Começar:
Por favor, certifique-se de que este cabo de energia está ligado firmemente à sua
unidade CookTek ANTES de ligar a unidade à tomada de energia e antes de tentar
funcionar com ela.
PORTUGUESE
MECHA ICAL I STALLATIO
Manual 650W 90327_A USI TL

3 16
The 650 watt buffet system is available in a 15-inch drop-in chassis with two
options for temperature controls (“D” and “R” models), or a 13.4 x 12.5-inch drop in
chassis (“S” model). The “D” and “S” models use SmarTemp™ technology to
actively control the temperature of the pan. The “R” model uses RFID-based
technology for more precise temperature control. Factory setting allows the user to
choose from four temperature settings in Fahrenheit or Celsius. The number of
temperature settings can also be increased to fifteen total for “D” and “R” models
using the “Changing the Temperature Settings” option.
User Interface Buttons
Power button - Use this button to turn the unit on and off. A green
LED will indicate when the unit is on.
Lock button - Use this button to prevent users from adjusting
settings. Pressing this button three times will lock the unit.
When the unit is locked, the only button that will continue to
work is the Power button. To unlock the unit, press the Lock
button three times. The red LED to the right of the button will indicate when the
unit is locked.
Up and Down Arrows - These buttons allow you to
quickly set the temperature.
Alphanumeric display - Displays holding
temperature (Fahrenheit or Celsius) and error
code information.
Control Panels
●Questo prodotto può essere riparato esclusivamente da un tecnico autorizzato
o dal centro di assistenza CookTek. Non tentare di aprire l'unità o di eseguire
interventi di manutenzione di alcun tipo. Per informazioni sull'assistenza,
contattare la CookTek al numero 1-312-563-9600.
●Questo apparecchio deve essere collegato a terra. Collegarlo esclusivamente a
una presa elettrica dotata di messa a terra. Prima di mettere in funzione l'unità,
leggere le istruzioni di messa a terra e i Requisiti di installazione elettrica a
pagina 3 di questo opuscolo. Non utilizzare un cavo elettrico di prolunga.
Før du bruker komfyren, må du gjøre følgende:
●Fjern all emballasje.
●Plasser enheten på et tørt, jevnt, hardt, stabilt og brannsikkert underlag.
●Hold enheten unna andre varmekilder, og la det være minst 5 cm klaring for
luftventilasjon på sidene, foran og på baksiden av enheten.
For din egen sikkerhet må du ikke kutte, fjerne eller ødelegge den elektriske
(jordede) koplingen fra kontakten. Ikke bruk en adapterkontakt eller skjøteledning
for komfyren.
ADVARSEL: Elektrisk støt kan oppstå fra kontakt som ikke er korrekt jordet.
Ta kontakt med en kvalifisert elektriker dersom du har spørsmål om disse
jordingsinstruksene.
Før du begynner:
ontroller at strømkabelen er satt helt inn i CookTek-enheten FØR du kopler
enheten til stikkontakten og før bruk.
●Den keramiske platen (eller overflaten på komfyren) må ikke berøres
umiddelbart etter bruk. Varme fra kjeler vil overføres til den keramiske platen og
gjøre den varm.
●Dette produktet kan bare repareres av en autorisert serviceagent eller av
CookTek-ansatte. Ikke prøv å åpne enheten eller utføre reparasjoner av noe
slag. For serviceinformasjon, kontakt CookTek på tlf. 1-312-563-9600.
●Dette produktet må jordes. Må kun koples til et korrekt jordet støpsel. Før bruk
bør du lese jordingsinstruksene og kravene til elektrisk installasjon på side 3 i
denne veiledningen. Ikke bruk skjøteledning.
Przed rozpoczęciem używania urządzenia Cooktop, należy wykonać poniższe
czynności:
●Usunąć wszystkie elementy opakowania.
●Ustawić urządzenie na suchej, poziomej, twardej, stabilnej i niepalnej
powierzchni.
●Ustawić urządzenie z dala od innych źródeł ciepła i zapewnić wokół urządzenia
wolną przestrzeń, co najmniej 0,5 cm, aby umożliwić obieg powietrza
ORWEGIA
POLISH
GE ERAL I FORMATIO
Manual 650W 90327_A USI TL
“D” Model Interface “R” Model Interface
“S” Model Interface

15 4
CookTek’s buffet is in conformance with ANSI/UL 197 and CSA 22.2 No. 109
standards and bears the commercially rated approvals. CookTek’s buffet is in
conformance with European Economic Area standards and bears the CE marking
signifying European Conformity.
Plug the buffet into a grounded, single-phase receptacle. Models MB061-D and
MB061-S will run on 100-120VAC drawing up to 650W. Models MB062-D, MB062-
S, and MB062-R will run on 200-240VAC drawing a maximum of 650W. Check the
rating plate on the unit to verify correct voltage and wattage. Voltages below
120VAC or 240VAC can result in less than rated ower and slower heating times.
This appliance is designed for holding food products only.
“R” models require the use of a Magneeto™or tagged chafing dish for
operation.
ote: For proper operation, an independent, dedicated circuit should be used
for up to 3 units installed on a 15amp (120VAC) circuit, 4 units installed on a
20amp (120VAC) circuit, or up to 5 units installed on a 20amp (240VAC)
circuit.
To operate all models:
●Press the Power button to turn the unit on. The green LED next to
the power button will illuminate. Press the Power button when you
are finished to turn the unit off.
●To lock the controls, press the Lock button three times. The
red LED to the right of the lock button will illuminate to indicate
the unit is locked. Locking the unit will prevent temperature
settings from being changed. The Power button will continue to function while
the unit is locked. To unlock the controls, press the lock button three more
times. Unplugging the unit when powered on will also unlock the unit.
●Press the Up and Down Arrows to select the desired temperature.
The default preset choices are:
● Fahrenheit Settings: 150, 160, 175, 190
● Celsius Settings: 65, 70, 80, 90
Additional temperature settings on “D” and “R” models are available by
changing the temperatre settings option. See “Changing the Set Temperature
Options” on page 6.
ote: When the unit is not in use for 5 minutes, it will enter a power save
mode where the Power LED will flash. Press any button on the controls to
exit the power save and return to the previous settings.
●Place an induction compatible pan on the unit.
●The letter “F” or “C” will flash in the display window and the Heating
LED will turn on.
●When the pan has reached the selected temperature, the “F” or “C” will stop
flashing and remain solid. The Heating LED will turn off and the At
Temp LED will turn on.
ηλεκτρική (γείωση) σύνδεση από το φις. Μη χρησιμοποιήσετε ποτέ προσαρμογέα
φις ή καλώδιο προέκτασης (μπαλαντέζα) με το Cooktop.
ΠΡΟΕΙΔΟΠΟΙΗΣΗ: Ένα εσφαλμένα γειωμένο φις μπορεί να έχει ως
αποτέλεσμα την ηλεκτροπληξία. Παρακαλείστε να συμβουλευτείτε αρμόδιο
ηλεκτρολόγο εάν έχετε τυχόν ερωτήσεις σχετικά με αυτές τις οδηγίες
γείωσης.
Πριν ξεκινήσετε:
Βεβαιωθείτε ότι αυτό το ηλεκτρικό καλώδιο είναι σταθερά συνδεδεμένο στη μονάδα
CookTek σας ΠΡΙΝ συνδέσετε το φις της μονάδας σε ηλεκτρική πρίζα και πριν
προσπαθήσετε να θέσετε τη μονάδα σε λειτουργία.
●Μην αγγίξετε την κεραμική πλάκα (ή το άνω μέρος του Cooktop) αμέσως μετά
τη χρήση. Η θερμότητα από την κοιλότητα θα μεταφερθεί στην κεραμική πλάκα.
Ως εκ τούτου, αυτή θα είναι πολύ ζεστή για να την αγγίξετε.
●Οι εργασίες επισκευής του προϊόντος αυτού πρέπει να πραγματοποιούνται
μόνο από εξουσιοδοτημένο αντιπρόσωπο επισκευών ή από προσωπικό της
CookTek. Μην επιχειρήσετε να ανοίξετε τη μονάδα ή να εκτελέσετε οποιαδήποτε
εργασία επισκευής σε αυτήν. Για πληροφορίες σχετικά με τις επισκευές,
επικοινωνήστε με την CookTek στον τηλεφωνικό αριθμό 1-312-563-9600.
●Η συσκευή αυτή πρέπει να είναι γειωμένη. Συνδέστε μόνο σε σωστά γειωμένη
πρίζα. Πριν τη λειτουργία, διαβάστε τις οδηγίες γείωσης και τις απαιτήσεις
ηλεκτρικής εγκατάστασης στη σελίδα 3 του παρόντος φυλλαδίου. Μη
χρησιμοποιείτε καλώδιο προέκτασης (μπαλαντέζα).
Prima di mettere in funzione il piano cottura, eseguire le seguenti operazioni:
●Rimuovere tutto il materiale di imballaggio.
●Collocare l'unità su una superficie asciutta, piana, rigida, stabile e non
infiammabile.
●Tenere l'unità lontana da altre fonti di calore e lasciare almeno 5 centimetri di
spazio per consentire la circolazione dell'aria tutto intorno all'unità.
Per la propria sicurezza, non tagliare, rimuovere o disattivare mai il collegamento
elettrico di terra dalla spina. Non utilizzare mai una spina adattatore o un cavo
elettrico di prolunga per collegare il piano cottura.
AVVERTE ZA: una spina elettrica non correttamente collegata all'impianto di
terra può provocare scosse elettriche. Rivolgersi a un elettricista qualificato
in caso di domande su queste istruzioni di messa a terra.
Prima di iniziare:
Assicurarsi che questo cavo di alimentazione sia collegato saldamente all'unità
CookTek PRIMA di collegare l'unità alla presa elettrica e prima di metterla in
funzione.
●Non toccare la piastra di ceramica (o la superficie del piano cottura) subito dopo
l'uso. Il calore della pentola si trasferisce alla piastra di ceramica, rendendola
estremamente calda.
ITALIA
Manual 650W 90327_A USI TL
APPROVED FOR COMMERCIAL USE
SMARTEMP™OPERATIO (“D” A D “S” MODELS)
GE ERAL OPERATIO

5 14
● Cet appareil doit être raccordé à la terre. Le brancher exclusivement à une
prise de courant correctement raccordée à la terre. Avant utilisation, lire les
instructions de raccordement à la terre, ainsi que les exigences en matière
d’installation électrique figurant à la page 3 du présent manuel. Ne pas utiliser
de câble de rallonge.
Vor Inbetriebnahme des Cooktop verfahren Sie bitte wie folgt:
● Entfernen Sie das gesamte Verpackungsmaterial.
● Stellen Sie das Gerät auf eine trockene, ebene, harte, stabile und nicht
brennbare Fläche.
● Halten Sie das Gerät von anderen Wärmequellen fern und lassen Sie um das
Gerät herum (vorne, hinten und seitlich) mindestens 5 cm für die Luftzirkulation
frei.
Zu Ihrer eigenen Sicherheit darf das Erdungskabel keinesfalls vom Stecker
abgetrennt, entfernt oder in schadhaftem Zustand verwendet werden. Benutzen Sie
für Ihren Cooktop niemals einen Steckeradapter oder ein Verlängerungskabel..
WAR HI WEIS: Ein nicht fachgemäß geerdeter Stecker kann zu einem
Stromschlag führen. Falls Sie noch Fragen zu diesen Anweisungen in
Zusammenhang mit Schutzkontakt und Erdung haben, wenden Sie sich bitte
an einen Elektrofachmann.
Bevor Sie beginnen:
Dieses Netzkabel muss fest mit dem CookTek verbunden sein, BEVOR Sie das
Gerät an die Steckdose anschließen und es in Betrieb nehmen.
● Berühren Sie die eramikplatte (oder Oberfläche des Cooktop) nicht
unmittelbar nach Gebrauch. Die Hitze der Pfanne überträgt sich auf die
eramikplatte, die dann ebenfalls heiß wird.
● Dieses Produkt darf nur durch bevollmächtigte Wartungstechniker oder das
Fachpersonal von CookTek gewartet werden. Versuchen Sie nicht, das Gerät
zu öffnen und selbst zu warten. Nähere Informationen zur Wartung erhalten Sie
bei CookTek unter der Rufnummer 1-312-563-9600.
● Das Gerät muss geerdet werden. Der Stecker muss in eine ordnungsgemäß
geerdete Steckdose gesteckt werden. Vor dem Öffnen lesen Sie bitte die
Anweisungen zu Schutzkontakt/Erdung und die Anforderungen an die
elektrische Installation auf Seite 3 dieses Handbuchs. Verwenden Sie kein
Verlängerungskabel.
Πριν θέσετε το Cooktop σας σε λειτουργία, εκτελέστε τα ακόλουθα:
●Αφαιρέστε όλα τα υλικά συσκευασίας.
●Τοποθετήστε τη μονάδα σε μια στεγνή, επίπεδη, σκληρή, σταθερή και μη
εύφλεκτη επιφάνεια.
●Διατηρήστε τη μονάδα μακριά από άλλες πηγές θερμότητας και αφήστε κενό
τουλάχιστον 2 ίντσες (5 εκατοστά) για την κυκλοφορία του αέρα στα πλαϊνά, το
μπροστινό μέρος και το πίσω μέρος της μονάδας.
Για την ασφάλειά σας, ποτέ μην κόψετε, αφαιρέσετε ή απενεργοποιήσετε την
GERMA
GREEK
●The set temperature can be adjusted at any time while the pan is
on the unit by pressing the Up and Down Arrows.
●When a pan is removed from the unit, the Heating and At Temp LEDs will turn
off and the “F” or “C” will turn on solid in the display. The unit is not heating or
holding the set temperature when both LEDs are off.
●When finished using the unit, press the Power button to turn the unit
off. The Power LED will turn off. Remove then pan from the unit. The
unit will remember the last temperature setting the next time it is powered on.
Using a tagged chafing dish or Magneeto™ I
●Place the tagged chafing dish or a Magneeto™ I and
pan on the unit. The Magneeto™ I or black block on
the chafing dish should be in one of the four corners
of the glass surface. The Magneeto™ I tab should
be underneath the pan.
●The yellow SmarTag™ LED and the yellow Pan
Detect LED will turn on.
●The “F” or “C” in the display will start flashing. This indicates the unit is heating
the pan. When the pan reaches the selected temperature, the “F” or “C” will
turn solid in the display.
●When the chafing dish or pan and Magneeto™ I is removed from the unit, the
SmarTag™ and Pan Detect LEDs will turn off and the “F” or “C” will turn solid in
the display. The unit is not heating or holding the set temperature unless both
LEDs are on.
●The set temperature can be adjusted at any time while the pan
is on the unit by pressing the Up and Down Arrows. If the word
“Auto” appears in the display when pressing either Arrow button, the
Magneeto™ I has been pre-programmed with a temperature. The Up and
Down Arrows cannot be used to adjust the set temperature in a programmed
Magneeto™ I. Follow the directions for “Programming a Magneeto™” on page
6 or use another Magneeto™ I or tagged chafing dish if a different set
temperature is desired.
●When finished using the unit, press the Power button to turn the unit
off. The Power LED will turn off. Remove the pan and Magneeto™ I from the
unit. The unit will remember the last setting the next time it is powered on.
Using a Magneeto™ II
● With unit turned on, place Magneeto™ II on the unit
(ribbed side down) with the RFID tab over one of
the four corners of the glass surface.
● The yellow SmarTag™ LED
will turn on and the Magneeto
II LED will begin to flash.
● Place induction compatible dish on top of
Magneeto™ II. Make sure the pan covers the
temperature sensor dome. Warning!! Do not cover
the RFID tab with the dish. The unit will stop heating.
Manual 650W 90327_A USI TL
RFID tab
Red LED
Temperature
Sensor Dome
RFID
block
Temperature
Sensor Tab
SMARTAG™OPERATIO (“R” MODELS O LY)
Magneeto™I

13 6 Manual 650W 90327_A USI TL
Turvallisuussyistä älä koskaan leikkaa, irrota tai pura sähköliitoksia (maadoitusjo-
htoa) pistokkeesta. Älä koskaan käytä keittotason kanssa sovitinpistoketta tai jatko-
johtoa.
VAROITUS: Väärin maadoitettu pistoke voi aiheuttaa sähköiskun. euvottele
valtuutetun sähköasentajan kanssa, jos sinulla on kysyttävää näistä maadoi-
tusohjeista.
Ennen kuin aloitat:
Varmista, että tämä virtajohto on tiukasti kiinnitetty CookTek:iin ENNEN laitteen pis-
tokkeen työntämistä pistorasiaan ja ennen käyttökokeilua.
● Älä koske keraamista levyä (keittotason päällä) heti käytön jälkeen. Astian
kuumuus siirtyy keraamiseen levyyn kuumentaen sen liian kuumaksi koskettaa.
● Tätä tuotetta saa huoltaa ainoastaan valtuutettu huoltopiste tai CookTekin
henkilökunta. Älä yritä avata laitetta ja suorittaa sille minkäänlaisia huoltotoimia.
Tietoja huollosta saat soittamalla CookTekiin numeroon +1-312-563-9600.
● Tämä laite täytyy suojamaadoittaa. Liitä ainoastaan oikein suojamaadoitettuun
pistorasiaan. Ennen käyttöä lue maadoitusohjeet ja sähköasennusvaatimukset
tämän lehtisen sivulta 3. Älä käytä jatkojohtoa.
Avant d’utiliser l’appareil Cooktop, effectuer les opérations suivantes :
● Retirer tous les matériaux d’emballage.
● Placer l’appareil sur une surface sèche, plane, solide, stable et non
inflammable.
● Placer l’appareil à distance de toute autre sources de chaleur et laisser un
espace libre d’au moins 5 cm (2 pouces) des deux côtés, à l’avant et à l’arrière
de celui-ci pour permettre la circulation de l’air.
Pour votre sécurité, ne jamais couper, déconnecter ou désactiver le raccordement
électrique (terre) de la prise de courant. Ne jamais utiliser un adaptateur ou une
rallonge électrique avec l’appareil Cooktop.
MISE E GARDE : Une prise de courant incorrectement raccordée à la terre
engendre un risque de choc électrique. Pour toute question concernant ces
instructions de mise à la terre, consulter un électricien qualifié.
Avant de commencer :
S’assurer que le câble d’alimentation est solidement fixé à l’appareil CookTek
AVANT de raccorder l’appareil à une prise de courant et d’essayer de le faire
fonctionner.
● Ne pas toucher la plaque de céramique (ou la partie supérieure de l’appareil
Cooktop) immédiatement après utilisation. La chaleur de la casserole se
transmet à la plaque de céramique, aussi celle-ci est chaude au toucher.
● L’entretien de cet appareil ne peut être effectué que par un réparateur agréé ou
par un membre du personnel de CookTek. Ne jamais essayer d’ouvrir l’appareil
ni de le réparer. Pour des informations concernant l’entretien, contacter
CookTek au +1-312-563-9600.
FRE CH
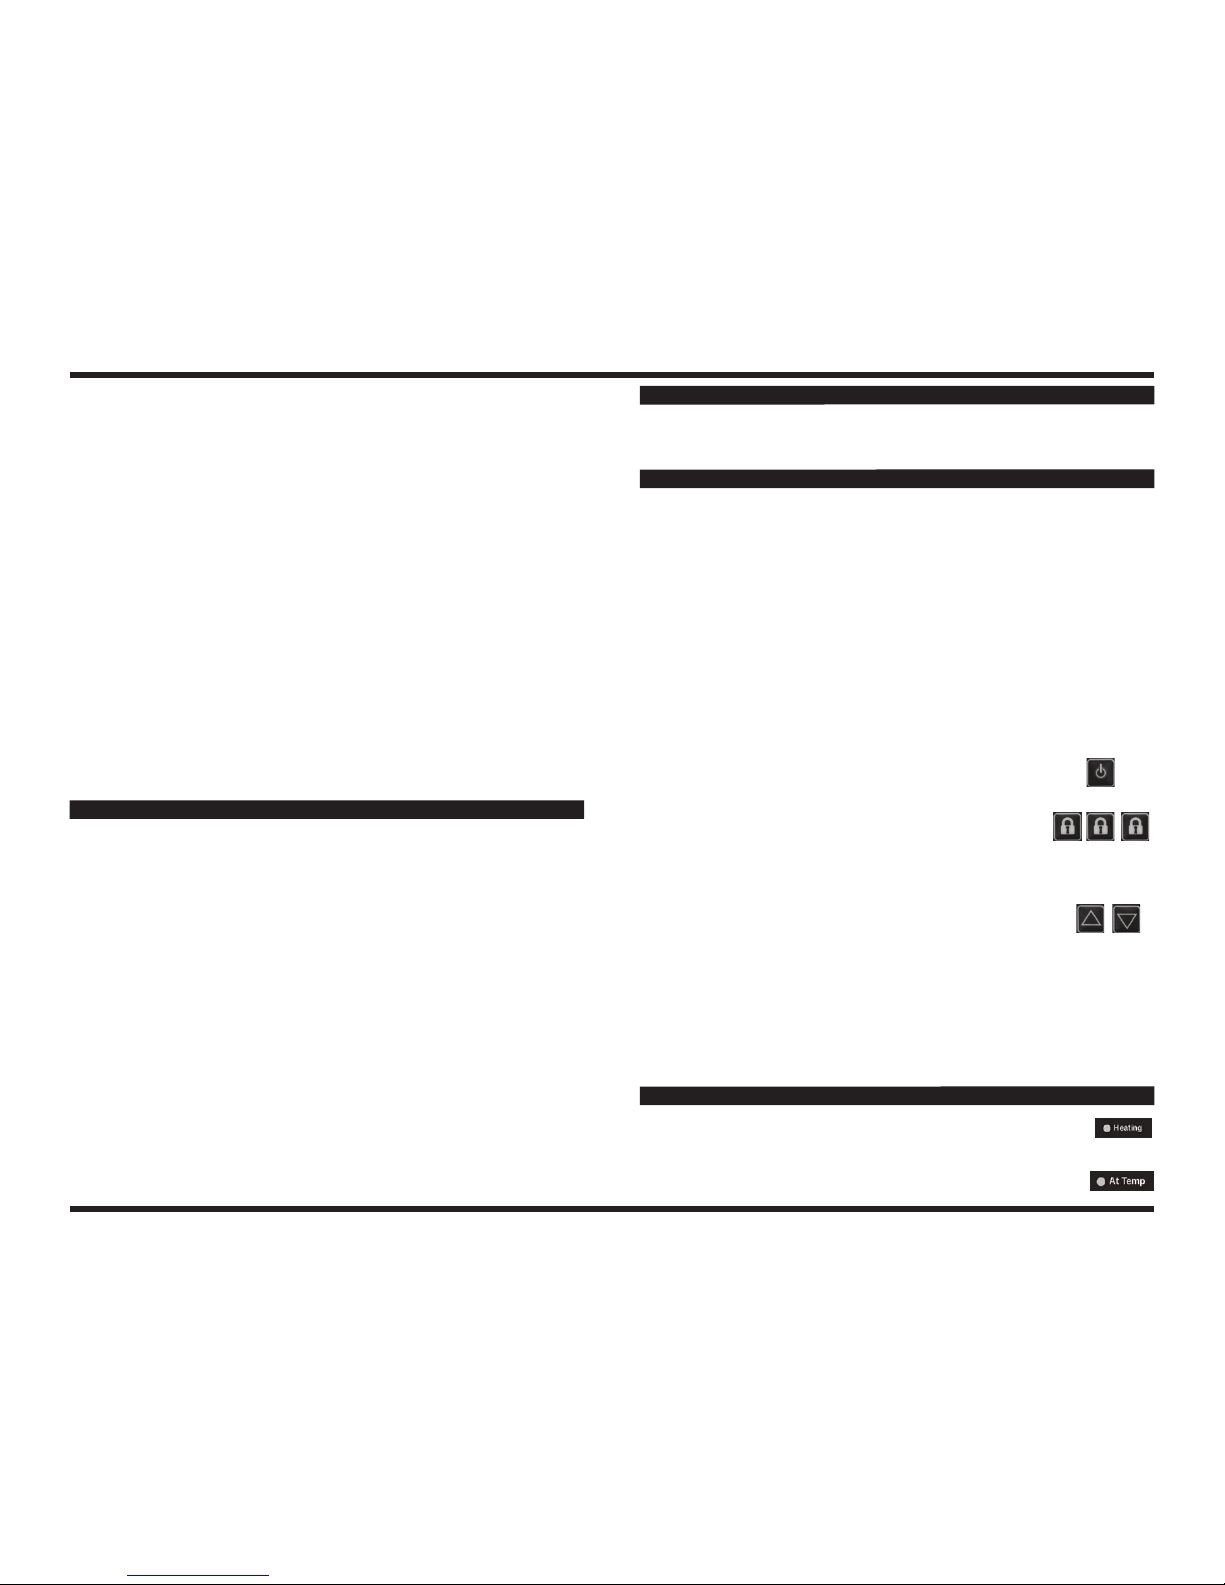
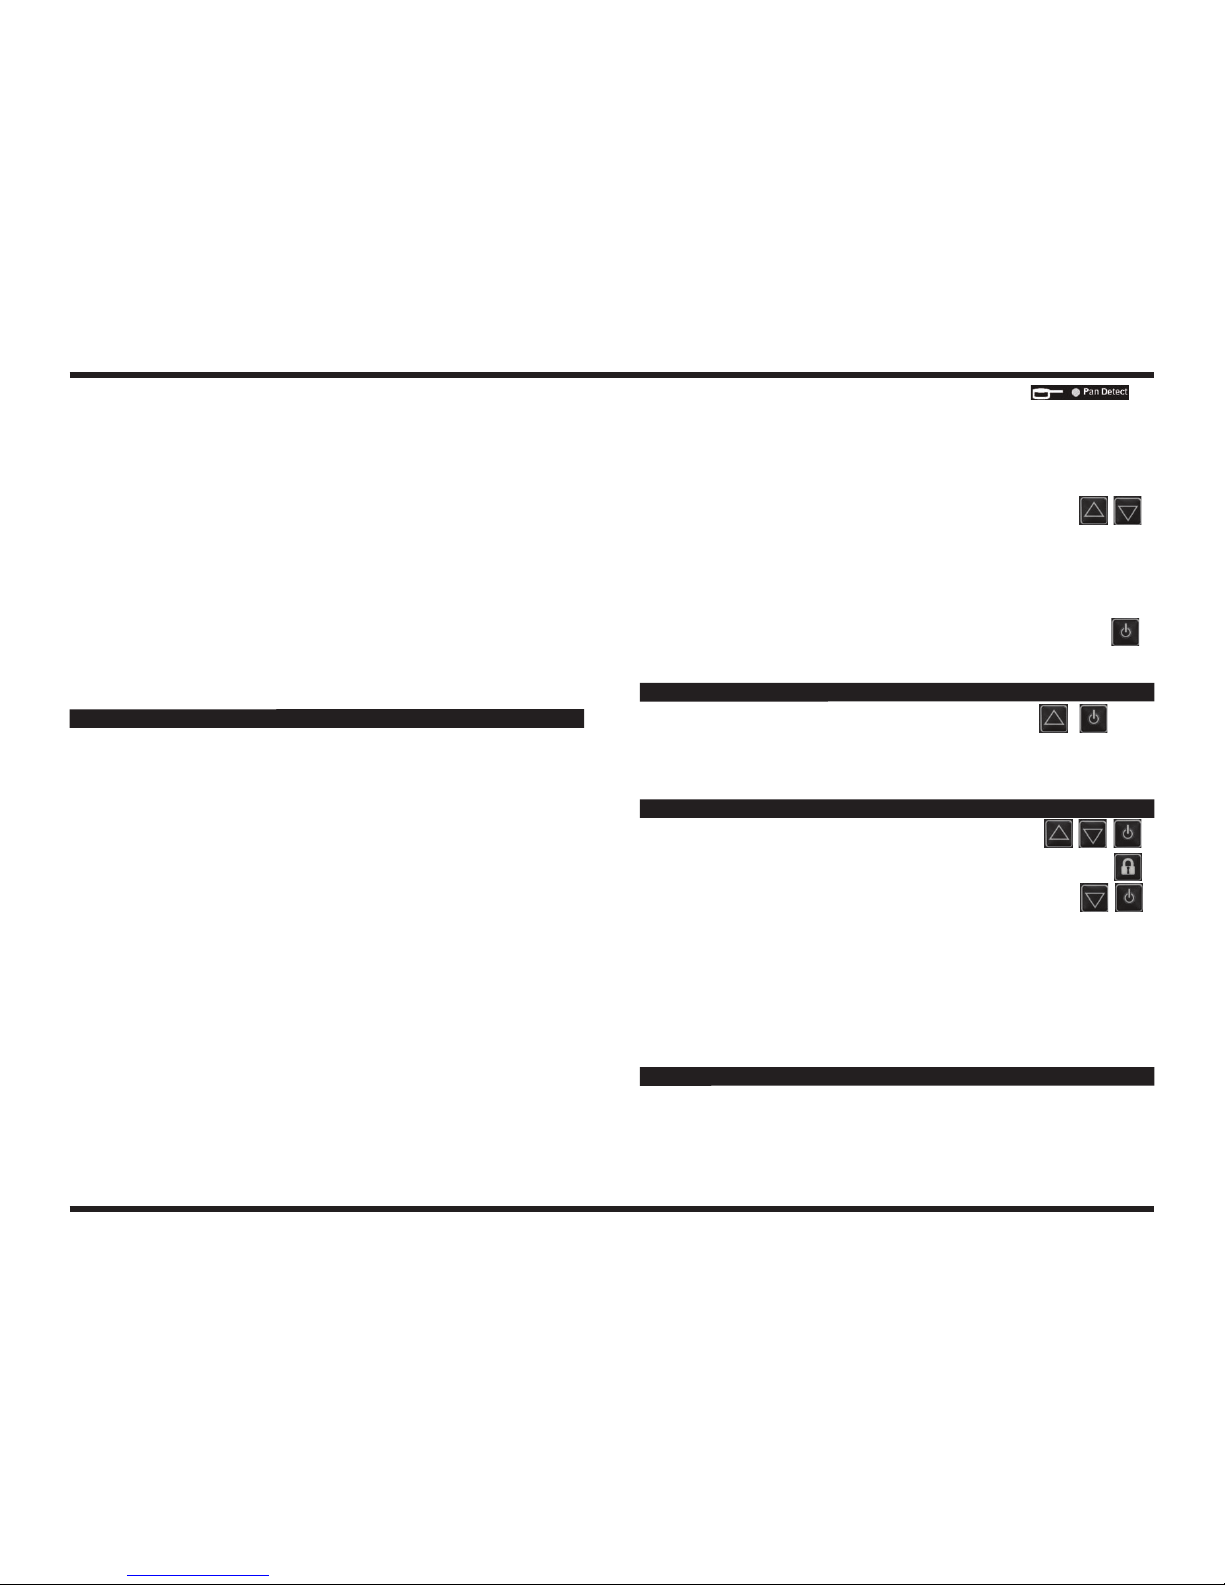
● The Pan Detect LED will turn on and the “F” or “C” in the
display will start flashing. This indicates the unit is heating the pan. When the
pan reaches the selected temperature, the “F” or “C” will turn on solid in the
display.
● When the pan is removed, the Pan Detect LED will turn off. The Magneeto™ II
LED will still flash. When the Magneeto™ II is removed, the SmarTag™ and
Pan Detect LEDs will both turn off.
● The set temperature can be adjusted at any time while the pan is
on the unit by pressing the Up and Down Arrows. If the word “Auto”
appears in the display when pressing either arrow button, the Magneeto™ II
has been pre-programmed with a select temperature. The Up and Down
Arrows cannot be used to adjust the set temperature in a Magneeto™. Follow
the directions for “Programming a Magneeto™” on page 6 or use another
Magneeto™ II if a different set temperature is desired.
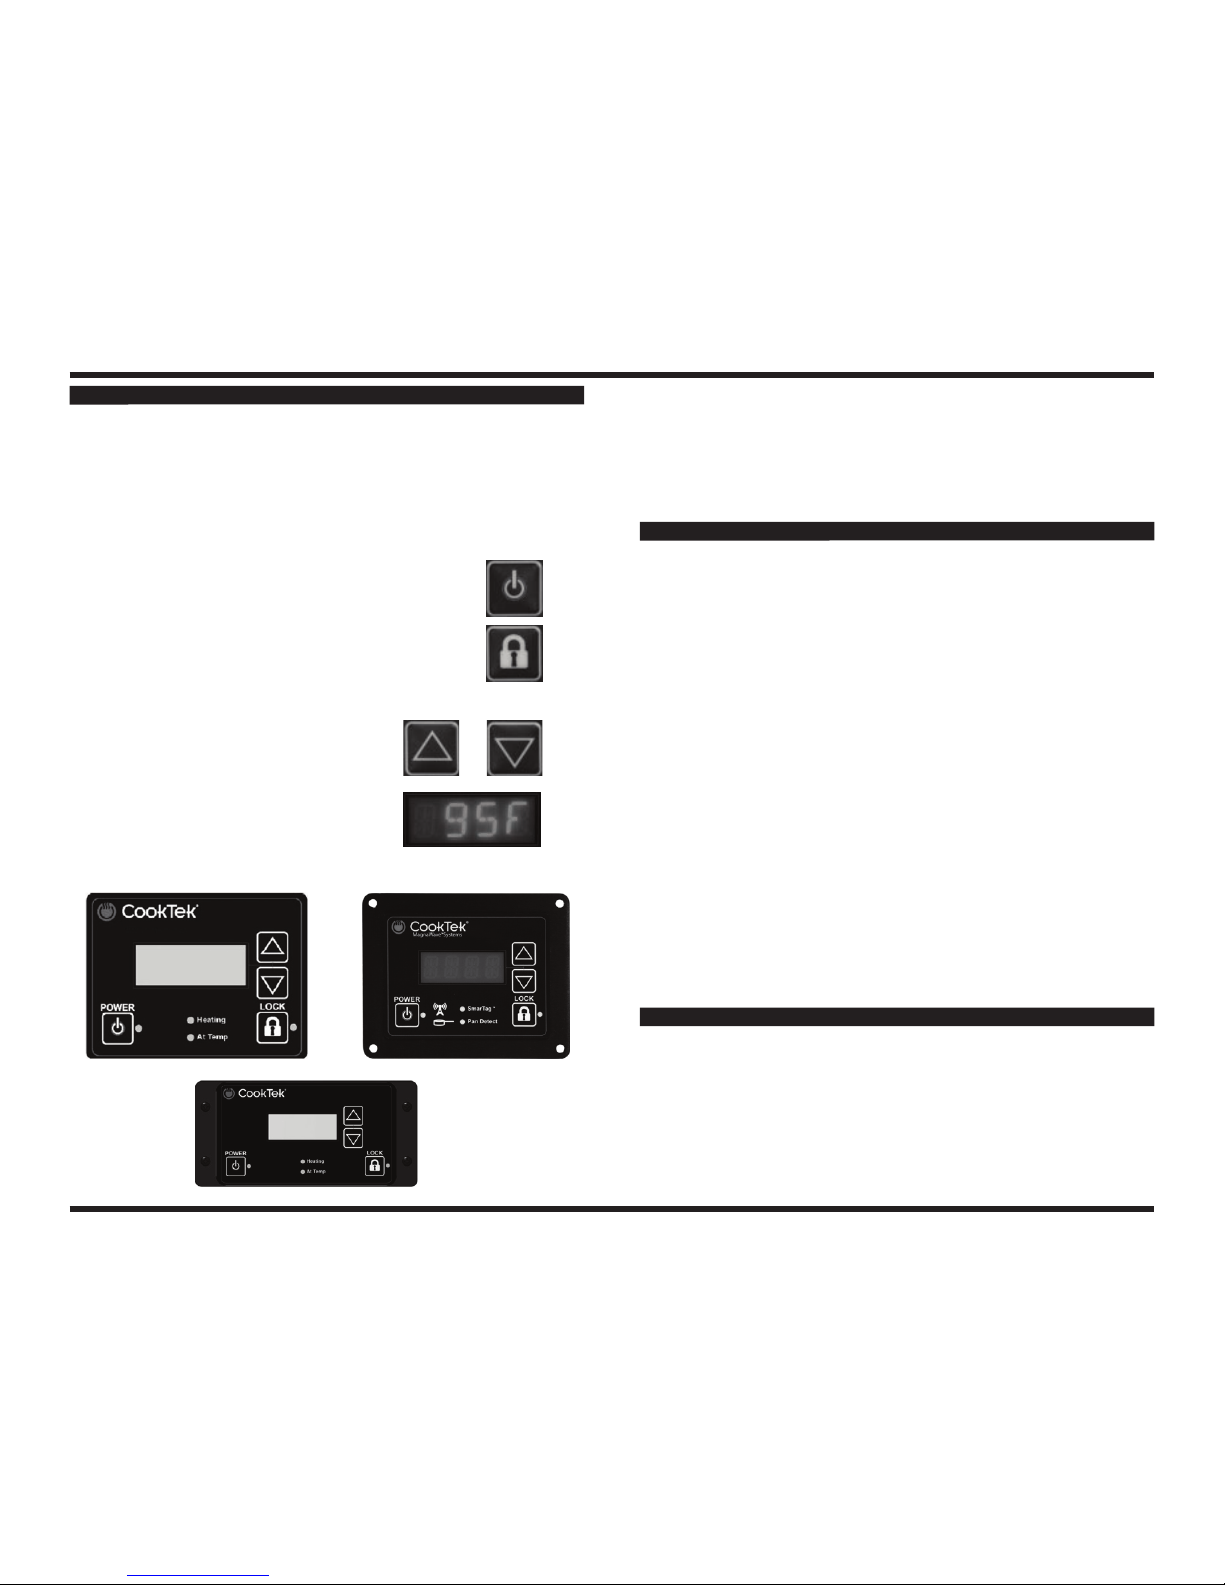
● When finished using the unit, press the Power button to turn the unit off.
The Power LED will turn off. Remove the pan and Magneeto™ II from
the unit. The unit will remember the last setting the next time it is powered on.
● Note: The Magneeto™ II limits the maximum set temperature to 190°F/85°C.
● Starting with the unit off, hold down the Up Arrow while
pressing the Power button.
● Use the Down Arrow to select the desired scale.
● Press the Power button to save the selection.
● Note: If a button is not pressed for more than five minutes, the unit will power
off, keeping the previously set temperature scale.
● Starting with the unit off, hold down the Up Arrow and Down
Arrow wile pressing the Power button.
● Use the arrow keys until the text “SETS” appears in the display. Press
the Lock button to select this feature.
● Use the Down Arrow key to toggle between the two options “PART”
and “FULL.” Press the Power button to save the selection.
●Selecting “PART” will make available the standard set temperatures listed in
the “General Control Operation” section.
●Selecting “FULL” will make a greater number of set temperatures available.
The set temperatures available with this selection are:
Fahrenheit: 80, 150, 160, 165, 170, 175, 180, 185, 190, 200, 210, 220, 230,
240, 250
Celsius: 30, 40, 50, 60, 65, 70, 75, 80, 85, 90, 95, 100, 105, 110, 120
● Note: If a button is not pressed for more than five minutes, the unit will power
off, keeping the previously selected temperature settings.
Magneeto™ devices are equipped with the capability to be programmed to a
specific set temperature. When the buffet unit detects a Magneeto™ that has been
programmed it will enter “Auto” mode. The Up and Down Arrows cannot be used to
change the set temperature when a programmed Magneeto™ device is in use. A
Magneeto™ does not have to be programmed in order to be used on the buffet.
To program a Magneeto™ device:
PROGRAMM G A MAG EETO™ I OR II (“R” MODELS O LY)
CHA GI G THE TEMPERATURE SCALE (F/C) - ALL MODELS
CHA GI G THE TEMPERATURE SETTI GS OPTIO - “D” A D “R” MODELS

7 12 Manual 650W 90327_A USI TL
● Starting with the unit off, hold the Down Arrow while pressing the
Power button.
● The display will start with the text “CLR.” Use this to clear the tag (the unit will
no longer enter auto mode). Otherwise, use the Up and Down Arrows to select
a temperature.
● To program the displayed setting to the tag, press the Lock
Button three times. The display will read “TAG SET.”
● Repeat if necessary with other Magneeto™ IIs.
● Note: Magneeto™ II devices cannot be programmed for a set temperature
greater than 190°F/85°C.
MA UAL TRA SLATIO ADDE DUM
DUTCH
Doe het volgende voordat u uw kooktop gaat gebruiken:
● Verwijder al het verpakkingsmateriaal
● Zet het toestel op een droge, vlakke, harde, stabiele en onbrandbare
ondergrond
● Houd het toestel uit de buurt van andere warmtebronnen en zorg dat er aan de
voor- en achterkant en de zijkanten minstens 5 cm vrij is voor luchtcirculatie.
Voor uw veiligheid mag u nooit de elektrische (massa) aansluiting uit de stekker
snijden, verwijderen of uitschakelen. Gebruik nooit een aangepaste stekker of een
verlengsnoer met de kooktop.
WAARSCHUWI G: Een verkeerd geaarde stekker kan u een elektrische schok
bezorgen. Raadpleeg een erkende elektricien als u vragen heeft over deze
aardingsinstructies.
Voordat u begint:
Controleer eerst of dit snoer stevig aan uw CookTek-apparaat is bevestigd VOOR-
DAT u de stekker van het toestel in het stopcontact steekt en u probeert het te ge-
bruiken.
● Raak de keramische plaat (of de bovenkant van de kooktop) nooit onmiddellijk
na gebruik aan. De hitte van de pan wordt op de keramische plaat overgebracht
zodat deze heet is bij aanraking.
● Dit product mag uitsluitend worden gerepareerd door een geautoriseerd
servicebedrijf of door personeel van CookTek. Probeer niet om het toestel open
te maken of op enige wijze te repareren. Neem voor informatie over onderhoud
en reparatie contact op met CookTek op 001-312-563-9600.
● Dit toestel moet worden geaard. Alleen aansluiten op een goed geaard
stopcontact. Lees voor het gebruik de aardingsinstructies en de vereisten voor
de elektrische aansluiting op pagina 3 van dit boekje. Gebruik geen
verlengsnoer.
Ennen keittotason käyttöä toimi seuraavasti:
● Poista kaikki pakkausmateriaalit.
● Laita laite kuivalle, tasaiselle, kovalle, tukevalle ja palamattomalle pinnalle.
● Pidä laite erossa muista lämmönlähteistä ja jätä laitteen sivuille, eteen ja taakse
vähintään 10 cm ( 2 tuumaa) vapaa tilaa ilmalle kiertää.
FI ISH
● Do not use aluminum foil on top of the buffet.
● Do not use the buffet near a faucet, swimming pool, sink, or other areas where
water can be found.
● Never store the buffet outside or upside down.
● Do not obstruct, block, or alter the air entrance or outlet. Do not stick foreign
objects into these openings.
● Do not strike or damage the buffet. Do not put the buffet in your luggage.
Throwing or dropping the buffet can damage the internal components or crack
the buffet, voiding your warranty. If the buffet becomes cracked, unplug
immediately and do not use.
Symptom Probable Cause Possible Solution
No power
(No lights or fan
noise)
● Unit unplugged
● No power to receptacle
● Plug unit into appropriate
receptacle
● Make sure that receptacle is
energized
● Check wall switches
● Check circuit breaker
● Plug a different electronic device
into the receptacle to make sure
that power is present
Pan does not heat ●Pan is not induction
efficient
● Pan not centered
● Not using a tagged
chafing dish or
Magneeto™(“R”
models only)
● Use induction efficient pan
● Center pan
● Use tagged chafing dish or
Magneeto™. If SmarTag™LED
not lit, position RFID tag over a
corner of the unit.
Buffet suddenly
stops heating
●Possible power brown
out
● Circuit shared with
another electrical device
● Safety shut-off engaged
● Assure proper voltage/power levels
● Make sure the buffet is not sharing
a circuit with electrical devices
other than CookTek buffet units
● The safety shut-off will engage if an
empty pan is left on the buffet
surface while the unit is working at
full power. Make sure that the
buffet surface is clear. Wait 15-20
minutes for the unit to reset.
Pan does not get
hot enough even
though power levels
are set to maximum
- induction efficient
pan in use
● Extension cord in use
● Circuit shared with
another electrical device
● DO NOT use extension cords.
Extension cords may affect the
power levels reaching the
appliance.
● Make sure that the buffet is not
sharing a circuit with other
electrical devices.
Pan heats unevenly,
does not maintain
heat level, or
overheats
● Pan is not induction
efficient
● Pan bottom may not be
flat enough
● Pan not centered
● Pan diameter is less
than 7 inches
● Use induction efficient pan
● Use flatter pan
● Center pan
● Use a larger induction efficient pan
TROUBLESHOOTI G

11 8 Manual 650W 90327_A USI TL
All commercial cooking equipment manufactured by CookTek is warranted against
defects in materials and workmanship for a period of one year from the date of
sale, or 18 months from the date of shipment from our factory, whichever comes
first. IMPORTANT! eep a copy of your sales receipt to verify date of purchase. A
valid proof of purchase, indicating Serial Number(s) and date of purchase is
required to obtain Warranty Service. This warranty is for the benefit of the original
purchaser and is non-transferable. Any defects in materials or workmanship, which
are brought to the attention of CookTek by written notification within the aforesaid
warranty period will be repaired or replaced, at CookTek’s discretion, with new or
recertified products or parts. THIS IS THE SOLE REMEDY FOR ANY BREACH OF
THIS WARRANTY. IN NO EVENT WILL COO TE BE LIABLE FOR DAMAGES
OF ANY IND, WHETHER DIRECT OR INDIRECT, SPECIAL OR
CONSEQUENTIAL.
THIS WARRANTY IS THE COMPLETE AND ONLY WARRANTY, EXPRESS OR
IMPLIED IN LAW OR FACT, INCLUDING BUT NOT LIMITED TO, WARRANTIES
OF MERCHANTABILITY, SUITABILITY, QUALITY, OR FITNESS FOR ANY
PARTICULAR PURPOSE.
This warranty is void if it is determined that upon inspection by an authorized
service agent that the equipment has been modified, misused, misapplied,
improperly installed, or damaged in transit by fire, flood, or act of God. Warranty
will be considered void if the serial nameplate has been removed or if the unit has
been opened or modified in any way, or service has been attempted by
unauthorized personnel. IMPORTANT! eep a copy of yoru sales receipt to verify
date of purchase. A valid proof of purchase, indicating Serial umber(s) and
date of purchase is required to obtain Warranty Service. The prices charged
by CookTek for its products are based upon the limitations in this warranty. Seller’s
obligation under this warranty is limited to the repair of covered defects without
charge by a CookTek factory authorized service agent or one of its sub-service
agencies.
To receive Warranty Service, please call CookTek at +1 (312) 563-9600 to obtain a
Return Authorization (RA) number. This RA number must be printed on the outside
of the return shipping container, or on the address label when returning units for
service. Units received without an RA will be refused at our shipping dock and may
encounter a delay in service. Units must be taken or shipped to the required
authorized service agency with transportation charges prepaid for service.
CookTek will provide return freight. In addition to restrictions contained in this
warranty, specific limitations are shown in the Service Policy and Procedure Guide.
Please save all packaging materials for possible use in shipping. CookTek
assumes no liabilities whatsoever for any damages incurred in transit.
(continued...)
WARRA TY STATEME T
● To reduce the risk of fire, electric shock or injury, please read, follow, and save
all instructions.
● Never immerse the cords, plugs, or appliance in water.
● Supervise carefully when appliance is used near children. eep children away
from appliance when in operation.
● Always unplug appliance immediately after use and allow for cooling time if
handling, transporting, or storing.
● Do not use any appliance that has a damaged cord or plug, or one that has
malfunctioned or been damaged. Consult the warranty and follow instructions
for service.
● Do not use any accessories or attachments that are not recommended by the
manufacturer. Use of unapproved accessories may cause injuries and void the
warranty.
● The pan on the appliance will heat continuously as long as the power is ON.
The pan will be hot and caution should be exercised when working on or near
the appliance.
● Do not let the power cord touch hot surfaces or hang over the edge of the
counter. Do not move the appliance with electric power is connected. Do not
move the appliance while a hot pan or pan containing hot liquids is on top of the
appliance.
● To disconnect the appliance, press the Power button and wait for the LED to no
longer be illuminated. You may then remove the plug from the outlet.
● Do not use CookTek Buffet for anything other than its intended use as described
in this manual. This unit is designed to heat food and is not intended for
laboratory or industrial use.
● Do not put food or unopened cans on the buffet surface.
● This product may only be serviced by an authorized service agent or by
CookTek personnel. Do not attempt to open the unit or perform service of any
kind. For service information, contact CookTek at +1 (312) 563-9600.
● This appliance must be grounded. Connect only to a properly grounded outlet.
Before operating, read grounding instructions and Electrical Installation
Requirements on page 2 of this booklet. Do not use an extension cord.
● Do not overcook food or leave appliance unattended while in use.
● In the unlikely event of a grease fire, smother flame by covering pan with a
tight-fitting lid, cookie sheet, or flat tray. DO NOT USE WATER. When the fire
is under control, turn off appliance and unplug from wall.
● Use only induction compatible and efficient cookware.
● Place buffet on a level, hard, stable, non-flammable surface before use.
● Never heat an empty pan. It may damage the buffet or cookware, and overheat
the unit. When overheating occurs, an error code will flash on the display and
the buffet will shut itself off automatically. When the internal temperature
returns to normal, the buffet can be used again.
● Remember to turn the buffet off after each use.
● eep the buffet away from gas and electric ranges or open flames. Do not
place in the oven. If the ambient air temperature is above 110°F, the buffet may
not function properly.
● Be sure to dry off the outside of the pan before use. Water droplets on the
outside of the pan may begin to boil and spatter as the pan temperature rises.
IMPORTA T I FORMATIO A D SAFETY PRECAUTIO S

9 10 Manual 650W 90327_A USI TL
This warranty is valid in the Continental United States only if purchased through an
authorized CookTek Representative or Dealer. This warranty is valid outside of the
Continental United States only if purchase through an Authorized CookTek
International Distributor. Warranty Service is provided only through the Authorized
Agent from which the unit was purchased.
For additional information and other details concerning warranty, please contact our
Service Department:
In the United States:
CookTek
Toll Free: +1 (888) COO TE (266-5835)
Toll Free Fax: +1 (888) COO FAX (266-5329)
Outside of the United States:
Phone: +1 (312) 563-9600
Fax: +1 (312) 432-6220
Worldwide Web
www.CookTek.com
Email: [email protected]
“D” and “R” Models
“S” Model
Your CookTek Induction Buffet is easy to keep clean. Be sure to follow these easy
instructions:
● Turn the unit OFF and remove the plug from any power outlets prior to cleaning.
● When the unit cools, wipe the glass off with a damp cloth.
● To clean the glass surface, use a mild detergent or glass cleaning cream.
● Never immerse the buffet in water or put in in the dishwasher.
In the event of a possible malfunction, your CookTek Buffet will display an error
code on the alphanumeric display. Some models will beep a specific number of
times, indicated by the error and flash the lights on the control box. Please consult
the following table when encountering an error code. “R” models will display text
for some error conditions instead of an error code.
To reset error conditions, remove the pan from the unit and press the Power button,
or unplug the unit.
Error Error Cause Displayed Message Troubleshooting
1
Broken
Temperature
Sensor
E-01 Service required
2
Broken Temp
Sensor, Glass
Temp Too High
E-02
Remove any pans from the buffet
surface and let cool. Turn unit off
and on to reset error. If problem
persists, contact service provider.
3Over current (peak) E-03 Try different cookware. Service
may be required.
6High line voltage E-06
To reset, unplug unit, wait 5
seconds, and plug in again. If
problem persists, have an
electrician monitor the line
voltage.
7Harware failure E-07 Service required.
8Zero cross failure E-08
Turn unit off, then on. Plug unit
into outlet on different circuit
breaker. If problem persists,
service is required on device
10 Magneeto™I or II
RTD Failure E-10 or “Bad Tag”
Magneeto™I or II needs repair.
Service needed for Magneeto™I
or II.
11 Tag communication E-11 or “Lost Tag” Ensure the RFID tag on the pan is
properly located.
12 RFID reader failure E-12 Service required.
13 User interface
error E-13
Check control panel
connection, cycle power.
Service required
16 Critical error E-16 Call dealer for service.
Service required.
ERROR CODES
U IT DIME SIO S
Dimensions
inches mm
A 12.50 317
B 11.63 295
C 13.38 339
D 12.63 320
F 3.82 96
G 0.97 24
H 0.28 7
J 4.86 123
2.57 65
L 6.47 164
M 3.07 77
N 2.67 67
P 4.96 125
Dimensions
inches mm
A 14.30 363
B 15.00 381
C 14.10 358
D 3.75 95
E 0.60 15
F 0.22 5
G 3.50 88
H 4.00 101
J 3.90 99
3.40 86
L 5.00 127
CARE A D CLEA I G
This manual suits for next models
8
Table of contents
Other CookTek Food Warmer manuals
Popular Food Warmer manuals by other brands

Delfield
Delfield 48000 Series Service and installation manual

Lockwood
Lockwood CA39 Operation and maintenance instructions

Presto
Presto Nomad Mason Jar instructions

BevLes
BevLes Classic-Line Proofer Heater CPH70-MP17 Installation and operating instructions

Omcan
Omcan FW-US-690-25-2 instruction manual

ORORO
ORORO BAY CITY user guide

ROBAND
ROBAND E14 operating instructions

Taiji
Taiji HC-6 operating instructions

Alto-Shaam
Alto-Shaam 500-PH/GD Specification sheet

Bonnet Neve
Bonnet Neve Design Series User instructions

Bloomfield
Bloomfield MOD-327TDMAF installation instructions

Hatco
Hatco Glo-Ray GRPWS Series Installation and operating manual