Sushi/Congee Casserole/Cake/Steam
16 17
Casserole/Cake/Steam
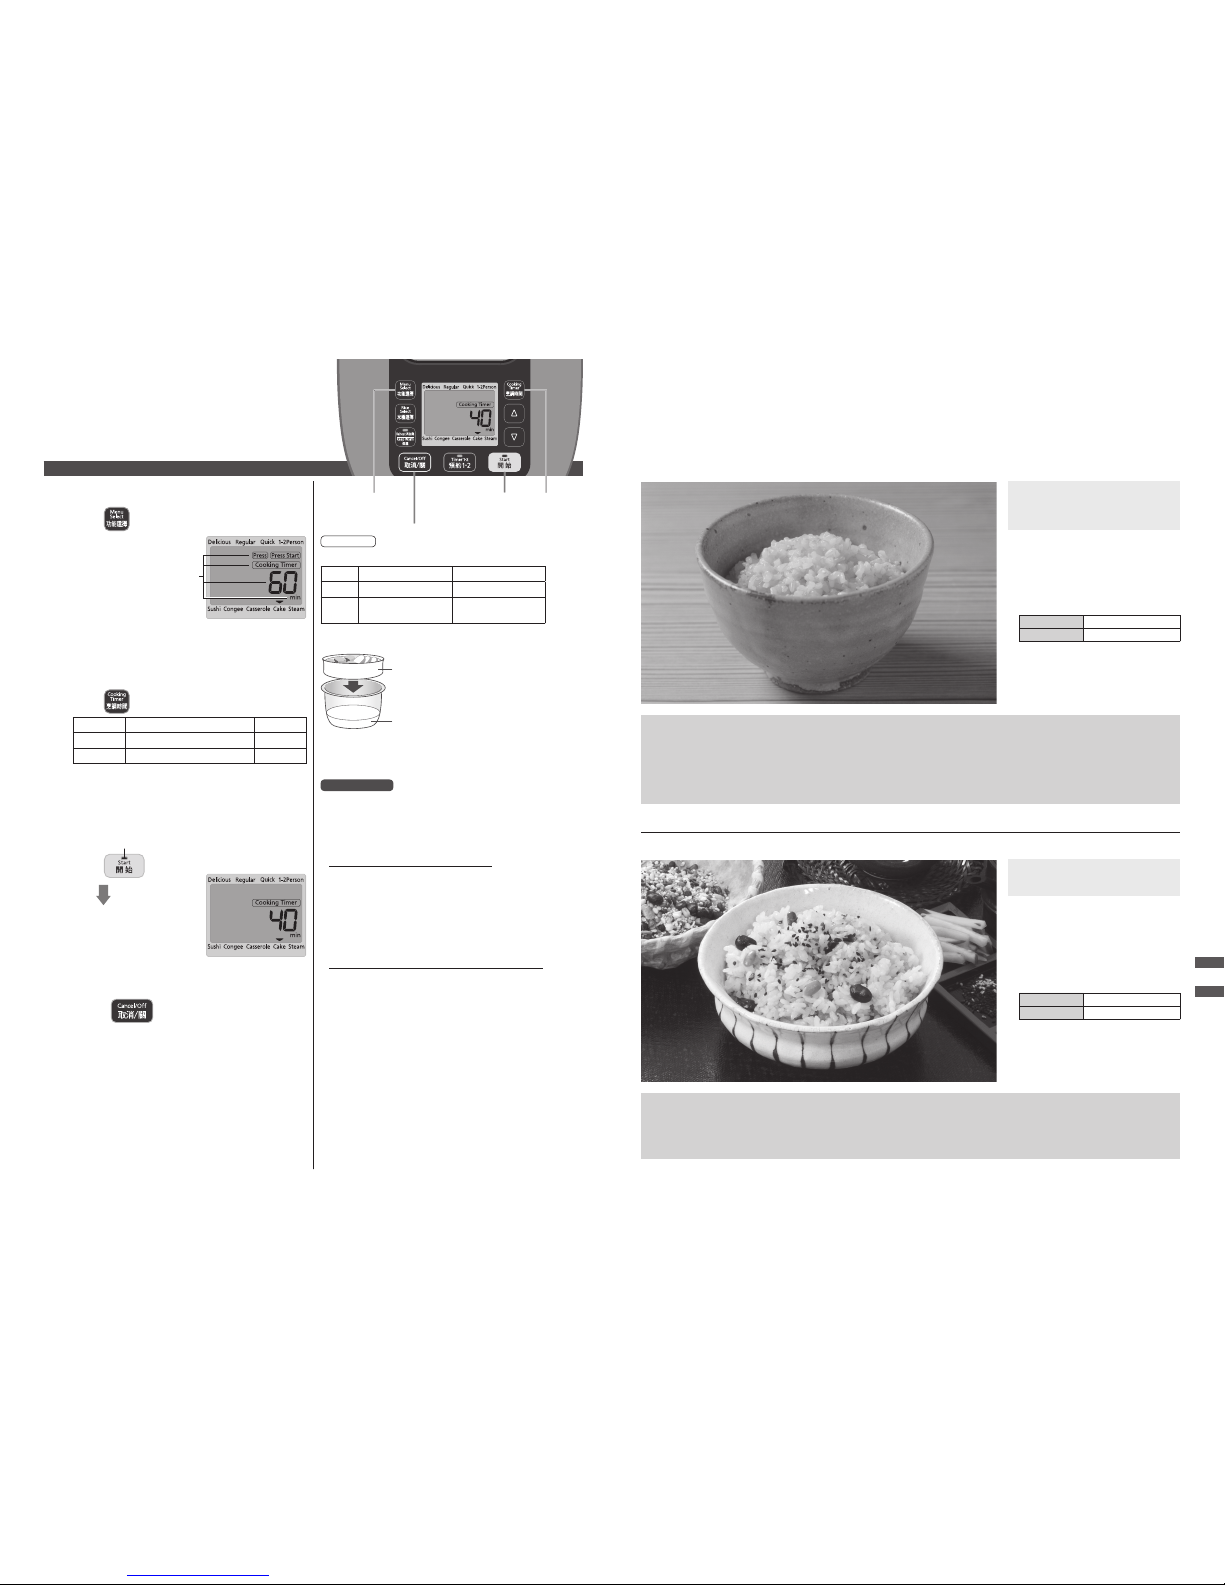
Chicken and Taro Casserole Rice
Ingredients (Serves 4 to 6):
White rice ...............3 cups
Chicken meat (diced)........200 g
Dried mushrooms
(soaked & diced) ...........5 pcs
Taro root (diced) ...........100 g
Dried shrimps (soaked) .......40 g
Chinese black fungus
(soaked & chopped) ..... Few pcs
Marinade:
A
Light soy ..............1 tsp
Dark soy .............½ tsp
Sugar.................1 tsp
Salt .................½ tsp
Starch .............. 1½ tsp
Sauce:
B
Light soy ..............1 tbs
Dark soy ..............1 tbs
Sugar................½ tbs
Sesame oil............½ tbs
Method:
Season diced chicken meat with A.
Deep fry diced taro root until
golden brown, drain and set aside.
Wash the white rice and place it
in the Inner Pan with water up to
“Water Level: White Rice 3”. Then
place , and other ingredients
evenly on the rice and close the
Outer Lid. (Do not mix.)
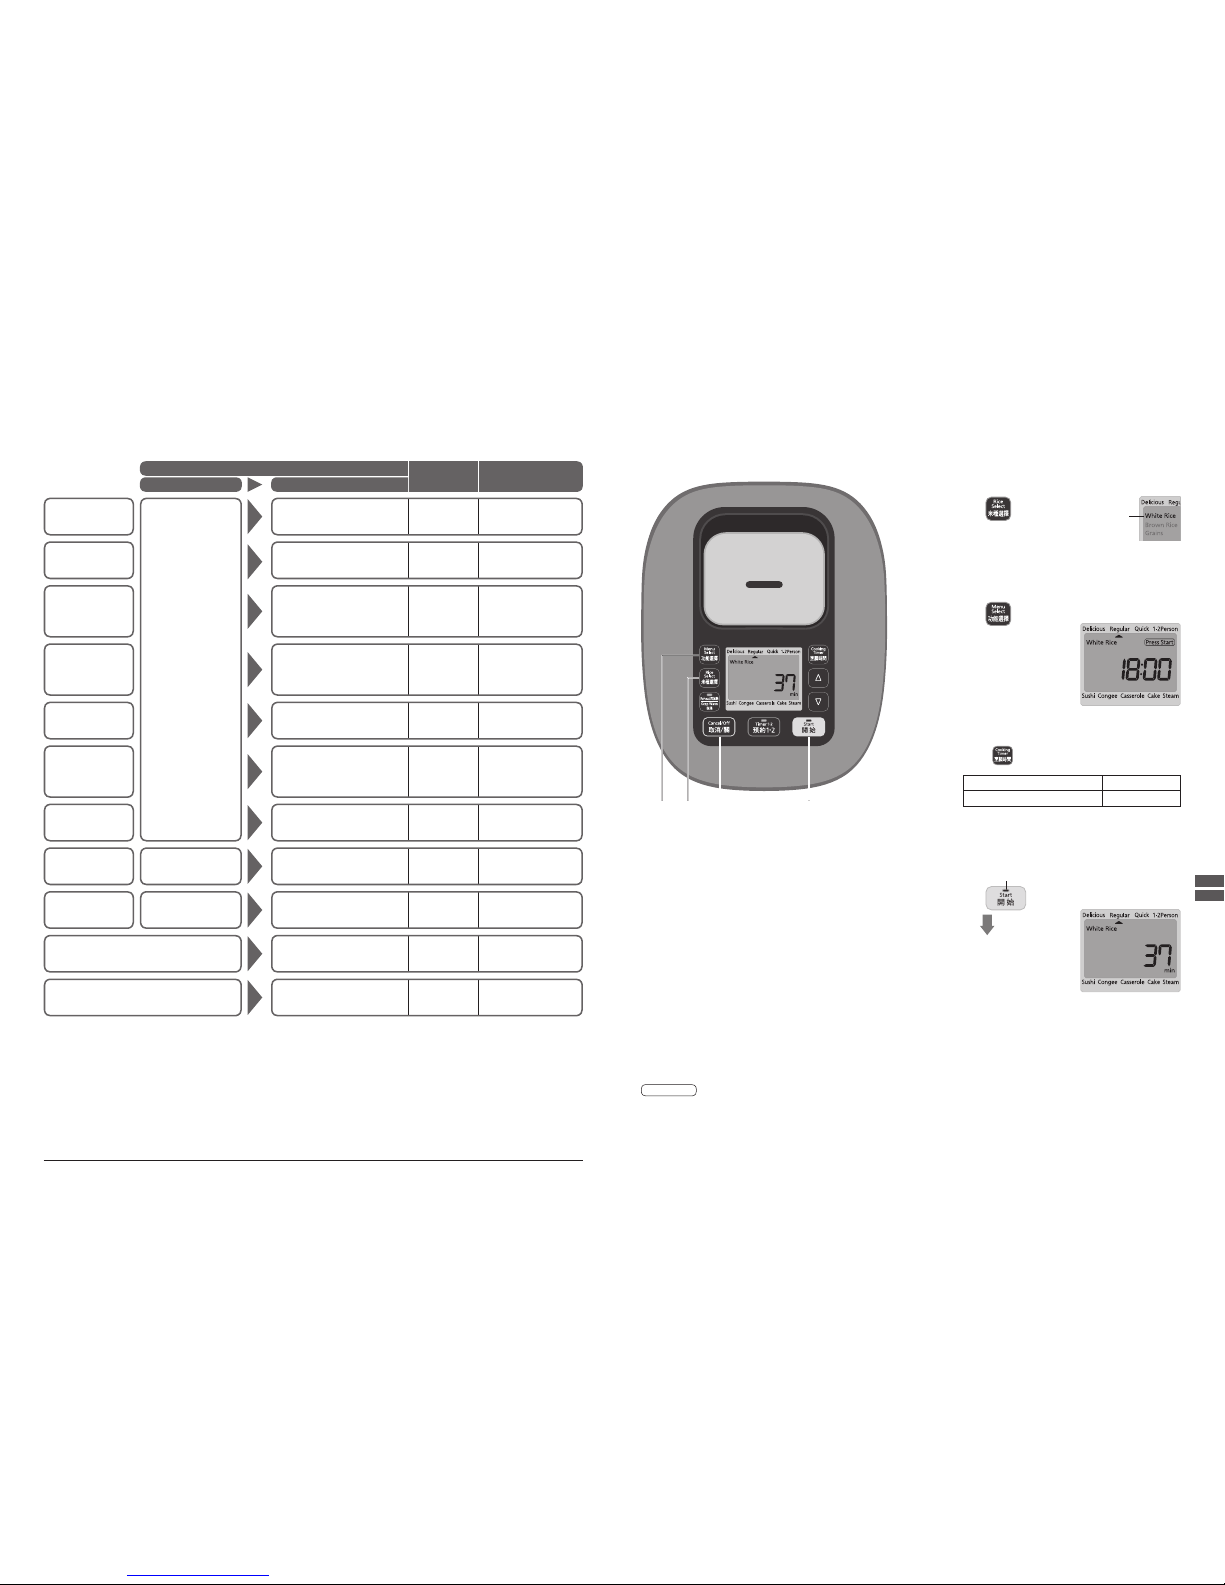
Select the program.
Rice Select White Rice
Menu Select Casserole
Press the “Start” button.
After the buzzer sounds add B and
stir the rice immediately to loosen
it.
Important Information:
OOWhen placing ingredients they
cannot go above the maximum
water level of White Rice.
OODo not open the Outer Lid while
cooking. (Cooking result may not be
satisfactory.)
Model Amount of rice (Cup*)
1.0L 1–3
1.8L 2–6
*
Measuring Cup provided as an accessory.
Pound Cake
Ingredients (Serves 4 to 6):
Butter or salad oil ...Small amount
Pancake mixture ...........200 g
Eggs ....................2 pcs
Soy milk................100 mL
Salad oil..................3 tbs
Raisins....................70 g
(May be substituted for other dry fruit.)
Above-mentioned amounts for 1.0L/1.8L*
Method:
Lightly smear the inside of the
Inner Pan with butter or salad oil.
Mix the ingredients until texture is
smooth. (Do not mix in the Inner Pan.)
Pour into the Inner Pan and
close the Outer Lid.
Select the program and set the
cooking time to 40 minutes.
Rice Select ─
Menu Select Cake
Press the “Start” button.
When the buzzer sounds, remove
the Inner Pan from the Warm Jar
and turn it upside down to remove
the cake. Then allow to cool on
plate or mesh.
*:
When using the 1.8L model,
increasing the quantity of ingredients
1.5-fold and setting the cooking time
to 60 minutes is recommended for a
nice, uffy cake.
Salted Meat Steamed with Baby Cabbage
Ingredients (Serves 4 to 6):
Baby cabbage .............100 g
Salted meat (Chinese ham) ....35 g
Method:
Break the baby cabbage into individual
pieces and wash these pieces. Slice
the salted meat and place aside.
Arrange the individual pieces of
cabbage in layers on the plate and layer
the sliced salted meat at the very top
(try to use the fatty parts of the meat).
Pour 2.5 cups of water in the Inner Pan.
Set the attached Steaming Basket,
put “” on it and close the Outer
Lid.
Select the program and set the
cooking time to 13 minutes.
Rice Select ─
Menu Select Steam
Press the “Start” button.
Note:
When baby cabbage is unavailable,
the heart of the bok choy may be
used instead.
Precaution
OOPlease do not block the hole in the Inner Lid with ingredients.
Sushi/Congee
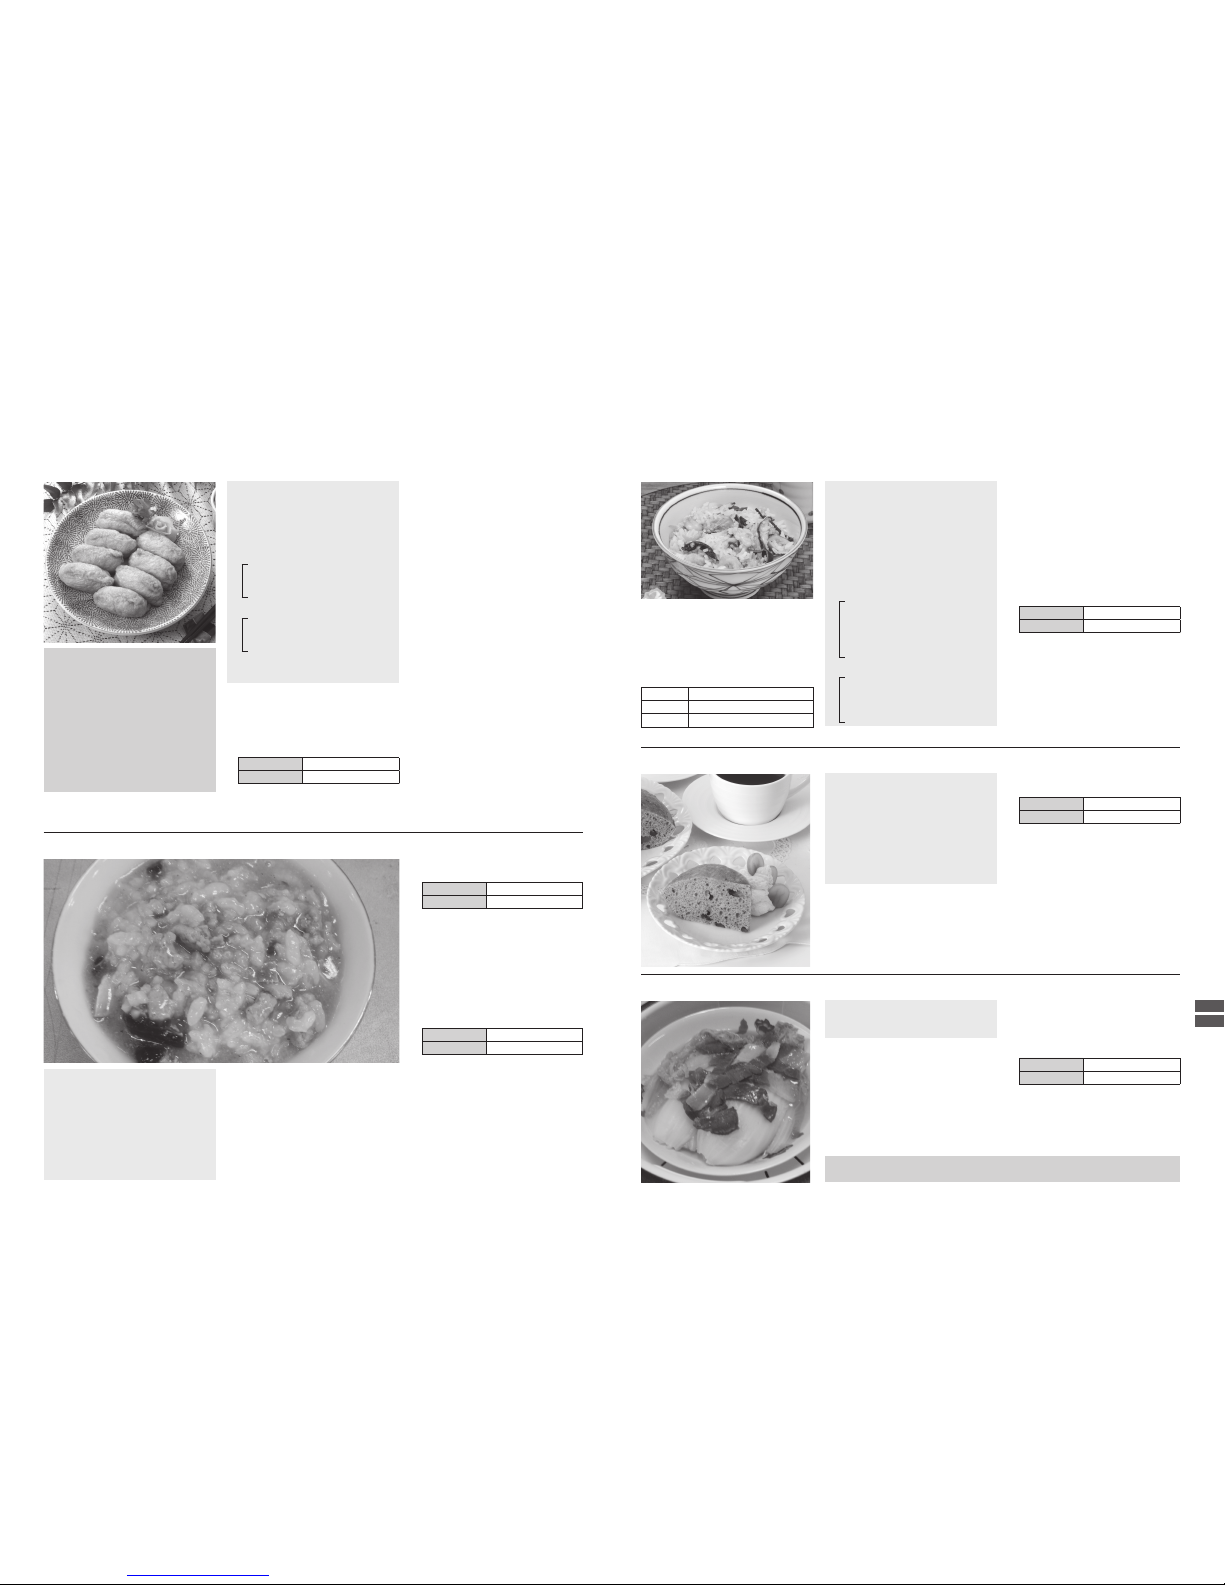
Inari-Sushi
Ingredients (Makes 20 pieces):
White rice ...............3 cups
Konbu .................5×5 cm
Fried tofu ................10 pcs
(cut in half and opened out to form pouches)
Instant dashi ..............½ tsp
White sesame .............2 tbs
A
Sugar.................60 g
Sake .................2 tbs
Dark soy ..............4 tbs
Sushi vinegar:
B
Vinegar ............. 90 mL
Sugar.................3 tbs
Salt ..................2 tsp
For garnish
Red ginger..............To taste
Method:
Wash the white rice and add water
up to “Water Level: Sushi 3”, lay
konbu on the rice and close the
Outer Lid.
Select the program.
Rice Select White Rice
Menu Select Sushi
Press the “Start” button.
Boil the fried tofu in water for 2 to
3 minutes to remove excessive
oil. Put the fried tofu and instant
dashi in a pan, add 400 mL of
water, and simmer on a low heat
for around 10 minutes. Add A and
simmer until all the soupy liquid
has evaporated.
Put B in a pan and warm gently to
make the sushi vinegar. Moisten
the inside of the sushi rice bowl
with water. When the buzzer
sounds, remove the konbu and
transfer the cooked rice to the
sushi rice bowl. Pour the sushi
vinegar evenly over the rice, then
mix with a chopping motion adding
the white sesame as you mix.
Next, cool with a fan. To ensure
that the sushi rice does not dry out,
cover it with a well-wrung cloth.
Fill the fried tofu with the sushi rice.
Arrange the sushi on a plate and
garnish with red ginger.
To cook sushi rice...
OO
To ensure that the avour is fully
absorbed, transfer the rice to the
sushi rice bowl while it is still warm
and mix in the sushi vinegar.
(
Do not mix in the sushi vinegar
with the rice still in the Inner Pan.
OOTo preserve the sheen of the rice,
cool quickly using fan.
OOTo prevent stickiness, set the Rice
Scoop at a shallow angle and mix
quickly with a chopping motion.
Pork and Century Egg Congee
Select the program and set
cooking time to 2 hours.
Rice Select White Rice
Menu Select Congee
Press the “Start” button.
When the buzzer sounds, press
the “Cancel/Off” button, open the
Outer Lid*, add the lean pork and
century egg to the Inner Pan and
close the Outer Lid.
*: When open the Outer Lid, please
note that the cooked food gets hot.
Select the program and set
cooking time to 1 hour.
Rice Select White Rice
Menu Select Congee
Press the “Start” button.
After the buzzer sounds, the
congee may be served after it has
been seasoned.
Ingredients (Serves 2 to 3):
White rice ...............½ cup
Meat broth (cooled) ........5 cups
Century egg................1 pc
Cooked lean pork ..........125 g
Seasoning:
Salt .......................5 g
Pepper.................To taste
Sesame oil..............To taste
Method:
Marinate the cooked lean pork with
the salt for 1 hour and then cut into
thin strips. Dice the century egg
and put aside for later use.
Wash the white rice and then pour
into the Inner Pan together with
the meat broth and close the Outer
Lid.
)