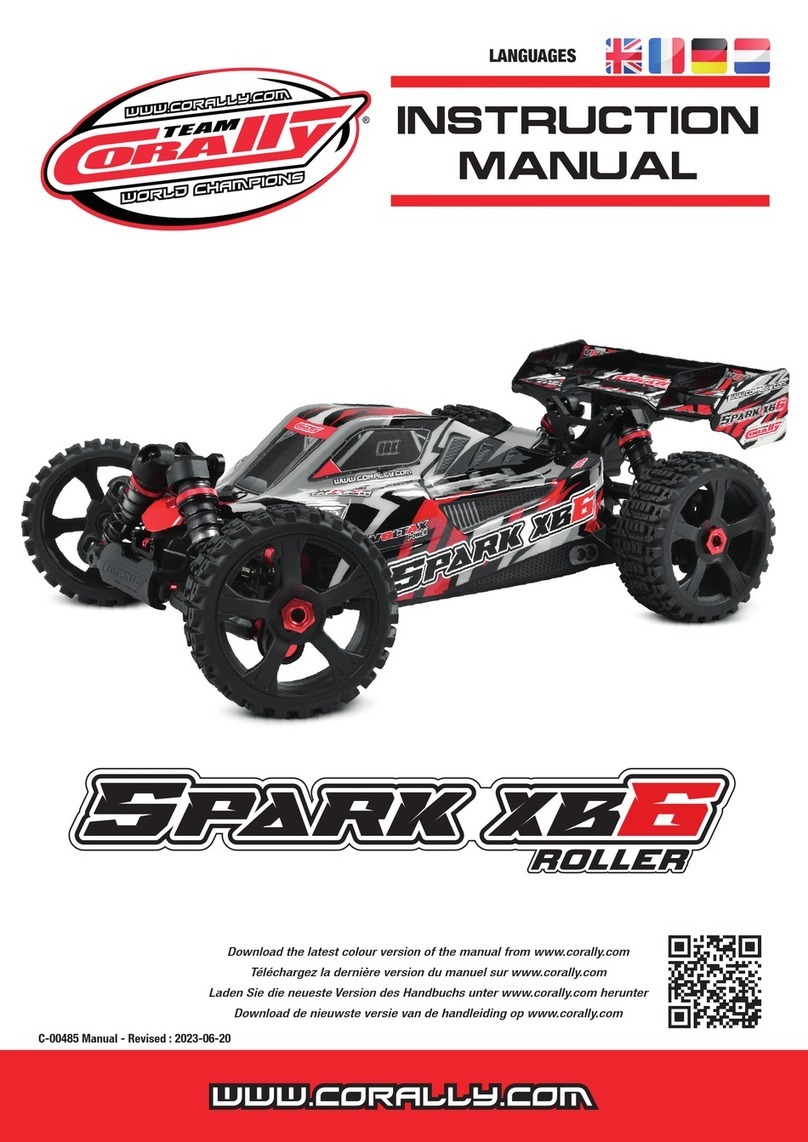
Corally SPARK XB6 User manual

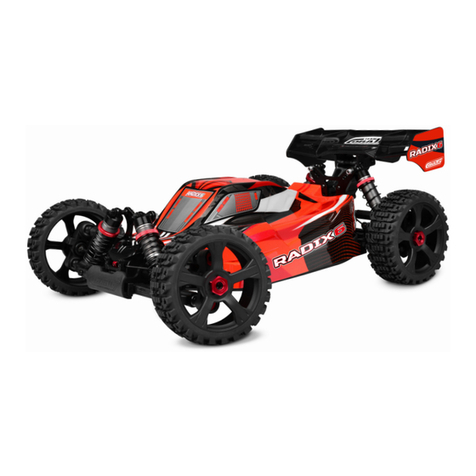
C-00285 Manual - Revised : 2023-06-20
INSTRUCTION
MANUAL
LANGUAGES
Download the latest colour version of the manual from www.corally.com
Téléchargez la dernière version du manuel sur www.corally.com
Laden Sie die neueste Version des Handbuchs unter www.corally.com herunter
Download de nieuwste versie van de handleiding op www.corally.com

2
Téléchargez le guide de démarrage rapide en Français sur le site • Laden Sie die Kurzanleitung auf Deutsch von der Website herunter • Download de Nederlandse snelstartgids op www.corally.com
Thank you for purchasing a Team Corally car. This manual describes the instructions for using the model and the electronic components. You will also find some
tips on how to maintain your RC model so that you can enjoy it for years to come. You have purchased one of the most efficient models available on the market
that has been designed by a team of professionals. You will also benefit from the best after-sales support. All Team Corally models guarantee a high quality of
manufacture and performance that guarantees you a high satisfaction of use and services provided by the Team Corally. Always take the time to read the instruc-
tions carefully in order to follow all the procedures to use your RC model safely for you and for other people and property in the area. This will allow you to take
full advantage of all the performance of your RC model.
Please also check the website www. corally.com/Downloads/ to check if you have the latest version of this instruction manual. (Version: see bottom cover of this
manual)
If you have any questions about the model and its components, you can send a message to info@corally.com
We also recommend that you get help from an experienced model maker or your dealer.
You will find all the references of the spare parts on the website www.corally.com
TERM OF USE
The user is responsible for the use of your model. The user assumes all risks associated with the use of the model. This model is not intended for use by children
under 14 years of age without the supervision of a responsible adult who is familiar with the dangers of using a RC model. Team Corally / JSP Group Intl bvba,
its manufacturers, distributors and resellers cannot control the use and load of the model and therefore cannot be held responsible for any damage to property
and damage caused to persons resulting from the use of this product. You must accept these conditions and consider yourself fully responsible for the use of this
product. If not, do not use this product.
Due to the continuous development of our products, the exact specifications of the kit may vary. If you have a problem with your new kit, please contact the store
where you purchased it, indicating the part number(s).
Team Corally / JSP Group Intl bvba reserves the right to change any specification without notice. All rights reserved.
For your safety, always use wear gloves and goggles when assembling and maintaining your model.
Always take all necessary precautions when handling products (silicone oil, grease, thread lock, cyanolyte glue, fuel) for the operation of the model. (Refer to the
manufacturer’s instructions)
For your safety, to keep the warranty and obtain the best performance, always use original CORALLY genuine parts.
Contains: LEAD (CAS 7439-92-1) ANTIMONY (CAS 7440-36-0)
WARNING: This product contains a chemical known to the state of California to cause cancer and birth defects or other reproductive harm.
CAUTION: CANCER HAZARD
Contains lead, a listed carcinogen. Lead is harmful if ingested. Wash thoroughly after using.
DO NOT use product while eating, drinking or smoking.
This owner’s manual is designed for use with your vehicle and contains the instructions you will need to operate and maintain your vehicle.
- We know you want to start driving immediately after unpacking, but it is very important that you take the time to read this manual carefully, even if you are an
experienced R/C driver.
- Read carefully and follow all instructions in this manual. Failure to comply with the instructions will be considered as abuse and/or negligence which may result
in the cancellation of the warranty.
- Your vehicle is designed to operate on uneven terrain. However, dust, sand, water and carpet fibres can get into your car’s workspaces and can damage your
vehicle if they are not removed quickly. We do not guarantee any warranty on your vehicle against damage caused by external elements such as sand, dirt or
water. Users are responsible for the maintenance and safe operation of this vehicle.
- This product is not a toy. It is not suitable for users under 14 years of age, unless they are supervised by adults.
- Never attempt to disassemble electronic components. These have been carefully calibrated at the factory.
- Only improve your car with parts made for your car. If you upgrade performance, replace the entire system (such as the motor, inverter, battery, etc.) so that all
components are properly adapted. Any malfunction resulting from a custom modification will void your warranty.
- Before driving your vehicle, please read this manual in its entirety and examine your vehicle and radio control system for any defects.
- For better performance, some adjustments may be necessary.
- This vehicle requires a battery (included in the car or in the packaging). Make sure the vehicle’s battery is sufficiently charged before driving, otherwise you may
lose control of the vehicle.
- The radio transmitter requires 4 AA batteries (not included)
- Always remove or disconnect the battery from the vehicle to the inverter when not in use.
- Please drive your car in a spacious place. Never drive your car on the street or in traffic. Public places are subject to specific legislation by country, city, munici-
pality, please comply with the legislation for the use of RC models in your region.
- This product is fully assembled in the factory. We accept no liability for damage and/or accidents resulting from custom modifications and/or malfunctions.
INTRODUCTION • QUICK START GUIDE
READ FIRST • QUICK START GUIDE
SAFETY PRECAUTIONS • QUICK START GUIDE

3
Téléchargez le guide de démarrage rapide en Français sur le site • Laden Sie die Kurzanleitung auf Deutsch von der Website herunter • Download de Nederlandse snelstartgids op www.corally.com
Failure to operate your model in a safe and responsible manner may result in injury to yourself, others or damage to property around you.
• Do not use your model on public roads or in areas where you may encounter pedestrians or riders.
• Do not operate in a congested area or in crowds.
• Do not operate in areas where loud noises can disturb others, such as hospitals and residential areas.
• Do not operate your model with obstructed line of sight, at night or near water.
• Your model is radio controlled, it is subject to possible radio interference. Radio interference can cause loss of control of your
model. Be careful.
• Take care not to injure yourself while using tools to adjust or upgrade your model.
• Since the model contains small parts, keep out of reach of children while assembling and/or disassembling your model.
• If your model becomes stuck against an object, release the throttle and retrieve it by hand
• Do not continue to apply the throttle when your model is stuck. This may damage the motor and/or ESC/Receiver unit.
• Turn OFF your model and don’t use it if it runs erratically. Please do not use your model again until the problem has been solved.
• Keep the wheels of the model off the ground when checking the operation of the radio equipment.
• When learning to operate your model, go to an area that has no obstacles that can damage your model.
• Before and after each use, check all the screws on the model.
• To maintain the best performance, check that all moving parts move freely.
Take all necessary precautions before, during and after using your model. You are responsible for the safe assembly, maintenance and use of your
model.
In case of any questions, contact your local reseller or contact Team Corally support for assistance.
• Follow and respect the manufacturer’s instructions for use
• It is important to check that your ESC is set to LIPO if you are using a LIPO battery. Failure to comply with this instruction will result in increased battery dis-
charge and may cause fire and damage to persons and property.
• When charging or storing LiPo batteries always use LiPo Safety Bag (Flame retardant).
• Always respect the maximum rate and voltage specified by the battery manufacturer.
• Charge the LIPO battery outdoors or in a ventilated area away from flammable objects and surfaces.
• NEVER leave your LiPo battery unattended while charging.
• If the battery swells during charging, stop charging immediately and disconnect the battery from the charger. Leave the battery outside for a few hours and
observe. Then recycle the battery according to the instructions of your country/region. Never dispose of a LIPO battery with domestic waste.
• Before recycling your defective battery, it must be neutralized. Take a plastic container, fill it with water and add a lot of salt until the water becomes opaque.
Place the LIPO battery in the water and leave for 24 hours. Check with a voltmeter that the voltage is 0.0V. Then recycle the battery according to local regula-
tions.
• Never charge a damaged or inflated battery.
• Never discharge the battery cells below 3.2V.
• Always use the appropriate balancer/charger when charging your LiPo battery pack.
• When the battery is empty, check the temperature of the battery before charging it.
If the battery is very hot, wait until it cools before charging it.
• Never charge a very hot battery as this may cause an explosion or fire.
• When the battery is empty, recharge it immediately. Do not store an empty battery, the battery will continue to discharge, it will fall below the minimum voltage
and become unusable.
USE PRECAUTIONS • QUICK START GUIDE
LIPO BATTERY SAFETY PRECAUTIONS • QUICK START GUIDE

4
If material defects or manufacturing faults should arise in a product distributed or manufactured by Team Corally / JSP Group Intl bvba, and
purchased by a consumer, we Team Corally / JSP Group Intl bvba acknowledge the obligation to correct those faults or defects within the limita-
tions described below. This manufacturers warranty is in addition to, and does not affect, the legal or contractual rights of the consumer which
arise from the purchase of such products. Team Corally / JSP Group Intl bvba guarantees the consumer that its products are free from material,
manufacturing, and construction faults, as determined by the general state of knowledge and technology valid at the time of manufacturing. The
fault responsible for causing the damage must be proven to have been present in the product at this time. Claims for compensation arising from
consequential damage or product liability will not be considered valid unless they fall under peremptory provisions of the law. If material defects
or manufacturing faults should arise in a product distributed or manufactured by Team Corally / JSP Group Intl bvba in the European community
(EC) and purchased by a consumer, then Team Corally / JSP Group Intl bvba undertakes to correct those defects within the limitations described
below. This manufacturer’s declaration does not affect the consumer’s legal or contractual rights regarding defects arising from the purchase
contract between the consumer and the dealer or reseller. Extend of the Warranty
If a claim is made under warranty, we take at our discretion to repair or replace the defective goods. We will not consider supplementary claims,
especially for reimbursement of costs relating to the defect (e;g. installation / removal costs) and compensation for consequent damages unless
they are allowed by statute. This does not affect claims on legal regulations, especially according to the product liability law.
Provisions of the Warranty
The purchaser is required to make the warranty claim in writing, and must enclose original proof of purchase (e.g. invoice, receipt, delivery note)
and the appropriate warranty card. He must send the defective goods to our local representatives or directly to Team Corally / JSP Group Intl
bvba, Geelseweg 80, 2250 Olen, Belgium at his own risk and cost.
The purchaser should state the material defect or manufacturing fault, or symptoms of the fault, as accurate as possible, so that we can check if
our warranty obligation is applicable. The goods are transported from the consumer to us, and from us to the consumer, entirely at the risk and
cost of the consumer.
Invalidation of the Warranty
The consumer cannot make a claim under warranty when the fault is affecting the use of the product arising from natural wear, competition
use, or improper use (including installation) or external forces. The consumer’s adherence to the building and operating instructions relevant to
the model, including the installation, operation, use of, and maintenance of, model-related components cannot be supervised by Team Corally /
JSP Group Intl bvba. Therefore Team Corally / JSP Group Intl bvba is in no way liable for loss, damage, or costs resulting from improper use, or
behaviour in any way connected to the above described provisions. Unless otherwise required by law, Team Corally / JSP Group Intl bvba is in no
way whatever liable to provide compensation for damages arising from the improper use of the model (including personal injury, death, damage
to buildings, loss of turnover, loss of business, or interruption of business, or any other direct, or indirectly caused, consequential damage).
Duration of Validity
The claim period is 24 months from the date of purchase of the product by the consumer from a dealer in the European Community (EC) counted
from the date of purchase. The claim period is 12 months from the date of purchase of the product by the consumer from a dealer outside the
European Community (EC) counted from the date of purchase. If a defect arises after the end of the claim period, or if evidence or documents
required according to this declaration in order to make the claim valid are not presented until after this period, then the consumer forfeits any
rights or claims from this declaration. The guarantee period is not prolonged by the granting of any claims within the framework of this warranty,
especially in the case of repair or replacement. The guarantee period also does not restart in such cases.
Warranty Expiration
If we do not acknowledge the validity of a claim based on this declaration within the claim period, all claims based on this declaration will expire
after six months from the time of registering the claim; however this cannot occur prior to the end of the claim period.
For any support, contact us at support.corally.com
Téléchargez le guide de démarrage rapide en Français sur le site • Laden Sie die Kurzanleitung auf Deutsch von der Website herunter • Download de Nederlandse snelstartgids op www.corally.com
WARRANTY • QUICK START GUIDE

5
Instruction manual
Colour version available on www.corally.com
not included in the kit
1/8 Scale Brushless Powered
XTREME BUGGY
2.4gHz 2-Channel
Digital Remote Control System
Length - Longueur - Länge - Lengte : . . . . . . . . . . . . . . . . . . . . . . . . . . . . . . . . . . . . . . . . . . . . . . . . . . . . . 495 mm
Width - Largeur - Breite - Breedte : . . . . . . . . . . . . . . . . . . . . . . . . . . . . . . . . . . . . . . . . . . . . . . . . . . . . . . 308 mm
Height Hauteur - Höhe- Hoogte : . . . . . . . . . . . . . . . . . . . . . . . . . . . . . . . . . . . . . . . . . . . . . . . . . . . . . . . 175 mm
Wheelbase - Empattement - Radstand - Wielbasis . . . . . . . . . . . . . . . . . . . . . . . . . . . . . . . . . . . . . . . . . . . . . . . 327 mm
Weight (no battery) - Poids (sans batterie) - Gewicht (ohne Batterie) - Gewicht (zonder batterij). . . . . . . . . . . . . . . . . . . . . . . . . . . . . 3650 g
BATTERIES AND CHARGER - BATTERIES ET CHARGEUR - BATTERIEN UND LADEGERÄT - BATTERIJEN EN LADER
• LiPo Power Pack 4S min. capacity 5000mAh • XT90 connector
• LiPo Power Pack 6S min. capacity 4500mAh • XT90 connector
• 4 pcs AA-Size Dry Cells for the Transmitter -
4 piles taille AA - 4 AA-Batterien - 4 AA-batterijen
• Battery Charger (LiPo) - Chargeur LiPo - LiPo-Ladegerät - LiPo-Lader
FOR MAINTENANCE - Pour l’entretien - Für Wartung - Voor onderhoud
• Hex Drivers 1.5 - 2.0 - 3.0mm-
Tournevis Hexagonal - Inbusschlüssel - Zeskantschroevendraaiers
• Nut Drivers : 5.5mm (M3 Nut) - 7.0mm (M4 Nut)
Tournevis à douille - Mutternschlüssel - Moeren aandrijvers
• Wheel Wrench 24mm
Clé de roue - Radschlüssel - Wielmoersleutel
• Silicone Oil for Differentials ans Shocks
Huile silicone - Silikonöl - Siliconenolie
• Threadlock to secure screws
Frein-filet - Schraubensicherungslack - Threadlock
• Brush and Cloth for cleaning
Brosse et chiffon - Pinsel und Lappen - Penseel en doek
KURON 825
• 4-Pole
• 2050KV
• 4-6S Sensorless Brushless Motor
CR-HV 7225
• HV Digital Servo
• Torque 25kg/cm
• Metal Gears
TOROX 185 Sensorless ESC
• Waterproof
• 150A Cont. Current
• 2-6S LiPo
• HV BEC
• Programmable
#C-16250
Team Corally - RC Car Tool Set
Tool Bag with 16 pcs Tools
*Votre meilleur compagnon pour l’entretien et la réparation de votre voiture - *Ihr bester Begleiter für die Wartung und Reparatur Ihres Autos- *Je beste partner voor het onderhouden en herstellen de auto
*Your best companion
for maintaining and
repairing your car
TECHNICAL SPECIFICATIONS - SPÉCIFICATIONS TECHNIQUES - TECHNISCHE DATEN - TECHNISCHE SPECIFICATIES
KIT CONTENT (Depends on the selected colour) - CONTENU DU KIT - KIT-INHALT - INHOUD VAN DE KIT
REQUIRED FOR OPERATION (Not included)
NECESSAIRE AU FONCTIONNEMENT (Non inclus) - FÜR DEN BETRIEB ERFORDERLICH (nicht im Lieferumfang enthalten) - NODIG VOOR BEDIENING (Niet inbegrepen)

6
Steering Servo
Speed Controller (ESC)
Brushless Motor
Battery compartment
Receiver Box
Steering Link
Steering Block
Suspension Arm
Rear Suspension Arm
Rear Upright
Camber Link
Wheel Axle
Rear Shock Absorber
Front Shock Absorber
Centre Differential
Front Differential
Rear Differential
CAR COMPONENTS • QUICK START GUIDE

7
READ THE INSTRUCTIONS
MAKE SURE THAT ALL SCREWS AND NUTS ARE
TIGHTENED PROPERLY.
CHARGE THE BATTERY
INSTALL THE FULLY CHARGED BATTERY
WHEN FINISHING
CHECK THE FUNCTIONS CHECK THE RADIO SYSTEM RANGE
Move away from the max. distance you will drive the vehicle.
Check that the vehicle responds properly to the controls.
If not, reduce the distance or change the driving location.
DRIVE SLOWLY TO BEGIN
CHARGER
BATTERY
BATTERY
BATTERY
OFF
CONNECT THE BATTERY TO THE ESC
SWITCH ON THE ESC
CLEAN AND MAINTAIN YOUR VEHICLE
CHARGER
BATTERY
ON
OFF
CHARGE THE BATTERY
INSTALL 4x AA BATTERY - 1.5V
TURN ON THE TRANSMITTER (Always First)
ON
• Lisez les instructions
• Lesen Sie die Anleitung
• Lees de instructies
• Vérifiez le serrage des vis et écrous
• Überprüfen Sie die Schrauben und Muttern auf festen Sitz
• Controleer de vastheid van de schroeven en moeren
• Roulez lentement pour débuter
• Fahren Sie zu Beginn langsam
• Langzaam rijden om te beginnen
• Nettoyez et entretenez votre voiture !
• Reinigen und pflegen Sie Ihr Auto!
• Reinig en onderhoud uw auto!
• Après, débranchez la batterie et rechargez-la
• Trennen Sie danach den Akku ab und laden Sie ihn auf
• Maak daarna de accu los en laad deze op
• Connectez la batterie au variateur et allumez-le
• Schließen Sie den Akku an den Regler an und schalten Sie
ihn ein
• Sluit de accu aan op de regelaar en schakel deze in
• Installez la batterie chargée
• Setzen Sie den geladenen Akku ein
• Installeer de opgeladen batterij
• Contrôlez les fonctions
• Kontrollieren Sie die Funktionen
• Controle van de functies
• Allumez l’émetteur (Toujours en premier)
• Schalten Sie den Sender ein (Immer zuerst)
• Zet de zender aan (altijd eerst)
• Contrôlez la portée de l’émetteur
• Überprüfen Sie die Reichweite des Senders
• Controleer het bereik van de zender
• Chargez la batterie
• Laden Sie den Akku
• De batterij opladen
• Installez les piles dans l’émetteur
• Setzen Sie die Batterien in den Sender ein
• Plaats de batterijen in de zender
QUICK START GUIDE • QUICK START GUIDE

8
C-72711 - Pinion 11 Teeth
C-72712 - Pinion 12 Teeth
C-72713 - Pinion 13 Teeth
C-72714 - Pinion 14 Teeth
C-72715 - Pinion 15 Teeth
C-72716 - Pinion 16 Teeth
C-72717 - Pinion 17 Teeth
M1.0 PINION - Hardened Steel - for 5mm diameter shaft
Note: The speed indicated in the table is a theoretical speed for information purposes. The real speed varies according to the type of
terrain, electronic equipment, atmospheric conditions and other driving parameters.
Note: La vitesse indiquée dans le tableau est une vitesse théorique à titre indicatif. La vitesse réelle varie en fonction du type de terrain, de l’équipement
électronique, des conditions atmosphériques et d’autres paramètres de conduite.
Bemerkung: Die in der Tabelle angegebene Geschwindigkeit ist eine theoretische Geschwindigkeit, die nur als Referenz dient. Die tatsächliche Geschwin-
digkeit hängt von der Art des Geländes, der elektronischen Ausrüstung, den Wetterbedingungen und anderen Fahrparametern ab.
Nota: De in de tabel aangegeven snelheid is een theoretische snelheid, uitsluitend ter referentie. De werkelijke snelheid varieert afhankelijk van het soort
terrein, de elektronische apparatuur, de weersomstandigheden en andere rijparameters.
!
MOTOR PINION MOD1.0 - PIGNON MOTEUR MOD1.0 - MOTORRITZEL MOD1.0 - MOTOR PINION MOD1.0
• High-performance pinions gear, manufactured from special steel for toughness and durability with precise tolerances and
assures unparalleled concentricity and vibration-free operation. Each pinion is marked with the tooth number for easy and quick
identification. Fits all cars with MOD1 gears (1/8 Scale)
• Pignons Haute Performance, fabriqué en acier spécial avec des tolérances précises pour garantir solidité, longévité et
concentricité et fonctionnement sans vibrations. Chaque pignon est marqué du nombre de dents pour une identification facile et
rapide. Convient à toutes les voitures avec une transmission MOD1 (Echelle 1/8)
• Hochleistungsritzel, hergestellt aus Spezialstahl mit präzisen Toleranzen, um Festigkeit, Langlebigkeit und Rundlauf sowie einen
vibrationsfreien Betrieb zu gewährleisten. Jedes Ritzel ist mit der Anzahl der Zähne gekennzeichnet, damit es schnell und einfach
identifiziert werden kann. Passend für alle Fahrzeuge mit MOD1-Getriebe (Maßstab 1/8)
• Tandwielen met hoge performance, geproduceerd van speciaal staal met nauwkeurige toleranties om sterkte, duurzaamheid,
concentriciteit en trillingsvrije werking te garanderen. Elk tandwiel is gemarkeerd met het aantal tanden voor snelle en eenvoudige
identificatie. Past op alle auto’s met MOD1-transmissie (schaal 1/8)
+TORQUE +SPEED
OK Factory fitted Usable but not recommended Not recommended, at your own risk
SPEED GEAR CHART - Tableau de vitesse - Drehzahlgangdiagramm - Versnellingstabel
With Spur Gear 46T - Gear Ratio 3.31
Avec couronne 46D - Rapport de démultiplication 3.31 - Mit Hauptzahnrad 46Z - Gear Ratio 3.31- Met tandwiel 46T - Gear Ratio 3.31
- You can choose a different pinion size to change the speed or acceleration. The car is equipped with a 13-tooth pinion from the factory, which is the best ratio
of power to speed and battery life. Adapt the pinion to the type of terrain (off-road = small pinion, speed = large pinion). If the motor gets too hot or the control-
ler shuts down (safety), the motor makes too much effort, reduce the pinion size.
- Vous pouvez choisir un pignon de taille différente pour modifier la vitesse ou l’accélération. La voiture est équipée du pignon 13 dents en usine ce qui est le
meilleur rapport puissance/vitesse et autonomie. Adaptez le pignon en fonction du type de terrain (tout-terrain = petit pignon, vitesse = grand pignon). Si le
moteur chauffe trop ou le variateur se coupe (sécurité), le moteur fait trop d’effort, réduisez la taille du pignon.
- Sie können ein Ritzel unterschiedlicher Größe wählen, um die Geschwindigkeit oder die Beschleunigung zu verändern. Das Auto ist ab Werk mit einem Ritzel mit
13 Zähnen ausgestattet, was das beste Verhältnis von Leistung/Geschwindigkeit und Reichweite darstellt. Passen Sie das Ritzel an den jeweiligen Geländetyp
an (Gelände = kleines Ritzel, Geschwindigkeit = großes Ritzel). Wenn der Motor zu heiß wird oder der Regler sich abschaltet (Sicherheit), der Motor zu viel Kraft
aufbringt, reduzieren Sie die Größe des Ritzels.
- U kunt een andere tandwielmaat kiezen om de snelheid of versnelling te veranderen. De auto is in de fabriek uitgerust met een 13-tands tandwiel, de beste
verhouding tussen vermogen, snelheid en bereik. Pas het tandwiel aan het soort terrein aan (off-road = klein tandwiel, snelheid = groot tandwiel).
Als de motor te heet wordt of de regelaar uitschakelt (veiligheid), levert de motor te veel inspanning, verklein dan het tandwiel.
GEAR RATIO
Km/h Mph Km/h Mph Km/h Mph Km/h Mph Km/h Mph Km/h Mph Km/h Mph Km/h Mph
Gear 11T Pinion 12T Pinion 13T Pinion 14T Pinion 15T Pinion 16T Pinion 17T Pinion 18T Pinion
46T 13,83 12,68 11,71 10,87 10,14 9,51 8,95 8,45
4S 58 36 63 39 69 43 74 46 79 49 84 52 90 56 95 59

9
PAPER STRIP 1x8cm
1. Loosen the screws.
Desserrez les vis.
Lösen Sie die Schrauben.
Draai de schroeven los.
2. Insert the paper strip.
Insérez la bande de papier.
Legen Sie den Papierstreifen ein.
Plaats de papierstrook.
3. Push the motor against the spur gear.
Poussez le moteur contre la couronne dentée.
Schieben Sie den Motor gegen das Zahnrad.
Duw de motor tegen het recht tandwiel.
4. Turn the spur gear to run the paper through the
teeth.
Stop when the paper is in the middle.
Make sure that the motor pinion is against the
spur gear.
Tournez la couronne dentée pour faire passer le
papier entre les dents.
Arrêtez lorsque le papier est au milieu.
Assurez-vous que le pignon du moteur est contre la
couronne dentée.
Drehen Sie das Hauptzahnrad, um das Papier durch
die Zähne zu führen.
Halten Sie an, wenn sich das Papier in der Mitte
befindet.
Achten Sie darauf, dass das Motorritzel am Haupt-
zahnrad anliegt.
Draai aan het rechte tandwiel om het papier door de
tanden te laten lopen.
Stop wanneer het papier in het midden is.
Zorg ervoor dat het motortandwiel tegen het rechte
tandwiel staat.
5. Maintain and tighten the fixing screws.
Maintenez et serrez les vis de fixation.
Halten Sie die Befestigungsschrauben fest und ziehen
Sie sie an.
De bevestigingsschroeven aanhouden en vastdraaien.
• If the gear mesh is not correct, you wear out the spur gear prematurely, the transmission will make noise, give unnecessary load on the motor (higher consumption, heating
of the transmission).
• Si l’espace entre le pignon et la couronne n’est pas correct, la couronne dentée s’use prématurément, la transmission fait du bruit et le moteur est inutilement sollicité
(consommation plus élevée, échauffement de la transmission).
• Wenn der Abstand zwischen Ritzel und Tellerrad nicht stimmt, verschleißt das Zahnrad vorzeitig, das Getriebe macht Geräusche und der Motor wird unnötig belastet (höherer
Verbrauch, Erwärmung des Getriebes).
• Als de afstand tussen het tandwiel en de recht tandwiel niet correct is, slijt de recht tandwiel voortijdig, maakt de transmissie lawaai en wordt de motor onnodig belast
(hoger verbruik, verhitting van de transmissie).
GEAR MESH ADJUSTMENT - AJUSTEMENT DE L’ENGRENAGE - GETRIEBEVERSTELLUNG - TANDWIELAFSTELLING

10
SILICONE
OIL
50%
WAIT TIGHTEN TIGHTEN
FULLY
5min
FILL MOVE
UP
3-4x
SLOWLY
MOVE
UP
FRONT REAR
SILICONE OIL SPRING TENSION SILICONE OIL SPRING TENSION SHOCK PISTON
TRACK USE 450CPS 4mm 400CPS 0mm 4 Holes
OFF-ROAD 600CPS 4mm 500CPS 0mm 4 Holes
FACTORY 500CPS 500CPS 4 Holes
.www. corally.com/Chemicals/Silicone-Oils/
• Fill the shock with silicone
oil.
• Remplissez l’amortisseur
avec de l’huile de silicone.
• Füllen Sie den Dämpfer mit
Silikonöl.
• Vul de schokdemper met
siliconenolie.
• Beweeg de zuiger op en
neer (3-4x) om de luchtbel-
len te laten ontsnappen.
• Trek de Schokas naar
beneden en wacht tot de
luchtbellen naar de opper-
vlakte stijgen.
• Schroef de dop van de
schokdemper op 50%.
• Beweeg de piston langzaam
in de bovenste positie, de
overtollige olie zal eruit
stromen.
• Draai nu de dop helemaal
vast, maar niet te vast,
anders wordt het membraan
vervormd.
• Move the piston
up&down
(3-4x) to release the air
bubbles in the silicone oil.
• Bewegen Sie den Kolben
nach oben&unten (3-4x), um
die Luftblasen abzulassen.
• Ziehen Sie die Schockwelle
nach unten und warten Sie,
bis die Blasen an die Ober-
fläche steigen.
• Schrauben Sie die Stoß-
dämpferkappe zu 50 % ein.
• Bewegen Sie den Kolben
vorsichtig in die obere
Position, das überschüssige
Öl fließt dann heraus.
• Ziehen Sie nun die Kappe
vollständig, aber nicht zu
fest an, da sonst die Memb-
ran verformt wird.
• Déplacez le piston de haut
en bas (3-4x) pour libérer
les bulles d’air.
• Tirez la tige d’amortisseur
vers le bas et attendez que
les bulles remontent à la
surface.
• Vissez le bouchon d’amor-
tisseur à 50%
• Déplacez doucement
le piston en position
haute, l’excédent d’huile
s’écoulera.
• Maintenant, serrez le
bouchon à fond, mais pas
trop, sinon la membrane
sera déformée.
• Pull the Shock shaft down
and wait until the bubbles
rise to the surface.
• Screw in the shock absorber
cap at 50%.
• Gently move the piston
in upper position, the oil
excess will flow out.
• Now tighten the cap fully but
not too much otherwise the
membrane will be deformed.
• It may be necessary to replace the silicone oil in the shock absorbers every 40 runs (depends on how you drive and the type of terrain you drive on).
• Il peut être nécessaire de remplacer l’huile silicone des amortisseurs toutes les 40 courses (cela dépend de votre conduite et du type de terrain sur lequel vous roulez).
• Es kann notwendig sein, das Silikonöl in den Stoßdämpfern alle 40 Fahrten zu wechseln (abhängig von Ihrer Fahrweise und dem Gelände, auf dem Sie fahren).
• Het kan nodig zijn de siliconenolie in de schokdempers om de 40 ritten te vervangen (afhankelijk van uw rijstijl en het soort terrein waarop u rijdt).
ALWAYS USE SILICONE OIL, NEVER USE ANY OTHER TYPES OF OIL • Toujours utiliser de l’huile de silicone pure, jamais d’autres types d’huile • Verwenden Sie immer
Silikonöl, niemals andere Öle • Gebruik altijd siliconenolie, gebruik nooit andere soorten olie
SHOCK ABSORBER MAINTENANCE -
ENTRETIEN DES AMORTISSEURS - STOSSDÄMPFERWARTUNG - ONDERHOUD SCHOKDEMPERS

11
OPTION
APPLY
SILICONE OIL
C-00180-768 Shock Piston (8pcs)
Shock Piston - 6 Holes 1.4
Shock Piston - 8 Holes 1.2
(Factory installed)
C-00180-133
C-00180-189
C-00180-768
C-00180-190
C-00180-192
C-00180-136
C-00180-138
C-00180-029
C-00180-770
C-00180-149
C-00180-078
C-00180-188
C-00180-188
C-00180-191
C-00180-165
(Front - Avant - Vorne - Voor)
C-00180-135
(Front - Avant - Vorne - Voor)
- Appliquez de l’huile silicone
- Silikonöl auftragen
- Breng siliconenolie aan
- Place all small parts on a screwdriver
(Ø3mm) and push them into the shock body.
All parts will be properly aligned.
- Placez toutes les petites pièces sur un tournevis
(Ø3mm) et poussez-les dans le corps de l’amor-
tisseur. Toutes les pièces seront correctement
alignées.
- Setzen Sie alle Kleinteile auf einen Schraubendre-
her (Ø3mm) und drücken Sie sie in den Dämpfer-
körper. Alle Teile werden richtig ausgerichtet.
- Plaats alle kleine onderdelen op een schroeven-
draaier (Ø3mm) en duw ze in de behuizing van
de schokdemper. Alle onderdelen zullen goed
uitgelijnd zijn.
C-00180-290 (Front - Avant - Vorne - Voor)
C-00180-164
(Rear - Arrière - Ninten - Achter)
C-00180-137
(Rear - Arrière - Ninten - Achter)
C-00180-287 (Rear - Arrière - Ninten - Achter)
C-31001-25
• Do not overtighten the Shock Cap to prevent deformation of the silicone Shock Bladder.
• Ne serrez pas trop le capuchon de l’amortisseur pour éviter la déformation de la membrane en silicone.
• Ziehen Sie die Dämpferabdeckung nicht zu fest an, um eine Verformung der Silikonmembran zu vermeiden.
• Draai de schokkap niet te strak aan om vervorming van het siliconenmembraan te voorkomen.
SHOCK ABSORBER - AMORTISSEUR - STOSSDÄMPFER - SCHOKDEMPER
REF TYPE POSI-
TION
THICK-
NESS LENGTH
C-00180-289 Shock Spring SOFT FRONT 1.4mm L: 84-86mm
C-00180-290 Shock Spring MEDIUM FRONT 1.6mm L: 84-86mm
C-00180-291 Shock Spring HARD FRONT 1.8mm L: 84-86mm
C-00180-286 Shock Spring SOFT REAR 1.4mm L: 95-97mm
C-00180-287 Shock Spring MEDIUM REAR 1.6mm L: 95-97mm
C-00180-288 Shock Spring HARD REAR 1.8mm L: 95-97mm

12
SILICONE OIL
75%
CAPACITY MAX.
FRONT DIFF CENTRE DIFF REAR DIFF
TRACK USE 7500CPS 15.000CPS 5000CPS
OFF-ROAD 10.000CPS 30.000CPS 7500CPS
FACTORY 20.000CPS 50.000CPS 10.000CPS
• Use the correct grade of silicone oil according to the operation. Use only Silicone Oil, never
use any other types of oil.
• Utiliser la bonne qualité d’huile de silicone en fonction de l’opération. N’utilisez que de
l’huile de silicone, jamais d’autres types d’huile.
• Verwenden Sie die richtige Silikonölsorte für den jeweiligen Einsatz. Verwenden Sie nur
Silikonöl, niemals andere Ölsorten.
•Gebruik de juiste soort siliconenolie, afhankelijk van de werking. Gebruik alleen siliconenolie,
gebruik nooit andere soorten olie.
4
4
• It may be necessary to replace the silicone oil every 50 runs (depends on how you drive and the type of terrain you drive on).
To dismount and maintain the differentials, follow the steps on these pages. To reassemble the differentials, repeat the steps in reverse.
• Il peut être nécessaire de remplacer l’huile silicone toutes les 50 courses (cela dépend de votre conduite et du type de terrain sur lequel vous roulez).
Pour démonter et entretenir les différentiels, suivez les étapes sur ces pages. Pour remonter les différentiels, répétez les étapes en sens inverse.
• Es kann notwendig sein, das Silikonöl alle 50 Fahrten zu wechseln (abhängig von Ihrer Fahrweise und dem Gelände, auf dem Sie fahren).
Um die Differentiale zu zerlegen und zu warten, befolgen Sie die Schritte auf diesen Seiten. Um die Differenziale wieder zusammenzusetzen, wiederholen Sie die Schritte in um-
gekehrter Reihenfolge.
• Het kan nodig zijn de siliconenolie om de 50 ritten te vervangen (afhankelijk van uw rijstijl en het soort terrein waarop u rijdt).
Volg de stappen op deze pagina’s om de differentiëlen te verwijderen en te onderhouden. Om de differentiëlen weer in elkaar te zetten, herhaalt u de stappen in omgekeerde
volgorde.
FRONT DIFFERENTIAL - DIFFÉRENTIEL AVANT - VORDERACHSDIFFERENTIAL - VOORSTE DIFFERENTIEEL
DIFFERENTIAL MAINTENANCE - ENTRETIEN DU DIFFÉRENTIEL - DIFFERENZIALWARTUNG - DIFFERENTIEEL ONDERHOUD

13
4
4
CENTRE DIFFERENTIAL - DIFFÉRENTIEL CENTRAL - MITTELDIFFERENTIAL - MIDDELSTE DIFFERENTIEELENTIEEL
REAR DIFFERENTIAL - DIFFÉRENTIEL ARRIÈRE - HINTERES DIFFERENTIAL - ACHTERSTE DIFFERENTIEEL
DIFFERENTIAL MAINTENANCE - ENTRETIEN DU DIFFÉRENTIEL - DIFFERENZIALWARTUNG - DIFFERENTIEEL ONDERHOUD

14
C-00180-410
Xtreme Diff Case - 30mm - FR / RE - 1 pc
Aluminium 7075 Hard AnodisedAluminium 7075 Hard Anodised
Made in ItalyMade in Italy
For FRONTFor FRONT
or REARor REAR
OPTION
C-00180-153-X
C-00180-153-X
C-00180-178
C-00180-182
C-00180-182
C-00180-205
C-00180-205
C-00180-179 (set)
C-00180-183
C-00180-184
C-00180-098
C-3611-3-08-16-05
C-3611-3-08-16-05
C-3002-30-12 (4pcs)
C-00180-154-X
C-3611-3-08-16-05 C-00180-205
C-00180-091
C-00180-183-1
C-00180-183-1
C-00180-182
C-00180-686
C-00180-684
C-00180-154-X
C-00180-182
C-00180-205
C-00180-686
C-3002-30-10 (x4)
C-3002-30-10 (x4)
C-3611-3-08-16-05
C-00180-179 (set)
C-00180-685
Centre Diff Assembly - Alu /
Steel - 46T Main Gear - 1 set
FRONT & REAR DIFFERENTIAL - DIFFÉRENTIEL AV & AR - DIFFERENTIAL VORNE UND HINTEN - VOOR & ACHTER DIFFERENTIEEL
CENTRE DIFFERENTIAL - DIFFÉRENTIEL CENTRAL - ZENTRALDIFFERENTIAL - MIDDENDIFFERENTIEEL

15
C-00180-854
Gearbox Case Set
Fit FRONT or REAR
OPTION
Aluminium 7075Aluminium 7075
Hard AnodisedHard Anodised
C-00180-117
C-00180-009-1
C-00180-123
C-00180-077
C-00180-329
C-00180-122
C-00180-150
C-00180-150
C-00180-360
C-3611-3-08-16-05 (x2)
C-00180-715
C-00180-966
C-00180-936
C-00180-532
C-00180-555-1
C-00180-1040
C-00180-935
C-00180-973
C-00180-977
C-00180-531
C-00180-220
C-00180-231
C-00180-089
C-00180-967
C-00180-811
C-00180-127
C-00180-149
C-00180-149
DIN913
M4x4
C-00180-207
HEX BUTTON HEAD SCREWS
DIN 7380 - STEEL - 10 PCS
M3x10mm
#C-3003-30-10
10
10
M3x12mm
#C-3003-30-12
12
12
12
12
20
20
12
M3x14mm
#C-3003-30-14
14
14
14
M3x16mm
#C-3003-30-16
16
16
M3x20mm
#C-3003-30-20
20
20
20
20
20
12
12
C-00180-149
C-00180-155-X
C-00180-322 (x2)
C-00180-156
C-00180-195
C-00180-032
C-00180-977
C-00180-973
C-00180-033 (set)
C-00180-033 (set)
C-00180-033 (set)
C-3611-3-08-16-05 (x2)
10
10
DIN913•M3x3
C-3003-25-18
C-3003-25-10 (x2)
DIN913•M3x3
M3x3
M3x3
M4x10
DIN 913 M5x5
C-3101-30 (x4)
C-3101-30 (x2)
C-3101-30 (x2)
10
C-00180-148 (x2)
C-00180-658
FRONT DRIVE TRAIN - TRAIN AVANT - VORDERRADANTRIEB - VOORSTE AANDRIJFLIJN

16
C-00180-854
Gearbox Case Set
Fit FRONT or REAR
OPTION
Aluminium 7075Aluminium 7075
Hard AnodisedHard Anodised
C-3004-40-04
C-3004-40-10
C-00180-033 (set)
C-00180-155-X
C-3004-50-05
C-3611-3-08-16-05
C-3611-3-08-16-05 (2x)
C-00180-061
C-00180-556-1
C-00180-170
C-00180-149
C-00180-089
C-00180-149
C-00180-293 C-00180-370-X
C-00180-369-1
C-00180-934
C-00180-531
C-00180-008
C-3101-30
C-3101-30 (4x)
C-3101-30
C-3101-40
C-00180-127
C-00180-714
C-00180-965
C-00180-965
C-00180-979
C-00180-975
C-00180-122
C-00180-329
C-00180-979
C-00180-975
C-00180-322
C-00180-156
HEX BUTTON HEAD SCREWS
DIN 7380 - STEEL - 10 PCS
M2.5x10mm
#C-3003-25-10
10
10
10
M2.5x18mm
#C-3003-25-18
18
18
M3x14mm
#C-3003-30-14
14
14
14
14
14
12
20
14
14
10
10
20
20
M3x8mm
#C-3003-30-08
8
M3x16mm
#C-3003-30-16
16
16
16
16
16
14
14
8
M3x20mm
#C-3003-30-20
20
M3x25mm
#C-3003-30-25
25 25
25
20
20
M3x30mm
#C-3003-30-30
30
C-00180-220
DIN913•M3x3
C-00180-197
C-00180-231
C-00180-045
C-00180-812
C-00180-033
DIN913•M3x3 (x2)
C-3101-40
C-3101-40
C-3101-30
C-3101-30
C-00180-148
C-00180-148
C-00180-658
C-00180-658
C-00180-005-2 (set)
C-00180-005-2 (set)
C-00180-005-2 (set)
C-3101-40 (4)
C-3101-30
C-3101-30
C-00180-226-B
C-00180-535
C-31205 (x2)
C-3611-3-08-16-05
REAR DRIVE TRAIN - TRAIN ARRIÈRE - HINTERACHSANTRIEB - ACHTERSTE AANDRIJFLIJN

17
C-00180-685
Center Diff Assembly -
46T Main Gear - Xpert
Build - 100K Oil Filled
OPTION
Aluminium / SteelAluminium / Steel
C-3004-40-04
C-3104-40
C-3104-40
C-3101-40 (2x)
C-52022
Digital Servo -
CRHV-7225-MG
C-72713
M1.0 Pinion - 13 Teeth
KURON 825
C-54055
C-00180-615
C-00180-615
C-00180-176
C-00180-023
C-00180-177
C-00180-242
C-00180-242
C-00180-321-4
C-00180-997
C-00180-018
C-00180-997
C-00180-1020
C-00180-970
C-00180-1017 (set)
C-00180-969 (set)
C-00180-969 (set)
C-00180-149
C-00180-171
C-00180-076
C-00180-969 TOROX 185
C-54011
C-3213-30-5 (x4)
C-3213-30-5 (x4)
HEX FLAT HEAD SCREWS
DIN 7991 - STEEL - 10 PCS
M3x6mm
#C-3002-30-06
M3x8mm
#C-3002-30-08
M3x12mm
#C-3002-30-12
M3x14mm
#C-3002-30-14
6
8
12
14
14
8
8
8
8
8
8
8
8
8
10
10
10
10
10
35 35
10
14
11
14
18
8
6
6
6
6
10
10
12
HEX BUTTON HEAD SCREWS
DIN 7380 - STEEL - 10 PCS
M3x10mm
#C-3003-30-10
10
M3x8mm
#C-3003-30-08
8
M3x6mm
#C-3003-30-06
6
M3x12mm
#C-3003-30-12
12
M3x14mm
#C-3003-30-14
14
M3x18mm
#C-3003-30-18
18
M3x30mm
#C-3003-30-30
30
8
8
M4x12mm DIN7991
#C-3002-40-12
M4x14mm DIN7991
#C-3002-40-14
M4x16mm DIN7991
#C-3002-40-16
M3x10mm DIN7991
#C-3002-30-10
M3x12mm DIN7991
#C-3002-30-12
FRONT
REAR
CHASSIS - SCREWS DESCRIPTION
CHASSIS - CHÂSSIS - CHASSIS - CHASSIS

18
C-00180-266
Servo Saver Steering Arm - 7075 T6 - Hard
Anodised - Black - 1 pc
OPTION
C-00180-145 (set)
C-00180-145 (set)
C-00180-147 (x2)
C-00180-150 (x2)
C-00180-175-2
C-00180-206
C-00180-831
C-00180-216
C-00180-036 (set)
C-00180-036 (set)
C-3003-30-10 (x2)
C-3002-30-16 (x2)
C-3101-30 (x2)
C-3101-30
C-3611-3-06-10-03 (x2)
C-3611-3-06-10-03
C-3611-3-06-10-03
C-3611-3-06-10-03 (x2)
C-00180-191
SERVO-SAVER - SAUVE-SERVO

19
C-00180-005-2
Wing Mount - Adjustable -
Composite - 1 Set
C-00180-008
Hub - Rear - Composite - 1 pc
C-00180-009-1
HD Steering Block (1pc) - Pillow
Ball Cup (2pcs) - Composite
C-00180-032
Bumper - Front - Rear - Com-
posite - 1 set
C-00180-033
Gearbox Case Set - Composite
- 1 Set
C-00180-036
Steering Bellcrank - Parts A-B-C
- Composite - 1 Set
C-00180-055
Suspension Arm Shim - Com-
posite - 1 Set
C-00180-004-1
Battery Strap - Hook & Loop
- 2 pcs
C-00180-122
Pin 2.5x17mm - Steel - 10 pcs
C-00180-149
Ball - 5.8mm - Steel - 4 pcs
C-00180-171
Threaded Ball - 6mm - Steel -
2 pcs
C-00180-150
Ball Shouldered - 6.8mm - Steel
- 4 pcs
C-00180-123-1
Pivot Ball - Steel - 4 pcs
C-00180-127
Hinge Pin - Outer - Steel - 2 pcs
C-00180-145
Servo Saver Shaft w/ Nut -
Aluminium - 1 pc
C-00180-117
Pivot Ball Adjusting Nut - Alu-
minium - 4 pcs
C-00180-206
Steering Rack Bushing - Steel
- 2 pcs
C-00180-207
Steering Block Arms - Alumini-
um - 2 pcs
C-00180-216
Servo Saver Spring - 1 pc
C-00180-230
Wheel Nut - Aluminium -
Ribbed - 4 pcs
C-00180-018
Centre Diff Bulkhead - Compos-
ite - 1 Set
C-00180-023
Motor Mount Centre Diff Insert -
Composite - 1 pc
C-00180-176
Motor Bulkhead - Aluminium
- 1 pc
C-00180-177
Motor Mount - Aluminium - 1 pc
C-00180-242
Side Guards - Left-Right - Com-
posite - 1 Set
C-00180-147
Servo Saver Post - Steel - 2 pcs
C-00180-226-B
Wing - Composite - 1 pc
C-00180-195
Anti-Roll Bar - 2.6mm - Front
- 1 pc
C-00180-201
Anti-Roll Bar - 2.6mm - Rear
- 1 pc
C-00180-089
Anti-Roll Bar Ball Cups - Com-
posite - 4 pcs
C-00180-220
Ball End 5.8mm - for Anti Roll
Bar - Steel - 4 pcs
C-00180-148
Shock Screw - Steel - 4 pcs
C-00180-170
Ball - 6.8mm - Steel - 2 pcs
C-00180-231
Collar - for Anti-roll Bar - Alu-
minium - 1 pc
C-00180-175-2
Steering Rack - Aluminium 7075
- 1 pc
SPARE PARTS - PIÈCES DE RECHANGE • ERSATZTEILE • ONDERDELEN

20
C-00180-966
Chassis Brace - Buggy - Front -
Composite - 1 pc
C-00180-965
Chassis Brace - Buggy - Rear -
Composite - 1 pc
C-00180-1017
Motor Wire Holder - Composite
- 1 Set
C-00180-811
Shock Tower - Buggy - 4mm -
Aluminium - Front - 1 pc
C-00180-970
Chassis Brace - Buggy - Alu-
minium 3mm - 1 pc
C-00180-812
Shock Tower - Buggy - 4mm -
Aluminium - Rear - 1 pc
C-00180-969
Center Diff Plate - Pinion Gear
Cover - XB - Composite - 1 pc
C-00180-1020
Servo Steering Link - Compos-
ite - 1 pc
C-00180-715
Drive Shaft - Centre - Front-
85,5mm - Steel - 1 pc
C-00180-714
Drive Shaft - Centre - Rear -
110mm - Steel - 1 pc
C-00180-975
Suspension Arm Mount - XB -
Rear - 4mm Aluminum - 1 set
C-00180-977
Suspension Arm Mount Covers
- Front - Composite - 1 Set
C-00180-973
Suspension Arm Mount - XB -
Front - 4mm Aluminum - 1 set
C-00180-979
Suspension Arm Mount Covers
- Rear - Composite - 1 Set
C-00180-556-1
Camber Links Rear - 93mm -
Composite - 2 pcs
C-00180-555-1
Steering Links - 77mm - Com-
posite - 2 pcs
C-00180-997
Servo Mount - Receiver Box -
Composite - 1 Set
C-00180-967
Body Post - Composite - 2 pcs
C-00180-934
Suspension Arm - Lower - Rear
- Composite - 1 pc
C-00180-936
Suspension Arm - Upper - Front
- Composite - 1 pc
C-00180-935
Suspension Arm - Lower - Front
- Composite - 1 pc
C-00180-535
Wing Washer - Large - Com-
posite - 1 Pc
C-00180-831
Steering Rack - Dual Stiffener -
Aluminium - 1 Pc
C-00180-1040
HDA Susp. Arm Insert - Outer -
Spacer 2.5mm - Alum - Red - 2 pcs
C-00180-329
Wheel Hex Adapter - Wide RTR
- Aluminium - 2 pcs
C-00180-360
Universal Joint Drive Shaft -
Buggy - Front - 1 pc
C-00180-369-1
Dogbones - Short - Rear - Steel
- 2 pcs
C-00180-370-X
PRO Drive Axle - Buggy - Rear -
Swiss Spring Steel - 2 pcs
C-00180-372
Servo Arm - Steering - Alu -
1 pc
C-00180-615
Battery Tray - Large - Compos-
ite - 1 Pc
C-00180-531
HDA Suspension Arm Insert -
Inner - Aluminium - Red - 2 pcs
C-00180-322
Suspension Arm Pivot Pin - Low-
er Inner - Fr/Re - Steel - 2 pcs
C-00180-614
Body Clip Retainer w/ Body clip
- Black - 6 pcs
C-00180-321-4
Chassis - Buggy - Aluminium
3mm - Black - 1 pc
C-00180-293
Ball 6.8mm - Steel - 4 pcs
SPARE PARTS - PIÈCES DE RECHANGE • ERSATZTEILE • ONDERDELEN
This manual suits for next models
4
Table of contents
Other Corally Motorized Toy Car manuals

Corally
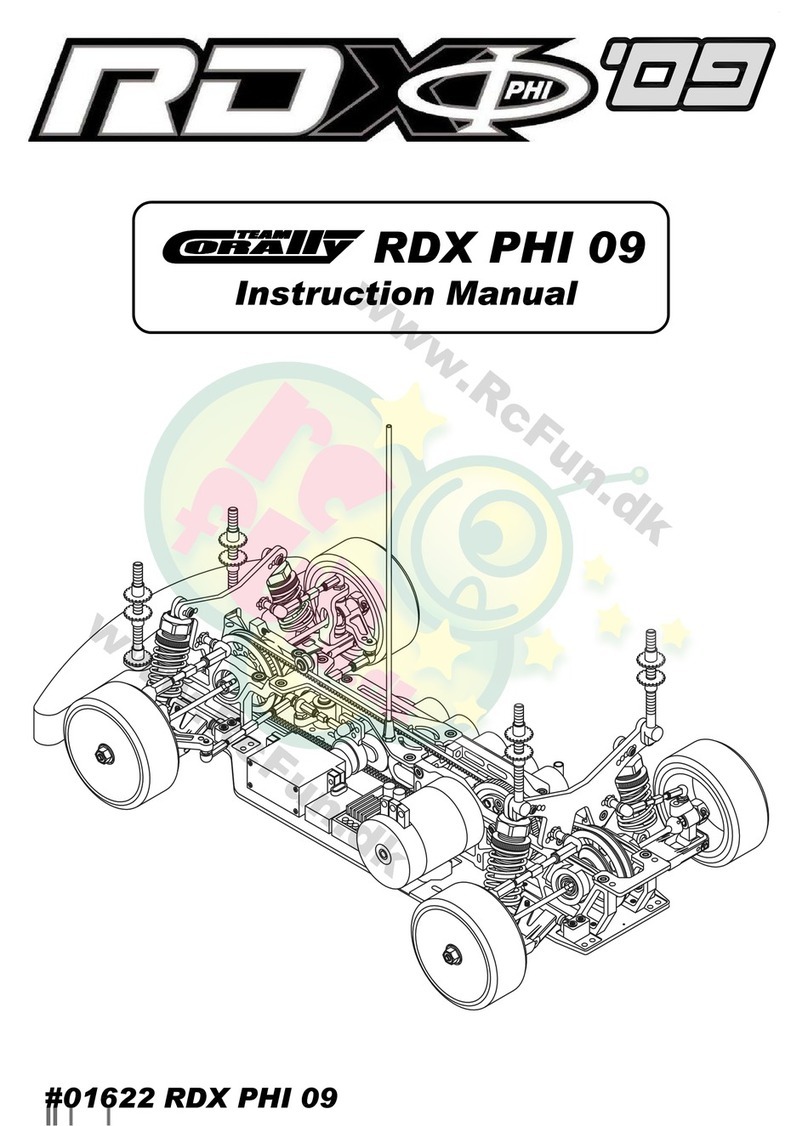
Corally 01622 User manual

Corally
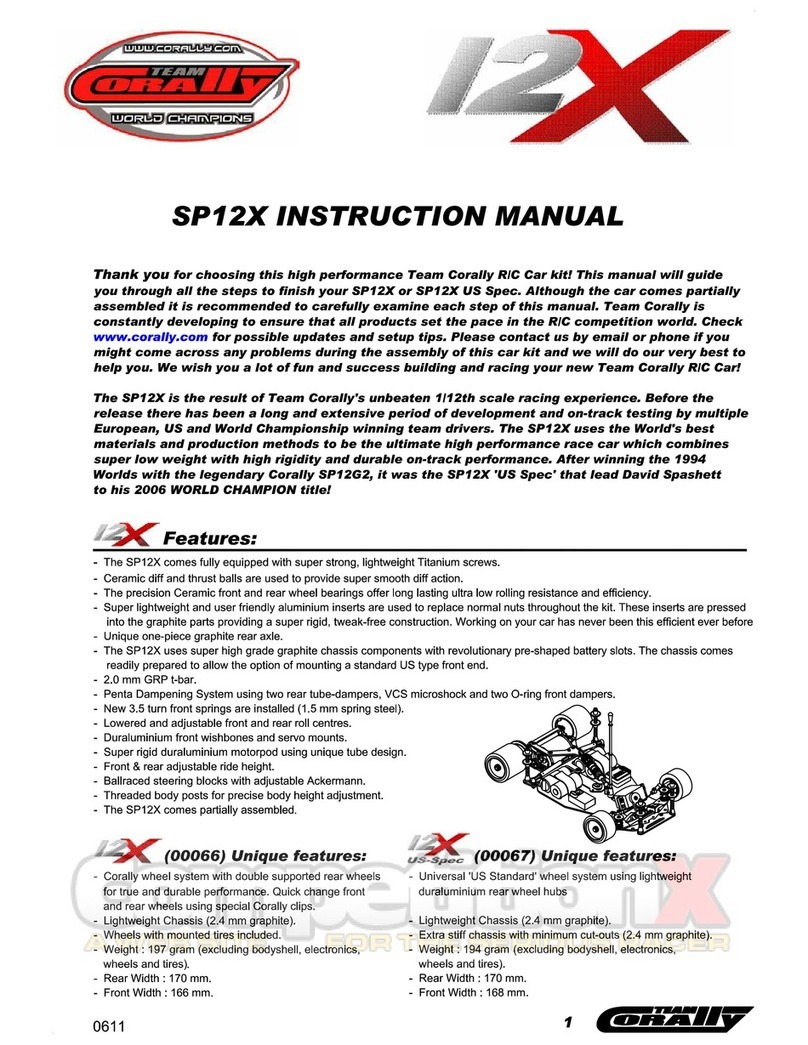
Corally SP12X User manual

Corally
Corally C-00170 KRONOS Setup guide

Corally
Corally Kronos XTR XP 6S Setup guide

Corally
Corally RADIX XP 6S Setup guide

Corally
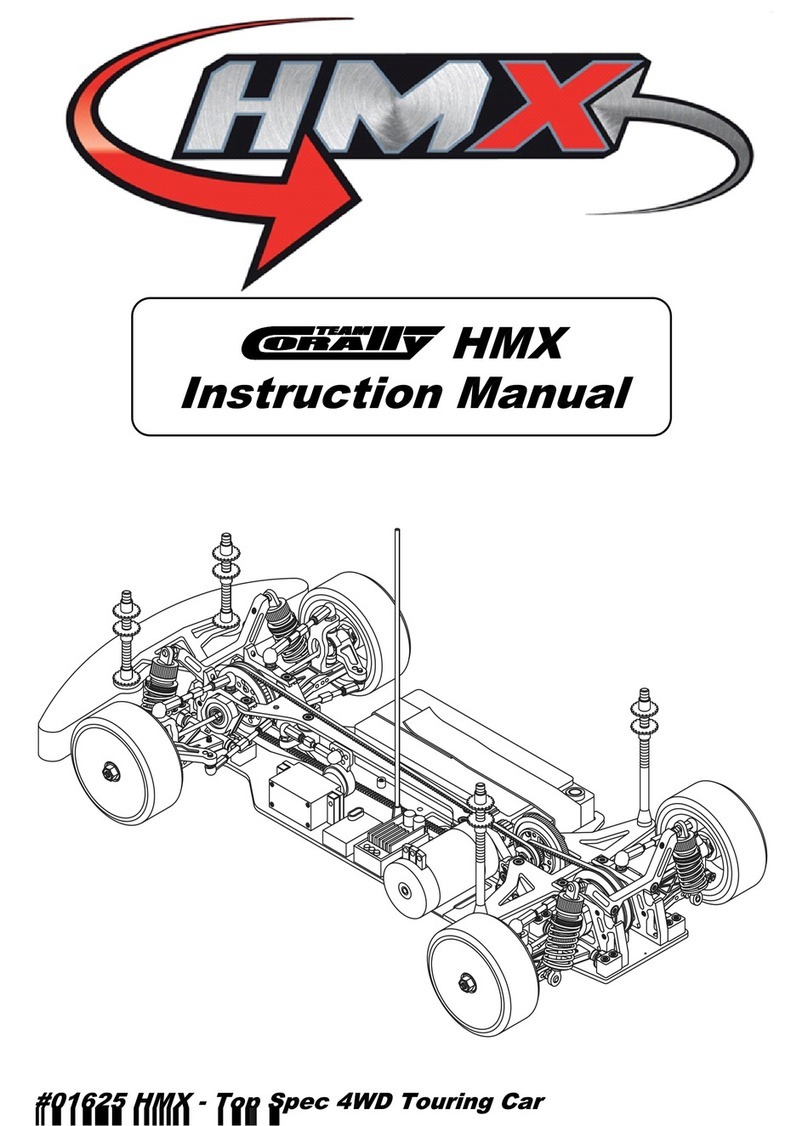
Corally HMX TC 01625 User manual

Corally
Corally MOXOD XP Setup guide

Corally
Corally Radix 6 XP 6S Setup guide

Corally
Corally RDX 00166 User manual

Corally
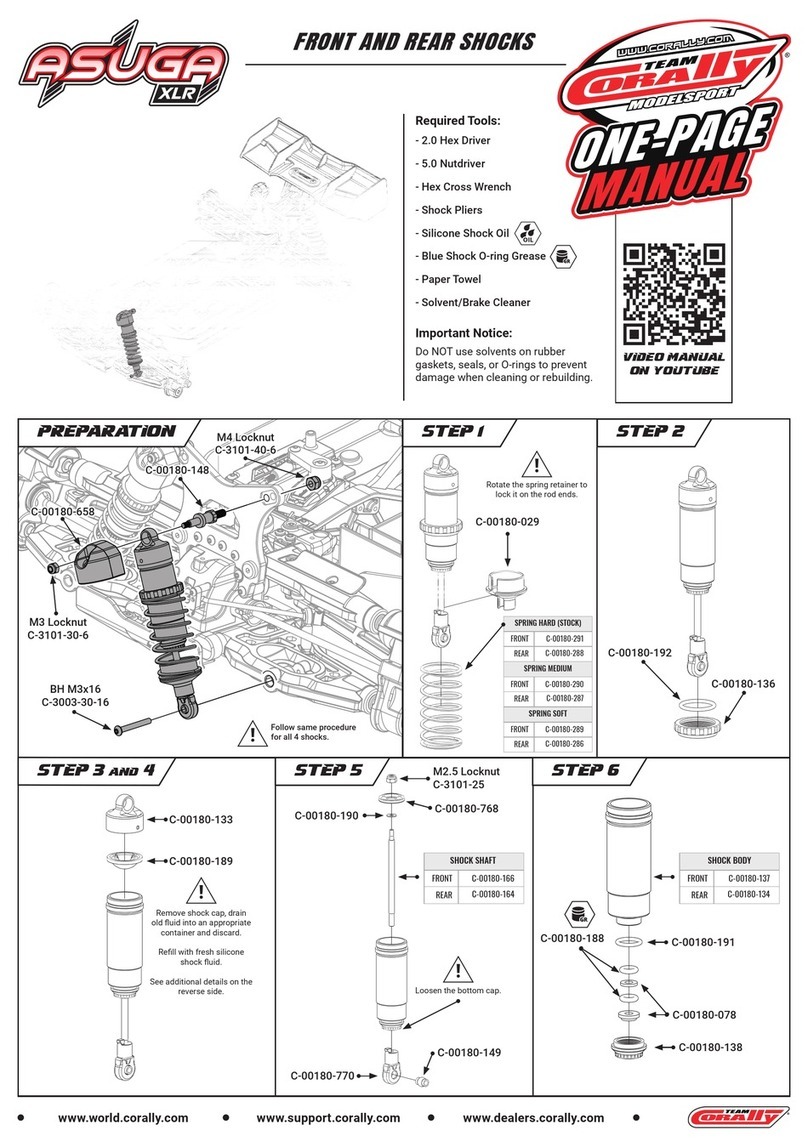
Corally COR00485 User manual