manuals.online logo
Brands
  1. Home
  2. •
  3. Brands
  4. •
  5. Corally
  6. •
  7. Motorized Toy Car
  8. •
  9. Corally C-00170 KRONOS Setup guide

Corally C-00170 KRONOS Setup guide

www.corally.com
C-00170_manual-V2
2
INTRODUCTION
READ FIRST
Thank you for purchasing a Team Corally car. This manual describes the instructions for using the model and the elec-
tronic components. You will also nd some tips on how to maintain your RC model so that you can enjoy it for years to
come. You have purchased one of the most efcient models available on the market that has been designed by a team
of professionals. You will also benet from the best after-sales support. All Team Corally models guarantee a high quality
of manufacture and performance that guarantees you a high satisfaction of use and services provided by the Team
Corally. Always take the time to read the instructions carefully in order to follow all the procedures to use your RC model
safely for you and for other people and property in the area. This will allow you to take full advantage of all the perfor-
mance of your RC model.
Please also check the website www. corally.com/Downloads/ to check if you have the latest version of this instruction manu-
al. (Version: see bottom cover of this manual)
If you have any questions about the model and its components, you can send a message to info@corally.com
We also recommend that you get help from an experienced model maker or your dealer.
You will nd all the references of the spare parts on the website www.corally.com
TERM OF USE
The user is responsible for the use of your model. The user assumes all risks associated with the use of the model. This
model is not intended for use by children under 14 years of age without the supervision of a responsible adult who is
familiar with the dangers of using a RC model. Team Corally / JSP Group Intl bvba, its manufacturers, distributors and
resellers cannot control the use and load of the model and therefore cannot be held responsible for any damage to
property and damage caused to persons resulting from the use of this product. You must accept these conditions and
consider yourself fully responsible for the use of this product. If not, do not use this product.
Due to the continuous development of our products, the exact specications of the kit may vary. If you have a problem
with your new kit, please contact the store where you purchased it, indicating the part number(s).
Team Corally / JSP Group Intl bvba reserves the right to change any specication without notice. All rights reserved.
This owner’s manual is designed for use with your vehicle and contains the instructions you will need to operate and
maintain your vehicle.
- We know you want to start driving immediately after unpacking, but it is very important that you take the time to read
this manual carefully, even if you are an experienced R/C driver.
- Read carefully and follow all instructions in this manual. Failure to comply with the instructions will be considered as
abuse and/or negligence which may result in the cancellation of the warranty.
- Your vehicle is designed to operate on uneven terrain. However, dust, sand, water and carpet bres can get into your
car’s workspaces and can damage your vehicle if they are not removed quickly. We do not guarantee any warranty on
your vehicle against damage caused by external elements such as sand, dirt or water. Users are responsible for the
maintenance and safe operation of this vehicle.
- This product is not a toy. It is not suitable for users under 14 years of age, unless they are supervised by adults.
- Never attempt to disassemble electronic components. These have been carefully calibrated at the factory.
- Only improve your car with parts made for your car. If you upgrade performance, replace the entire system (such as
the motor, inverter, battery, etc.) so that all components are properly adapted. Any malfunction resulting from a custom
modication will void your warranty.
- Before driving your vehicle, please read this manual in its entirety and examine your vehicle and radio control system
for any defects.
- For better performance, some adjustments may be necessary.
- This vehicle requires a battery (included in the car or in the packaging). Make sure the vehicle’s battery is sufciently
charged before driving, otherwise you may lose control of the vehicle.
- The radio transmitter requires 4 AA batteries (not included)
- Always remove or disconnect the battery from the vehicle to the inverter when not in use.
- Please drive your car in a spacious place. Never drive your car on the street or in trafc. Public places are subject to
specic legislation by country, city, municipality, please comply with the legislation for the use of RC models in your
region.
- This product is fully assembled in the factory. We accept no liability for damage and/or accidents resulting from custom
modications and/or malfunctions.
3
USE PRECAUTIONS
SAFETY PRECAUTIONS
Failure to operate your model in a safe and responsible manner may result in injury to yourself, others or damage to
property around you.
• Do not use your model on public roads or in areas where you may encounter pedestrians or
riders.
• Do not operate in a congested area or in crowds.
• Do not operate in areas where loud noises can disturb others, such as hospitals and residential
areas.
• Do not operate your model with obstructed line of sight, at night or near water.
• Your model is radio controlled, it is subject to possible radio interference. Radio interference
can cause loss of control of your model. Be careful.
• Take care not to injure yourself while using tools to adjust or upgrade your model.
• Since the model contains small parts, keep out of reach of children while assembling and/or
disassembling your model.
• If your model becomes stuck against an object, release the throttle and retrieve it by hand
• Do not continue to apply the throttle when your model is stuck. This may damage the motor
and/or ESC/Receiver unit.
• Turn OFF your model and don’t use it if it runs erratically. Please do not use your model again
until the problem has been solved.
• Keep the wheels of the model off the ground when checking the operation of the radio equipment.
• When learning to operate your model, go to an area that has no obstacles that can damage your model.
• Before and after each use, check all the screws on the model.
• To maintain the best performance, check that all moving parts move freely.
Take all necessary precautions before, during and after using your model. You are responsible for the safe as-
sembly, maintenance and use of your model.
In case of any questions, contact your local reseller or contact Team Corally support for assistance.
For your safety, always use wear gloves and goggles when assembling and maintaining your model.
Always take all necessary precautions when handling products (silicone oil, grease, thread lock, cyanolyte glue, fuel) for
the operation of the model. (Refer to the manufacturer’s instructions)
For your safety, to keep the warranty and obtain the best performance, always use original CORALLY genuine parts.
Contains: LEAD (CAS 7439-92-1) ANTIMONY (CAS 7440-36-0)
WARNING: This product contains a chemical known to the state of California to cause cancer and birth defects or other
reproductive harm.
CAUTION: CANCER HAZARD
Contains lead, a listed carcinogen. Lead is harmful if ingested. Wash thoroughly after using.
DO NOT use product while eating, drinking or smoking.
4
If material defects or manufacturing faults should arise in a product distributed or manufactured by Team Corally / JSP
Group Intl bvba, and purchased by a consumer, we Team Corally / JSP Group Intl bvba acknowledge the obligation to
correct those faults or defects within the limitations described below. This manufacturers warranty is in addition to, and
does not affect, the legal or contractual rights of the consumer which arise from the purchase of such products. Team
Corally / JSP Group Intl bvba guarantees the consumer that its products are free from material, manufacturing, and
construction faults, as determined by the general state of knowledge and technology valid at the time of manufacturing.
The fault responsible for causing the damage must be proven to have been present in the product at this time. Claims
for compensation arising from consequential damage or product liability will not be considered valid unless they fall
under peremptory provisions of the law. If material defects or manufacturing faults should arise in a product distributed
or manufactured by Team Corally / JSP Group Intl bvba in the European community (EC) and purchased by a consumer,
then Team Corally / JSP Group Intl bvba undertakes to correct those defects within the limitations described below. This
manufacturer’s declaration does not affect the consumer’s legal or contractual rights regarding defects arising from the
purchase contract between the consumer and the dealer or reseller. Extend of the Warranty
If a claim is made under warranty, we take at our discretion to repair or replace the defective goods. We will not consider
supplementary claims, especially for reimbursement of costs relating to the defect (e;g. installation / removal costs) and
compensation for consequent damages unless they are allowed by statute. This does not affect claims on legal regula-
tions, especially according to the product liability law.
Provisions of the Warranty
The purchaser is required to make the warranty claim in writing, and must enclose original proof of purchase (e.g.
invoice, receipt, delivery note) and the appropriate warranty card. He must send the defective goods to our local rep-
resentatives or directly to Team Corally / JSP Group Intl bvba, Geelseweg 80, 2250 Olen, Belgium at his own risk and
cost.
The purchaser should state the material defect or manufacturing fault, or symptoms of the fault, as accurate as possible,
so that we can check if our warranty obligation is applicable. The goods are transported from the consumer to us, and
from us to the consumer, entirely at the risk and cost of the consumer.
Invalidation of the Warranty
The consumer cannot make a claim under warranty when the fault is affecting the use of the product arising from natural
wear, competition use, or improper use (including installation) or external forces. The consumer’s adherence to the
building and operating instructions relevant to the model, including the installation, operation, use of, and maintenance
of, model-related components cannot be supervised by Team Corally / JSP Group Intl bvba. Therefore Team Corally /
JSP Group Intl bvba is in no way liable for loss, damage, or costs resulting from improper use, or behaviour in any way
connected to the above described provisions. Unless otherwise required by law, Team Corally / JSP Group Intl bvba is
in no way whatever liable to provide compensation for damages arising from the improper use of the model (including
personal injury, death, damage to buildings, loss of turnover, loss of business, or interruption of business, or any other
direct, or indirectly caused, consequential damage).
Duration of Validity
The claim period is 24 months from the date of purchase of the product by the consumer from a dealer in the European
Community (EC) counted from the date of purchase. The claim period is 12 months from the date of purchase of the
product by the consumer from a dealer outside the European Community (EC) counted from the date of purchase. If
a defect arises after the end of the claim period, or if evidence or documents required according to this declaration in
order to make the claim valid are not presented until after this period, then the consumer forfeits any rights or claims
from this declaration. The guarantee period is not prolonged by the granting of any claims within the framework of this
warranty, especially in the case of repair or replacement. The guarantee period also does not restart in such cases.
Warranty Expiration
If we do not acknowledge the validity of a claim based on this declaration within the claim period, all claims based on
this declaration will expire after six months from the time of registering the claim; however this cannot occur prior to the
end of the claim period.
For any support, you can contact us by email at info@corally.com
WARRANTY
5
KIT CONTENT (Depends on the selected model)
REQUIRED FOR OPERATION (Not included)
Transmitter User Guide
4x AA Batteries
for the Transmitter
1.5mm
2.0mm
3.0mm
Hex Drivers
Cross Wrench
4S - 14.8V LiPo Battery
Silicone Oil
(for maintenance)
Charger
RTR Model
LIPO BATTERY SAFETY PRECAUTIONS
• Follow and respect the manufacturer’s instructions for use
• It is important to check that your ESC is set to LIPO if you are using a LIPO battery. Failure to comply with this instruc-
tion will result in increased battery discharge and may cause re and damage to persons and property.
• When charging or storing LiPo batteries always use LiPo Safety Bag (Flame retardant).
• Always respect the maximum rate and voltage specied by the battery manufacturer.
• Charge the LIPO battery outdoors or in a ventilated area away from ammable objects and surfaces.
• NEVER leave your LiPo battery unattended while charging.
• If the battery swells during charging, stop charging immediately and disconnect the battery from the charger. Leave
the battery outside for a few hours and observe. Then recycle the battery according to the instructions of your country/
region. Never dispose of a LIPO battery with domestic waste.
• Before recycling your defective battery, it must be neutralized. Take a plastic container, ll it with water and add a lot of
salt until the water becomes opaque. Place the LIPO battery in the water and leave for 24 hours. Check with a voltme-
ter that the voltage is 0.0V. Then recycle the battery according to local regulations.
• Never charge a damaged or inated battery.
• Never discharge the battery cells below 3.2V.
• Always use the appropriate balancer/charger when charging your LiPo battery pack.
• When the battery is empty, check the temperature of the battery before charging it.
If the battery is very hot, wait until it cools before charging it.
• Never charge a very hot battery as this may cause an explosion or re.
• When the battery is empty, recharge it immediately. Do not store an empty battery, the battery will continue to dis-
charge, it will fall below the minimum voltage and become unusable.
www.corally.com/Downloads/
6
CAR COMPONENTS
Steering Servo
Speed Controller (ESC)
Brushless Motor
Centre Differential
Front Differential
Rear Differential
Battery compartment
Receiver Box
Steering Link
Steering Block
Suspension ArmAnti-Roll Bar
Rear Suspension Arm
Rear Upright
Turnbuckle
Wheel Axle
Rear Shock Absorber
Power Switch
Anti-Roll Bar
Front Shock Absorber
7
QUICK START GUIDE
Steering Block
1.5V - AA BATTERY
INSTALL 4x AA BATTERY
TURN ON THE TRANSMITTER (Always First)
READ THE INSTRUCTIONS
MAKE SURE THAT ALL SCREWS AND NUTS ARE
TIGHTENED PROPERLY.
CHARGE THE BATTERY
CHARGE THE BATTERY
INSTALL THE BATTERY
WHEN FINISHING
CHECK THE FUNCTIONS CHECK THE RADIO SYSTEM RANGE
Move away from the max. distance you will drive the vehicle.
Check that the vehicle responds properly to the controls.
If not, reduce the distance or change the driving location.
DRIVE SLOWLY TO BEGIN
1.5V - AA BATTERY
1.5V - AA BATTERY
1.5V - AA BATTERY
CHARGER
BATTERY
BATTERY
BATTERY
ON
OFF
CONNECT THE BATTERY TO THE ESC
SWITCH ON THE ESC
CLEAN AND MAINTAIN YOUR VEHICLE
CHARGER
BATTERY
ON
OFF
-1° -1°
-1°
0mm 63mm
72mm
63mm
0mm
28°
90°
-1°
+
+
-
-
-2° -2°
+
+
-
-
4mm
1mm
8
BASIC CAR SETTINGS
FRONT TOE
FRONT CAMBER
FRONT CASTER
REAR CAMBER
Adjust the angle by screwing the TURNBUCKLE.
To change the Caster Angle, move the Upper Suspension Arm
forward or backward using the different CASTER CLIPS sizes.
TOE-OUT TOE-OUT
Adjust the angle by screwing the TURNBUCKLE.
Adjust the angle by screwing
the PIVOT BALL.
• Place the chassis on a block in order to release the suspension to the maximum.
• Measure the distance between the 2 fixing points of the shock absorber.
• If necessary adjust the FR & RE suspension travel by screwing the set screw on the FR & RE lower suspension arm.
FOR BUMPY GROUND FOR FLAT GROUND / ROAD
9
BASIC CAR SETTINGS
SUSPENSION TRAVEL
RIDE HEIGHT
FRONT REAR
118mm
130mm
• Lift the car by ±30cm and drop the car on the floor.
• The front and rear suspension arms should be ± parallel to the ground. (Neutral setup)
• Adjust the tension of the shock absorber spring according to the type of terrain.
It is important to properly adjust the travel of the suspension arm to prevent the shock absorber from reaching the end of its travel
and damaging it.
To achieve the correct ground clearance setting, follow the instructions below.
Release the
suspension Release the
suspension
30cm
SILICONE
OIL
50%
WAIT TIGHTEN TIGHTEN
FULLY
5min
FILL MOVE
UP
3-4x
SLOWLY
MOVE
UP
SPRING TENSION
.www. corally.com/Chemicals/Silicone-Oils/
10
• Pull the Shock shaft
down.
• Fill the shock body with
silicone oil.
• Front : 450cps
Rear : 400cps
• Move the piston
up&down
(3-4x) to release the air
bubbles in the silicone
oil.
• Pull the Shock shaft
down.
• Install the shock absorb-
er vertically and let it sit
for a few minutes until
the bubbles rise to the
surface.
• Install the silicone mem-
brane in the shock cap.
• Tighten slightly the
shock cap on the shock
body.
• A little oil will flow out of
the shock absorber.
• Gently move the piston
in upper position.
• The excess will flow out
of the shock absorber.
• Allow the piston in the
upper position.
• Tighten the cap fully but
not too much otherwise
the membrane will be
deformed.
It may be necessary to replace the silicone oil in the shock absorbers every 40 runs.
It depends on how you drive and the type of terrain you drive on.
Remove the shock absorbers from the car. (4x)
Remove the shock cap. Drain the oil from the shock absorber.
FILL THE SHOCK ABSORBERS WITH NEW SILICONE OIL ALWAYS USE SILICONE OIL, NEVER USE ANY OTHER TYPES OF OIL.
FRONT REAR
SILICONE OIL SPRING TENSION SILICONE OIL SPRING TENSION SHOCK PISTON
TRACK USE 450CPS 4mm 400CPS 0mm 6 Holes Ø1.3mm
OFF-ROAD 600CPS 4mm 500CPS 0mm 6 Holes Ø1.3mm
BASHING 650CPS 4mm 550CPS 0mm 6 Holes Ø1.3mm
SHOCK ABSORBER MAINTENANCE
APPLY
SILICONE OIL
C-00180-080 Shock Piston
Shock Piston - 4x1.6
Shock Piston - 4x1.8
Shock Piston - 5x1.4
Shock Piston - 5x1.5
Shock Piston - 5x1.6
Shock Piston - 6x1.4
Shock Piston - 6x1.3
Shock Piston - 8x1.2
Shock Piston - 8x1.3
Set content
C-00180-133
C-00180-189
C-00180-080
C-00180-190
C-00180-192
C-00180-136
C-00180-316
C-00180-029
C-00180-027
C-00180-149
C-00180-078
C-00180-188
C-00180-188
C-00180-191
C-00180-166 (Front)
C-00180-137 (Front)
C-00180-290 (Front)
C-00180-164 (Rear)
C-00180-134 (Rear)
C-00180-287 (Rear)
C-31001-25
11
Place all small parts on a screwdriver (Ø3mm)
and push them into the shock body. All parts
will be properly aligned.
Do not overtighten the Shock Cap to
prevent deformation of the silicone
Shock Bladder.
SHOCK ABSORBER - EXPLODED VIEW
FRONT DIFF CENTRE DIFF REAR DIFF
TRACK USE 7500CPS 15.000CPS 5000CPS
OFF-ROAD 10.000CPS 30.000CPS 7500CPS
BASHING 20.000CPS 50>100.000CPS 10.000CPS
Use the correct grade of silicone oil according to the operation.
Use only Silicone Oil, never use any other types of oil.
Perform the same maintenance operations for the centre and rear differentials.
12
DIFFERENTIAL MAINTENANCE
• 1. Remove 2 screws under the chassis.
• 2. Remove the 2 shock absorbers fixing screws.
Rotate the shock absorbers upwards
• 3. Loosen the fixing screws of the ANTI-ROLL BAR.
• 4. Remove the 2 fixing screws from the differential
cover.
• 5. Extract the differential.
• 6. Unscrew the differential. (4x F/H M3x10)
• 7 Drain the silicone oil from the differential.
• 8 Fill with new silicone oil but not fully.
(75% capacity max.)
SILICONE OIL
It may be necessary to replace the silicone oil every 50 runs.
It depends on how you drive and the type of terrain you drive on.
www. corally.com/Chemicals/Silicone-Oils/
75%
CAPACITY MAX.
C-00180-153-1
C-00180-153-1
C-00180-178
C-00180-182
C-00180-182
C-00180-205
C-00180-205
C-00180-179 (set)
C-00180-183
C-00180-184
C-00180-098
C-3611-4-08-16-05
C-3611-4-08-16-05
C-00180-154-1
C-3611-4-08-16-05 C-00180-205
C-00180-091
C-00180-183
C-00180-182
C-00180-184
C-00180-154-1
C-00180-182
C-00180-205
C-00180-090
C-3611-4-08-16-05
C-00180-179 (set)
13
FRONT & REAR DIFFERENTIAL - EXPLODED VIEW
CENTRE DIFFERENTIAL - EXPLODED VIEW
14
GEAR RATIO
GEAR MESH ADJUSTMENT
1. Loosen the screws.
2. Insert the paper strip.
3. Push the motor against the spur gear.
4. Turn the spur gear to run the paper through
the teeth.
Stop when the paper is in the middle.
Make sure that the motor pinion is against
the spur gear.
5. Tighten the fixing screws.
If the gear mesh is not correct, you wear out the spur gear prematurely, the transmission will make noise, give unnecessary load on the
motor (higher consumption, heating of the transmission).
PAPER STRIP 1x8cm
Motor
Pinion
11T
C-72711
12T
C-72712
13T
C-72713
14T
C-72714
15T
C-72715
16T
C-72716
17T
C-72717
18T
C-72718
19T
C-72719
20T
C-72720
21T
C-72721
22T
C-72722
23T
C-72723
Spur Gear 46T 46T 46T 46T 46T 46T 46T 46T 46T 46T 46T 46T 46T
3,08 12,87 11,79 10,89 10,11 9,44 8,85 8,33 7,86 7,45 7,08 6,74 6,43 6,15
Optional Optional Standard
Fitted
Not
Suitable
Not
Suitable
Not
Suitable
Not
Suitable
Not
Suitable
Not
Suitable
Not
Suitable
Not
Suitable
Not
Suitable
Not
Suitable
MOTOR PINION MOD1.0
High-performance 13T tooth pinion gear, manufactured from special steel for toughness and durability with precise tolerances and assures
unparalleled concentricity. Created on a special gear machine, all pinions feature ultra-precise tooth shaping and ultra-true running for
vibration-free operation. Each pinion is marked with the tooth number for easy and quick identification.
• Special hardened steel
• CNC cut teeth for perfect teeth shape and concentricity
• Module MOD1
• fits all cars with MOD1 gears (1/8 Scale)
• for 5.0mm motor shafts
www.corally.com/Pinions-Gears/Pinions-MOD1/
+TORQUE +SPEED
C-00180-117
C-00180-108
DIN916•M4x4
C-00180-108
C-3611-4-08-16-05
C-3611-4-08-16-05
C-3611-4-08-16-05
C-3611-4-08-16-05
C-3611-4-08-16-05
C-3611-4-08-16-05
C-00180-108
C-00180-108
C-00180-108
C-00180-108
C-00180-106
C-00180-106
C-00180-104
C-00180-329
C-00180-122
C-00180-329
C-00180-123
C-00180-207
C-00180-207
C-00180-150
C-00180-150
C-00180-039
C-00180-039
C-00180-144
C-00180-144
C-00180-341
C-00180-341
C-00180-040
C-00180-040
C-00180-101
C-00180-101
C-00180-150
C-00180-150
C-00180-100
C-00180-100 C-00180-322
C-00180-322
C-00180-156
C-00180-033
C-00180-033
C-00180-231
C-00180-033
C-00180-197
C-00180-220
C-00180-220
C-00180-149
C-00180-149
C-00180-089
C-00180-089
C-00180-193
C-00180-051
C-00180-051
C-00180-032
C-00180-109 (4)
C-00180-219 (2)
C-00180-048
C-00180-068
C-00180-148 (2)
C-00180-149
C-00180-030
C-00180-030
C-00180-149
C-00180-055
C-00180-155-1
C-00180-240
C-00180-240
M3x10
M3x10
M3x30
M3x16
M3x16
M3x16
M4x10
M4x10
M3x16
M2.5x18
M2.5x10
M3x10
M3x14
M3x14
M3x12
M3x16
M3x16
M3x10
M3x10
DIN916•M3x3
DIN916•M3x3
DIN916•M3x3
DIN916•M3x3
DIN916•M4x4
M3x20
Nylstop Nut•M3
Nylstop Nut•M3
Nylstop Nut•M4
Nylstop Nut•M3
Steel Shim•M6
Steel Shim•M6
C-00180-123
C-00180-123
C-00180-117
C-00180-122
Nylstop Nut•M3
DIN916
M4x4
15
FRONT DRIVE TRAIN - EXPLODED VIEW
C-00180-251 (2)
C-00180-226-B
C-00180-005
C-00180-005
C-00180-005
C-00180-005
C-00180-033
C-00180-033
C-00180-246
C-00180-220
C-00180-030
C-00180-030
M3x14
M3x20
M3x14
M3x16
M3x10 (2)
M3x20
M3x16
M3x16
M3x20
M3x12
M3x12
M3x25
M3x30 (2)
M3x216
M3x216
DIN912•M3x25
M2.5x10 (2)
M3x12 (2)
F/H•M3x10 (2)
DIN916•M3x3 (2)
DIN916•M3x3
DIN916•M3x3
DIN916•M4x4
Nylstop Nut•M3
Nylstop Nut•M3
Nylstop Nut•M3
Nylstop Nut•M3
Nylstop•M3
Nylstop Nut•M3
Nylstop Nut•M4
Nylstop Nut•M3
Nylstop Nut•M3
Nylstop Nut•M3 (4)
Nylstop Nut•M3
Nylstop Nut•M4
Nylstop Nut•M3
Nylstop Nut•M3
Nylstop Nut•M4
Nylstop Nut•M4
Nylstop Nut•M4
Nylstop Nut•M3
Nylstop Nut•M4
Nylstop Nut•M3 (4)
C-00180-148
C-00180-373
C-00180-021
C-00180-329
C-00180-122
C-00180-114
C-00180-114
C-00180-055
C-00180-055
C-00180-105
C-00180-186
C-00180-105
C-00180-223
C-00180-103
C-00180-127
C-00180-368
C-00180-368
C-00180-367
C-00180-367
C-00180-090
C-00180-090
C-00180-089
C-00180-149
C-00180-149
C-00180-089
C-00180-033
C-00180-055
C-00180-155-1
C-00180-055
C-00180-055
C-00180-041
C-00180-041
C-00180-041
C-00180-144
C-00180-144
C-00180-170
C-00180-293
C-00180-293
C-00180-231
C-00180-220
C-00180-052 C-00180-156
C-00180-322
C-00180-020
C-00180-322
C-00180-238
C-00180-238
C-00180-052
C-00180-149
C-00180-149
C-00180-148
M2.5x18
C-3611-4-08-16-05
C-3611-4-08-16-05
C-3611-4-08-16-05
C-3611-4-08-16-05
C-3611-4-08-16-05
C-3611-4-08-16-05
M3x25
C-00180-055
C-00180-329
C-00180-122
M3x20 (2)
C-00180-041
C-00180-170
DIN916•M4x4
DIN916•M4x4
C-00180-127
M4x8
M4x8
16
REAR DRIVE TRAIN - EXPLODED VIEW
C-00180-301
C-00180-301
C-00180-301
C-00180-301
C-00180-372
C-00180-171
C-00180-044
C-00180-129
C-00180-013
C-00180-013
C-00180-017
C-00180-145
C-00180-145
C-00180-147
C-00180-175
C-00180-191
C-00180-206
C-00180-206
C-00180-216
C-00180-036
C-00180-036
C-00180-242
C-00180-328
C-00180-242
C-00180-090
C-00180-004
C-00180-179 (set)
C-00180-188
C-00180-188
C-00180-188
C-00180-091
C-00180-176
C-00180-023
C-00180-177
C-54055
C-00180-184
C-00180-205
C-3104-40
C-54011
C-52021
C-00180-205 C-72713
C-00180-015
C-00180-018
C-00180-154-1
C-00180-154-1
C-00180-102
C-00180-149
C-00180-044
C-00180-305
C-00180-305
C-00180-301
F/H•M3x8
F/H•M3x14
F/H•M4x20
F/H•M4x14
F/H•M4x14
F/H•M4x10
F/H•M4x12
F/H•M4x14
F/H•M4x20
F/H•M3x12
F/H•M4x10
F/H•M4x12
F/H•M4x14 (2)
F/H•M3x10
F/H•M3x14
DIN916•M4x4
M3x8
F/H•M3x8
M3x10
M3x12
M3x18
M3x12
M3x8
M3x8
M3x6
M3x6
F/H•M3x8
M3x12
M3x10
M3x12
M3x10
M3x30
M4x12
M3x6
M4x12
F/H•M3x8
Nylstop Nut•M3
Nylstop Nut•M3
Nylstop Nut•M3
Nylstop Nut•M3
Nylstop Nut•M3
C-3611-2-06-10-03
C-3611-2-06-10-03
C-3611-2-06-10-03
C-3611-2-06-10-03
F/H•M3x8
F/H•M3x8
C-31205
C-31205
C-3611-4-08-16-05
C-3611-4-08-16-05
F/H•M3x6
17
CHASSIS - EXPLODED VIEW
18
SPARE PARTS
C-00180-021
Gearbox Brace Mount Stiffener
- Composite - 1 pc
C-00180-032
Bumper - Front - Rear - Com-
posite - 1 set
C-00180-041
Rear Camber Ball Cups - Outer
- Inner - 1 set
C-00180-055
Suspension Arm Shim - Com-
posite - 1 Set
C-00180-004
Battery - ESC Tray - Composite
- 1 pc
C-00180-015
Center Diff Plate - Spur Gear
Cover - Composite - 1 pc
C-00180-027
Body Post - Composite - 2 pcs
C-00180-044
Ball Joint 6mm - Composite -
2 pcs
C-00180-017
Arm Holder - Steering Deck -
Composite - 1 pc
C-00180-029
Shock Spring Cup - Composite
- 4 pcs
C-00180-033
Bumper - Front - Rear - Com-
posite - 1 set
C-00180-048
Bushings Set - 0 Deg -
Composite - 1 Set
C-00180-078
Shock Body Insert - Washer -
Composite - 1 set
C-00180-080
Shock Piston - Composite - 9
versions - 4 pcs/type
C-00180-005
Wing Mount - Adjustable -
Composite - 1 Set
C-00180-018
Center Diff Bulkhead - Compos-
ite - 1 Set
C-00180-036
Steering Bellcrank - Parts A-B-C
- Composite - 1 Set
C-00180-051
Suspension Arm Mount - Front -
Composite - 1 Set
C-00180-089
Anti-Roll Bar Ball Cups - Com-
posite - 4 pcs
C-00180-013
Servo Mount - Receiver Box -
Composite - 1 Set
C-00180-020
Gearbox Brace Mount A - Rear -
Composite - 1 pc
C-00180-023
Motor Mount Center Diff Insert -
Composite - 1 pc
C-00180-030
Shock Bushing - Composite -
4 pcs
C-00180-052
Suspension Arm Mount - Rear -
Composite - 1 Set
C-00180-039
Steering Ball Cups - Composite
- 1 set
C-00180-091
Spur Gear 46T - Steel - 1 pc
C-00180-098
Diff Case - FR-RE - Composite
- 1 pc
C-00180-090
Diff Case - Center - Composite
- 1 pc
C-00180-99
Suspension Arm Long - Lower -
Rear - Composite - 1 pc
C-00180-100
Suspension Arm Long - Lower -
Front - Composite - 1 pc
C-00180-101
Suspension Arm Long - Upper -
Front - Composite - 1 pc
C-00180-102
Chassis Brace - Front - Com-
posite - 1 pc
C-00180-103
Chassis Brace - Rear - Com-
posite - 1 pc
C-00180-104
Shock Tower Brace - Front -
Composite - 1 pc
C-00180-105
Shock Tower Brace - Body Mount
- Rear - Composite - 2 pcs
C-00180-122
Pin 2.5x17mm - Steel - 10 pcs
C-00180-137
Shock Body - Front - Aluminium
- Hard Anodised - 1 pc
C-00180-143
Turnbuckle - M5 - 92mm -
Steel - 2 pcs
C-00180-168
Shock Tower - 4mm - Alumini-
um - Front - 1 pc
C-00180-144
Turnbuckle - M4 - 92mm -
Steel - 2 pcs
C-00180-373
Shock Tower - 5mm - Alumini-
um - Rear - 1 pc
C-00180-150
Ball Shouldered - 6.8mm - Steel
- 4 pcs
C-00180-164
Shock Shaft - 66mm - Rear -
Steel - 2 pcs
C-00180-176
Motor Bulkhead - Aluminium
- 1 pc
C-00180-123
Pivot Ball - Steel - 4 pcs
C-00180-136
Shock Collar - Aluminium -
Hard Anodised - 2 pcs
C-00180-149
Ball - 5.8mm - Steel - 4 pcs
C-00180-166
Shock Shaft - 61mm - Front -
Steel - 2 pcs
C-00180-177
Motor Mount - Aluminium - 1 pc
C-00180-109
Caster Clips Set - 1 to 4.5mm
- 1 Set
C-00180-127
Hinge Pin - Outer - Steel - 2 pcs
C-00180-108
Steering Block Wide - Pivot Ball
Cup (2) - Front - Composite - 1 set
C-00180-145
Servo Saver Shaft w/ Nut -
Aluminium - 1 pc
C-00180-154-1
Center Diff. Outdrive Cup - Steel
- 2 pcs
C-00180-170
Ball - 6.8mm - Steel - 2 pcs
C-00180-178
Diff. Bevel Gear 43T - Steel -
1 pc
C-00180-117
Pivot Ball Adjusting Nut - Alu-
minium - 4 pcs
C-00180-133
Shock Cap - Aluminium - Hard
Anodised - 2 pcs
C-00180-147
Servo Saver Post - Steel - 2 pcs
C-00180-155-1
Pinion Outdrive Cup - Steel -
2 pcs
C-00180-171
Threaded Ball - 6mm - Steel -
2 pcs
C-00180-179
Planetary Diff. Gears - Steel -
1 Set
C-00180-153-1
Diff. Outdrive Cup - Steel -
2 pcs
C-00180-129
Turnbuckle - M3 - 35mm -
Steel - 2 pcs
C-00180-134
Shock Body - Rear - Aluminium
- Hard Anodised - 1 pc
C-00180-148
Shock Screw - Steel - 4 pcs
C-00180-156
Bevel Pinion 13T - Steel - 1 pc
C-00180-175
Steering Rack - Aluminium
7075 - 1 pc
C-00180-182
O-Ring - Silicone - 5x8mm -
5 pcs
C-00180-114
Composite Rear Upright - Wide
- 1 pc
19
SPARE PARTS
C-00180-207
Steering Block Arms - Alumini-
um - 2 pcs
C-00180-220
Ball End 5.8mm - for Anti Roll
Bar - Steel - 4 pcs
C-00180-231
Collar - for Anti-roll Bar - Alu-
minium - 1 pc
C-00180-251
Wing Washer - Composite. -
2 pcs
C-00180-322
Suspension Arm Pivot Pin - Low-
er Inner - Fr/Re - Steel - 2 pcs
C-00180-329
Wheel Hex Adapter - Wide RTR
- Aluminium - 2 pcs
C-00180-183
Diff. Gasket - 4 pcs
C-00180-190
Shock Washer - 2.5x6x0.5mm -
Steel - 10 pcs
C-00180-197
Anti-Roll Bar - 2.4mm - Front
- 1 pc
C-00180-287
Shock Spring - Medium - Rear
- 2 pcs
C-00180-191
O-Ring - Silicone - 9x12mm
- 5 pcs
C-00180-204
Shim Rings - 6x18x0.2mm -
Steel - 10 pcs
C-00180-216
Servo Saver Spring - 1 pc
C-00180-226-B
Wing - Composite - 1 pc
C-00180-238
Suspension Arm Mount - Rear -
Aluminium - 1 set
C-00180-290
Shock Spring - Medium - Front
- 2 pcs
C-00180-184
Gear Diff. Pin - Steel - 2 pcs
C-00180-192
O-Ring - Silicone -
16.2x19.8mm - 5 pcs
C-00180-205
Diff. Outdrive Pin - 2x10mm -
Steel - 4 pcs
C-00180-240
Suspension Arm Mount - Front -
Aluminium - 1 Set
C-00180-316
Shock Cap - Lower - Aluminium
- 2 pcs
C-00180-246
Anti-Roll Bar - Rear - 2.6mm
- 1 pc
C-00180-301
Centre Roll Cage Mount - Com-
posite - 1 Set
C-00180-305
Centre Roll Cage Pin - Steel
- 2 pcs
C-00180-188
O-Ring - Silicone - 4x8mm -
5 pcs
C-00180-193
Drive Shaft - Center - Front -
Steel - 1 pc
C-00180-223
Centre Drive Shaft - Truggy -
Rear - Steel - 1 pc
C-00180-189
Shock Bladders - Silicone -
4 pcs
C-00180-186
Chassis Brace Link - Steel
- 1 pc
C-00180-206
Steering Rack Bushing - Steel
- 2 pcs
C-00180-219
Suspension Arm Pivot Pin -
Upper - Front - Steel - 2 pcs
C-00180-230
Wheel Nut - Aluminium -
Ribbed - 4 pcs
C-00180-328
Chassis - Long - Truggy XP RTR
- Aluminium - 1 pc
C-00180-242
Side Guards - Left-Right - Com-
posite - 1 Set
C-00180-293
Ball 6.8mm - Steel - 4 pcs
20
SPARE PARTS

Other Corally Motorized Toy Car manuals

Corally Kronos XTR XP 6S Setup guide

Corally

Corally Kronos XTR XP 6S Setup guide

Corally MOXOD XP Setup guide

Corally

Corally MOXOD XP Setup guide

Corally Radix 6 XP 6S Setup guide

Corally

Corally Radix 6 XP 6S Setup guide

Corally 01622 User manual

Corally

Corally 01622 User manual

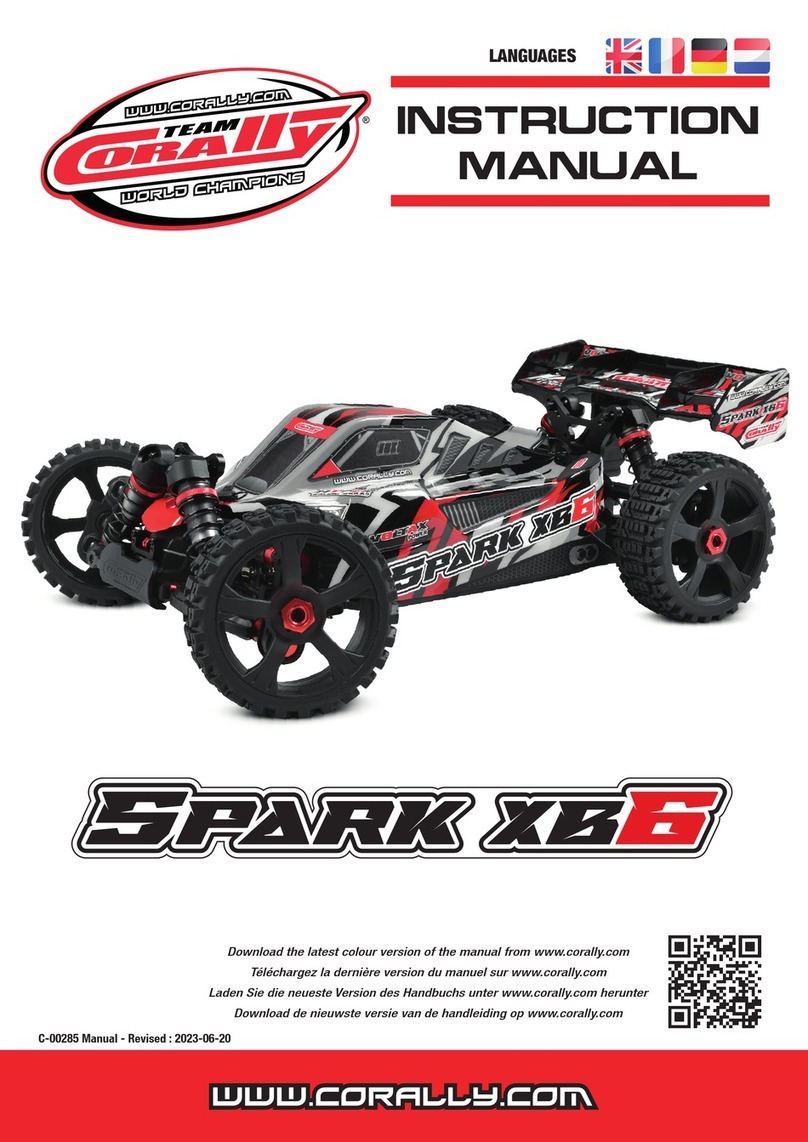
Corally SPARK XB6 User manual

Corally

Corally SPARK XB6 User manual

Corally RADIX XP 6S Setup guide

Corally

Corally RADIX XP 6S Setup guide

Corally Muraco XP 6S Setup guide

Corally

Corally Muraco XP 6S Setup guide

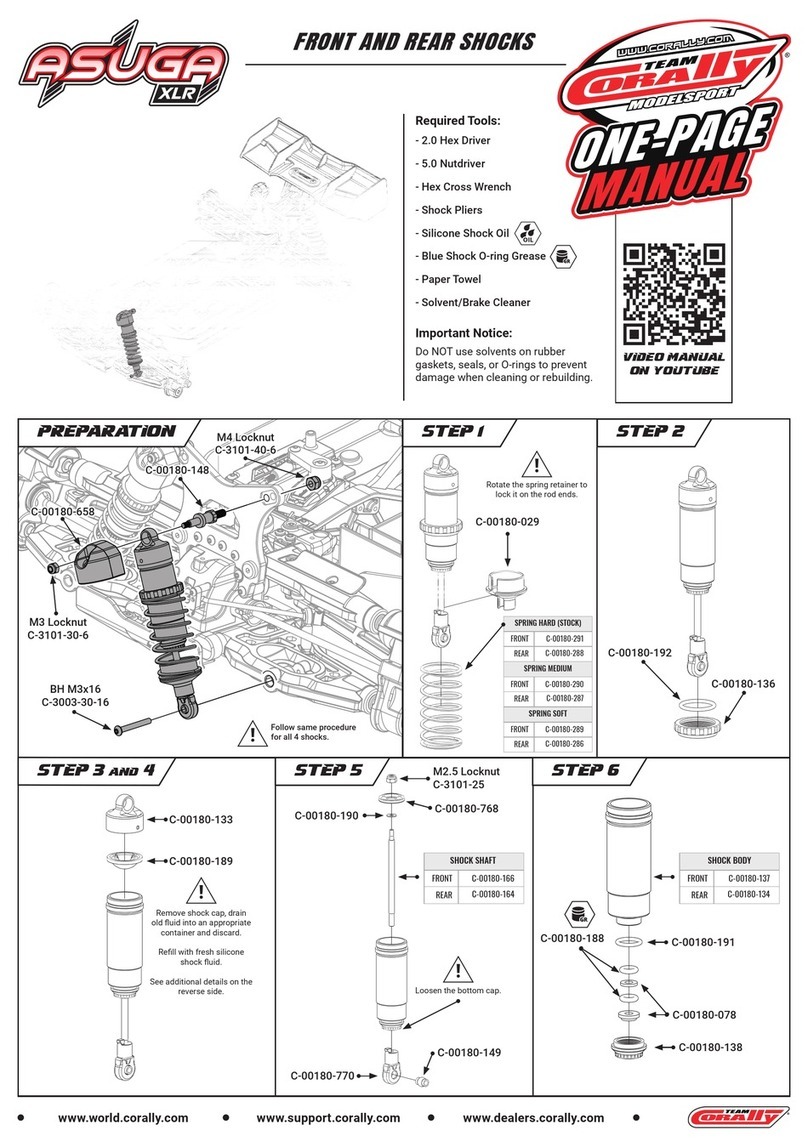
Corally ASUGA XLR User manual

Corally

Corally ASUGA XLR User manual

Corally DEMENTOR XP 6S Setup guide

Corally

Corally DEMENTOR XP 6S Setup guide

Corally SP12X User manual

Corally

Corally SP12X User manual

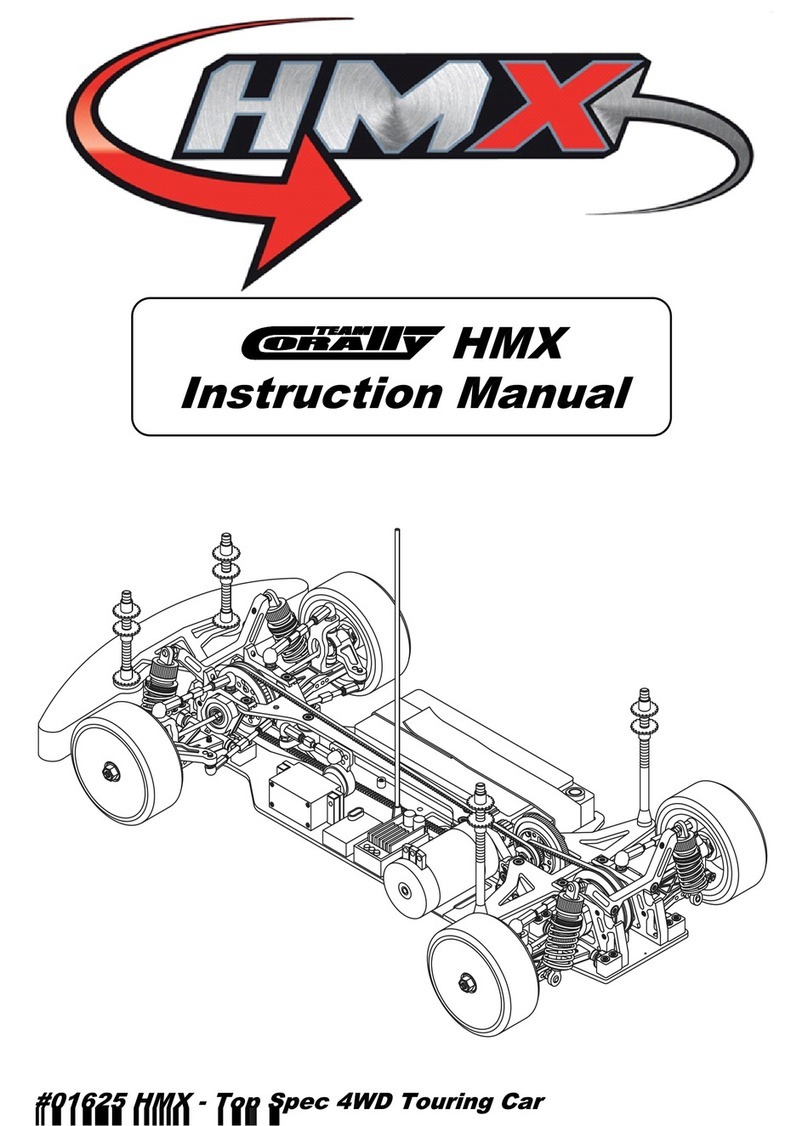
Corally HMX TC 01625 User manual

Corally

Corally HMX TC 01625 User manual

Corally COR00485 User manual

Corally

Corally COR00485 User manual

Corally RDX 00166 User manual

Corally

Corally RDX 00166 User manual

Popular Motorized Toy Car manuals by other brands

Jamara VW Beetle 2,4GHz instructions

Jamara

Jamara VW Beetle 2,4GHz instructions

Duratrax WarHead EVO Operation manual

Duratrax

Duratrax WarHead EVO Operation manual

REVELL 4914 manual

REVELL

REVELL 4914 manual

Traxxas 58076-1 owner's manual

Traxxas

Traxxas 58076-1 owner's manual

Magom LIEBHERR 574 manual

Magom

Magom LIEBHERR 574 manual

Little Tikes Dino Dune Buggy user guide

Little Tikes

Little Tikes Dino Dune Buggy user guide

Jamara 404035 instruction manual

Jamara

Jamara 404035 instruction manual

Anki Overdrive Product information guide

Anki

Anki Overdrive Product information guide

Associated Electrics REEDY POWER RC10 T6.4 TEAM KIT instruction manual

Associated Electrics

Associated Electrics REEDY POWER RC10 T6.4 TEAM KIT instruction manual

Kyosho Integra Instruction booklet

Kyosho

Kyosho Integra Instruction booklet

Tamco Ranger Instruction manual & parts catalogue

Tamco

Tamco Ranger Instruction manual & parts catalogue

RTX SideWinder RTR Electric Dune Buggy Component and upgrade parts listing

RTX

RTX SideWinder RTR Electric Dune Buggy Component and upgrade parts listing

Nerf TERRASCOUT manual

Nerf

Nerf TERRASCOUT manual

Reely ROAD 23 10 72 operating instructions

Reely ROAD

Reely ROAD 23 10 72 operating instructions

Tamiya 51336 quick start guide

Tamiya

Tamiya 51336 quick start guide

BS RACING BS709E instruction manual

BS RACING

BS RACING BS709E instruction manual

Fenix G56.2 manual

Fenix

Fenix G56.2 manual

RC4WD C2X Class 2 Competition Truck w/ Mojave II 4 Door... manual

RC4WD

RC4WD C2X Class 2 Competition Truck w/ Mojave II 4 Door... manual

manuals.online logo
manuals.online logoBrands
  • About & Mission
  • Contact us
  • Privacy Policy
  • Terms and Conditions

Copyright 2025 Manuals.Online. All Rights Reserved.