Table Contents
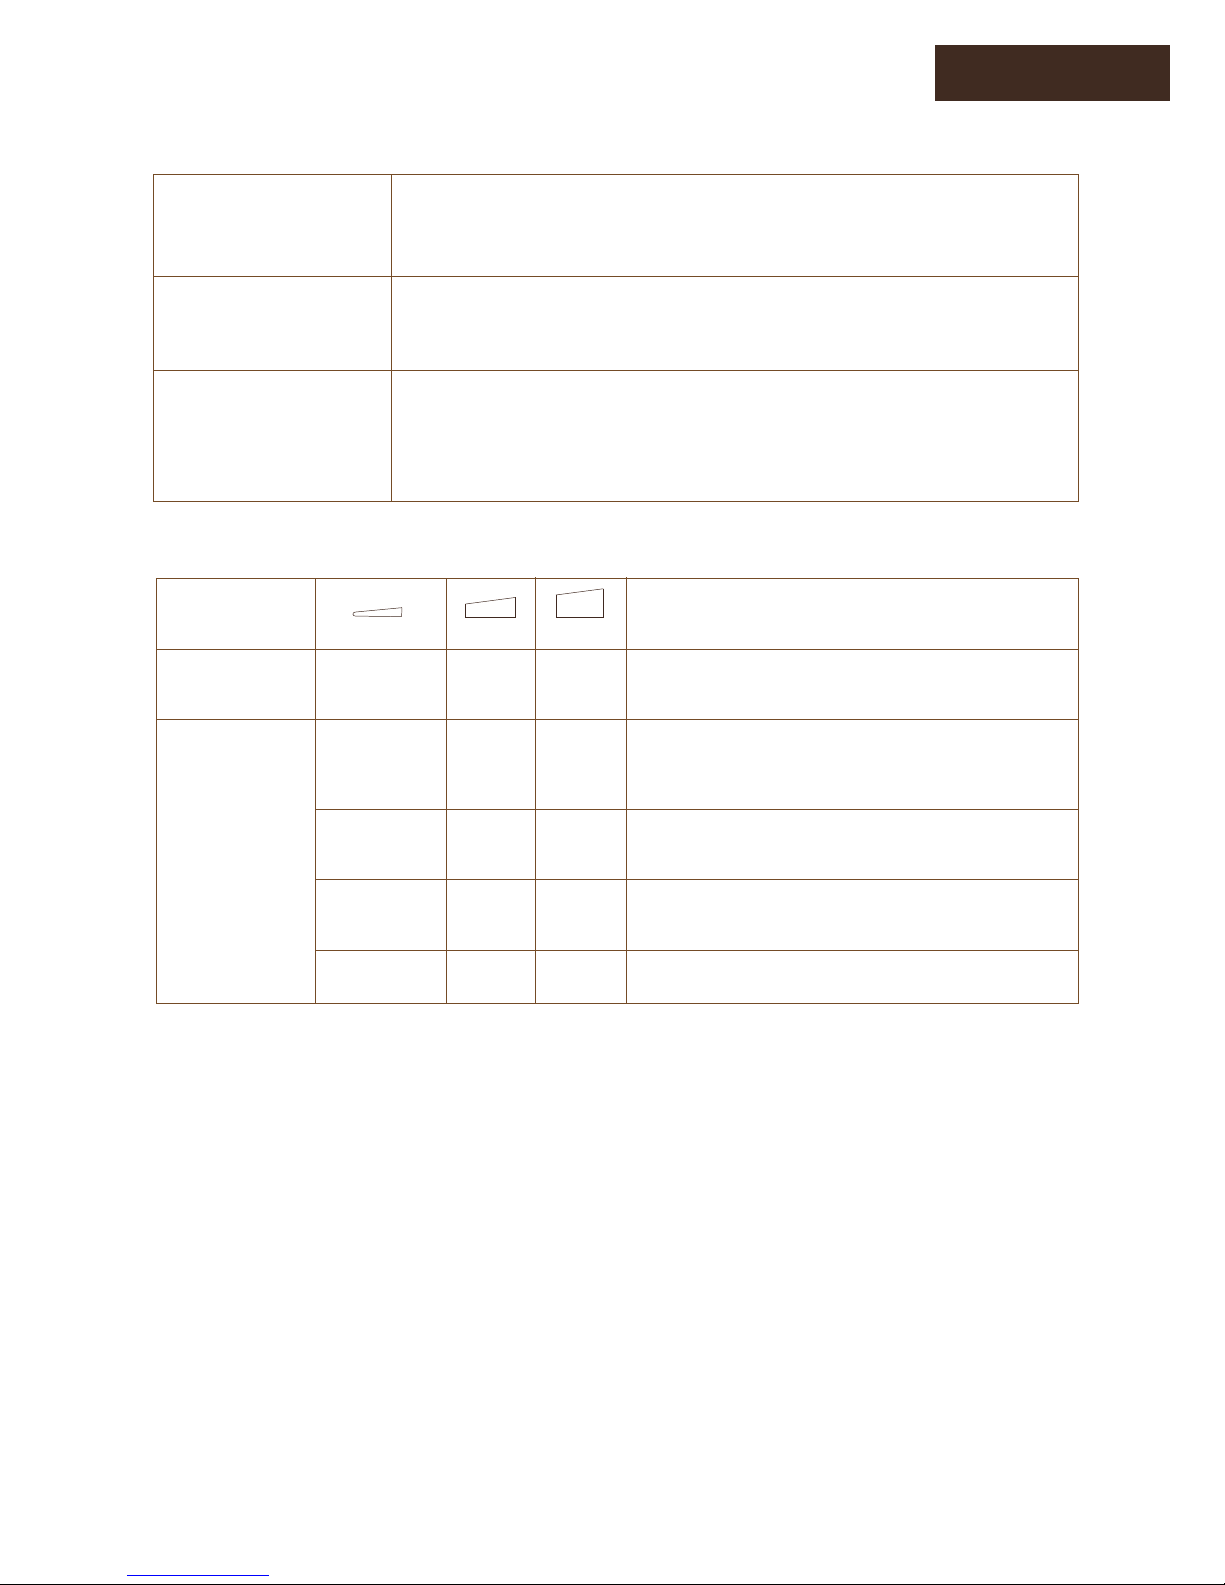
LED Indicator
WLAN Signal LED Indicator
POWER
WPS
LAN
WAN/LAN
ON: The Device is power on.
OFF: The Device is power off.
Flashing: WPS connection is established or
WPS signal of another device is expected.
ON: The Ethernet port is connected.
OFF: The Ethernet port is disconnected.
Flashing: Data is Transferring.
WiFi signal is strong
Disconnect
Weak reception signal from Router
Signal stengthis below 25%
Good reception signal from Router
Signal stength: 25% to 50%
Strong reception signal from Router
Signal stength: 50% to 100%
Mode Description
AP/Router
Repeater
ON
ON
ON
ON
ON
ON
OFF
OFF
ON
OFF
OFF
ON ON
OFF
Flashing
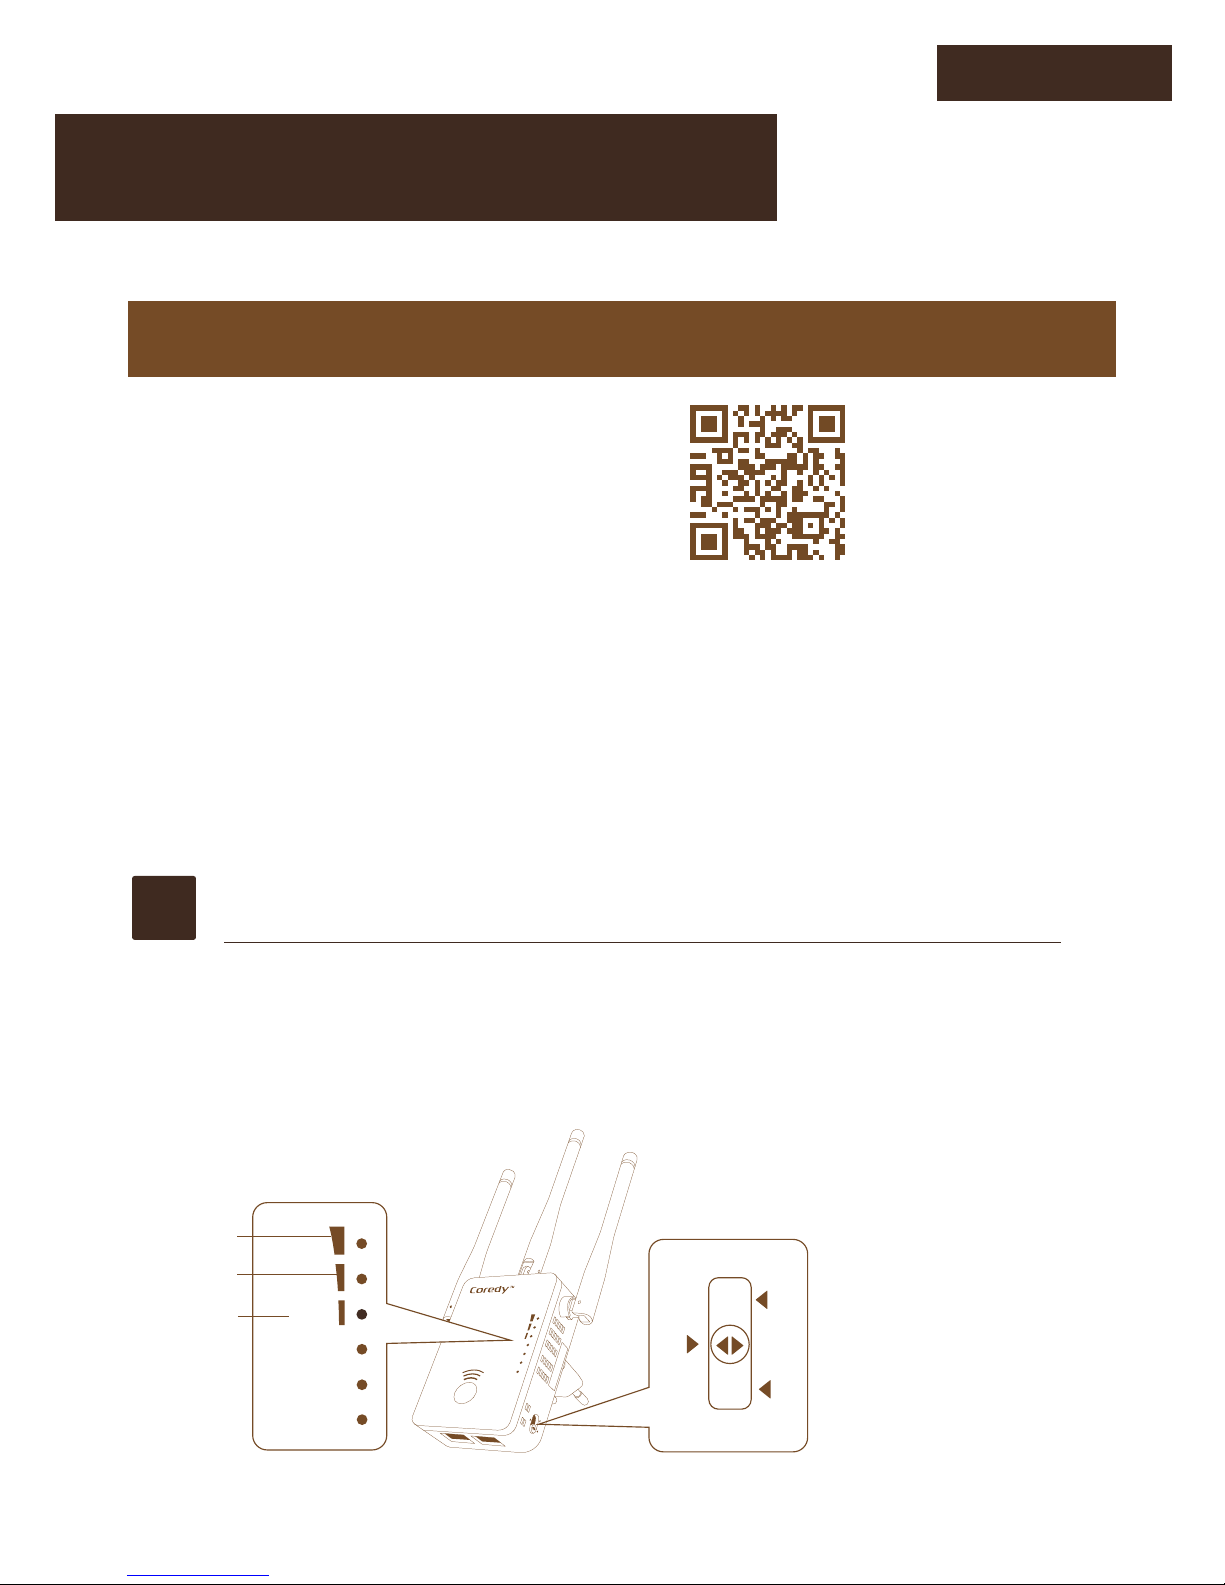
12 3
Power Switch: It is used for turning the Power On or Off .
WPS Button: It is used for establishing a secure connection
between the E750 and other WPS-capable devices like Router,
Access Point, Cellphone etc.
Reset Button: It is used for restoring the E750 by using Reset Pin.
Mode Selector Switch: It is used for selecting using mode
physically.