Corsair Marine Pulse 600 User manual

www.corsairmarine.com
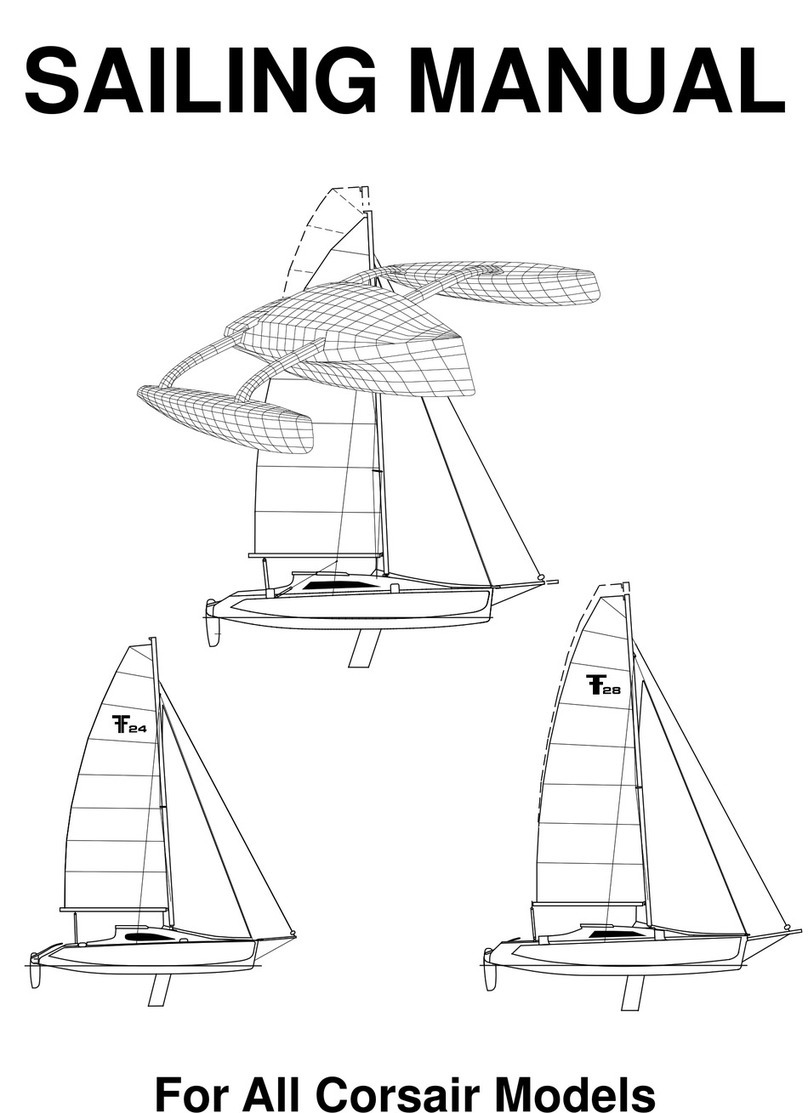
SAILING
MANUAL
https://www.boat-manuals.com/

PAGE 2
Sailing manual applicable to
This manual has been compiled to help you to operate your craft with safety and enjoyment. It contains details of the craft; the equipment
supplied or fitted; its systems, and information on its operation and maintenance. Please read it carefully and familiarize yourself with the craft
before using it.
If this is your first craft, or you are changing to a type of craft you are not familiar with, for your own comfort or safety, please ensure that you
obtain handling and operating experience before assuming command of the craft. Your dealer or national sailing federation or yacht club will be
pleased to advise you of local sailing schools or competent instructors.
PLEASE KEEP THIS MANUAL IN SECURE PLACE, AND PASS ON TO THE NEW OWNER WHEN YOU SELL THE CRAFT
Model: __________________________________________________________________________________________
Hull Number: _____________________________________________________________________________________
Owner1: _____________________
_____________________________
_____________________________
_____________________________
Owner2: _____________________
_____________________________
_____________________________
_____________________________
Owner3: _____________________
_____________________________
_____________________________
_____________________________
Built by:
Corsair Marine International
T: (+84 8) 3873 3620 | F: (+84 8) 3873 3621
https://www.boat-manuals.com/

PAGE 3
TABLE OF CONTENTS
GENERAL__________________________________________________________________ 4
PREPARATION _____________________________________________________________ 4
OUTBOARD MOTOR ________________________________________________________ 4
TRAILERING _______________________________________________________________ 4
RIGGING __________________________________________________________________ 5
BOOM AND SAIL SET UP ____________________________________________________ 7
MAST SETUP _____________________________________________________________ 10
SAILING __________________________________________________________________ 11
THE BASICS ______________________________________________________________ 11
ROTATING MAST CONTROL ________________________________________________ 12
WINDWARD PERFORMANCE________________________________________________ 13
REACHING________________________________________________________________ 13
SPINNAKER_______________________________________________________________ 13
SPINNAKER JIBING ________________________________________________________ 14
SPINNAKER SAILING DOWNWIND ___________________________________________ 14
SAFE SAILING RECOMMENDATIONS_________________________________________ 15
SAILING HINTS ____________________________________________________________ 16
BEACHING________________________________________________________________ 16
RETRIEVING TO TRAILER ___________________________________________________ 16
DE-RIGGING ______________________________________________________________ 17
LIFTING OUT ______________________________________________________________ 17
MARINA DOCKING_________________________________________________________ 18
SAFETY __________________________________________________________________ 18
UNSINKABILITY ___________________________________________________________ 18
CAPSIZE__________________________________________________________________ 18
RIGHTING ________________________________________________________________ 18
PERSONAL RESPONSIBILITY _______________________________________________ 18
SAFETY IN GENERAL_______________________________________________________ 19
TECHNICAL NOTES ________________________________________________________ 19
https://www.boat-manuals.com/

PAGE 4
GENERAL
This manual contains important information
about the safe operation and maintenance of
your Corsair built Pulse 600. Read it carefully,
become familiar with the procedures described
and follow the recommendations to help make
your sailing enjoyable and trouble-free.
Corsair trimarans are designed and built as high
performance cruising trimarans, which when
used as intended, with their enormous stability
and unsinkability, are among the safest and
fastest trimarans afloat.
PREPARATION
Before going sailing, you will need to provide the
proper safety equipment as required by local
regulations. This should include life jackets for all
crew members.
Check the weather forecast; know into what
weather you might be sailing.
OUTBOARD MOTOR
The recommended motor size is between 2 –
4HP long shaft.
There is a number of eco-friendly ‘Sail Boat’
motors now available and some of these are
designed for heavy, hard to push displacement
boats and their propellers are effectively ‘geared
down’ to give high thrust at low speeds.
However, Corsair trimarans have a very easily
driven hull and may not need such a propeller.
The result can be the same as always driving
your car in low gear.
You will have plenty of thrust, but speed is low,
and economy can be poor. These motors do
have advantages and if used, you may need
to experiment with different propellers to get
the best and most efficient performance. Refer
to the engine manual for details of operation,
maintenance and winter storage. Always be sure
you have enough fuel for your planned trip. The
motor can be used while the floats are extended
or folded but should always be tilted up when
sailing.
The dagger board should always be down when
motoring to prevent any sideways movement. If
not, the boat will have a hovercraft like motion
with wide skidding turns. With the board down,
handling is excellent.
TRAILERING
CAUTION
Measure and know the overall height on the trailer. Care
should be taken to avoid all low, overhead obstacles.
Always park into the wind or uphill to help the mast stay
in line while being winched up. Trailer should remain
hooked to towing vehicle.
The total towing weight can vary considerably depending
on options and can be determined exactly by using a
weighbridge. Check that the vehicle is approved and
equipped as recommended by its manufacturer for towing
this weight and the capacity of the towing hitch is suitable.
While towing, watch for strong crosswinds. A Corsair is a
relatively light boat for towing, but it still has considerable
windage. For easy, stable towing, the trailer should be
balanced to have 5 to 10% of the total weight on the
coupling ball. This can be measured by a bathroom scale.
If you find ‘fish tailing’ occurs, increase this weight. If
necessary, a simple change like shifting the gas tank or
outboard forward can make a considerable difference to
trailer behavior.
Trailer lights are fitted either on special brackets or as a
separate light bar on the boat’s transom. They are thus
independent from the trailer, and the wiring never gets near
the water, considerably improving reliability. If separate,
be sure to fit the correct lights on the appropriate sides.
The wire should be run along the top of the boat and then
connected to the towing vehicle. Independent wiring avoid
the frequent breakdowns that occur with wiring through the
trailer being towed on its own, the lights can be mounted
directly to the trailer.
Before trailering, check that tires are inflated correctly, the
beam locking pins are in place, the rudder is fully up and tied
to one side, the poptop or hatch is secured, and the boat is
tied down to the trailer. There should be one tie- down per
side, these being looped around the winches or brackets on
the cockpit coamings, and tied to the tie-down loops on the
trailer. The bow eye should also be tied down to the winch
post, in addition to the winch line. Check that all the trailer
supports always bear equally against the hulls.
When trailering, be sure to pivot up or remove the trailer
jockey wheel, and that the hitch is locked on to the ball.
Should the mast extend back past the trailer lights by more
than the legal amount, the appropriate warning flag should
be tied on the back. The mast can be positioned far enough
forward to eliminate any excessive over, however this may
not be possible if the towing vehicle is a van.
When trailering, always allow extra distance for stopping.
Particularly watch for low bridges, overhanging trees or
awnings etc. If necessary, the boat can be partially unfolded
on the trailer in order to pass under a low bridge.
https://www.boat-manuals.com/

PAGE 5
RIGGING
This procedure has been developed from over
hundreds of launchings around the world and has
proven to be safe and easy. Don’t be disheartened
if it takes you longer the first few times. This is not a
race. After a few launchings this process will become
easier as you are more familiar with your boat and your
confidence builds.
Two people can have a Pulse 600 rigged and launched
in around 20 minutes.
DANGER
Before starting to rig, check to see that there are no
power lines for the mast not to touch while being
raise or while being moved to the ramp
Recommended setup procedure is as follows:
1. Remove the trailer tie-downs and the trailer lights.
The tie-downs can be tied together and used as
the bow line for launching which saves stowing
them, and then finding a bow line.
2. Undo the trailer winch hook, and pull some slack
so the hook will pass over the bow roller. Leave it
lying on the foredeck.
3. Place the mast raising pole on the foredeck for
use.
Climb into the cockpit via the transom. Ensure the
trailer is still coupled to the car or the back of the
trailer has been chocked.
4. Move fwd alongside the mast undoing the mast
ties (at each end) and the rigging ties as you go.
5. Lift the forward end of the mast and walk aft,
rolling the mast on the aft mast roller while
checking that the rigging wires do not catch. Stop
once the mast foot is over the pivot brackets.
Shroud attachment
The mast yoke now needs to be fitted to the mast foot
using the through pin (mast raising bracket can also
be fitted prior to rolling mast back or be left on the foot
prior to de-rigging). Another alternative is to attach the
mast raising bracket to the deck first, then fit the mast
to it.
6. The mast foot is connected to the mast step as
follow:
Mast raising bracket ready to be installed
Mast raising bracket after installation to mast base
7. Fit the mast raising wires these are led form the
eye around 8’ up the front of the mast to the
aluminum side anchors (aligned with the mast
pivot point).
Mast raising supports
Note that the length of these raising wires is adjustable
and they should be slightly loose and monitored on the
first mast raising. This is to ensure they cannot become
over tight during the initial raising procedure. They
should never be more than moderately tight, and once
adjusted and set, should need no further monitoring or
adjustment.
8. Position the mast raising pole on the mast in the
raising socket. Attach the wire from the top of
the pole to the eye on the front of the mast, with
the pole being approximately perpendicular to the
mast.
Additional side lines can then be fitted from the end to
the raising wire anchors to stabilize pole sideways.
The length of the wire from the pole to the mast can
also be adjusted, and a little experimenting will give an
almost perfect moderate tension on the raising wires
throughout the complete raising procedure.
Trailer winch raising procedure
https://www.boat-manuals.com/

PAGE 6
WARNING
During mast raising it is very important to be alert to
all items of rigging lifting or supporting the mast. If any
resistance to raising is felt at point, stop and check
that nothing has fouled. Do not proceed until any
obstruction is clear.
9.a Take the trailer winch line hook and pull it back
over the pole and connect it to the spinnaker
halyard (after it has been unhooked from the
mast). Winch line should extend at least 2’ aft of
the raising fork.
Check to see that the spinnaker halyard is securely tied
off at the cleat on the side of the mast.
Mainsheet attached used to raise mast.
10.a The mast is now winched up, checking again for
power lines.
Check to see that all rigging wires are clear and have
not snagged anywhere. Raising wires should initially be
slightly loose and tighten slightly on the way up.
11.a Once the mast is fully up, connect forestay. For
initial rigging mast rake should be set to around
3.5° to 4.5°. Once initial adjustment has been
done, the forestay turnbuckle does not need to
be undone during normal rigging or de-rigging,
only the clevis pin is removed or inserted.
12.a Once forestay is connected, slacken off the
trailer winch, disconnect the spinnaker halyard,
and return it to the mast. Remove raising pole,
mast yoke, rewind the winch and reconnect
hook to the bow eye.
Leave mast raising wires attached to the mast as these
are still required for support until after the float are
unfolded and shroud properly tensioned.
Mainsheet raising procedure
CAUTION
The shrouds must always be connected to the floats.
Otherwise there is a danger that the mast could
topple forward with over-winching
9.b Take the mainsheet purchase system and
connect it to the spinnaker halyard just forward
of the mast raising pole fork. Attach the block
with the tail to the bow pad eye.
Monitor the float shrouds with rotating masts on initial
rigging to ensure they do not become too tight or catch
on anything during raising.
10.b The mast is now winched up, checking again for
power lines.
Check to see that all rigging wires are clear and have
not snagged anywhere. Raising wires should initially be
slightly loose and tighten slightly on the way up.
Check that the socket in the rotating mast foot aligns
correctly with the pivot ball on the deck as the mast
nears the fully up position.
CAUTION
The Pulse 600 mast can be raised with the floats
folded or unfolded. When pulling up the mast it is
important that the sheet runs through the cleat to
prevent accident dropage. When walking away from
the sheet tie off the tail to prevent accidental release.
NOTE
The mainsail on the Pulse 600 is set up with a
floating tack so before hoisting the mainsail attach
the Cunningham into position on mast. (Shackle
attachment onto saddle at the base of mast)
https://www.boat-manuals.com/

PAGE 7
Mast on way up and being held from going sideways by raising wires
BOOM AND SAIL SET UP
The pulse 600 has incorporated the furling boom
system, for ease of operation when rigging and de
rigging.
BOOM SET UP
The boom is connected on to a shaft that passes
through the mast with the furling handle attached to the
fwd side of the mast. The handle is locked into position
by a retractable hand piece which will slide out when
you need to furl the main sail.
Once you have connected the boom onto mast. Attach
the adjustable boom topper onto the rotating SS
bracket on the out board end of boom.
This will allow the boom to stay in a horizontal position.
Attach the mainsheet system to the dux strop that the
outhaul is connected to. This will help keep the boom
stationary when you are hoisting the mainsail.
HOISTING MAINSAIL
When hoisting the mainsail for the first time. You can
unfold and layout in the cockpit and nets, Load the
mainsail battens and set to the required tension.
Attach the main halyard to the head of sail and attach
the outhaul line shackle to the clew on foot of the sail.
Tie a small lashing line onto the ring that is on the shaft
on boom end and allow 250mm of lashing to the tack
point on sail.
This will act as a safety strop for when you decide to
furl the mainsail and disconnect the Cunningham hook.
When hoisting the mainsail, make sure you are headed
to the wind direction. Reducing the wind pressure in
sail will make hoisting possible
Once you have everything connected in place and
facing in the right direction you are ready to hoist
the mainsail. Make sure you have a little slack in the
https://www.boat-manuals.com/

PAGE 8
outhaul line boom topper and mainsheet. If these lines
are tight they will create friction loads when hoisting
and make it impossible to hoist to max height.
Hoist mainsail to max height by feeding the head of sail
into the sail track cut out 150mm on mast just above
boom connection. Once you have max hoist lock off
halyard using the camcleat and horn cleat on mast,
attach the Cunningham hook to the tack and apply a
little tension.
The amount of Cunningham tension will vary on how
strong the breeze is and what angle of sailing you are
doing.
Adjust the outhaul and mainsheet to the desired
tension and keep the boom topper slack. You do not
want any tension on this line when mainsheet tension is
applied.
FURLING MAINSAIL.
The Pulse 600 mainsail furling system is quick and user
friendly for anyone.
When you are ready to Furl, depower the Pulse by
heading up into the breeze.
Make sure the boom topper is attached to the rotating
SS bracket on boom end and the boom is set at a
horizontal position, move the mainsheet from the
outboard strop to the rotating SS bracket.
Release the Cunningham from the tack on the sail.
Have one hand holding the furling handle ready to wind
up, and the other hand holding and controlling the main
halyard rate of bringing the sail down.
When the main halyard is unlocked you can ease the
halyard in your hand and wind the sail up onto boom
with your other hand. As you furl keep an eye on the
sail so that the mainsail is not being distorted by the
battens not running parallel with the boom. If there is
any distortion and the battens are not aligned correctly
it may require the angle of boom to be adjusted either
up or down.
Quickly lock the halyard off and make the adjustment
on boom topper. You may need to raise the mainsail
again to refurl the main sail correctly.
Roller furled mainsail
SETTING UP THE JIB
The pulse 600 jib has a furling jib using a Harken furler
which is attached to the bottom Forstay end. The jib
sail has a zipper luff that the halyard runs on the inside
of the luff. Once the Forstay is in positioned you can
connect and hoist the jib sail.
Attach the halyard to the top of Jib and pull the trace
line down, as the jib goes up wrap the zipper luff
around the forstay wire and do up as the jib is being
hoisted. Once you have mx hoist un do the trace line
and connect the jib halyard to the 3;1 purchase system
that is attached at the top of Furling drum. Allow 250 to
300mm of purchase.
Once the halyard is tied off apply tension on the
purchase system to set the desired luff tension on jib.
Once set, wrap the zipper luff around the purchase
system and clip off. The drum on furler should be pre
loaded with the furling line and once the jib has been
hoisted can be furled. It is advisable to furl once the jib
sheets have been attached to the foot of jib sail. The
furling line runs along the stb side of deck up to a cam
cleat mounted on the side of rind frames.
Tie a small lashing line onto the ring that is on the shaft
on boom end and allow 250mm of lashing to the tack
point on sail.
This will act as a safety strop for when you decide to
furl the mainsail and disconnect the Cunningham hook.
When hoisting the mainsail, make sure you are headed
to the wind direction. Reducing the wind pressure in
sail will make hoisting possible
Once you have everything connected in place and
facing in the right direction you are ready to hoist
the mainsail. Make sure you have a little slack in the
https://www.boat-manuals.com/

PAGE 9
outhaul line boom topper and mainsheet. If these lines
are tight they will create friction loads when hoisting
and make it impossible to hoist to max height.
Hoist mainsail to max height by feeding the head of sail
into the sail track cut out 150mm on mast just above
boom connection. Once you have max hoist lock off
halyard using the camcleat and horn cleat on mast,
attach the Cunningham hook to the tack and apply a
little tension.
The amount of Cunningham tension will vary on how
strong the breeze is and what angle of sailing you are
doing.
Adjust the outhaul and mainsheet to the desired
tension and keep the boom topper slack. You do not
want any tension on this line when mainsheet tension is
applied.
https://www.boat-manuals.com/

PAGE 10
JIB SHEETS
Jib sheets are a 2:1 endless line, this allows the
flexibility to sheet sitting out on the floats. Attach the
Ronstan 2:1 blocks to the saddle position on main ring
frame and the Ronstan friction rings onto clew of sail.
You are now ready to run the sheet lines. Once the
sheet lines are set you can furl the jib.
The furling line is located on the Starboard side. Once
the luff tension is set and the jib sheets connected you
can now furl the jib by pulling on the line.
When the jib is furled make sure the line is cleated off
(located on side of ring frame).
This will prevent the jib from unfurling prematurely.
MAST SETUP
Rig tension and mast setup are very important for good
sailing performance and while rotating masts do not
require much rig tension (to allow full mast rotation),
most owners do not tension their rigs enough.
Synthetic Rigging used on the cap shrouds will stretch
a little internally but will settle after a few sails. The
wing section masts that are used on Corsair Trimarans
required some pre-bend. The amount of pre-bend is
achieved by tightening the diamond wires.
The Pulse 600 mast has a pre-bend amount of 35mm,
this can be checked by running a messenger line from
the hound area (forestay lug) to the center of boom
shaft along the aft face of mast. 35mm gap will roughly
be around the speader location.
For good windward performance the forestay must be
tight and thus cannot be emphasized too much
An important rule, vital to the well being of all masts,
particularly fixed masts, is to be sure that your leeward
cap shroud never becomes too loose. Some looseness
is not unusual but if it is very loose and visibly flopping
around, you could risk losing your mast. Loose rigging
will also greatly affect the performance of your Corsair.
https://www.boat-manuals.com/

PAGE 11
SAILING
This manual is not intended to be a sailing instruction
manual and it is presumed that all owners will have a
basic sailing knowledge and skill. There are however,
many aspects of sailing a Corsair trimaran efficiently
and the following covers some of these:
THE BASICS
The mainsail is usually hoisted first. Turn directly into
the wind and commence pulling on the halyard. The
Pulse 600 has a roller furling boom fitted. Release the
handle from the locking socket on the mast allowing
the handle to roll freely. The main will automatically
unroll from the boom however if the halyard tension
becomes too tight unrolling a few turns in advance will
help ease the load.
Once the main is fully hoisted, attach the Cunningham
and pull tension until the majority of wrinkles have been
removed from the luff. The topping lift can now be
eased.
The mainsheet should now be moved from the furling
dogbone at the end of the mast to the mainsheet strop.
At this stage you should also attach the mast rotation
control to the boom and pull tight until the mast section
is pointing into the direction of the apparent wind. All
these controls are connected using snap shackles or
quick fitting hooks and are very easy to attach when
setting up.
All Corsair models sail and tack easily under mainsail
alone. If you have lot of tacking to clear a channel then
it may be much easier with just the main. You don’t
have to worry about tacking the jib and this won’t allow
you to go too fast particularly in crowded waters or if
there is minimal visibility.
The correct technique for sailing mainsail only is to
sheet it free to avoid choking the boat. The traveler
can be locked on the centerline and the mainsheet
slackened off so
the boom is about 12” out from center. Your boat
speed should be 7 - 8 knots in 10 to 15 knots of wind.
If you find boat speed is less, then the problem is an
over-sheeted main or trying to point too high.
There is a technique involved in sailing main only, and
once learned how, it is a very relaxed form of sailing.
The secret is to keep the main eased out more,
particularly after a tack. Don’t try to point high until
boat speed has built up.
You can now release the jib furler line and pull on the
leeward jib sheet. Now you’re sailing!
Corsair trimarans are sailed like any other yacht, the
most notable differences being the response, lightness
of the helm and the low angle of heel. This ranges from
an average of 5° to 10° to a maximum of about 15°.
Pointing ability is excellent but care must be taken not
to over sheet or try to point too high. Just a few less
degrees pointing, with sheets slackened slightly, can
see the boat speed jump from 10 or 12 knots to 12 or
14 knots.
To reef, first point the boat into the wind depowering
the main. Disconnect the cunningham eye tackle. The
topping lift should also now be used to lift the back of
the boom a couple of inches above horizontal.
Now release the outhaul from the clew, separating
the mainsail from the boom entirely. Go forward and
after releasing the main halyard pull the luff of the main
down untill the Cunningham can be hooked into the
reef attachment. Now lock off the main halyard. Go to
the back of the boom and reattach the outhaul to the
new reef position. The sail is now fitted in it’s reefing
position. The excess sail can be roiled up by hand and
then zipped away in the foot of the sail which has been
designed to house this extra sail while reefing. You
can now apply Cunningham and outhaul tension as
needed. Reefing is complete.
https://www.boat-manuals.com/

PAGE 12
Roller furler handle
ROTATING MAST CONTROL
The correct rotation of a rotating mast will give a
much more efficient and powerful mainsail. It is thus
important that the rig not be set up too tight as this can
prevent full rotation.
There are many opinions on what the correct amount of
rotation should be but a general guideline is to keep the
mast rotated enough to give a smooth, even, transition
from the mast to the mainsail on the leeward side.
Achieving the right amount of rotation will improve
your speed and mainsail shape by pulling the apparent
breeze through the slot efficiently. The amount of
rotation will vary between 35° to 90° degrees.
Apparent breeze
Mast rotation
Avoid allowing the mast to rotate or swing back and
forth, which can happen in light winds combined
with waves or when sailing off the wind with less sail
pressure. This is usually prevented by having the
mainsheet angled forward from the boom, which forces
the boom forward to keep the mast rotated when
pulled tight.
The amount of mast rotation is controlled by a line to
the rotation arm on the mast from the boom. This acts
as more of a preventer than a positive control. The
mast will naturally rotate in s position generally in line
with the apparent breeze. The control line will prevent
the mast from over rotating. A line from the boom has
the advantage of being self-tacking by maintaining the
mast at a constant rotation angle relative to the boom
on all points of sail.
https://www.boat-manuals.com/

PAGE 13
WINDWARD PERFORMANCE
All corsair models will point very high if set up and
sailed correctly but this can also be very dependent
on the crew’s skill. It is possible to point just as high
as a mono hull but this may not be the fastest way to
windward. A good multihull is capable of much higher
speeds to windward than a mono, which also brings
the apparent wind forward, to where pointing is much
greater.
One thing to avoid is over sheeting the headsail, while
pulling this very tightly will guarantee a good pointing
angle; the boat speed may be slow. The correct way is
to let the sheet out 1”-2” from being tight on so that the
curve of the headsail leach matches the curve of the
mainsail.
It should then not backwind the main and your pointing
angle and boat speed should both be excellent.
Once you have achieved good boat speed, then
experiment by tightening sheets very slightly, pointing
slightly higher, while trying to maintain the same boat
speed.
The mainsail traveler should be pulled to the center
of boom in light to moderate winds and as the
wind increases, moved outboard slightly and more
mainsheet tension applied. In very strong winds the
mainsheet should be pulled on as tightly as possible.
A tight mainsheet helps keep the forestay straight for
good pointing ability.
If the jib is back winding the main, open the slot by
moving the traveler a little more to center. Keeping
an open slot between jib and main is crucial to good
windward performance as any back winding of the
main will choke the boat. Equally as important, the jib
must be relatively flat with no hook in the leach and not
over sheeted.
If set up and sailed correctly, a Corsair trimaran will
match the windward ability of the best mono hull racers
that are
20% to 30% larger. Pointing high and going fast is one
of the hardest things to achieve in any boat but with a
little care and tuning a Corsair is one of the best.
Achieving good windward performance can be very
satisfying but it does depend on a lot of factors being
right!
REACHING
When reaching, it is vital that the mainsail be let out far
enough. A common mistake is to sheet it in too tightly
resulting in loss of boat speed, a heavy helm and an
excessive heel angle.
Always remember you will generally go faster by easing
the sheets out. Pulling on them tighter is more likely to
slow you down.
Your mainsail should have leach tell tails fitted as
standard. Watch these, and should they disappear
behind the mainsail to leeward then you are sheeted in
too tightly. They should always be flowing aft.
All sails trimmed to work together
SPINNAKER
The spinnaker is a very easy sail to use on a trimaran,
due to the wide beam and level sailing. The spinnaker
thus becomes a very practical and safe sail for family
sailing with very few control problems. All Corsair
models use an asymmetric spinnaker which are the
easiest to use, and the fastest if used correctly.
The asymmetric spinnaker can be launched from the
leeward wing net, or furled from a top down furler, and
the sheets led back to blocks on the aft beams near
the floats for general all round performance. For better
pointing ability, particularly when tacking downwind, a
closer sheeting angle is better, and the ideal position
will vary depending on spinnaker. A block on a movable
strap around the aft beam gives plenty of options in this
regard.
The tack line is led from a pad eyeat the end of the sprit
back along the main deck to a cleat on the deck at the
aft end. To set, connect tack line, sheet, and halyard.
Pull on tack line until tack is at the end of pole, hoist
and then sheet in.
Alternatively if a top down furler is used the furler drum
shall be shackled to the bowsprit pad eye and the
furled sail shall be led back into the main hull. Prior to
reaching your mark hoist the spinnaker being sure to
https://www.boat-manuals.com/

PAGE 14
apply plenty of halyard tension, this is critical to the
furling ability of the sail. Hoisting the sail furled is a very
easy and safe exercise. Now that the sail is hoisted and
you have rounded your mark you can release the furler
lines and pull on the sheet, the sail will very quickly
unfurl and you are now sailing under spinnaker.
Depending on wind conditions and points of sail you
may choose to sail with the jib furled or unfurled. If the
jib begins to flog it should be furled quickly to avoid any
permanent damage to the sail.
Sailing with spinnaker
SPINNAKER JIBING
The asymmetric spinnaker can be jibed either through
the slot between the forestay and spinnaker tack or
around the outside. With ‘inside’ jibing the sheets
are run between the spinnaker tack and the forestay.
Outside jibing requires the sheets to be run outside the
spinnaker tack.
Inside jibing is probably the most common, as outside
jibing does have the risk of a sheet going under the
boat, though this is lessened using a continuous one
piece sheet. The advantage is that the sail does not
have to fit through a narrow slot between spinnaker
and forestay.
With inside jibing, the skipper should start turning
slowly while the crew eases the sheet to keep the sail
full. As the clew nears the slot or the spinnaker starts
to collapse, the new sheet should be quickly pulled in
to pull the spinnaker through the slot and around while
also releasing the old sheet.
The outside jibing procedure is similar with the crew
waiting until the clew reaches just in front of the
headstay and then pulling in the new sheet, with the
sail going around the outside.
In all cases it is very important that the skipper turns
slowly and then heads up to fill the sail before coming
to the right course.
SPINNAKER SAILING DOWNWIND
On first using an asymmetric spinnaker you may be
disappointed with downwind performance -unless you
take note of what is said here. The asymmetric cannot
match a full symmetric spinnaker straight downwind
because of the smaller, flatter area and a restricted
ability to project to windward. The major advantage
is considerably easier handling and superior reaching
performance.
A rotating mast is very efficient and can achieve a very
large performance increase over fixed masts making
downwind tacking a possibility.
The basic technique/rule is to sail downwind while
keeping the apparent wind at about 90°, trimming the
sails so
they are not stalling or luffing. The extra speed
generated will pull the apparent wind further
forward allowing you to go deeper and deeper while
maintaining a very high speed. Just keep the apparent
wind at around 90°. It can be tricky to get the right
angles, but if done correctly, the results can be
exhilarating. So try it! Flying the jib inside the spinnaker
may also help improve performance.
https://www.boat-manuals.com/

PAGE 15
SAFE SAILING
RECOMMENDATIONS
DANGER
Be fully aware that it is possible to capsize any
multihull and the following rules should always be
observed for safe sailing
1. Reduce sail early as follows:
a. Main should be reefed to reef points when
wind reaches 20 knots.
b. In 30 knots main furl main to 3rd batten.
Other variations of the above are possible depending
on the circumstances. Experienced and alert racing
crews can delay reefing to even well beyond the above
limits.
A quick way to reduce sail and achieve a very
comfortable and safe motion is to simply drop the
jib and sail under main only, reefed if considered
necessary. This avoids the need to tack the jib and the
fully battened main remains docile and easy to handle.
Sometimes when running downwind, it is better to drop
the main and run under jib only. Corsair trimarans can
go to windward and tack while sailing under either jib or
mainsail alone.
2. When winds are strong and gusty, and the boat is
being sailed hard, crews should always have the
sheet of the largest sail, be it the mainsail, jib, or
spinnaker in hand, ready for quick release.
Always be ready to release the sheets if you feel
the boat is being pressed too hard. Instruct your
crew to do likewise. If concerned, then just reef
until you are comfortable.
When reaching, it is better to bear away downwind
than round up. The boat will slow down and
mast momentum from the turn is to windward,
reducing heel. Round up and speed may increase
surprisingly, while mast is thrown to leeward
heeling the boat more.
The only time to luff up is while hard on the wind.
Do not bear away in this case, feathering the sails
until any gust passes by.
In general, your visual indication of being
overpowered is when the leeward float is pressed
far enough down to have waves regularly wash
over it. If cruising with your family then you should
reef before this happens for the best comfort. If
sailing for speed then this is not of great concern,
providing the crew is vigilant and this sort of sailing
has been done for hours at very high speeds.
It is not unusual to drive the low resistance float
bows through waves or even submerge the float in
some circumstances. This has been found to have
no adverse effect on the boat and in fact the boat
will tend to round up slightly, not slew to leeward
as commonly and mistakenly believed. However,
this is sailing on the limit so don’t push your luck
unless prepared for a ducking.
3. Beware of being caught side on with little speed
and with all sails sheeted in tight. This can happen
after a tack if concentration is lost.
4. If caught in a severe thunderstorm, a simple safety
procedure is to drop all sail and simply let the boat
drift. You will lay side on to the wind which is quite
safe unless the waves are very large, in which
case you should steer off downwind. Corsairs will
steer quite well from a reach to run with no sails
up in winds over 5 knots - try it sometime. It is
even possible to round up into the wind.
5. Always listen to the latest weather forecast before
you set out on any sailing trip.
6. Always leave yourself a large safety margin, be it
while sailing or simply motoring around.
7. Always carry full safety gear, including life jackets
as required by your country’s Coast Guard and
local regulations.
For safety, always wear a life jacket when sailing
hard. Always keep the sheet in hand ready for
instant release
DANGER
Never leave the sheets unattended if un-reefed and
the wind is exceeding 20+ knots.
The above procedures will give a high margin of
safety and should always be observed whenever
safety is paramount. If absolute performance is
required and an experienced crew is aboard, the
above limits can be comfortably exceeded.
https://www.boat-manuals.com/

PAGE 16
SAILING HINTS
Corsair trimarans have several unique sailing features,
one of these being the ability to make continuous
360° turns in the one spot. To do this, while going to
windward for instance, just tack, but don’t touch any
of the sheets. You will continue to turn, jibe and tack
again indefinitely. This can be a handy tactic on starting
lines!
A simple way of heaving is to just tack as above but
immediately put the helm over to turn back into the
wind with the jib sheeted on the windward side. This
prevents tacking again and the boat will instead fall off.
The rudder then takes over again and turns the boat
back into the wind. You will then stabilize like this, just
off the wind, moving forward very slightly. The helm
can be lashed over and you now have a stable, barely
moving work platform to do any needed repairs, stop
for lunch or just wait for someone else to catch up!
Should you ever lose the rudder, for whatever reason,
don’t despair. Among the repertoire of tricks is the
ability to sail without the rudder. It takes a little practice
to get right and it is worth practicing sometime. Pull
the rudder fully up (first making sure you have plenty
of room). Now, to go to windward you sheet the jib
as per normal but let the main right out. Pull the main
on slightly and you will begin moving. Pull the main on
and you will go faster, let it out and you will go slower.
Pull the main hard on and you will tack. Immediately let
it right out until you stabilize on a reach and then start
pulling it in until you are going fast again.
This takes a bit of practice to get it right, and for a
time you will be all over the place but after a while you
should be able to work your way to windward, tacking
too, just by adjusting the mainsail.
You can also sail surprisingly affectively without any
sails. The mast alone is sufficient to get steerage way
downwind and once moving you can bring her up on to
a reach, even back into the wind. This can be a handy
feature for coming into a ramp or dock at a greatly
reduced speed.
Another feature is the ability to back up. This takes a
bit of practice but by turning into the wind, and waiting
until she starts going backwards, you can control
this backing for as long as you want. Just steer the
rudder whichever way you want to go. Can be useful in
backing off a beach, or away from a dock - just let her
go back, swing off a beach or away from a dock - just
let her go back, swing around once in clear water, and
then accelerate away.
The high potential speeds possible with rotating masts
off the wind can be intimidating to new multihull sailors
and, if necessary, the potential speed can be reduced
to a more comfortable level by reducing sail or by under
rotating the mast which depowers the mainsail. More
rotation can be used as one becomes comfortable with
the speeds possible.
When spinnaker running before large seas offshore with
boat speeds of 20 knots or more there can be a danger
of pitch poling. This can be caused by pressure from
the mainsail which cannot be caused downwind should
the bow dig in. The solution is to drop the mainsail,
which virtually eliminates this risk.
The limit for racers with modern rigs will always be
nose diving, though this is hard to do with a Pulse 600
design due to its ‘high volume, reverse bows’ .
Crew position is extremely important on the Pulse. As
crew weight can account for up to 30% of the total
boat weight. Upwind in light airs the skipper and crew
should be as far foreward as possible and sitting in the
center hull or even on the leeward nets. At the wind
increases the weight should be gradually moved aft
and to windward.
The boat should be heeled to leeward (crew on leeward
side) when sailing to windward in light winds, just as
with a mono. This keeps the sails in a more efficient
shape.
BEACHING
One major multihull advantage is the ability to come
right into a beach. You can raise the daggerboard and
rudder and pull the Pulse600 in far enough so that the
boat cannot move around in the waves.
RETRIEVING TO TRAILER
After sailing is finished, the jib and mainsail are furled.
Remember to lift the boom aft end as required with
topping lift for smooth roller furling.
The floats can be folded before arriving at the ramp for
reduced beam or after the boat has been pulled from
the water. Prior to folding, as with all rotating masts, the
mast raising wires must fitted.
Before folding, first check to see that no one is on the
side being folded and then undo the beam bolts. The
beams on the side first released may spring about 12”
into the air as the last bolt is undone. Hold the top of
the beam and lift upward to fold, taking care not to let
the float swing in too fast against the center hull which
could damage the stops. Attack the beam locking
strops. Now fold the second side.
WARNING
Take great care while folded in wind of 25 knots or
more. A combination of a high cross wind and a fast,
tight turn, may be sufficient to overcome the folded
stability of bigger designs resulting in a roll over
https://www.boat-manuals.com/

PAGE 17
Locking Strop
Raise and remove the dagger board and rudder. You
are now ready for the trailer.
Back the trailer down into the water until the water
reaches the forward inward bend of the trailer but not
any further than this. Gently guide the boat into the
center and pull up as far as it will go. Take care here
that it comes on straight.
A side line from the windward aft saddle may also be
helpful if cross winds prevent the stern swinging too far
sideways.
If motoring onto the trailer, leave the dagger board
down until the last minute otherwise any crosswind
makes it very difficult to keep on center. Once fully
on, connect the trailer winch hook and winch on the
remaining few feet.
The boat can now be pulled from the water and when
on level ground, remember to check that it is fully
winched slack in the winch wire. Tie an extra safety
line from the bow eye down to the winch post, ready
for de-rigging.
DE-RIGGING
Remove the bow line, separate the two lines, and use
as the side tie - downs. Fit aft and fwd mast support
and the trailer lights.
If possible, relieve the tension on the battens and these
can be left in the loosely rolled main. Remove the
roller furling handle (if fitted) and stow in the anchor
well. Leave the topping lift on to take the weight and
disconnect boom from the mast. Lay it down in the
cockpit and fit the sail cover/bag. Disconnect the
topping lift and reconnect to the mast.
To lower the mast, ensure the spinnaker halyard is
secured to the horn cleat on the mast side. Release the
trailer winch hook (or attach mainsheet blocks), pass
it over the bow and hook to the spinnaker halyard.
Tension the winch until the forestay just becomes slack,
allowing the pin to be removed. There is no need to
slacken the turnbuckle.
Take the forestay back and secure to the mast.
Remove all halyards etc. from the rope clutches and
blocks as required. Wrap these around the mast to
retain all stays and halyards neatly against the mast.
It is important that this is done now, otherwise when
lowering the mast any loose stays will tend to fall away
over the boat. It also makes subsequent rigging easier.
Fit the mast raising pole/yoke assembly and begin
lowering the mast by letting out the trailer winch line.
The raising wires must be fitted with rotating masts.
As the mast comes down take care that the winch line
meets the center of the raising pole, and that the mast
is central when it reaches the aft mast support.
Once the mast is fully down, disconnect the winch
hook, reconnect to the bow eye, and retention. The
spinnaker halyard is then reconnected to the mast.
Disconnect mast from the step and walk the mast
forward until the mast can be mounted on the fwd
mast mount.
Secure the mast to the fwd and aft mast support. All
rigging wires and stays should now be secured to the
mast. This is to prevent them from rubbing on the deck
which will quickly wear through any gel coat or paint.
On long trips it is also a good idea to pad between the
wires and the mast or remove the wires altogether.
CAUTION
Do not use elastic cord type ties on the mast with
hooks as they can be dangerous by whipping back
and causing eye damage.
Rudder should be removed and stored. Should local
regulations not permit the rudder case to be left on
the transom, it should be removed and stowed in the
towing vehicle. If fitted, secure the pop top down or it
could lift up during high speed towing.
Connect the trailer lights (making sure they are on the
correct sides) and then check that the trailer is correctly
positioned under the hull. You are now ready for the
road.
LIFTING OUT
Should there be no ramp present then the Pulse 600
like all Corsair models can be quite safely lifted in and
out by the usual dockside lift.
Slings can be used around the complete folded craft,
the best bearing areas for the slings being the beam
areas.
https://www.boat-manuals.com/

PAGE 18
MARINA DOCKING
For marina docking, the shrouds are released from
the floats and the floats folded as normal. The marina
slip can then be entered and the folded boat moored
as with any other craft. However, care must be taken
if high cross winds are a possibility, as folded stability
is limited. Precautions include running a line from the
mast to the dock on each side, a wider folded position,
or lowering the mast in extreme conditions.
One problem with marina docking is stains or growth
on the lower float sides. This is not a major problem
with short stays in a slip, but will be a nuisance over a
long period. There are several ways to overcome this,
one being the use of an antifouling wax on the float
sides. Thus the gelcoat finish is preserved and only an
occasional wipe is needed. Antifouling paint could also
be applied to the float sides but this is not attractive, it
needing to be 2’ 6” wide.
One of the best and recent solutions for long term
marina docking is a dock liner, which surrounds the
boat with sterilized water, preventing growth.
SAFETY
The modern trimaran with its enormous stability
and unsinkability is a very safe craft and has now
established an excellent safety record. However, this
safety is dependent on the operator and how the craft
is handled.
The major hazard to be avoided is capsizing. This is
rare with well sailed multihulls but can occasionally
occur with racers pushing it to the limit. Sail too fast for
the conditions and the risk of capsizing is higher.
In general, the risk factor will only begin to increase
when boat speed exceeds 15 knots while reaching
or about 10 knots windward. When sailed for the
conditions, or with safety in mind, Corsairs are the
safest craft afloat.
UNSINKABILITY
This is the ultimate safety feature for any boat. All
Corsair models are unsinkable being constructed
almost completely in foam/glass with multiple
watertight compartments. With no heavy keel, it is
therefore immune from sinking, even with all watertight
compartments flooded.
There are 9 watertight compartments, including:
¡Floats
¡Forward collision compartment
¡Storage locker
¡Under cockpit floor
¡The four beams
CAPSIZE
Capsize is always a possibility even if a remote one and
should it ever occur, stay calm and make sure all crew
are accounted for. Anything stored within the storage
locker will remain dry and undamaged
RIGHTING
When the opportunity arises and outside assistance is
available, the most successful system for any multihull,
is to tow the capsized boat fore and aft. Depending
whether the stern or bow is lower in the water will
determine where you attach your tow line bridle, so
make sure you choose the end that is floating highest.
You may need to use a second bridle line and attach
this to the beams that are closest to the tow vessel
(see Dia). These lines will prevent the vessel slewing off
line as you right the vessel. As you begin to right your
vessel you will need to ease these lines.
If the above procedure does not work, then try flooding
the end that needs to sink, or add some crew weight
(ready to abandon ship once the end concerned starts
to go under). If this fails, try towing the other direction.
Some controlled flooding may also be required. Towing
sideways will not work.
Righting your vessel using the following folding system
is as follows:
Righting Procedure
PERSONAL RESPONSIBILITY
There have been exhaustive efforts to minimize the risk
of personal injury, loss, or any other form of damage,
while operating a Corsair built trimaran but obviously it
is impossible to completely eliminate every risk. Deck
gear cannot be made trip proof, nonskid can wear
and cause slipping, rigging wires can be kinked while
rigging and later fatigue, lifelines can be fallen over,
groundings at speed can cause eventual dagger board
or rudder failure, neglect of proper maintenance can
cause early failure and lack of experience can cause
accidents in congested areas or bad conditions. Sailing
can be hazardous at times and the boat operator
should accept responsibility for all such hazards.
Many of these risks have been covered in this manual,
but obviously it is impossible to cover them all. Some
recommended procedures may not even be the
correct ones in certain situations. The operator should
therefore always be vigilant against all possible safety
https://www.boat-manuals.com/

PAGE 19
hazards and correct or warn the crew against any
possible danger immediately.
SAFETY IN GENERAL
Capsize matters can be depressing but to put it in
perspective, a capsize is simply very difficult to do.
Luffing up slightly or bearing away (if on a reach) is
usually all that is required. The risk of capsize can be
virtually eliminated simply by reducing sail according to
the conditions and being prepared to let the sheets go.
When under spinnaker in winds of over 20 knots it
should always be a matter of policy to never leave the
spinnaker sheet unattended. It should be hand held,
not even cleated. Cruisers shouldn’t even use the
spinnaker in over 20 knots. Under main and jib you
can still reach 15 knots, with complete comfort and
safety.
Fortunately it is very hard to capsize a Corsair trimaran
but this can lead to overconfidence. Don’t fall into this
trap! Always be aware that it is possible to capsize and
reduce speed accordingly to suit the conditions - just
like any car.
TECHNICAL NOTES
WINCH LINE
The trailer winch line should be regularly replaced. This
tends to wear quite rapidly and is under a high strain
when lifting the mast. A breakage here could be very
dangerous. It is always advisable to stand clear of the
line while lifting the mast. Also, frequently check the
trailer winch line tight when on a long trip.
SPRING RETAINING CLIPS
The spring retaining clips as used on the turnbuckle
clevis pins should be regularly checked to ensure they
will still ‘clip’ fit on the clevis pin. Replace if they have
lost their spring and become loose, otherwise you
could lose your mast.
These spring clips have been used successfully for over
20 years and are intended as a convenient ‘quick rig’
feature. They are not as secure as a properly fitted
cotter pin, and if any doubts exist on their use then
a cotter pin or circular ring should be used instead
and a few of these are usually included in the toolbox.
However, these rings or pins will increase rigging time
and the final decision in this regard is for the owner.
LAUNCHING
If immersing the trailer to the bend in the frame will still
not let you free the boat, be careful; a few inches more
can have your boat drifting away so have a bow line
secured.
BEAM BOLTS
These should always be in place and tightened before
going sailing. Otherwise the upper folding struts can
again be overloaded as above due to the beam inner
end being forced up slightly by sailing loads.
It is also possible, but unlikely, for a beam bolt to gall
and seize in a bolt pad, which can prevent you from
folding up the boat. If this happens, then you can
still fold up the boat by simply releasing the bolt pad
nuts from inside or cutting off the Beam bolt head. To
avoid this, keep the threads well lubricated with Teflon
grease.
HOISTING MAINSAIL
If you find this is tight going up or down (a not
uncommon problem with full batten boltrope mains)
there are now some spray-on silicon compounds that
can help. Remember to also check that the mainsail
foot outhaul is slackened off.
BEARING AWAY
Don’t forget this is a very effective and safe way
of absorbing gusts while reaching in strong wind
conditions, particularly under spinnaker. Rounding up
tends to throw the mast to leeward (the wrong way)
and can increase speed dramatically - all very exciting.
However, bearing away throws mast to windward,
speed falls off and the motion feels much safer. This
may sound odd, but try it sometime in lighter conditions
to get confidence - it really works.
RUDDER/DAGGERBOARD HUM
This is not an uncommon occurrence due to the
difficulty in getting perfectly fair foils in a production
environment, and even carefully handmade foils can
develop a hum. This can be reduced or eliminated with
a little fine tuning by filling or sanding the trailing edge
of the foil concerned.
COMPRESSION PADS
These are fitted to the ends of the beams on all Corsair
models to eliminate any gap or movement between the
beam ends and the raised pads in the hull.
Do not remove, as this would cause the high
compression loads in this area to be directed through
the upper folding struts which are not strong enough
for such loads. They are designed for folding loads
only and end mounting points may fail.
https://www.boat-manuals.com/

PAGE 20
This would not cause a serious beam problem as the
beams then simply move inboard to bear against the
hull again.
FLOAT/BEAM VENTS
The floats are vented through micro cowl vents fitted
to the float transoms. These are to prevent a buildup of
air pressure inside the floats on hot days that could be
enough to open up the hull to deck join.
Should the float be inverted as in a capsize, then the
airlock formed above these vents would prevent any
significant flooding.
The floats are vented through micro cowl vents fitted
to the float transoms. These are to prevent a buildup of
air pressure inside the floats on hot days that could be
enough to open up the hull to deck join.
Should the float be inverted as in a capsize, then the
RUST
Many grades of stainless steel will get an occasional
brown stain saltwater that can look like rust. The grade
used on most marine fittings is Type 304 or 303 and
both of these will show this. Type 316 which is a more
expensive grade but actually slightly weaker, does
not. All three grades can be used on your Pulse 600,
depending on the application. To avoid this staining,
always wash your boat down with fresh water after
every outing. The brown stains will not appear if the salt
is washed off.
CLEANING FLOATS
These can be extended for cleaning, if wished, while
boat is on the trailer. Float supports must be dropped
down and the boat then rocked one way. The ‘high
side’ float can then be extended. Let the boat lean the
other way and the remaining float can be extended.
You will need to support the floats in some way once
extended.
MAINTENANCE
In general, after every sail, the complete boat and trailer
should always be thoroughly washed down with fresh
water. This is very important to keep that new look and
to prevent rust taking hold on the trailer. Particularly,
wash out the brakes and suspension area of the trailer.
Regularly check the bilges of the center hull and floats
for any water. Sails should always be rolled up or folded
(the same way as you receive them) – dried first it wet.
If possible, keep your boat under cover as this will
ensure the finish keeps its gloss for the life of the boat.
Even the best gel coat finish will eventually begin to
fade. Polishing your Corsair Trimaran once a year will
maintain the gel coat shine and strengthen the gel coat
surface.
MAST
¡Masthead sheaves should turn freely and clevis
or pivot pins should not be worn or show signs of
distortion.
¡Sheaves should turn freely, and clevis or pivot pins
should not be worn or show signs of distortion.
¡Forestay tab/nose should be checked for any
cracks or sign of distortion.
¡All other stay attachments to mast should be
checked for distortion or corrosion.
HULL
¡Check bow pad eyes and saddles for any
movement.
¡Check all chain plates for any signs of movement.
¡Check deck to hull joints where visible for any de-
lamination or cracking in joint.
¡Check wing nets, particularly eyelets for wear.
Wing nets should be replaced every three or four
years. The taped edges are usually the first to fail and
sometimes just redoing these will extend the net life.
Replacement nets can be purchased from Corsair
Marine by contacting the factory or your local dealer.
¡Check rudder case for any sign of stress cracks
particularly at lower end.
¡Check dagger board around bottom edges of hull
for any stress cracks.
¡Check leading and trialing edges of dagger board
for any de-lamination.
¡Check control lines for wear and replace if
necessary.
¡Check hull area around lower folding strut
brackets for any sign of damage/cracking.
STANDING RIGGING
¡All stays should be checked for broken strands
or corrosion, particularly at end stages. If any
stays are badly kinked, replacement should be
considered. Stainless steel is prone to fatigue and
in a trailer boat it is not uncommon to get kinks in
the stays while rigging or de-rigging which further
fatigues the wire.
Check all turnbuckles for corrosion and that all locking
rings or pins are in place and work correctly.
https://www.boat-manuals.com/
Table of contents
Other Corsair Marine Boat manuals