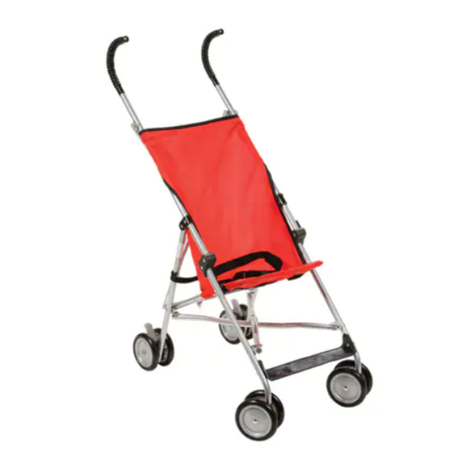
Cosco 01070 User manual

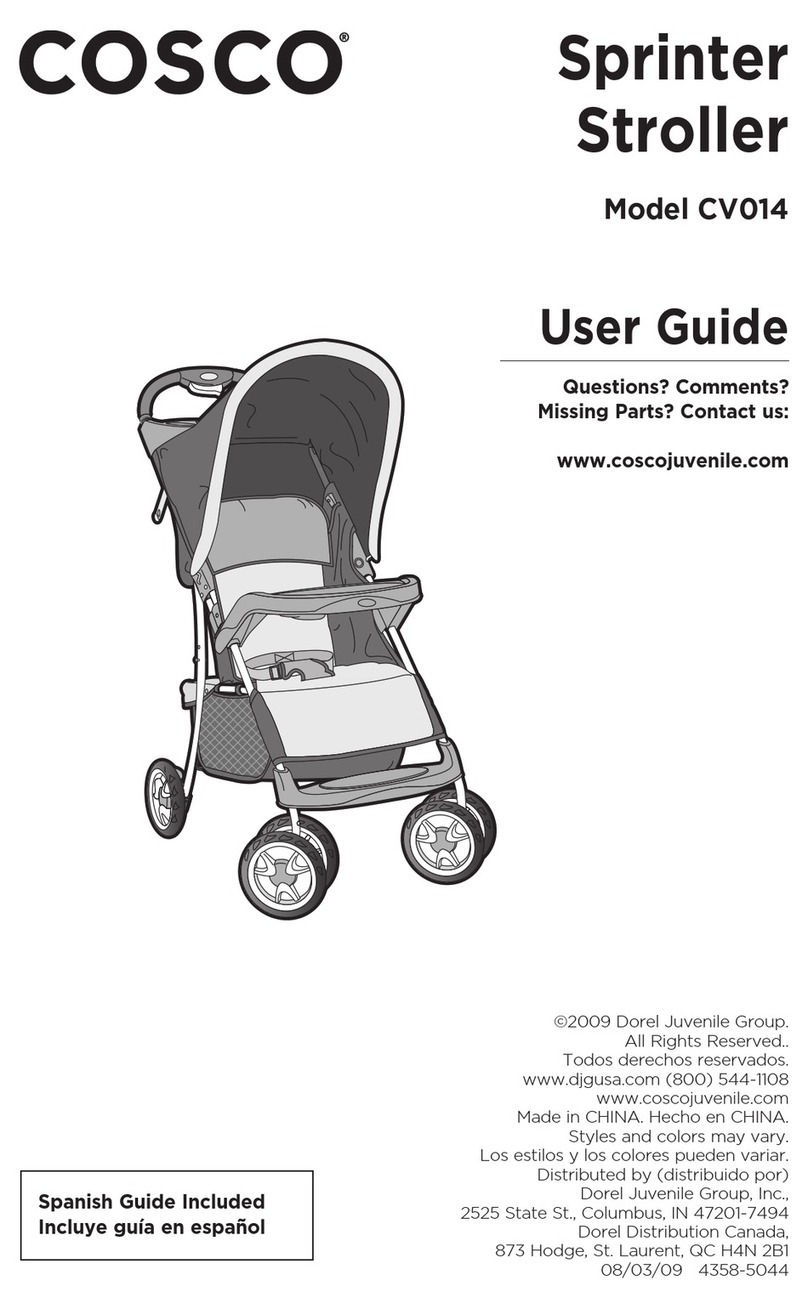
cosco Sprinter
Stroller
ModelOIOTO
User
Guide
Questions?
Comments?
Missing
Parts?Contactus:
www.coscoj
uven
ile.com
SpanishGuide
Included
lncluye
guia
enespahol
O2OO9
DorelJuven e Group.
ail R,9l-rs
Rese,ved..
Todos derechos
reservados.
www.djgusa.com
(80O) 544-1144
,.v\A
w (
O>COJJ
/en e.CO'a
Made in CHINA.
Hechoen CHINA.
Styes
anclco ors may vary.
Los e;i os \r o: co ore. pLede^ va'a'.
g 51.e-red by .
distrbu,do po \
Dore Juvenl
e Group, nc.,
2525StateSt, Co umbus, ll\ 472417494
DorelDistribution
Canada,
873 lodge, St.
Laurent,QC H4N 2B1
03/30/a9 4358-4786

UsingYourStroller
To Use
Child's
Tray
l. Guide
tray tabs intoslotson
strollerframe.
Push
untiltray clicks
into place.
To remove
tray,pullout
finger
tabsonbothsides
andslide
tray out.
To UseBrakes
l. Stepdown onto levers
on both
rear
wheels.To parkstroller,
BOTH
BRAKES
MUSTBELOCKED.
Lift uo
levers
to unlock
brakes.
To Adjust SeatPosition
1.
To lower seat back:Locaterelease
clipbehind
backrest.Squeeze
release
clip,
pullawayfrom the stroller
and
lowerseatback.
2.To raise
seatback Holding
the ring
on the strap,squeeze
releaseclipand
push
toward the seatback
(Figure
2).
NOTE:
DONOT
adjustthe seatwhen
your
childisinthestroller.

UsingYour
Stroller
To Use
RestraintSystem
1,
Place
your
child
inthestroller,
with
thecrotchstrap
between
thechild's
legs.Fasten
bothbuckles
(Figure
i).
Tightenstraps:
Pullout bottomloop
to desired
tightness,
then
pull
onstrap
end.
(Figure
1a).
Loosenstrapst
Pullout bottomloop
for slack,
then
pull
outtop looP
to
desired
looseness,
then
pull
onthe
buckle.
NOTE:lfthestraps
should
comeout
of thebuckle,
rethreadA - Dasshown
(Figure
1b).
AWARNING
. NEVER
LEAVE
CHILD
UNATTENDED.
ALWAYSkeepchild
in
view
wheninstroller.
. AVOIDSERIOUS
INJURYfrom
falling0rslidingout.
ALWAYSuseseat
belt,Check
frequently
to
make
sure
itissecure.
. Beltsmustbe
threaded
exactlyas
shown
(Figure
1b).
. Failure
tofollow
theseinstructions
could
result
intheserious
injury
or
death
of
your
child.

f-) Using
YourStroller
To FoldStroller
L Lockrearbrakesand remove
your
baby.
Closecanopy.
Slidethebutton
on handlebarto theleftand
squeeze.
2,Hold
thebuttoninandPush
thehandlebar
down.
3.Secure
thestroller
latchontothe
post
stroller
frame
tube.Stroller
will
stand
alone.

Using
YourStroller
To InstallDesigner
22lnlant CarSeat
l. Remove
adapterbarfrom behind
seat
back.
Recline
seatbackto lowestposition.
Close
canopy.
2. Insert
the rigidend of adapterbar
into holeinside
stroller
frame.
Move
fabricto get better access
to the hole
inside
the frame.
Pushin spring
end
and insertintothe holeon the other
side.
Test
to make
sure
barissecurely
installed.
NOTE:
Make
sureno
fabricis
caught
between
the bndsof the adapterbar
and holesinframe.
AWARNING
To
avoid
serious
injury:
.Use
ONLY
Designer
22intant
carseats
withthe
Travel
System.
' Please
refer
to
the
manufacturer's
instructions
for
the
us-e
of
your
infant
carseat.
.ALWAYS
use
child's
tray
when
car
seatisinstalled.
.ALWAYS
install
car
seatfacing
to
therear
ofthe
stroller.
.ALWAYS
usethe
restraint
system
inthe
car
seat.
' Place
adapter
barin
storage
position
behind
seat
backwhen
not
in
use.

Using
Your
Stroller
To Instaf
l Designer
22lntant Car
Seat,
continued:
3. Car seat must be
positioned so that
child faces the stroller
handle, Lower
thecar
seat
downsotherear
rests
inside
thechild's
tray.
The
channel
atthe
frontof the
car
seatshould
restonthe
adapter
bar.
4, Press
downinthewell
of thecar
seat
onto
the
adapter
bar
(Figure
4).
Car
seat
will
click
when
locked
in
place.
Pull
uPon
car
seat
to makesure
it is
securely
installed
(Figure
qa).
5.
To remove
thecar
seat,
Pull
upontherelease
button
underneath
theheadrest
(Figure
5).
Remove
the
adapter
bar
and
replace
instorage
Posltlon
behind
theseat
back
(Figure
5a).

A lt'lPonrRr.lrt
Failureto follow the warnings on the labels
"na in the instruction manuil can result in
the death or seriousiniury of your child.

Failure to follow these warnings can result in
the seriousinjury or death of your child. To
help you recognizethose instructions which
are most critical to your child's safety,
we
usethis sYmbolA:
AAccordins to accidentstatistics,
children
are saferwh-en
properly restrained in the
rear seating poSiticinsthan in the front
seatingpositions.
^dR' AN.t"t place a child in front of an
[[l${airbag in the reanfacing position.
\lI1/ Death or serious injury can occur.
-
Antir child restraint must alwaysfacethe
rear of the vehicle.
Altir restraint must only be usedwhen the
chitdweighsbetween 5'22lbs. (2.3'| 0 kg).
AN."." placea child less
than one year old
forward facing.
ACtreck vehicleinstructions for more
information about air bag/child restraint use.
AFo" vehicleswith an air bag,but without a
back seat,refer to your vehicle owner's
manual.
AMake sure the harnessheight is correct
for your child's
size.
ATlr. harness must be snug.
AThe vehicle or LATCH belt must stay
tight at the belt path. lf it's not, your child
could be injured or killed.
A Never take your child out of the child
restraint or try to tend to your child's needs
while the vehitle is moving. Never leave
child unattended.
ADo not usea child restraint with damaged
or missing parts.
ADo not usecut,frayed or damaged
harnessstraps.
ADo not substitute parts or try to modify
the child restraint in any way.
AOo not usea child restraint that has been
in a crash.You must get a new child
restraint.
AUse the child restraint only on vehicle
seats that face forward. Do not use on seats
that face the sidesor rear of the vehicle.
ACheck the vehicle or LATCH belt before
each use.Use only if the belt can be
tightened properfy and securely.
Afnis child restraint should be securely
belted in the vehicleevenwhen not in use.In
a crash or sudden stop,an unsecured child
restraint could injure other occupants.
A.l,.lever
allow any child to play with this
child restraint; it i-snot a toy.
ADo not lubricate buckles and fasteners.
ADo not usethis child restraint when the
top of your child's head comes within one
inih ofthe top of the child restraint's head
area.
ADorel luvenile Group doesnot recommend
the use6f anychild reitraint accessories
except those-provided bYDJG.
ADo not remove any of the warning labels
or other labelson the child restraint.
APlacing your child in a hot child restraint
may result in burns.
ARead instructions for other warnings.
1ichelp
protectyour vehicle
seat's
upholstery
from
damage,
use
atowel underneath
and
behind
thild
restraint.
To avoid your child being seriously burned, take
the following precautiona:
l.Park
in
theshade
or where
sln does
not
directly
hitthe childrestraint,
2.Corer the childrestraint
with asheet
or blanket
when
not in
use.
3.Check
for hot seat
andbuckles
before
placing
child
in
child
restraint.
Childrestraints
could
berecalled
for saferyreasons.You
must
register
thisrestrgint
to bereached
inarecall.
Sendyour name,
address
and
the restraint's
model
number
and
manufacturing
date
to:
Dorel
Juvenile
Group,
Inc.
PO Box2609,
Columbus,
lN 47202-2609
Attn:Consumer
Relations
or visitwww.djgusa.com
or calll-800-544-
|108
Forrecall
information,
callthe U.S.
Government's
Vehicle
Safety
Hotline
at l-888-327-4236
(TTY:l-800-
424-9153),
or goto http://www.NHTSA.gov.
Thischild
restraint
iscertifiedficr
aircraft
use.Useon
forward-facing
aircraft
seats
onlyandinaposition
where
the lap
beltcanbe
tightened
securelyThis
childrestraint
is
installed
inan
aircraftseat
thesame
wayit isinstalled
ina
vehicle.
Usethe childrestraint
onlywirhF.A.A.
cerrifiedequipment.
Contacttheairlinepriorto takingachildrestraint
on
boardinorderto comply
with their specific
regulations.
5

Your
vehicle's
Gatures
may
beconsiderably
different
than
those
pictured
here.
Coniult
your
vehicleonrner's
manual
to help
identifiyourvehicle's-specific
features.
______-----
i
.
,\
d
A.Anchor Bracket
F_or
Top
Anch
orage
Strap
(Forwdrd-Facing
bnty)
B.LATCHAnchors
(ln
seat
bight)
C.Seat Buckles
D.Air Bas
(Consult
yo-ur
vehicle
ownerb manual
for allair
bag
locations)
E.Seat
Bisht
(Where
seaicushions
meet)

Back
A. Handle
B. Canopy
C. Head/HipRoll
(on
selectmodels)
D. HandleAdjustment
Lever
E. Harness Retainer
(one
or two piece)
F. Harness Straps
G. Buckle Plate
H. Buckle Release
Button
Removable Base
CanopyWindow
(onselect
models)
HarnessAdjustment
Brackets
Base Release
Handle
M. LockingGlip
(under
childrestraint)
N. Instructions
(under
child
restraint)
O. Shell
(child
restraint)
P Levelto Ground
Line
t.
L

ReanFacinq
5-22
lbs
(2.t-lOl(g)
AND 19"-29-
tall(48-74cm).
NOTE: lf your child
does
not meetthe criteria
for the
Rear-Facing
position,
do not usethischild
restraint!
YouMUST maketheseadjustments
with your
childbeforeyou install
the childrestraint inthe
vehicle.
From
the backof the child
restraint,
loosenthe free
endof harnessfrom
harness
adjustment
bracketto makea loop.
Pulldownon harnessat
the harnessslotto
remove
the loopat the
harness
adjustment
bracket.
RearrFacingwith base:
Child
andchild
restraint
with base
face
the back
of
thevehicle
and
areplaced
inthe back
seat.
ReanFacing without
base:
Child
and
child
restraint
without base
face
the back
ofthevehicle
and
are
placed
inthe back
seat.
Fromthe front of child
restraint,
pull
on harness
to loosen.Repeat
for
other adjustment
bracket.
l2 continued
on nextpoge.

Harness
Slot
Dependingonyourmodel,
presson harnessretainer
releasebutton and
pull
apart
(4A) OR push
down
ontab (4B)
and
slide
harnessout.
Pressredbuttonon
buckleto releasethe
buckle
plates.Pullbuckle
plates
out. Place
harness
straF over
sidesof child
restraint.
Placethe child's
bottom
andback
flatagainst
the
childrestraint.This
will
increase
comfort andallow
the harness
to properly
tighten.
Check Harness Height:
Determinewhich
set
oT
harnessslots
works best
for yourchild.
Adjust
if
needed.
Harnessslot being
used
must
be even with or
just below the shoulders.
lfthe bottom harnessslots
areabovethe child's
shoulders.
do not usethis
childrestraint
untilthe
child
growsinto it.
Fromthe back
of the child
restraint,
removefree end
of harness
from harness
adjustment
bracket.
From
thefront of child
restraint,
pullharness
strap
out. Repeat
for other
adjustment
bracket.
Rethread
harness
into new
harnessslotlocation.
Makesureharnessstraps
do not twist.
continued
on nextpoge.

Il
Failureto rcinstallthe harness
system correctly
can rcsult in serious injury or death.
Rethread
oneharness
end
onto one
adjustment
bracket
bythreadingloose
end
overlowerbar,
behind
locking
teethand
up
between
upperteethand
top of bracket.Thread
harnessendbetween
locking
teethandout the
bottom of bracket
as
shown.Make
sureharness
does
nottwist. Repeatfor
otheradjustmentbracket.
To change buckle
location:
Determine
which
ofthe
threeavailablebuckle
slotsisbothcon6rtable
andsnugfor yourchild.
From
underseatshell,
push
downon largetab
and
pull
metalclipout.
Insertmetalclipup
throughtheshell.
Choose
newlocationand
pull
metalclipthrough
shellandbehind
tabs.
Pushdownon clipto lock
underlargetab.
Positionharnessstraps
overthechild'sshoulders.
Fittop buckle
plateover
bottom buckle
plate.The
connectionshould
be
lockedtogether.
Hold
buckle
plates
togetherwith onehand
andbucklewith the other.
Pushbuckle
plates
into
buckleuntil
youhear
a
"click."Pullupon harness
to makesure
buckle
is
locked.
continued
on next
poge.

Dependingonyourmodel,
snaDtheharnessretainer
togbther
(4A) OR thread
harnessinto harness
retainer
(4B).
Pull
harnessstrapaway
fromshell
atthe harness
slot
to tightenharness
snugly.
Pullonfreeendof
harnessstrapto remove
slack.
NOTE: A snugstrap
should
not allowanyslack.
It liesina relatively
straight
linewithout
sagging.lt
doesnot press
onthechild's
fleshor push
thechildl body
intoan
unnatural
position.
Positiontheharness
retainerat mid-chest
(even
with armpits),
away
from
thechild's
neck
l
r{
Fromthe back
ofthechild
restraint,loosen
the free
endof harness
from
harnessadjustment
bracket
to makea loop.
Pull
downon harnessat
the harness
slotto
removethe loopatthe
harness
adjustment,
bracketto loosen.
Dependingonyourmodel,
presson harness
retainer
releasebuttonand
pull
apart
(3A) OR pushdown
ontabandslide
harness
out (3B).
Release
harness
by
pressingredbuttonon
buckle.
Remove
child.
rl!
Failure to fasten and tighten the harness
system correctly with e.-achusecan result in
serious injury or death.
t8

Toadjust
handle,
squeeze
both red adjustment
levers
on each
sideof handle.
Rotateupor down to
desired
location.Release
levers.Makesureboth
sidesarelocked
into place. l
.T
T
ll
t
t
I
2l
20
Read
ALLinstructions
before
using
child
restraint
asacarrier.
NEVER
usecarrier
unless
child
is
properly
secured.
For
use
asa
carrier
by
childl-en
weighing
less
than
22.pounds
(10
kg)
andless
than
29'inchis(74
cm)
tall.
NEVER
leave
child
unattended.
Always
keep
child
within
arm'sreach
Suffocation
Hazard: lnfant
carrier
canroll
over
onsoft
surfaces
andsuffocate
child.
NEVERplace
carrier
onbeds,
sofas
or other
softsurfaces.
Strangulation
Hazard: Child
can
stranglein
loose
harness
srraps.
NEVER
leave
childin
carrier
when
harness
straps
areloose
or
undone.
Fall
Hazard: Child's
movement
can
slide
carrier.
NEVERplace
carrier
near
edges
of
counter
tops,tablbs
or other
elevated
iurfaces.
Donot
usethe
carrier
ifit isdamaged
or
broken,
or ifanyparts
are
missing.
-
Do not use in the
seating area or
across top of
shopping-cart.

The LATCH SYstem Not allvehicle
beltswill
work withthis
childrestraint.
You
mustdetermine
if
your vehicles
belts
arecompatible
with thischild
restraint'.lfyouwill usethe LATCF|
system,
refe"
to the LATCH
section.
ELR - Emergency Locking Retractor Belts
Definition:These
beltsonlylock
in
asuddenstop
or
crash.To
seeif you havethistypeof belt,
pull
onthe lap
belt,letit returnpart
way,thenpull
onit again.lfit
moves
freely,it isanELRbeltandthe childrestraint
'
couldwork loose
durilgnormal
driving.
Referto your
vehicleonrner'smanual.
ELRshoulder
beltseitherrequire
alocking
clipor
cannot
beusedwith any
childrestraint.
ELRlap-onfbeltsmustbereplaced
withamanual
belt;
contactyour
vehicledealer.
A locking
clip
willnot
correct
this
problem.
Automatic/Passive vehicle seat belts
Theautomatic(passive)
2-pointbelthasno lap
belrYou
mustinstall
a lap
beltto secure
achildrestraint.You
may
alsoneed
to installanextralapbekfor anautomatic
3-
pointbelt.Referto the vehicles
owner'smanual.
A
locking
clipwillnotcorrectthisproblem.
Vehiclebelt too short
Contactyourvehicle
dealerfor aseatbeltextender.
Belts in center of the door or sidepanel (A) or
middle of the vehicleseatcushion (B).
Youmust
move
the childrestraint
to anotherseating
location.Alocking
clipwillnotfixthisproblem.
See
"Locking
Clip"section.
continued
on next
poge.
Vehicle Belts
LATCHmeans
Lower
Anchorsand
Tethers
for
CHildren.
Not all
vehicles
manufactured
before
September
2002
were
equipped
with LATCH-
The LATCHsystem
allows
achild
restraint
to be
secured
inthe
vehicle
without
using
thevehicle
beltsystem
ind can
ONLY
beused
in
vehicles
that
have
the anchor
bars
installed.
Check
your
vehicle
owner's
manual
to see
which
seating
Positions
may
beequipped
with the
LATCH
system.
lf LATCHisnot an
option,
You
willuse
Your
vehiclei
belts.There
are
some
vehicle
belts
that
willnotwork withachild
restraint
or willrequire
special
attention.See
nextpagefor sPecific
instructions.
22

Manual Belts
Manul lap
belts
are
common
in
thecenter
rearseat
and
can
allow
the child
restraint
to
loosen
whenit istiltedor
iarred.
After tightening
the
iap
beltsecurelY,
tilt and
oush
thechild
restraint
iorwardand
to both sides'
lf no loosening
occurs'
yourchild
resiraint
should
besecure.
lfloosening
does
occur'
trl
thefollowing:
lfthebuckle
plate
slides
onthebelt,
iurn the buckle
Plate
over'
lfthebuckle
slides,
turn
the buckle.
Refasten
the
vehicle
lap
belt.The
release
button
should
face
out
after
twisting
sothat it is
easy
to reachin an
emergency.
lfthe lap
belt
continues
to
loosen,
the child
restraint
mustbemoved
to
another
location
inthe
vehicle.A
locking
cliP
will
not correct
this
Problem;
see
yourvehicle
owner's
manual.
NOTE: Remove
thelocking
clip
when
theseat
beltis
not beingused
withachild
restraint.
Thelocking
clipis
located
onthe back
ofthe seat.A
locking
clipwill ndt fix
alltypes
of seat
beltproblems.
Before
you putyour childrestraint
inthevehicle,
buckle
thelap/shoulder
belt.Pull
onthdlapbeltportion.
lfit
loosens
or slips,you
must
either
use
a locking
clipto
hold
theseat
belttightor move
the child
restraint
to
another
seatint
location.
Thread
bothvehiclelap
andshoulder
beltsthrough
the beltpath(as
shoarn).
Buckle.
Pull
upon
shoulder
beltuntil
allslack
isout andlap
beltistight.
Grasp
both
vehiclebela
together
just
behindthe
buckleplate
andunbuckle.
Thread
both portions
of
thevehicle
beltontothe
locking
clip.
Position
lockingclip
about
I in.(2.5
cm)from
vehicle
belt's
buckle
plate.
continued
onnextpoge.
vehicle
seat
beltand
latch
plate
(or buckle)

Rebuckle
belt LaP
belt
portion should
now be
tieht. lf not,
remove
lo-cking
clip
and
rdPeat
all
stePs.
Same
steps
aPPIY
for use
onthe child
restraint.
Make
sure
shoulder
belt
follows
lap
beltPath.
P
o
g)
'Tl
p).
r)
oq
6
o
t.l
I
b',
NJ
q
6
!'r
UJ
I
o
oq
-
\o
I
N)
:
+
co
I
\
A
o
26
Lap/Shoulder
Belt LapBelt
LATCHBelt Lay'Shoulder
Belt
Failure
to placethis child restraint facing
the rear of the vehicle
when the child is
between 5-22lbs(2.3'10 kg) can result in
seriousinjury or death.
Placing
a reanfacingchild restraint
in any seat equipped with an air bag
can result in serious
injury or death.

When LATCHisnot
available,
fastenbqlthook
together
infront of base
assholrn.
Push
down
firmly
onthe
base
andpull
uponthe
belt
to tighten.
For
a
manual
belq
refer
to
"Kn
o,.ing
Your
Vehicle
Belts"
section.
Pull
upon
shoulder
strap
to
remove
any
slack
With weakest
hand
atbelt
path,
tilt and
push
thebase
forward
and
back.and
fromside
to side.lfthe
seat
belts
do not loosen,
yourchild
restraint
should
be
secure.
NOTE: Some
"play"
from
frontto backor about
an
inch
from
side
to side
is
v.
0l
.!'.
' -t-1:
.!r.
l'1i,.
Oq.
C
o.
(':l
(tr.
,r5,
tJ
r
'hJ:
i^r,,
|
...
o..
Oq
\O.l
..
r "
Nr.,,
.:\Oj'
4,,
.O
.|...
{r..
.4,.
6.'
rl!
A looseLATCH system
canresult in
serious
injuryor death. 'acceptab|e
lf.jt
m9-ve1
more,
review
"KnowingYour
Vehicle
Belts"
and
"TheLocking
Clip"sections.
Placebase
inthe back
seat
withtaller
side
against
the
back
ofvehicle
seat.
Thread
the
vehicle
lapor
lap/shoulder
belt
combination
through
belt
pathas
shown.Buckle
vehicle
belt.
With child
secured
in
child
restraint,
attachto
base
Alignnotches
in
thefront of shell
with
thebars
onthebase.
Push
downfirmly
to lock
intoplace.
Youwillhear
a
"click"
when
it is
locked.
Pull
upto make
sure
it is
locked
into
place Continued
onnextpoge.
29
Using this child restraint in any vehicle
seatwhere the lap belt cannot-
be
tightened securelyand properly or where
it can be loosenedby pullirieon it can
result in seriousinju-r-y
or d6ath.
Table of contents
Other Cosco Stroller manuals

Cosco
Cosco Lift & Stroll Plus TR337 User manual

Cosco
Cosco US119 User manual

Cosco
Cosco US164 User manual

Cosco
Cosco US120 User manual

Cosco
Cosco US090 User manual

Cosco
Cosco TR305 User manual

Cosco
Cosco CV014 User manual

Cosco
Cosco TR167 User manual

Cosco
Cosco Altura User manual

Cosco
Cosco Lift & Stroll 01211C User manual