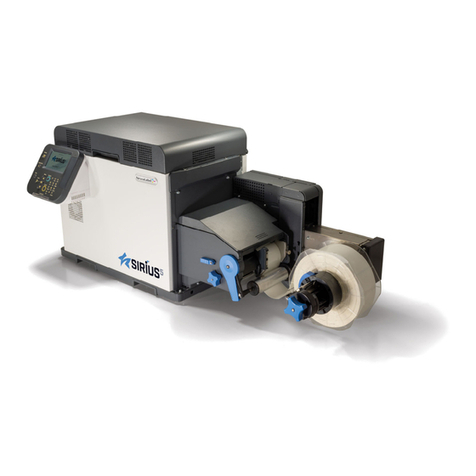
CourierPost SATO D512 User manual

Label Printer Setup Guide –CourierPost SATO D512
Before you start
Download the Seagull Drivers:
1. Visit the following link:
http://www.seagullscientific.com/downloads/drivers/archive/7.2/7.2.2/SATO_7.2.2.exe
This will download the driver installer.
Local Printer Install (USB)
To install the driver:
1. Run the downloaded Seagull Driver installer, which will extract the drivers to a folder called
Seagull on your C:/ drive. You may choose a different folder if required. The installer will ask you
if you want to run a driver wizard and/or view a readme. Just untick those boxes and click finish.
2. Open Control Panel -> Printers and Faxes
3. Click “Add new printer” in the left sidebar, OR right click an empty space inside the Printers and
Faxes window and select “Add Printer”.
4. Click Next, and at the next screen select “Local Printer attached to this computer”, but untick
“Automatically install my plug and play printer”. Click Next.
5. Make sure “Use Existing Port” is selected, then, in the listbox, select a USB Port. Typical names
for the USB ports are “USB001 – Virtual printer port for usb”, “USB003 – Virtual printer port for
usb”. Generally it’s best to pick the port with the highest number to avoid possible conflicts with
already installed printers. Click Next.
6. When asked to select and install drivers, click “have disk”. Click Browse and browse to where you
extracted the drivers earlier (default is C:/seagull/). Select the driver file (it’ll be the only visible
file in the folder). Click okay to confirm the selection.
7. Browse down the list of printer models now available. Select “Sato D512”.
8. Click next to continue.
9. When asked to name the printer, call it “Ticket-It”,
10. Untick “Set as default printer”.
11. If your printer is plugged into the computer and is online, print a test page when prompted.
12. Click finish.
13. Follow the completing the setup instructions.

Network Printer Install (Ethernet)
Before you start:
1. Determine which approach you will be using. If you have a server or an always-on PC that will not
be using Ticket-it, run the below setup on that computer and then share the printer to the client
PCs. If you do not have a server, you will need to repeat the setup on each PC on the network.
2. Assign the printer an IP address on the network using the Quickset tool on the driver disk that
comes with the printer. The software should be more or less self-explanatory; you can search the
network for the printer, select it, and then enter an IP address for it to use. If the printer cannot
be found immediately, you can search for it by its MAC address, which is on the back of the
Ethernet Card installed in the printer.
To install the driver:
1. Run the downloaded Seagull Driver installer, which will extract the drivers to a folder called
Seagull on your C:/ drive. The installer will ask you if you want to run a driver wizard and/or view
a readme. Just untick those boxes and click finish.
2. Open Control Panel -> Printers and Faxes/ Devices and Printers.
3. Click “Add new printer” in the left sidebar, OR right click an empty space inside the Printers and
Faxes window and select “Add Printer”.
4. Click Next, and at the next screen select “Local Printer attached to this computer”, but untick
“Automatically install my plug and play printer”. Click Next.
5. Make sure “Create New Port” is selected, then, in the listbox, select TCP/IP Port and click Next.
6. A window will pop up asking you to specify details for the new port. Simply enter the IP address
that has been assigned to your printer in the first box. The second box will fill automatically.
Press Next and Okay until you get to the driver install window.
7. When asked to select and install drivers, click “have disk”. Click Browse and browse to where you
extracted the drivers earlier (default is C:/seagull/). Select the driver file (it’ll be the only visible
file in the folder). Click okay to confirm the selection.
8. Browse down the list of printer models now available. Scroll down and select “Sato D512”.
9. Click next to continue.
10. When asked to name the printer, call it “Ticket-It”,
11. Untick “Set as default printer”.
12. If your printer is plugged into the computer and is online, print a test page when prompted.
13. Click finish.
14. Follow the completing the setup instructions.

Completing the setup
To configure the paper size:
1. In Control Panel -> Printers and Faxes, right-click your ticket-it printer and select “Printing
Preferences”.
2. Click the “Page Setup” tab.
2. Click the “New” button under Stock to add a new label size.
3. Enter Ticket-It as the name.
4. Enter 100mm as the width.
5. Enter 176mm as the height.
Note: If you have your PC configured to US localisation settings, these values will be in inches!
You will need to convert these values into inches (tip: use an online converter).
6. Set both Exposed Liner Width values to 0.
7. Click Ok.
8. Click “Advanced Options”, and then change “Default Orientation” to “180°”. If the printer is
shared, this setting will be in effect on other computers using the printer as well.
To assign the printer as the default in Ticket-It:
1. Login to Ticket-It and click Administration.
Note: if this is the first time you’ve used Ticket-It on this particular computer, you will need to go
to install the “Meadco’s Script” when prompted via a yellow bar at the top of the screen. The
item is installed correctly when the “Default Label Printer” and “Default Printer Page Size”boxes
are not greyed out. You MUST be using Internet Explorer for this to work.
2. Scroll down to User Defaults.
3. Set the “Default Label Printer” drop-down box to “Ticket-It” – or the name you selected for your
Ticket-It printer.
4. Set “Default Printer Page Size” to “Ticket-It” – or the name you selected for the Ticket-It label
stock size.
5. Click the green “Save” button beneath this section.
Notes:
Make sure the printer name assigned to the printer is always the same on every PC. If there is no
printer available on the computer with the same name as the Default Label Printer saved in
Ticket-It, Ticket-It will print to the printer set as Default under Windows’ Printers and Faxes
settings. This is often not the right printer.
Even if the printer is shared, you will need to create the custom page size on each client PC.
Table of contents

