Courtyard HYPH4601-7 User manual
Owner’s Manual
Breckenridge Induction Heater
Item# 51161
Model# HYPH4601-7
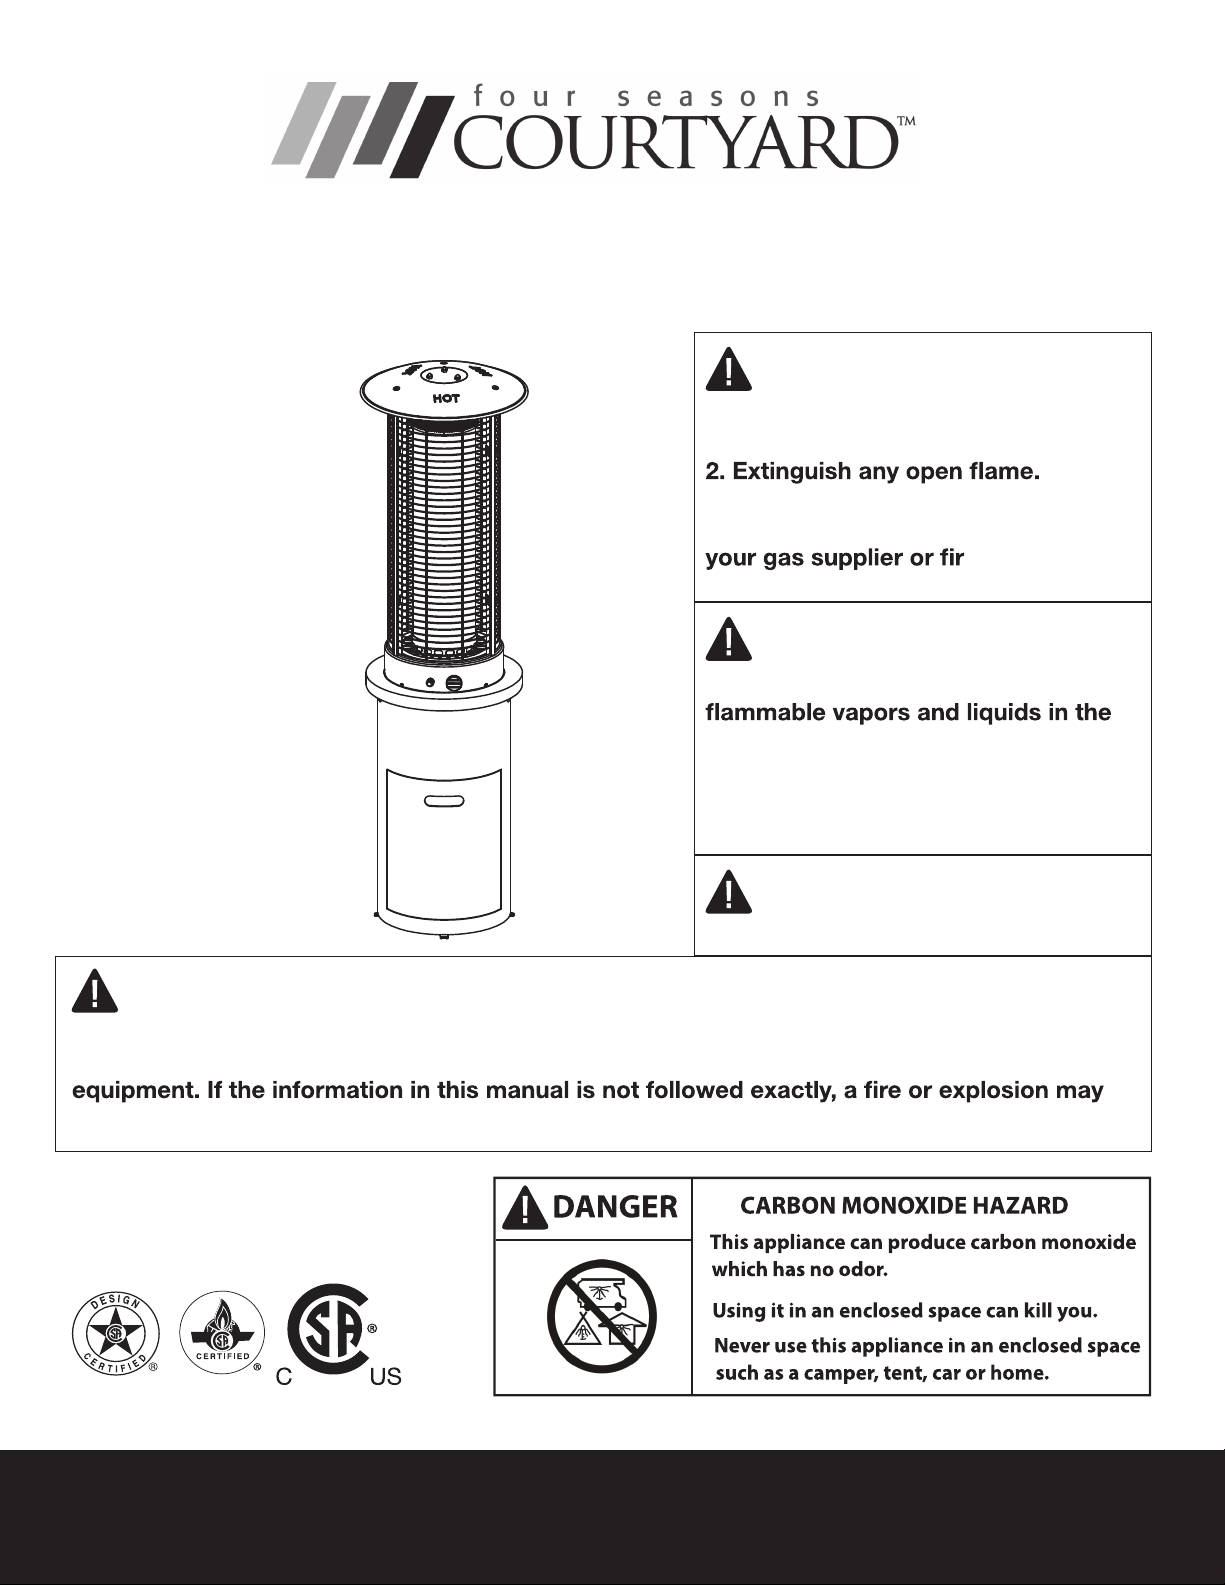
WARNING
Improper installation, adjustment, alteration, service or maintenance can cause injury or
property damage. Read the owner’s manual thoroughly before installing or servicing this
result causing property damage, personal injury or loss of life.
DANGER
WARNING
WARNING
If you smell gas:
1. Shut off gas to the appliance.
3. If odor continues, keep away from
the appliance and immediately call
e department.
Do not store or use gasoline or other
vicinity of this or any other appliance.
An LP-cylinder not connected for use
shall not be stored in the vicinity of
this or any other appliance.
For outdoor use only.
Save these instructions for future use. If
you are assembling this unit for someone
else, give this manual to him or her to read
and save for the future.
Bond Manufacturing Co., Inc. | Page 2
WARNING
Before you assemble or operate this unit, please carefully read this entire manual. Failure to do so
SAFETY INFORMATION
•The installation of this unit must adhere to local codes or either the National Fuel Gas Code, ANSI
Z223. 1/NFPA54, OR CAN/CGA-B149.1, National Gas and Propane Installation Code.
•THIS UNIT IS INTENDED FOR OUTDOOR USE ONLY! This product shall be used outdoors, in a
ventilated space and shall not be used in any enclosed area.
•This unit is to be used with propane gas only! (sold separately)
•Do not attach a remote gas supply to this unit.
•Only use propane gas for this unit.
•This unit is not intended for natural gas.
•Converting this unit to natural gas is dangerous and not recommended. The conversion of this unit
will void the manufacturer warranty.
•If the propane gas tank is leaking gas, you may hear, see, or smell a hiss. Do the following:
•Never install or remove a propane tank from this unit while it is in use.
•Applying too much propane may result in gas pooling and will not burn. Allow fresh air into the unit
so that the remaining gas may escape.
•
•
•
•
•
•Discontinue use if any part of the propane tank is damaged. Rust and dents may be hazardous and
should be inspected by a gas supplier.
•Do not operate unit until all parts are fully assembled.
•Do not paint or color any part of this heating unit.
•Unit may be hot while in use, do not attempt to move it while in use.
•Never leave this heating unit unattended while in use.
•This unit is not intended for cooking.
•
•Keep a safe distance to avoid burning skin or clothing.
•Do not sit or rest hands or feet on this heating unit.
•
•Keep all electrical cords and fuel supply hose away from heated surfaces.
•Combustible materials should not be within 61 cm / 24 in of the top of the unit, or within 61 cm /
24 in around the entire unit.
•
vapors and liquids.
•Never use the unit in spaces which may contain volatile or airborne combustibles.
•
•Do not add water into the unit.
•Do not operate unit if any part has been under water. Call a service technician to replace any
The max. inlet supply pressure: max. Gas supply 27.94 cm / 11 in w.c. (2.74kPa)
Use LP propane tanks with the following dimensions: (30.5 cm D / 45.72 cm H) (12 in D / 18 in H) -
capacity 9.08 kg / 20 lbs. You must use a propane tank that has a collar to protect the gas valve.
The tank system must be set up for vapor withdrawal.

1-866-771-2663 | Page 3
damaged part should this occur.
Only use the regulator and hose assembly provided with this unit. Replacement parts must be supplied
directly by Bond Manufacturing Co., Inc.
NOTE: You must follow all steps to properly assemble this heating item. Make sure the gas
valve is turned “OFF” before assembling. Do NOT attempt to assemble without proper tools.
•Do not disconnect any part while unit is in use.
•Do not store a spare propane tank on or near this unit.
•If the heating unit is indoors, detach the propane tank and leave outdoors.
•Y.
•Always remove protective cover before operating (if applicable).
•Do not set the protective cover over the unit until it is turned off and completely cooled down.
•Check for leaks after not using the unit for long periods of time.
•Children should never operate this unit. Children must be supervised while near this unit.
•Keep gas tank at least 152.4 cm / 5 ft. away from unit when lit. (if external tank)
•The maximum gas supply pressure is 250psi.
•All installation and repair should be done by a qualified professional. This unit should be
inspected annually and cleaned regularly.
•Inspect all elements of this heating unit before each use. If there is damage, the burner must be
replaced.
•Be aware of the hazards of high temperatures and stay away from the unit to avoid any burns or
injury.
•
of the U.S. Department of Transportation or the National Standard of Canada CAN/CSA-B339, LP gas
tanks, spheres and tubes for Transportation of Dangerous Goods; and Commission.
•Type I, (CGA791) LP
gas tank connection.
•
•Inspect the gas hose and all connections to the propane tank prior to each use.
•Always follow lighting instructions carefully.
•Do not use 30 lb. propane tanks for this unit.
•In case of high winds, secure this unit to the ground to prevent the unit falling over.
•Children and adults should be alerted to the hazards of high surface temperatures and should
stay away to avoid burns or clothing ignition.
•Young children should be carefully supervised when they are in the area of the appliance.
•Clothing or other flammable materials should not be hung from the appliance or placed on or
near the appliance.
•Any guard or other protective device removed for servicing the appliance shall be replaced
prior to operating the appliance.
•Installation and repair should be done by a qualified service person. The appliance should be
inspected before use and at least annually by a qualified service person. More frequent cleaning
may be required as necessary. It is imperative that the control compartment, burners and
circulating airways of the appliance are kept clean.
Inspect the burner before use of this unit. If the burner shows any kind of damage, do not operate
the appliance. For assistance with repair or replacement of the burner or any other parts, call Bond
Manufacturing Co., Inc. at
1-866-771-BOND (2663)
Bond Manufacturing Co., Inc. | Page 4
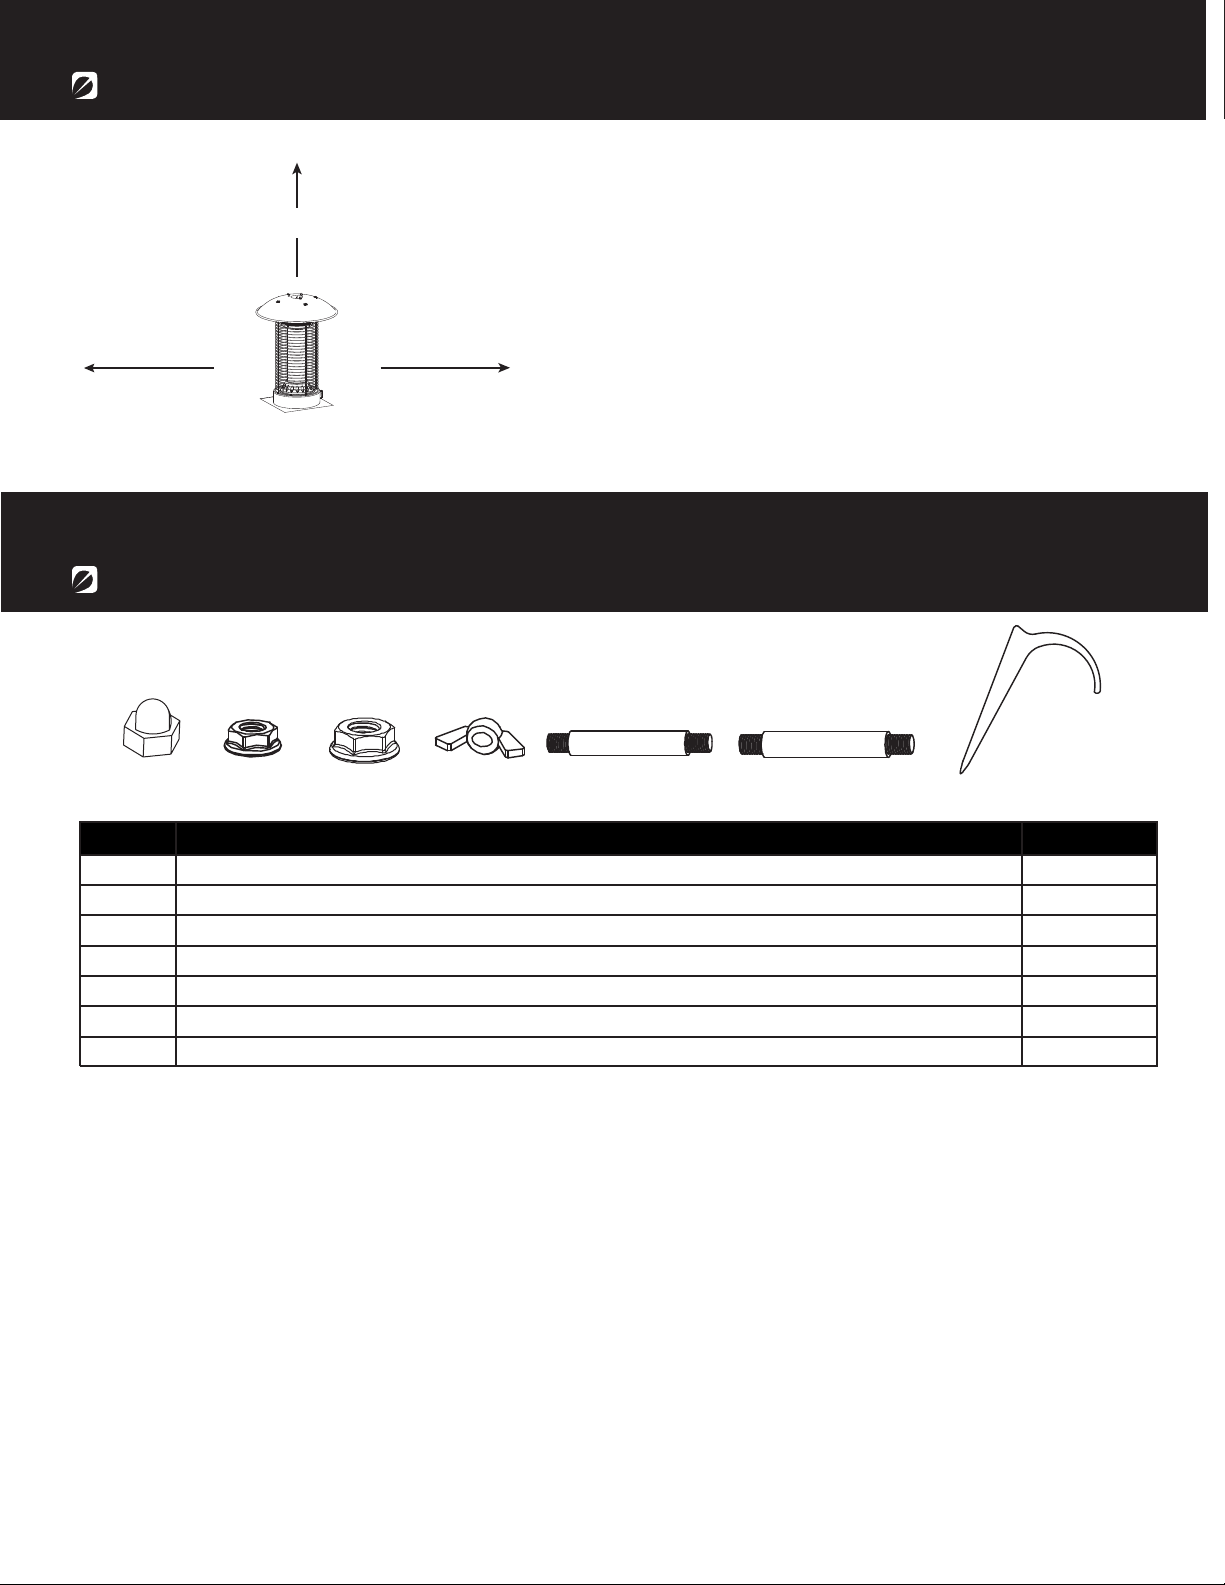
HARDWARE
Before beginning assembly of product, make sure all parts are present. Compare parts with package
contents list and hardware contents list. If any part appears missing or damaged, don't use this product
and call customer service immediately.
Estimated assembly time: 30 minutes.
Tools required for assembly (not included): Phillips Screwdriver, Wrench.
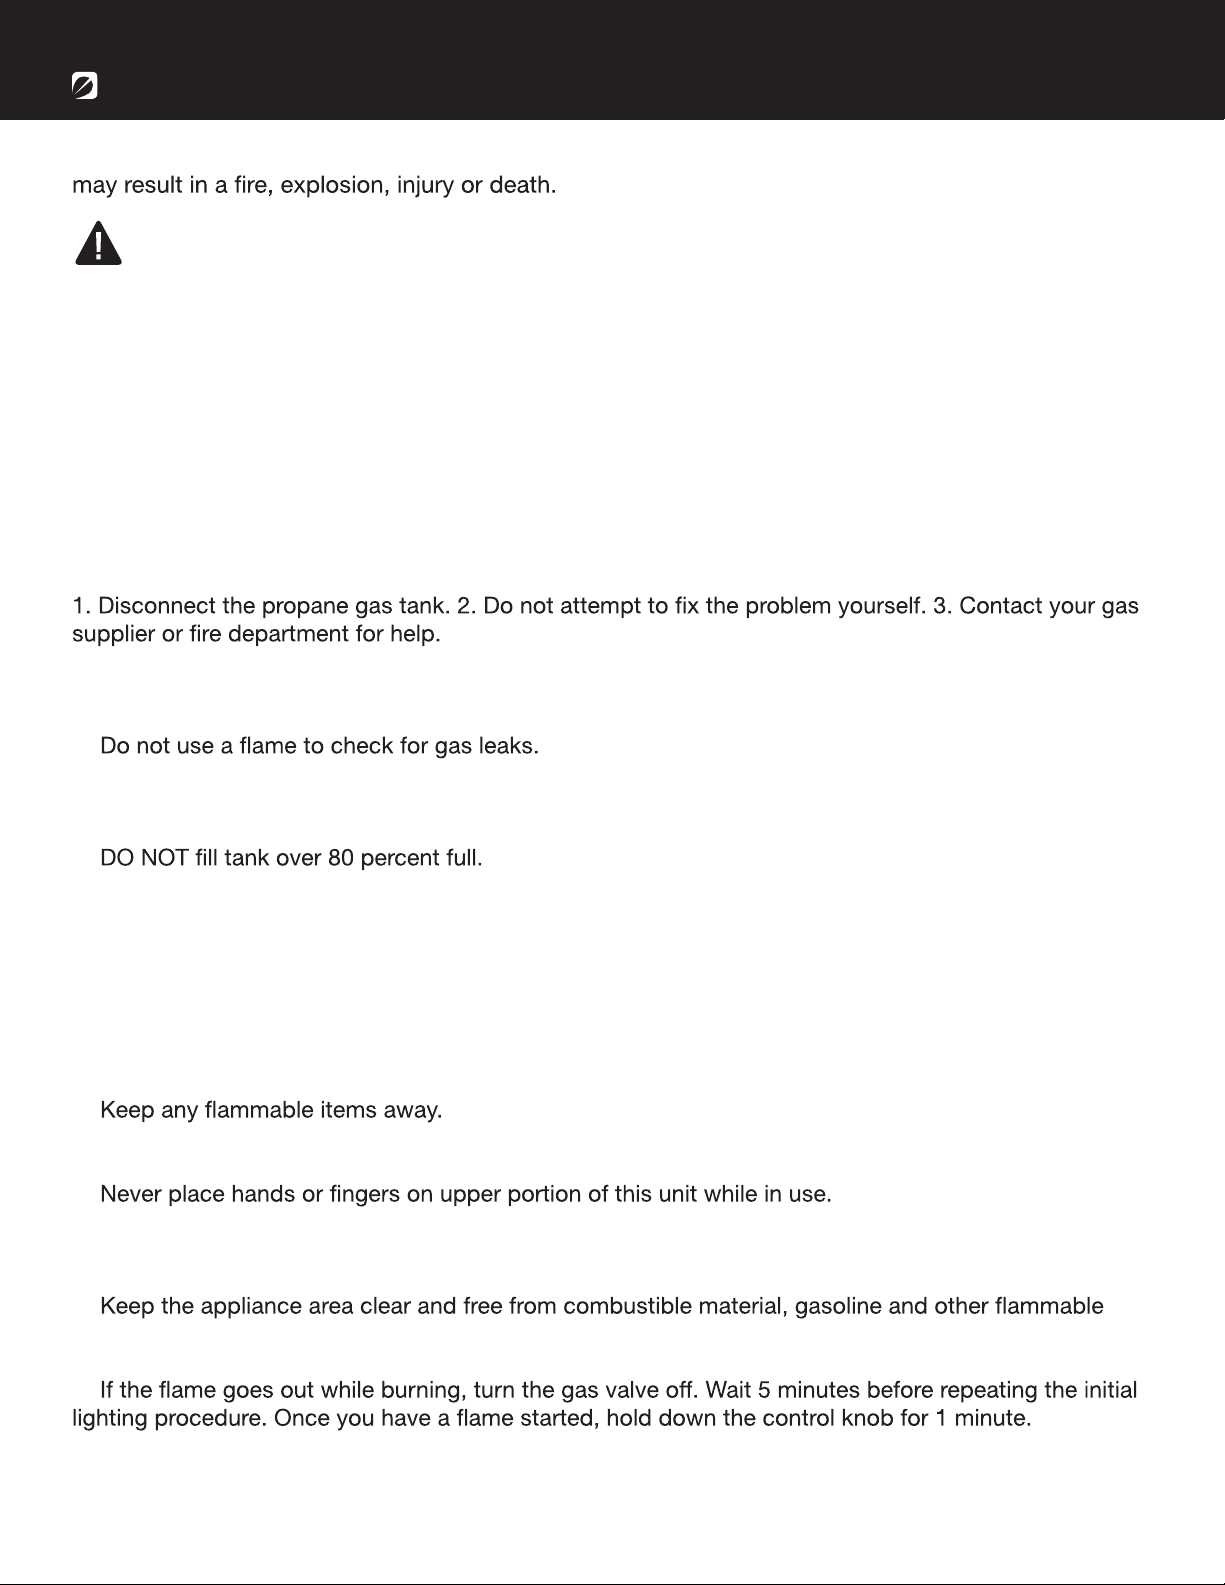
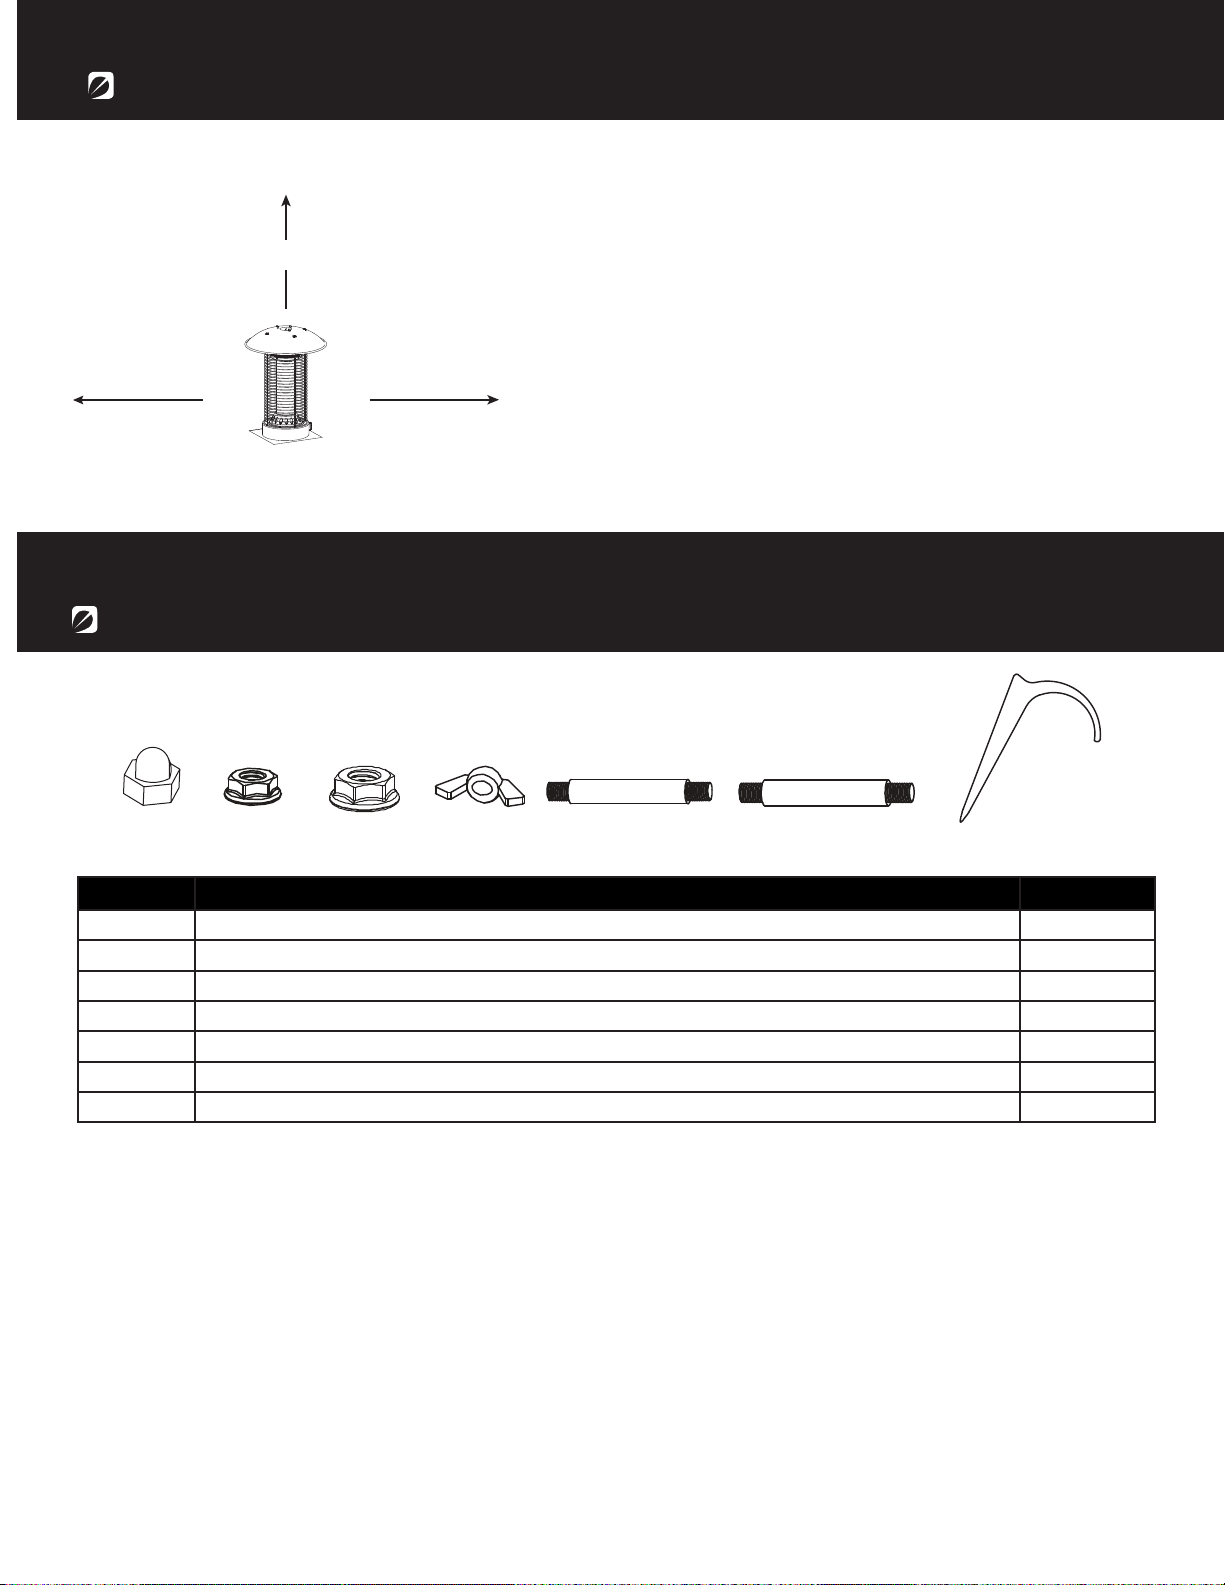
Combustible materials should not be within 61
cm / 24 in of the top of the unit, or within 61 cm
/ 24 in around the entire unit.
SAFETY INFORMATION
Min. Clearance
61 cm / 24 in
Min. Clearance
61 cm / 24 in
Min. Clearance
61 cm / 24 in
BE CAREFUL: WHEN CERTAIN MATERIALS OR
ITEMS ARE STORED ABOVE, BESIDE OR UNDER
THIS HEATER WHILE IN USE, THEY WILL BE
SUBJECT TO RADIANT HEAT AND COULD BE
SERIOUSLY DAMAGED.
ytQnoitpircseDmetI
3tuNpaC6MAA
4M6 NutBB
3tuN8MCC
3tuNgniW5MDD
3sdutS6MEE
3sdutS8MFF
4Anchoring NutGG
AA BB CC DD EE FF GG

1-866-771-2663 | Page 5
Item Description Qty
A Tank Supporter 1
B Glass Tube Ring 1
C Door (preassembled) 1
D Reflector 1
E Upper Radiation Screen 1
F Lower Radiation Screen 1
G Body 1
H Glass Tube 1
I Mesh Guard 3
J Upper Supporter 3
K Battery (AA) 1
CONTENTSCONTENTS
H
I
D
E
F
G
J
B
A
K
C
L
L Protective cover 1
BB
G
A
G
DD
J
G
B
Bond Manufacturing Co., Inc. | Page 6
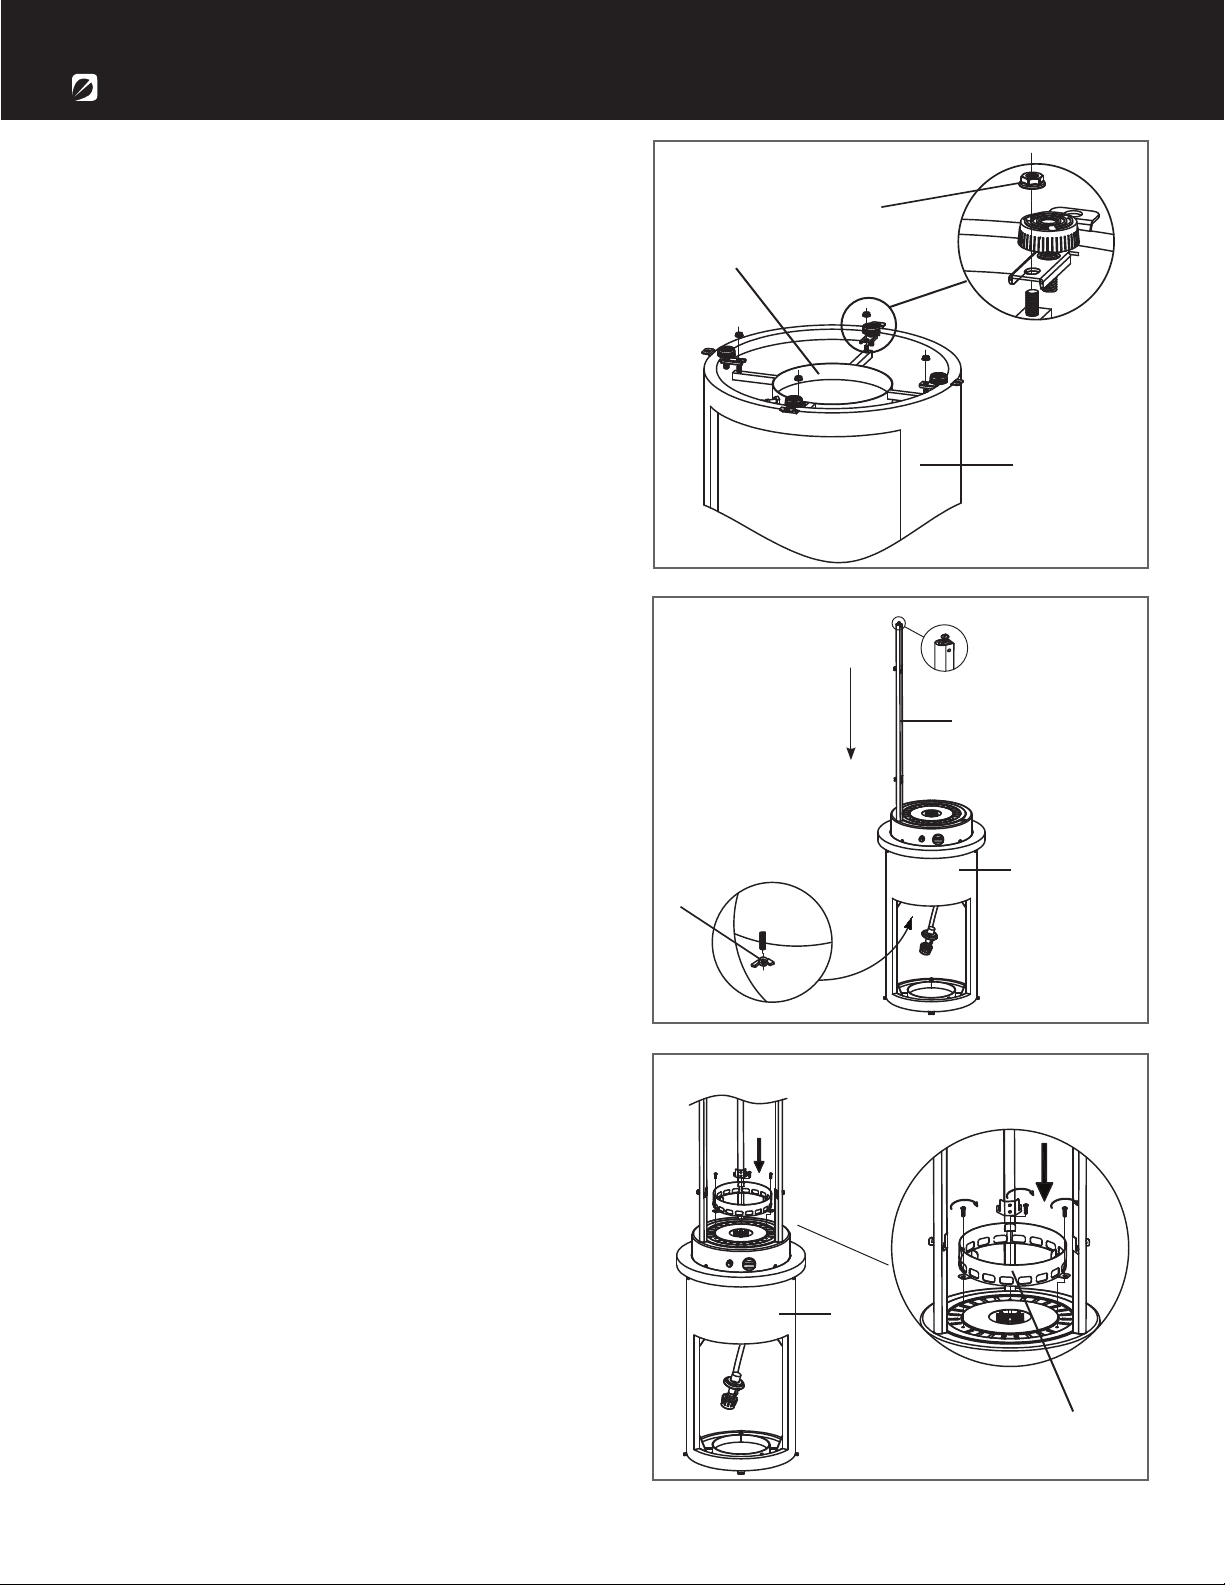
ASSEMBLY INSTRUCTIONS
2. Slide the 3 upper supporters (J) into the slots
in the burner at the top of the body (G). Be sure
that they are fully inserted. Tighten the upper
supporters (J) with 3 M5 wing nuts (DD).
Note: Be sure that the hook on the upper
supporter is upwards.
3. Remove the 3 preassembled screws from the
burner at the top of the body (G). Attach the glass
tube ring (B) to the top of the burner using the 3
preassembled screws you just removed.
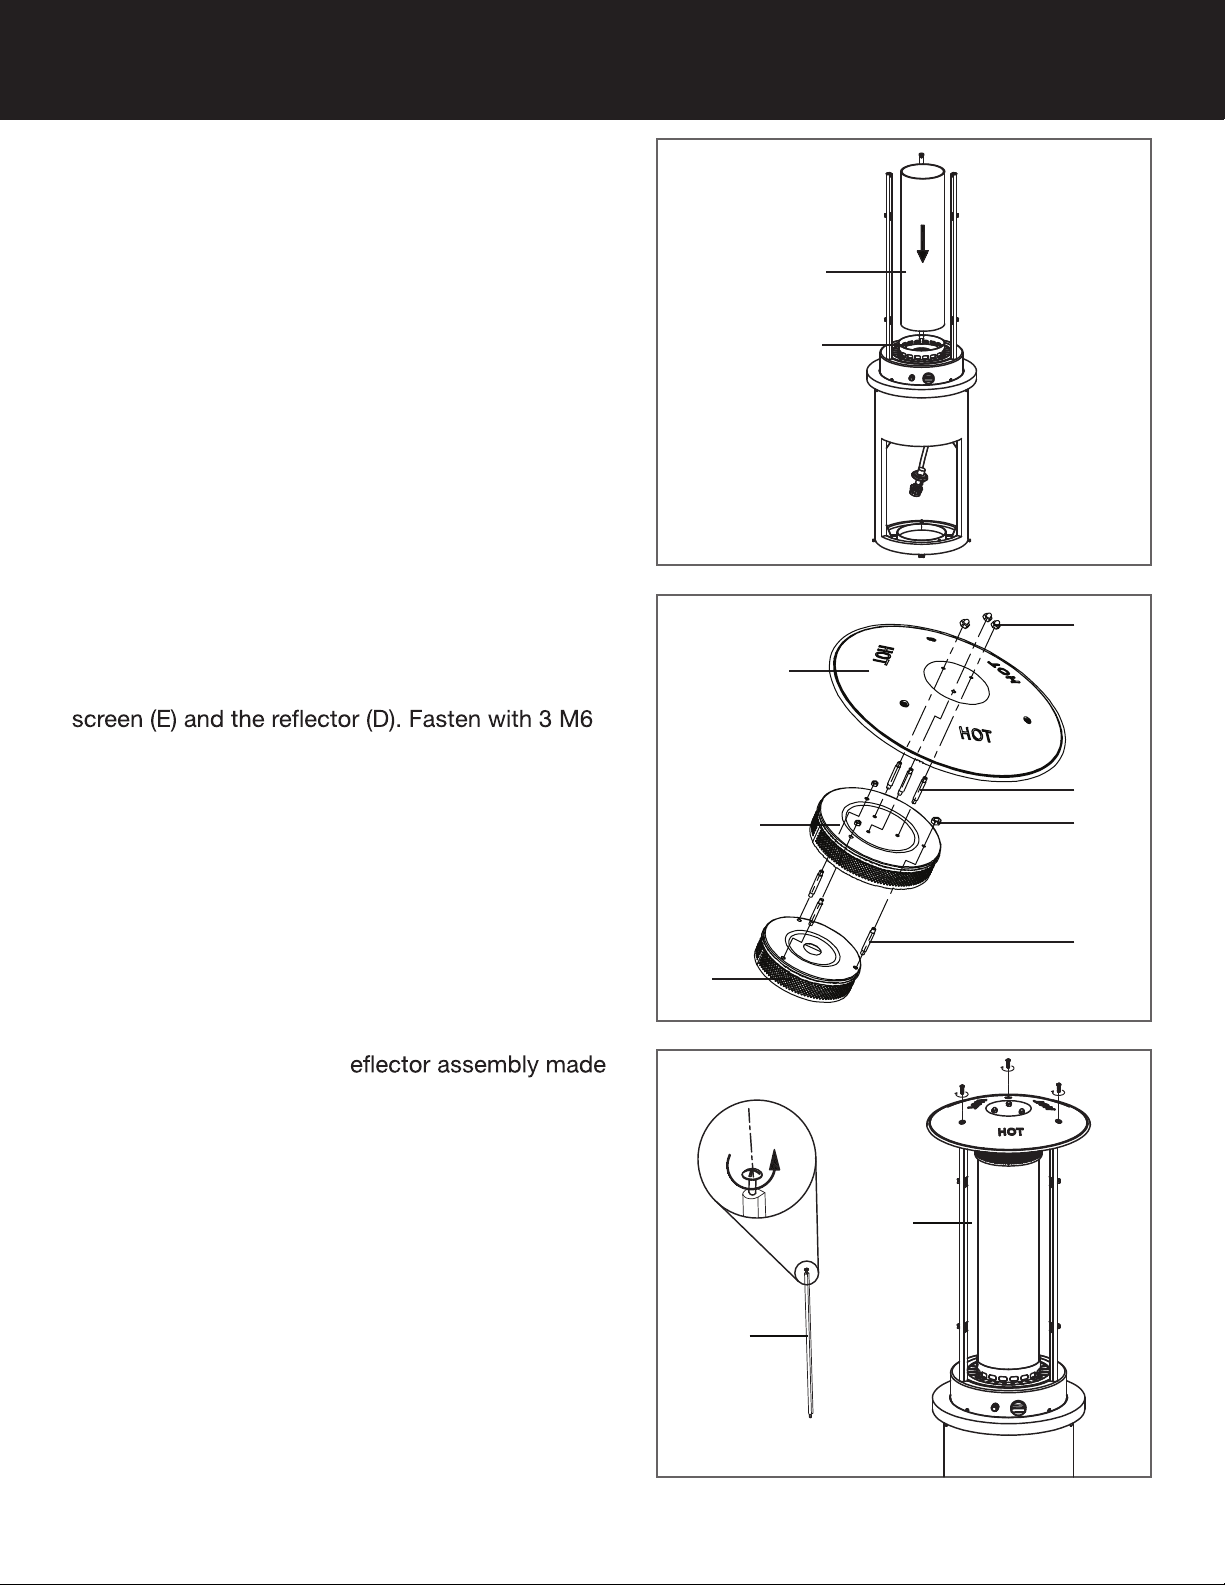
1. Flip the body (G) upside down on a protected
surface. Remove the glass tube (H).
Attach the tank supporter (A) to the bottom of the
body (G) using 4 M6 nuts (BB). Flip the body (G) over.
Note: Make sure the wing nut on the tank
supporter (A) faces the door on the body (G).
B
H
F
E
D
AA
EE
CC
FF
J
J
1-866-771-2663 | Page 7
4. Place the glass tube (H) into the top of the glass
tube ring (B).
reppuehtmorfswercs5M3evomeR...666
supporters (J). Place the r
in the previous step onto the upper supporters (J).
Tighten together with 3 M5 screws just removed
from the upper supporters (J).
5. Insert 3 M8 studs (FF) in between lower
radiation screen (F) and upper radiation screen (E).
Fasten the studs with 3 M8 nuts (CC). Then insert
3 M6 studs (EE) between the upper radiation
cap nuts (AA).
Bond Manufacturing Co., Inc. | Page 8
ASSEMBLY INSTRUCTIONS
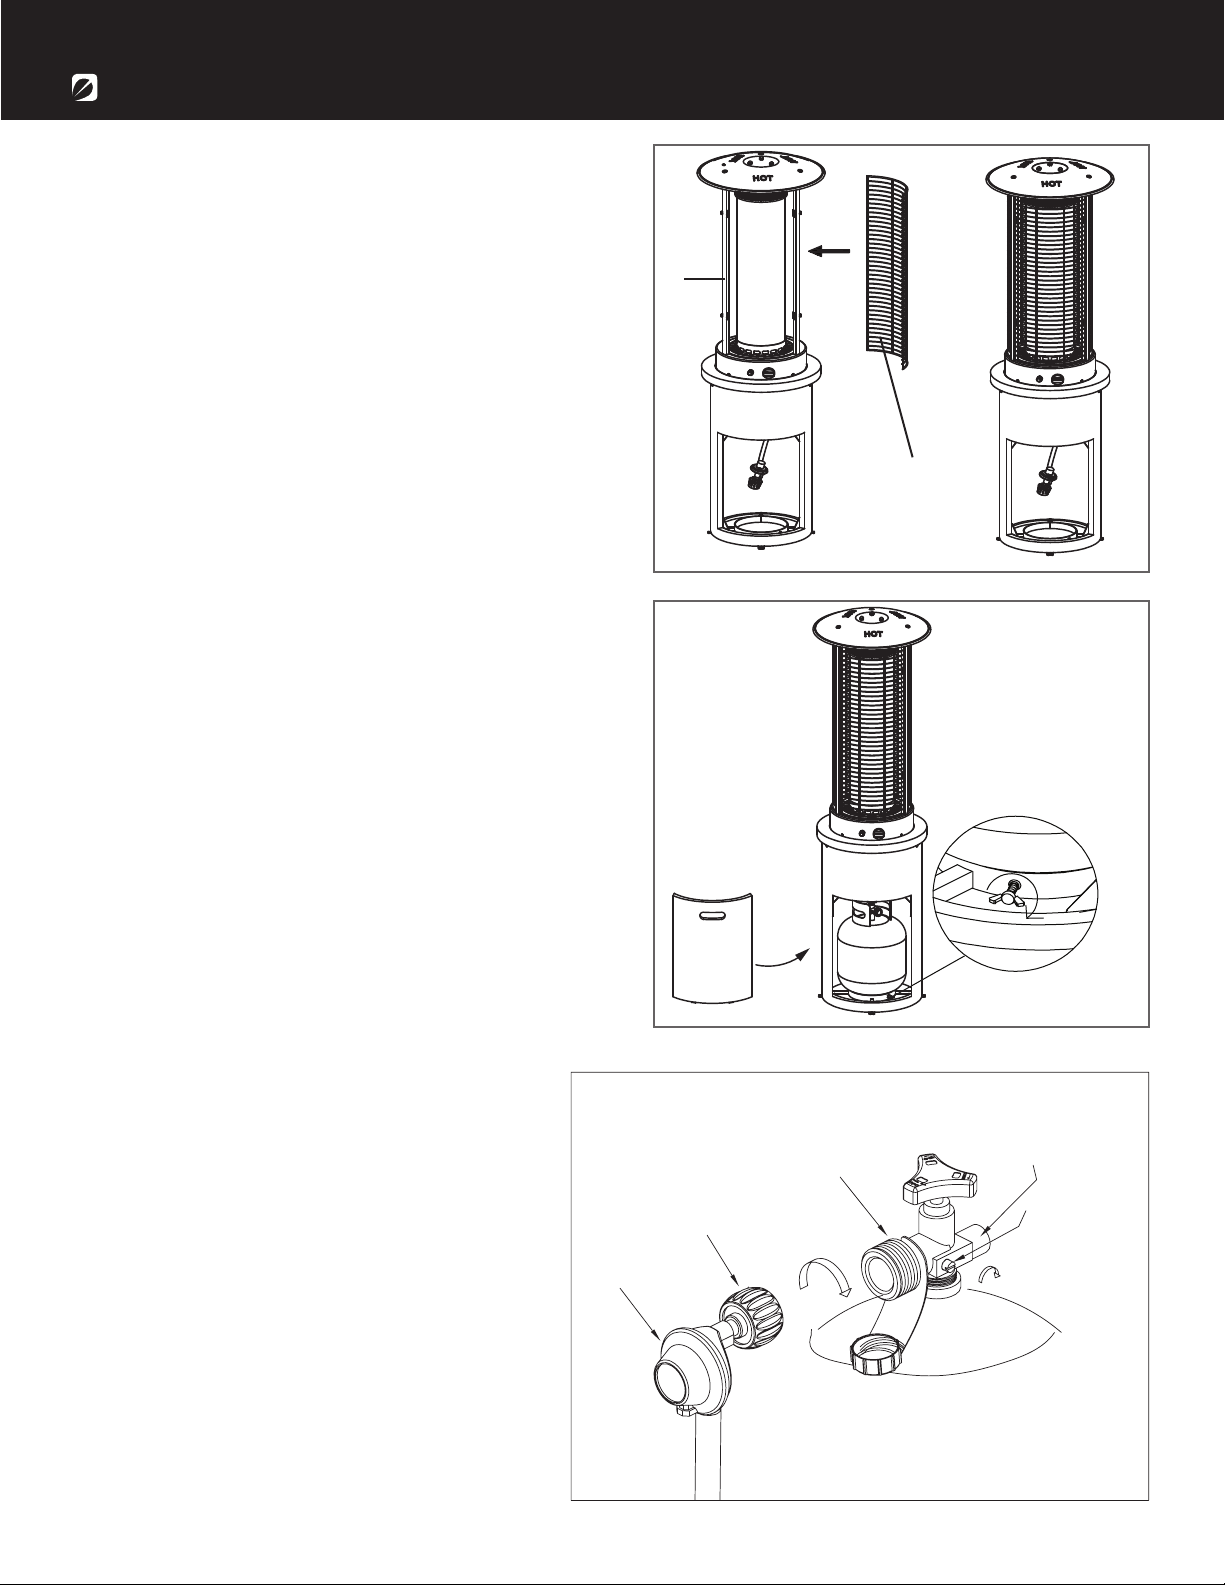
7. Attach the 3 mesh guards (I) onto the hooks at
the top of the upper supporters (J).
8. Open the door (C). Place the propane gas
tank (not included) into the tank supporter.
Tighten the preassembled wing screw clockwise
to ensure the propane tank is secure.
Close the door after the tank is connected to
the regulator (see below).
CYLINDER VALVE
PRESSURE
RELIEF VALVE
BLEED-OFF
VALVE
BLACK COUPLING NUT
REGULATOR
turn clockwise to connect
turn clockwise
to reseal
9. Turn the cylinder valve on the tank
clockwise to close the propane tank.
Attach the preassembled regulator to the
cylinder valve by turning the regulator
coupling nut clockwise. Make sure it is
fastened securely and tighten connections
by hand only.
J
I

K
GG
1-866-771-2663 | Page 9
OPERATION
•The glass tube may break if it is wet while in use; never use the heater while it’s raining outside.
•Do not splash any liquid on the heater while it is in use.
•Keep children away from the unit while in use; the glass tube may be extremely hot while in use.
Do not touch.
over.
•Never use the heater if the glass tube shows any cracks.
Before performing a leak test, be sure that no sparks can occur and you are in a spacious outdoor
area. Connect the propane gas tank to the regulator and turn the valve on the unit to the “off”
position. Brush a soap and water mixture on all connections. Turn the gas supply on; if bubbles
occur on any connection there may be a leak. If you smell gas or a leak is discovered turn the
gas valve off, disconnect propane gas tank and do not use the appliance until the leak is is
repaired.
heating item.
10.
11. Use the 4 anchoring nuts (GG) to attach the
heater in place to the ground.
Remove the rubber cap on the electronic igniter
by unscrewing and slide battery (K) into the
battery slot. Make sure the positive side of the
battery faces outwards. Screw the electronic
igniter cap over the battery tightly.

Bond Manufacturing Co., Inc. | Page 10
OPERATION
To Light
To Extinguish
1. Unscrew the ignition button on the burner to see if the battery (K) has already been placed inside.
If the battery (K) is not already within the ignition button on the burner, please place the battery
(K) into the ignition button slot.
2. Make sure the ignition control knob is turned to the “off” position. Connect propane gas tank and
slowly open the valve on the propane gas tank by turning the knob counterclockwise.
3. Press in and turn the ignition control knob to the “pilot” position; hold down for 1 minute.
4. Push the ignition button, while still holding down control knob down, to generate a spark.
5. Check to see if there is a pilot light through the glass tube (H). If there is, turn the control knob to
the “low” position.
6. n the control knob to the “high” position.
1. Push and turn the ignition control knob clockwise to the “off” position.
2. Turn the propane gas tank valve on the gas tank to close the gas supply and disconnect the
propane gas tank.
in property damage, personal injury or death.
between 51 - 71.2 cm /20 - 28 in
in height.

•Before performing any maintenance always disconnect propane gas tank.
•Keep the heating item free and clear from combustible materials.
•Visually inspect burner for obstructions and keep tank enclosure free and clear from debris.
•Use a soft brush to get rid of the mild stains, loose dirt and soil after the burner is completely
cooled down. Wipe down with a soft cloth.
•Harsh weather conditions may cause stubborn stains, discoloration and possibly rust pitting.
•Permanent damage may occur if powder or solvent comes in contact with painted or plastic
components on this heating unit.
•Keep the heating unit stored away from direct sunlight.
•If storing this unit inside, disconnect the propane gas tank from the gas valve.
•Not using manufacturer approved or supplied parts/accessories may result in a defective condition
and void the warranty of this heating unit.
•Carbon deposits may pose as a re hazard; clean the reector and inside of the glass tube with
•Always place lid (if applicable) or protective cover on heating item when not in use.
soap and water if any carbon deposits are present.
Envirostone®Surface Care
Our Envirostone®material has been sealed with a patented treatment to prevent staining and
moisture absorption, but it does require proper maintenance to ensure the integrity of the surface.
Please see below for recommendations on maintaining your Envirostone®surface for years of
pleasure:
•Clean any spills immediately to prevent permanent Envirostone®surface staining or damage.
Blot any liquid spills with a clean, dry cloth to avoid spreading of the spill to the rest of the table.
Clean your Envirostone® surface with a soft, clean cloth or sponge. Mix a solution of warm clean
water and mild dish soap to remove any surface dirt or mild spills. Rinse all soap solution off of the
tabletop and dry completely to avoid water spots. Regularly cleaning the Envirostone® surface will
aid in a longer lasting product.
•Do not use petroleum-based or abrasive cleaning products. Do not use any harsh brushes when
cleaning the Envirostone® surface.
•Do not slide products across the Envirostone® surface to avoid permanent scratching and
damage.
•Always use protective mats such as coasters or placemats when eating on an Envirostone®
surface. These protective products will help absorb sweating on cool beverages and will block
out any heat rings from appearing beneath a warm mug or plate. When placing hot dishes on an
Envirostone® surface, always use mats or hot pads.
•Envirostone® surface must be covered at all times when not in use. Cover your product with an
outdoor furniture cover when not in use to protect it from the elements. Store your product indoors
during winter months. Avoiding extreme cold temperatures will prevent cracking of the unit.
MAINTENANCE
1-866-771-2663 | Page 11

Problem Cause Solution
Gas valve may be off Turn the gas valve on
Gas tank may be empty Refill the gas tank
Orifice may be blocked Clean out the orifice
Air is within supply system Pump out air from all lines
Loose connection Check all fittings and tighten connections
as necessary
Debris around the pilot Clean out the debris
Loose connection Check all fittings and tighten connections
as necessary
Thermocouple is bad Call for a replacement part and replace
the thermocouple
Gas leak within the line Check all connections; call for a
replacement part if anything is damaged
Lack of gas pressure Gas tank is almost empty
Gas pressure is low Gas tank is almost empty
Orifice may be blocked Clean out the orifice
Control knob isn’t on Turn the control knob on
Thermocouple is bad Call for a replacement part and replace
the thermocouple
Pilot light assembly is bent or not in the
correct location
Place pilot light in the correct location
and retry lighting procedure
Pilot won’t light
Pilot won’t stay on
Burner won’t light
TROUBLESHOOTING
Bond Manufacturing Co., Inc. | Page 12

WARRANTY
If you have any questions or concerns, please contact Bond Manufacturing Co., Inc. at the below
resources:
CONTACT
The manufacturer warranty will be voided by, and manufacturer disclaims any responsibility for, the
following actions:
•
•Use of any component part not manufactured or approved by Bond Manufacturing Co., Inc.
•Use and installation other than what is listed in this manual.
Please contact the manufacturer for replacement parts.
1-866-771-2663 | Page 13
elp available in English and Spanish Monday - Friday,
Toll Free Phone 1-866-771-BOND (2663) |
8:00am - 4:30pm PST
Email customer[email protected]
Online www.bondmfg.com
H
Manufactured for and distributed
by True Value Company
Chicago, IL 60631-3505
Four Seasons Courtyard™
is a trademark of the
True Value Company
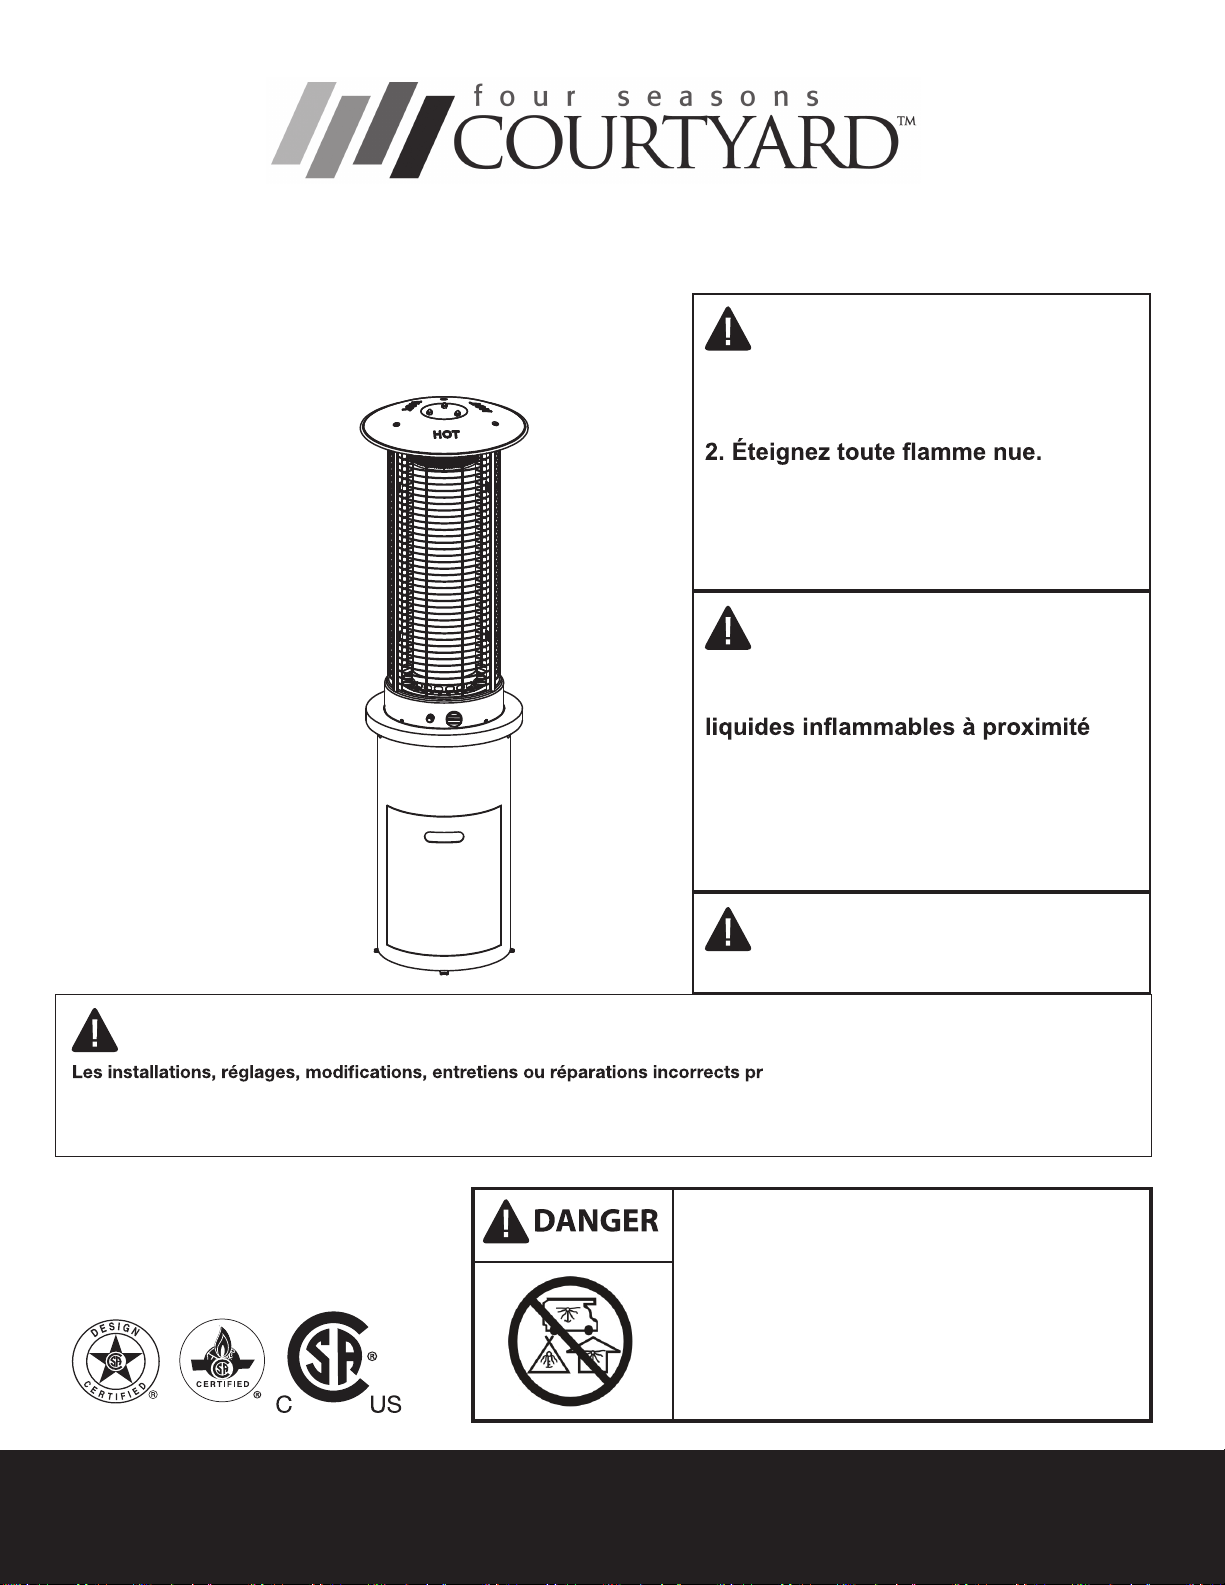
No de produit 51161
No de modèle HYPH4601-7
Guide d’utilisation
ésentent des risques de dommages
corporels ou matériels. Lisez soigneusement le guide d’utilisation avant d’installer ou d’entretenir ce matériel. Si les directives
dans ce manuel ne sont pas suivies avec exactitude, un incendie ou une explosion pourrait se produire, causant des
dommages matériels, des blessures corporelles ou une perte de vie.
DANGER
AVERTISSEMENT
AVERTISSEMENT
AVERTISSEMENT
Si vous détectez une odeur de gaz :
1. Coupez l’alimentation en gaz de
l’appareil.
3. Si l’odeur persiste, tenez-vous
à distance de l’appareil et appelez
immédiatement le fournisseur de gaz
ou le service d’incendie.
N’entreposez pas et n’utilisez pas
d’essence ni d’autres vapeurs ou
de cet appareil ou de tout autre
appareil. Ne rangez pas de bouteille
de propane liquide non raccordée à
proximité de cet appareil ni de tout
autre appareil.
Pour un usage extérieur seulement.
RISQUE LIÉ AU MONOXYDE DE CARBONE
Cet appareil peut générer du monoxyde de
carbone, un gaz inodore. L’utilisation de
cet appareil dans un endroit fermé pourrait
causer la mort. N’utilisez jamais cet
appareil dans un endroit fermé comme une
caravane, une tente, une automobile ou une
maison.
RISQUE LIÉ AU MONOXYDE DE CARBONE
Cet appareil peut générer du monoxyde de
carbone, un gaz inodore. L’utilisation de
cet appareil dans un endroit fermé pourrait
causer la mort. N’utilisez jamais cet
appareil dans un endroit fermé comme une
caravane, une tente, une automobile ou une
maison.
Conservez ces instructions pour une utilisation
future. Si vous installez cette unité pour
quelqu’un d’autre, donnez ce manuel à lui ou
elle à lire et épargner pour l’avenir.
Chaufrette à induction Breckenridge
•L’installation de cette unité doit être conforme aux codes locaux ou au National Fuel Gas Code,
ANSI Z223.1/NFPA5A, ou au Code national d’installation pour les appareils et l’équipement à gaz
naturel et propane CAN/CSA-B149.1.
•CETTE UNITÉ EST CONÇUE UNIQUEMENT POUR UN USAGE EN PLEIN AIR! Ce produit doit
s’utiliser en plein air, dans un espace aéré, et ne doit pas être utilisé dans un espace fermé.
•On doit utiliser cette unité uniquement avec le gaz propane! (vendu séparément)
•N’attachez pas une source externe d’alimentation en gaz à cette unité.
•Utilisez uniquement le gaz propane avec cette unité.
•Cette unité n’est pas conçue pour le gaz naturel.
•La conversion de cette unité au gaz naturel est dangereuse et déconseillée. La conversion de cette
unité annulera la garantie du fabricant.
•Si une fuite dans la bouteille de gaz propane est présente, vous pourriez entendre, voir ou sentir un
le problème vous-même. 3. Communiquez avec votre fournisseur de gaz ou le service d’incendie pour
obtenir de l’aide.
•N’installez jamais ni retirez jamais une bouteille de propane de cette unité quand elle fonctionne.
•L’application de trop de propane peut entraîner une accumulation de gaz qui ne brûlera pas.
Permettez l’entrée d’air frais dans l’unité pour que le gaz qui reste puisse s’échapper.
•
•Pression d’entrée de l’alimentation maximale : alimentation max. en gaz 27.94 cm / 11 in colonne
d’eau (2,74kPa)
•Tenez-vous à une distance sécuritaire pour éviter la brûlure de la peau ou des vêtements.
•N’asseyez-vous ni reposez les mains ou les pieds sur cet appareil de chauffage.
•Ne mettez jamais les mains ou les doigts sur la partie supérieure de cette unité pendant son usage.
•Gardez tout cordon électrique et le tuyau d’alimentation en gaz loin des surfaces chauffées.
•On ne doit pas tenir des matériaux combustibles dans une distance de moins de 61 cm / 24 in du
haut de l’unité, ou dans une distance de moins de 61 cm / 24 in autour de l’unité en entier.
•N’utilisez jamais l’unité dans des aires qui peuvent contenir des combustibles volatils ou en
suspension dans l’air.
•
MISE EN GARDE
Avant d’assembler ou d’utiliser cette unité, veuillez lire avec soin tout ce guide. L’omission de ce
processus peut entraîner un incendie, une explosion, une blessure corporelle ou la mort.
RENSEIGNEMENTS SUR LA SÉCURITÉ
•Employez des bouteilles de GPL avec les dimensions suivantes : (30.5 cm D / 45.72 cm H) (12 in D /
18 in H) - capacité 9.08 kg / 20 lbs.
•Il faut utiliser une bouteille de propane munie d’une bague de protection du robinet de gaz.
•NE remplissez PAS la bouteille à un niveau supérieur à 80 %.
•Le système d’alimentation de la bouteille doit assurer le retrait de vapeur.
•Cessez l’utilisation si une partie de la bouteille de propane est endommagée. La rouille et les bosses
peuvent être dangereuses et doivent être inspectées par un fournisseur de gaz.
•N’utilisez pas l’unité jusqu’à ce que toutes les pièces soient complètement assemblées.
•Ne peinturez ni teintez aucune partie de cet appareil de chauffage.
•L’unité peut être chaude pendant l’utilisation; n’essayez pas de la déplacer quand elle fonctionne.
•Ne laissez jamais cette unité de chauffage sans surveillance pendant l’usage.
•Cette unité n’est pas conçue pour la cuisson des aliments.
•
1-866-771-2663 | Page 15

commande pendant une minute.
N’ajoutez pas d’eau dans l’unité.
N’utilisez pas l’unité si une partie a été submergée dans l’eau. Appelez un technicien de service pour
remplacer toute partie submergée si cela se produit.
Ne détachez aucune pièce pendant l’usage de l’unité.
N’entreposez pas une bouteille de propane de rechange sur ou à proximité de cette unité.
Si l’appareil de chauffage est à l’intérieur, détachez la bouteille de propane et laissez-la à l’extérieur.
N’utilisez pas cette unité dans un bateau ou véhicule. Il faut opérer cette unité UNIQUEMENT sur
une surface plane à l’extérieur.
Retirez toujours la housse protectrice avant l’utilisation (le cas échéant).
Ne mettez pas la housse protectrice sur l’unité avant qu’elle soit arrêtée et complètement refroidie.
•Ne permettez jamais aux enfants d’utiliser cette unité. Il faut surveiller les enfants quand ils
sont à proximité de cette unité.
Gardez la bonbonne de gaz à une distance d’au moins de l’unité quand elle est
allumée. (pour une bonbonne externe)
La pression d’alimentation en gaz maximale est de 250 psi.
•
Cette unité doit être inspectée annuellement et nettoyée de façon régulière.
Inspectez tous les éléments de cet appareil de chauffage avant chaque usage. S’il y a des
dommages, il faut remplacer le brûleur.
Soyez conscient des dangers des températures élevées et tenez-vous loin de l’unité pour éviter des
brûlures ou blessures.
bouteilles de GPL du U.S. Department of Transportation (DOT) ou de la Norme nationale du Canada,
CAN/CSA-B 339, Bouteilles à gaz cylindriques et sphériques pour le transport des marchandises
dangereuses; et commission.
La bouteille de GPL doit être munie d’un dispositif homologué de protection contre le remplissage
excessif et d’un raccord de bouteille de GPL QCCI ou de Type 1 (CGA791).
Inspectez le tuyau d’alimentation et tous les raccordements à la bouteille de gaz propane avant
chaque usage.
Suivez toujours les instructions d’allumage avec soin.
N’utilisez pas une bonbonne de propane de 13.6 kg / 30 lb. pour cette unité.
•Prévenez enfants et adultes des risques que représentent les surfaces pouvant atteindre des
températures élevées et demeurez à une distance sécuritaire de l’appareil pour prévenir les
•Surveillez attentivement les enfants lorsqu’ils se trouvent à proximité de l’appareil.
•
l’appareil ou à proximité de celui-ci.
•Avant de mettre l’appareil en marche, replacez tout écran ou autre dispositif de protection
ayant été retiré lors de l’entretien.
•
doit être inspecté chaque année. Un nettoyage plus fréquent peut être nécessaire. Il est essentiel
de garder toujours propres le compartiment de contrôle, les brûleurs et les conduits d’aération.
Bond Manufacturing Co., Inc. | Page 16
On ne doit pas utiliser cet appareil de chauffage sur des terrasses en plastique ou en bois articiel.

RENSEIGNEMENTS SUR LA SÉCURITÉ
Utilisez uniquement le régulateur et l’ensemble raccord-tuyau fournis avec cette unité. Les pièces de
rechange doivent être fournies directement par Bond Manufacturing Co., Inc.
Inspectez le brûleur avant l’utilisation de cette unité. Si le brûleur indique des signes de dommage
quelconque, n’utilisez pas l’appareil. Pour obtenir de l’aide avec la réparation ou le remplacement du
brûleur ou de toute autre pièce, appelez Bond Manufacturing Co., Inc. au 1.866.771.2663.
REMARQUE : Il vous faut suivre toutes les étapes pour assembler correctement cet appareil de
chauffage. Assurez-vous que le robinet de gaz est à la position ‘OFF’ (arrêt) avant
l’assemblage. N’essayez PAS de l’assembler sans les bons outils.
1-866-771-2663 | Page 17
QUINCAILLERIE
Avant de commencer l’assemblage de l’article, assurez-vous d’avoir toutes les pièces. Compare le
Temps d’assemblage approximatif : 30 minutes.
Outils nécessaires pour l’assemblage (non inclus) : tournevis cruciforme, clé.
contenu de l’emballage avec la liste des pièces et celle de la quincaillerie incluse. Si des pièces
sont manquantes ou endommagées, ne tentez pas d’assembler le produit.
RENSEIGNEMENTS SUR LA SÉCURITÉ
Dégagement Min.
61 cm (24 po)
Dégagement Min.
61 cm (24 po)
Dégagement Min.
61 cm (24 po)
FAITES ATTENTION: LORSQUE CERTAINS
MATÉRIAUX OU ARTICLES SONT ENTREPOSÉ,
AU-DESSUS, À CÔTÉ OU EN-DESSOUS CE
RADIATEUR LORSQU’IL EST UTILISÉ PUISQU’ILS
SERONT EXPOSÉS À LA CHALEUR RADIANTE ET
PEUVENT ÊTRE SÉRIEUSEMENT ENDOMMAGÉS.
Les matériaux combustibles ne doivent pas être dans
les 61 cm / 24 in du haut de l’appareil , ou dans les 61
cm / 24 in autour de l’ ensemble de l’unité .
Bond Manufacturing Co., Inc. | Page 18
Article Description Qté
AA Écrou borgne M6 3
BB Écrou M6 4
CC Écrou M8 3
DD Écrou à oreilles M5 3
EE Goujon M6 3
FF Goujon M8 3
GG Écrou d’ancrage 4
AA BB CC DD EE FF GG

Article Description Qté
A Support-bouteille 1
B Anneau tubulaire de verre 1
C Porte 1
D Réflecteur 1
E Écran de protection supérieur 1
F Écran de protection inférieur 1
G Corps 1
H Tube de verre 1
I Écran de treillis 3
J Support supérieur 3
K Pile (AA) 1
CONTENU
L Housse protectrice 1
1-866-771-2663 | Page 19
H
I
D
E
F
G
J
B
A
K
C
L

INSTRUCTIONS D’ASSEMBLAGE
2. Glissez les 3 supports supérieurs (J) dans les
fentes du brûleur en haut du corps (G). Assurez-
vous qu’ils sont complètement insérés. Serrez les
supports supérieurs (J) avec 3 écrous à oreilles
M5 (DD).
Remarque : Assurez-vous que le crochet du
support supérieur est orienté vers le haut.
3. Retirez les 3 vis préassemblées du brûleur en
haut du corps (G). Attachez l’anneau tubulaire de
verre (B) à la partie supérieure du brûleur utilisant
les 3 vis préassemblées que vous venez de retirer.
Bond Manufacturing Co., Inc. | Page 20
1. Mettez le corps (G) à l’envers sur une surface
protégée. Retirez le tube en verre (H).
Attachez le support-bouteille (A) au fond du corps
(G) utilisant 4 écrous M6 (BB). Retournez le corps
(G).
Remarque : Assurez-vous que l’écrou à oreilles du
support-bouteille (A) fait face à la porte du corps
(G).
BB
G
A
G
DD
J
G
B
This manual suits for next models
1
Table of contents
Languages:
Popular Heater manuals by other brands

Fondital
Fondital DIMENSION L Installation, use and maintenance manual

Atlas
Atlas 634/0458 Assembly instructions

Unold
Unold RONDO OSZILLIEREND Instructions for use

Frico
Frico SIReAC Original instructions

Jaga
Jaga Maxi WT Mounting instructions

HeatStar
HeatStar ERXL-80 Operating instructions and owner's manual

THERMOCOAX
THERMOCOAX isopad IGB-G Series operating instructions

Thermor
Thermor Emotion barres Digital instruction manual

Kambrook
Kambrook KCE75 Instruction booklet

Master
Master B35CED owner's manual

PANDROL
PANDROL HFP 36V Operation and maintenance manual

Black & Decker
Black & Decker BDTH600 Use and care book


