Cowon CR1 User manual

ver. 1.2 EN
Quick Guide

COWON CR1
3
Remote Keys for Navigator
Adjust Caption Timing
Add Bookmark
Go to Bookmark
Sleep
Pan Scan
LCD off
Close Current Mode
Show File List
Move Focus
Volume
Power
Previous
Fast Forward (FF)
Rewind (REW)
Zoom In
Zoom Out
Next
Play/Pause
Mute
Music Mode Movie Mode
Enter
RightLeft
Up
Down
Menu Navigator Mode
- Please refer to Q5W manual for full function of the remote
- The remote is included in Q5W Package
Windshield Suction Mount
Push Push
①
②
③
Lock

2
COWON CR1
Quick Install Guide
for Windows 98SE/ME/2000/XP
Mac OS 10.x
GPS Antenna : SIRF III Internal GPS antenna for receiving satellite data.
FM Transmitter Switch : Sets FMT channel. FMT (FM Transmission) function allows playback
of the sound through the vehicle’s radio via FM transmission when the FM radio is set to the
same frequency.
I/O Connection Terminal : Connection port for connecting COWON Q5W.
Volume : Adjust the cradle speaker volume.
Power LED : Shows the ON/OFF status
NAVI Button : Executes the Navigator.
MUSIC Button : Executes the Music player. (Play / Pause in Music Player)
MOVIE Button : Executes the Video player. (Play / Pause in Movie Player)
Suction Pedestal Mounting Hole : Installation hole for windshield suction pedestal
Speaker : Built in stereo speaker.
DC Power : Connect cigarette lighter power adapter.
1
2
3
4
6
7
8
9
10
11
5
Navigator Cradle
1
3
2
9
10
11
4 5 6 7 8

4
COWON CR1
1. Install the mount head of the windshield suction pedestal to the mounting hole of the
cradle.
2. Please make sure to wipe all foreign material off the window.
3. Push the pedestal suction cup firmly to the windshield, then flip the number 1 lever down to
secure the suction cup.
4. Use the number 2 and 3 knobs to adjust the angle and rotation of the pedestal to provide
the best visibility.
5. Press and release the front of the cradle to release the cradle part for the COWON Q5W.
6. Make sure the COWON Q5W’s I/O terminal is completely inserted into the I/O connection
terminal of the cradle.
7. Press the whole front surface of the cradle toward the mount until it clicks. The unit is now
fixed in the cradle.
8. Insert the power adapter into the cigarette jack and connect it to the DC input of the naviga-
tion cradle to turn on the power.
Dashboard Installation
Push Push
②
③
①
Lock

COWON CR1
5
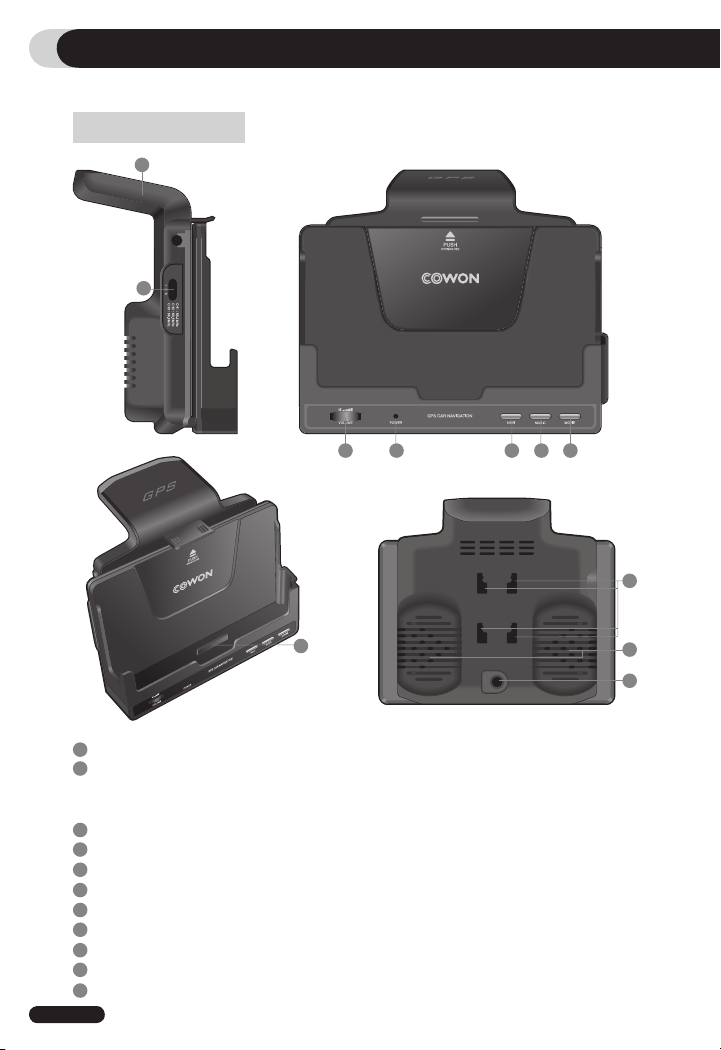
- Be sure to install the navigator where it does not block the driver’s view. Do not install the product over
an air bag cover or within the air bag deployment zone. COWON assumes no responsibility of liability
for injury or death as a result of car crashes and/or air bag deployment.
- In order to have clean satellite data reception, make sure the GPS antenna is horizontal with the sky.
- The navigator cradle may fall off the windshield if it is attached to the windshield with a suction cup
for an extended period of time. To prevent this, please rest the navigator on the dashboard while it is
attached to the windshield. When not in use, please detach it from the windshield and store the unit.
- Do not pull the navigation cradle’s front forcefully or abruptly as it may break off.
- The FMT transmission can be affected by the car type or surrounding environment causing noise in
the sound. Please, try to change the FMT channel for the best reception
NOTICE TO DRIVERS IN CALIFORNIA AND MINNESOTA: State law prohibits drivers in Cali-
fornia and Minnesota from using suction mounts on their windshields while operating motor
vehicles. COWON does not take any responsibility for any fines, penalties, or damages that
may be incurred as a result of disregarding this notice. (See California Vehicle Code Section
26708(a); Minnesota Statutes 2005, Section 169.71)
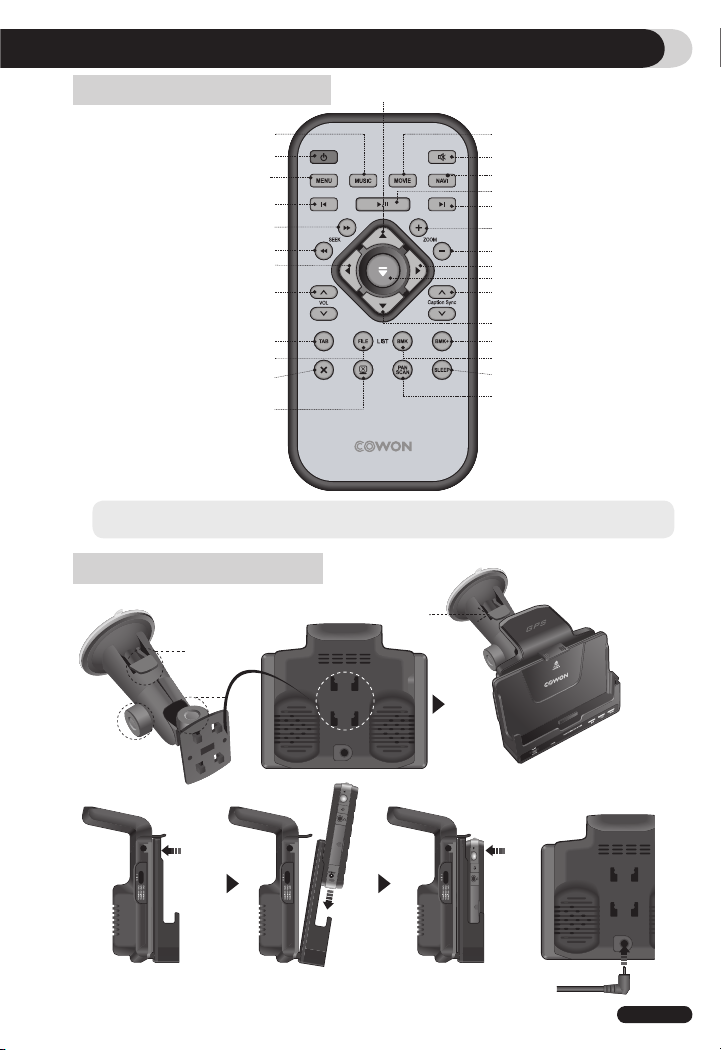
1. Please make sure to wipe all foreign material off the connector and dashboard.
2. Remove the cover of adhesive tape and affix the connector to the dashboard.
3. Install the mount head of the pedestal to the mounting hole of the cradle.
4. Push the pedestal suction cup firmly to connector, then flip the number 1 lever down to
secure the suction cup.
5. Use the number 2 and 3 knobs to adjust the angle and rotation of the pedestal to provide
the best visibility.
6. Press and release the front of the cradle to release the cradle part for the COWON Q5W.
7. Make sure the COWON Q5W’s I/O terminal is completely inserted into the I/O connection
terminal of the cradle.
8. Press the whole front surface of the cradle toward the mount until it clicks. The unit is now
fixed in the cradle.
9. Insert the power adapter into the cigarette jack and connect it to the DC input of the naviga-
tion cradle to turn on the power.

6
COWON CR1
For “Q5W Car Navigation Pack (Q5W and GPS Cradle package)” users :
GPS navigation Software (NavMate) is preloaded on Q5W. Only activation is
required through Horizon.
If you purchased Q5W and GPS Cradle separately, you need to install NavMate.
When you insert the included installation DVD in the DVD drive, the installation program
starts automatically. If it does not, run x:\autorun.exe (where x is the letter of your DVD
drive)
• Upgrading Firmware
Upgrading firmware is highly recommended for best performance. To upgrade firmware,
connect Q5W to the PC, press the “Upgrade Firmware” button, and then follow the
procedure on the screen.
• Installing NavMate : GPS Navigation Software
To use GPS navigation feature with your Q5W, please install NavMate. To install, con-
nect Q5W to the PC, press the “Install NavMate” button, and then follow the procedure
on the screen.
1. Installing Software

COWON CR1
7
After installing the NavMate navigation software on your device, please go to the following
web site to obtain the code to activate the software:
"http://www.horizonnav.com/activation/cowon"
User name: cowon
Password: 3r4t56
Voucher code is attached on the back of the cradle.
For support, call 186 NAVMATE1 (1.866.286.2831).
Voucher code will not be reissued if lost. Product return, activation and/or other
services may not be provided without voucher code.
2. Activation Process
Follow these four easy steps and you are on your way.
After the NavMate software starts, you will see the reminder warning to use your Nav-
Mate software safely and lawfully.
Before operating your NavMate software, please carefully read and follow the instructions
provided in the “Safety Information and Precautions” section of this manual.
▶Quick Start
▶Step 1 -- Start up/Main Menu
Navigation Software Utility (NavUtil) has 3 major components:
1) POI Uploader
2) Backup
3) Restore.
This utility helps the user to upload/download POI files, map and voices files, backup the
user specific data files and also to restore user specific data files into the navigation unit.
3. NavUtil
4. NavMate Software Operation
________________________________________
________________________________________

8
COWON CR1
Warning Screen
Main Map Screen

COWON CR1
9
Proceed to the highlighted route and drive while the NavMate software provides audible
and visual guidance to your destination.
▶Step 3 -- Map/Guide along Route
• icon to activate main menu.
• Start Route Guidance
• Point of Interest
• State/Province NOTE: The software remembers the last State/Province, so this
step is not necessary every time.
• By Category
• Airport
• Sort by Distance
• Select one of these and the system will calculate a route to that destination using the
criteria set in the Setup menu.
You have many ways to select a destination.
For this example, let’s find a nearby Airport.
Select by touching screen:
▶Step 2 -- Select Destination

10
COWON CR1
That’s it! You’ve arrived at the selected destination.
Refer to the rest of this manual to become more familiar with the many options available
on your NavMate software.
▶Step 4 -- Arrive at Destination

COWON CR1
11

Other manuals for CR1
1
Table of contents
Other Cowon Automobile Accessories manuals
Popular Automobile Accessories manuals by other brands

Directed
Directed Directechs DB3 installation guide

Automotive Data Solutions
Automotive Data Solutions TR2410ATL owner's manual

Muchmore
Muchmore CTX-W platinum Operation manual

Metra Electronics
Metra Electronics Axxess CLASSII-100 installation instructions

Whispbar
Whispbar K930W manual

Crux
Crux RVCCH-75F instructions

ACV
ACV 381230-33-1 installation manual

Carefree
Carefree SR0023 Installation & operation manual

Alexo Sweden
Alexo Sweden 652-301 Series Installation and operating instructions

Dynojet
Dynojet POWER VISION PV3-25-04 installation guide

EVoCharge
EVoCharge EVC80-310-001 installation guide

Thule
Thule 1654 instructions