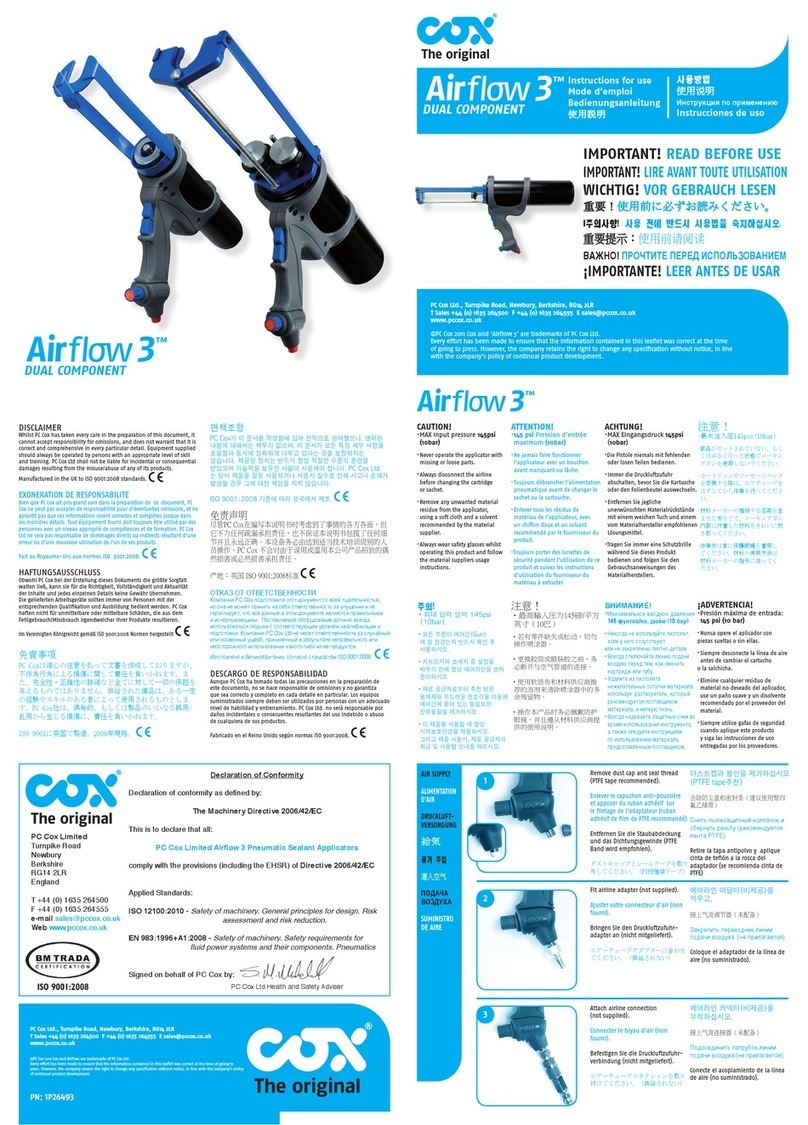
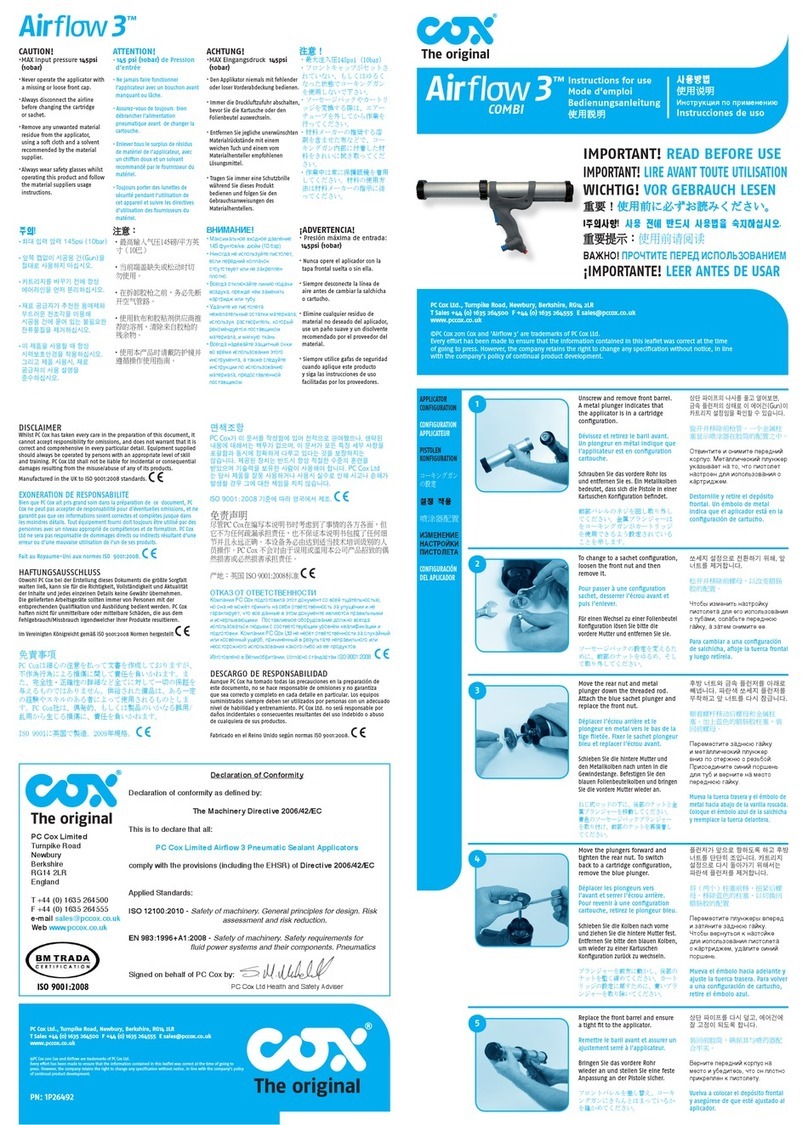
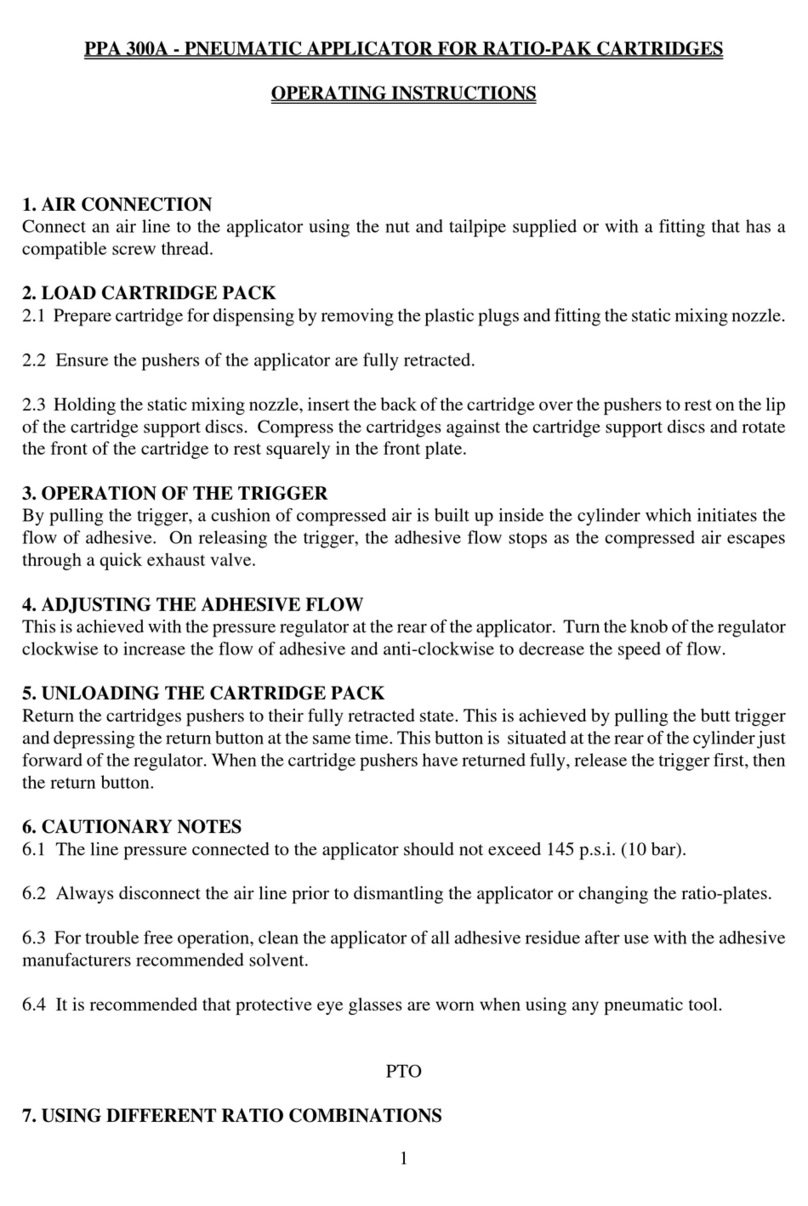
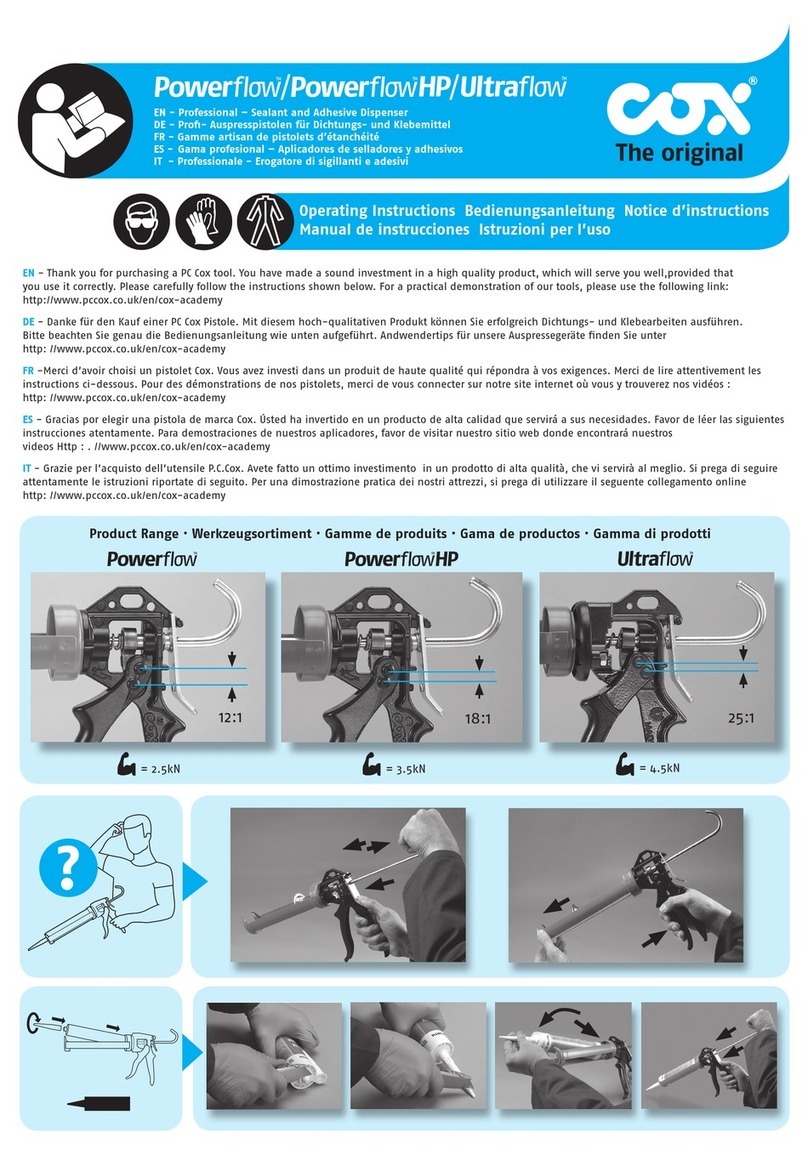
COX Airflow 1 User manual

SAFETY
This applicator is a quality product for the professional user; it is designed for
high duty cycles over long operating periods. As compressed air is used as the
power source, operator fatigue is minimal, but it must be remembered that
compressed air can be dangerous when used incorrectly. The user should take
time to read and understand these operating instructions fully. Failure to do so,
could lead to serious bodily injury.
ALWAYS
• USE PROTECTIVE EYE EQUIPMENT WHEN OPERATING.
• DISCONNECT THE AIR SUPPLY BEFORE STARTING ANY MAINTENANCE/CLEANING TASKS.
NEVER
• CONNECT THE APPLICATOR TO AN AIR SUPPLY WHICH CAN EXCEED 145 psi (10 BAR)
• IMMERSE THE GUN IN SOLVENT.
• OPERATE THE GUN WITH LOOSE, BROKEN OR MISSING PARTS.
• CARRY THE GUN BY THE AIR PIPE.
• USE DAMAGED CARTRIDGES OR THE WRONG TYPE OF CARTRIDGE IN THE APPLICATOR.
• FIT A REGULATOR WITH A HIGHER PRESSURE VALUE.
It is recommended that ear protection is used for Mk5b type guns.
CONNECTION
Check the supply pressure. For optimum performance the supply pressure must
be greater than 100 psi (6.8 bar) and less than 145 psi (10 bar).
The applicator will work at lower supply pressures, but flow rates could be
reduced and may vary.
Connect the applicator to a suitable compressed air source using the nut and tail
supplied, or with a suitable tting. All applicators are tted with a male ¼” BSP
thread.
OPERATION/CONTROLS
A - Internal Pressure Regulator
The internal pressure regulator controls the material flow rate and ensures a
stable flow of sealant is maintained. To increase the flow of sealant, turn the
knob in a clockwise (+) direction. To decrease the ow, turn the knob in an
anticlockwise (-) direction.
The regulator is colour coded to designate the maximum pressure that will be
allowed in to the applicator barrel, regardless of the line in pressure.
Blue = 50 psi (3.4 bar) Yellow = 75 psi (5.1 bar) Orange = 100 psi (6.8 bar)
B - Trigger
By pulling the trigger, a cushion of compressed air is built up inside the
applicator, which initiates the ow of material. On releasing the trigger, the
sealant flow ceases as the compressed air escapes rapidly by a quick exhaust
valve at the rear of the gun.
C - Plunger Return Button (Where tted)
Press and hold the plunger return button (C), then pull the trigger (B).
This will pull back the plunger rods automatically ready for the next cartridge.
If the applicator is not tted with the air return button, manually pull back the
plungers using the indicator knob (D).
D - Indicator/Return Knob
This gives a visual indication of how much material is remaining in the cartridge
during use. For guns not fitted with air return, the return knob is used to
manually pull the plungers back.
MAINTENANCE
DAILY: Wipe the applicator using the adhesive manufactures recommended
solvent before it has time to set. Special care should be taken to make sure no
residue is left on the rods.
WEEKLY: Check the plungers and all external bolts/screws are tight. Tighten if
found to be loose.
MONTHLY: Place a small amount of oil in the air pipe to keep the internal seals
and pistons lubricated.
NOTE
Tested in accordance with European Machinery Regulations (1.1.95)
Mk5b pneumatic applicator has A-weighted sound pressure levels in
excess of 70dB (A).
Series 2 pneumatic applicator has A-weighted sound pressure levels
less than 70dB (A).
WARNING
Two Component Applicators with cartridge locators
1. Ensure rods are fully retracted towards the barrel.
2. Locate rear of cartridge over plungers and onto cartridge locators.
3. Push back rmly until the front of the cartridge can be located into the
frame assembly.
4. Check that the cartridge is correctly located before operating the trigger.
Two Component Applicators with support straps
1. Ensure rods are fully retracted towards the barrel.
2. Place cartridge into frame assembly making sure the front of the cartridge
locates in the frame assembly slot.
3. Check that the cartridge is correctly located before operating the trigger.
Two Component Applicators with hinged frame assembly
1. Ensure rods are fully retracted towards the barrel.
2. Swing frame assembly open.
3. Load cartridge/sachet into sleeve and t manifold (if required).
4. Close frame assembly.
5. Check that the cartridge/sachet is correctly located before operating
the trigger.
Two Component Applicators with hinged cartridge sleeve
1. Manually retract plungers using the indicator rod (not shown).
2. Twist sleeve downwards
3. Load the cartridge in the sleeve.
4. Close sleeve fully.
5. Check that the cartridge is correctly located before operating the trigger.
Co-Axial Applicators with hinged frame assembly
1. If gun is tted with air return, fully retract plungers.
2. Swing the frame assembly open.
3. Load the cartridge in the sleeve. NOTE – This will push back the plungers on
guns not fitted with air return.
4. Close frame assembly fully. Rotate cartridge if required.
5. Check that the cartridge is correctly located before operating the trigger and
the frame is fully closed.
CARTRIDGE LOADING
Airflow 1 and Airflow 2 Operating Instructions
2 Component Pneumatic Sealant and Adhesive Dispensers

Noise Emission
• Sound pressure level, A weighted (LwA) = 89.96dB
• Sound pressure level at work station, A weighted (LpA) = 78.96dB
• Peak emission sound pressure level, C weighted (LpC, peak) = 109.54
• Average daily exposure (based on 8 hours continuous use) = 78.96dB
Vibration Emission
Hand arm vibration = 0.04m/s2
Two Component AF1/AF2 - Tool Weights (empty)
Safety Instructions for pneumatic sealant and
adhesive dispensers
General
•Please make sure you read and fully understand all the
instructions provided in this manual, before attempting
to use the tool.
•Do not discard the safety instructions. These should be
stored in a safe place, and should be read and referred
to regularly, to ensure the safe use of this tool.
•The user, or the user’s employer, shall carry out a risk
assessment before using the tool each time, to ensure
that it is safe to apply material.
•This tool is not intended for use by persons (including
children) with reduced physical, sensory, or mental
capabilities. Operators who lack experience or knowledge
of the tool, must be given thorough training first before
being allowed to use the tool.
•This tool should only be used to dispense sealants and
adhesives from conventional material packaging systems.
The dispensing of other material types, or the use of
customer modified packaging systems, is strictly forbidden.
•The tool should be inspected periodically, to ensure that
the text and graphics on the labels are still clearly legible.
If not, the user shall contact the manufacturer and request
replacement labels.
•Do not modify this tool in any way. Modications can
reduce the eectiveness of safety measures, and increase
the risks to the operator.
Tool Use
•Always wear gloves and safety glasses, before attempting
to dispense any materials with this tool.
•Please ensure that the material packaging system is the
correct size for this tool, and that it has been adequately
secured to the tool, before attempting to dispense any
material.
•Before using the tool each time, please check the airline
to ensure that it is not damaged. There should be no loose
connections, or excessive lengths of hose left lying in areas
that could create a trip hazard.
•Never exceed the maximum air pressure stated on the tool.
•To prevent projectile hazards, please ensure the tools are
never operated with open ended frames or barrels.
Accessories should also be adequately secured to the tool
and the material packaging system. If the mixing nozzle
becomes blocked during use, it should be replaced.
•Never aim the tool at yourself or anyone else during use.
•Always disconnect the compressed airline from the tool,
when loading/re-loading the tool with material.
•Always disconnect the tool from the air supply after use.
Sicherheitshinweise bei Druckluftpistolen für
Dichtungsmaterialen und Klebstoe
Allgemeines
•Stellen Sie bitte sicher, dass Sie alle in dieser Betriebsanleitung
angegebenen Instruktionen lesen und verstehen, bevor Sie das
Werkzeug verwenden.
•Verwahren Sie die Sichheitshinweise an einem sicheren Platz
auf und werfen Sie diese nicht weg. Um einen sicheren Gebrauch
dieses Werkzeugs zu gewährleisten, ist eine regelmäßige
Durchsicht und der Verweis auf die Sicherheitshinweise
notwendig.
•Der Werkzeugnutzer oder dessen Arbeitgeber sollte vor jedem
Einsatz des Werkzeugs eine Risikobewertung ausführen, um eine
gefahrlose Anwendung sicherzustellen.
•Dieses Gerät ist nicht zur Verwendung durch Personen
(einschließlich Kinder) mit eingeschränkten körperlichen,
geistigen oder sensorialen Fähigkeiten. Werkzeugbediener, denen
es an Erfahrung und Wissen im Umgang mit dem Werkzeug
mangelt, müssen vor der Nutzung zunächst eine umfassende
Schulung zum Gerät erhalten.
•Dieses Werkzeug sollte nur mit herkömmlichen Dichtungs- und
Klebstogebinden verwendet werden. Das Aufbringen anderer
Materialien oder der Gebrauch von kundenmodizierten
Gebinden ist strengstens verboten.
•Um sicherzustellen, dass der Text und die Grak auf den
Etiketten noch klar leserlich sind, sollte das Werkzeug regelmäßig
geprüft werden. Sollte dies nicht mehr gegeben sein, werden auf
Anfrage neue Ersatzetiketten vom Hersteller bereitgestellt.
•Modizieren Sie dieses Werkzeug in keinster Weise. Jegliche
Änderungen am Gerät können die Wirksamkeit von
Sicherheitsmaßnahmen reduzieren und die Gefahren für den
Maschinenbediener erhöhen.
Bedienung des Werkzeugs
•Tragen Sie immer Handschuhe und Sicherheitsbrille bevor Sie
beginnen, Materialien mit dem Werkzeug aufzutragen.
•Bevor Sie das Werkzeug verwenden, stellen Sie bitte sicher,
dass die Verpackungsgröße des zu verarbeitenden Gebindes
(Kartusche/ Schlauchbeutel) die richtige Größe für dieses
Werkzeug aufweist. Prüfen Sie, dass vor der Nutzung das zu
verarbeitende Gebinde korrekt gesichert im Werkzeug eingesetzt
wurde.
•Die Pressluftzuleitung muss vor jedem Gebrauch des Geräts auf
Mängel geprüft werden. Lose Anschlüsse sowie lange Kabel, die
Stolperfallen bilden können, müssen vermieden werden.
Überschreiten Sie nie den auf dem Werkzeug maximal
angegebenen Luftdruck.
•Um geschossähnliche Gefahren zu verhindern, stellen Sie bitte
sicher, dass das Werkzeug nie mit geönetem Rahmen bzw.
Gebinderohr benutzt wird. Auch jegliche Zubehörteile sollten
sicher mit dem Werkzeug oder dem Gebinde verbunden sein.
Sollte sich die Düse während des Arbeitsganges verstopfen,
muss diese ausgewechselt werden.
•Richten Sie das Werkzeug während des Gebrauchs nie auf sich
selbst oder gegen jemand anderen.
•Trennen Sie das Werkzeug stets von der Druckluftleitung wenn
Sie eine neue Verpackung des Verarbeitungsmaterials einsetzen
•Trennen Sie das Werkzeug nach Ende der Nutzung immer von
der Druckluftzufuhr.
Règles de sécurité pour nos pistolets d’extrusion de
mastics et colles de type pneumatique
Conseils de sécurité générale
•Assurez- vous d’avoir bien lu et compris cette notice
d’instructions avant de mettre le pistolet sous tension.
•Conservez bien ces instructions pour référence ultérieure.
Consultez ces instructions à chaque fois qu’il est nécessaire
afin de vous assurer du bon emploi et de la mise en marche
du pistolet en toute sécurité.
•L’utilisateur doit impérativement vérier que le pistolet
est en bonne état de fonctionnement et accomplir les
vérications d’usage avant d’utiliser le pistolet pour éviter
les risques d’accident.
•Ces vérications doivent se faire avant toute mise en marche
du pistolet.
•Cet outil n’est pas conçu pour les personnes ou enfants dont
les capacités physiques, sensorielles ou mentales sont réduites
ou pour les personnes novices ayant aucune
expérience ou connaissance du ce produit à moins qu’elles
ont pu bénécier, par l’intermédiaire d’une personne
responsable de leur sécurité, d’une surveillance et d’instructions
préalables concernant l’utilisation de cet outil.
•Ce pistolet est conçu pour l’extrusion de produits d’étanchéité
et de colles fournis dans les emballages
standards de types cartouches ou poches. L’extrusion de toute
autre type de produits, ou type de packaging est strictement
interdit.
•Vériez régulièrement que toutes les étiquettes qui
apparaissent sur le pistolet sont toujours lisibles. Des étiquettes
de remplacement sont disponibles sur demande auprès du
fabricant.
•Ne pas modier ce pistolet d’aucune façon. Ceci pourrait
avoir des conséquences néfastes sur le bon fonctionnement de
l’appareil et donc aecter la sécurité de l’utilisateur.
Usage
•Le port de gants et de lunettes de sécurité est recommandé
•Assurez- vous que vous avez le bon outil pour la taille de votre
cartouche poches.
•Placez votre cartouche/poche correctement votre cartouches ou
poches dans le pistolet avant de commencer à extruder votre
produit.
•Vériez que la ligne d’arrivée d’air n’est pas endommagée
avant toute mise sous tension. Tous les composants doivent
être en bon état et xés correctement, et prendre les
mesures nécessaires pour s’assurer que personne ne se prenne
les pieds dans le câble d’arrivée d’air.
•Le produit ne doit pas être sous tension ou relier à la ligne
d’arrivée d’air lorsque l’utilisateur recharge le pistolet.
•Après utilisation, n’oubliez pas de débrancher le pistolet du
compresseur à air.
P C COX LTD, TURNPIKE INDUSTRIAL ESTATE, NEWBURY, BERKSHIRE, RG14 2LR, UNITED KINGDOM
T Sales +44 (0) 1635 264500 | F +44 (0) 1635 264555 | E sales@pccox.co.uk | www.pccox.co.uk
CBA 25 0.8
CBA 50 0.8
CBA 200 C 2.8
CBA 310 C 3.1
CCA 380 A 3.3
CCA 380 B 2.6
PPA 75 LP 1.2
PPA 75 HP 1.6
PPA 150 LP 1.6
PPA 150 HP 1.9
PPA 300 A 3.3
PPA 300 B 2.3
Product Type Weight (kg)
PPA 600 A 3.6
PPA 750 A 3.8
RBA 100 LP 1.4
RBA 100 HP 1.7
RBA 200 B 1.9
RBA 300 B 2.2
TBA 100 LP 1.6
VBA 100 HP 1.7
VBA 200 A 2.9
VBA 200 B 2.2
VBA 400 A 3.1
VBA 400 B 2.6
Product Type Weight (kg)
PC Cox Ltd.
Turnpike Industrial Estate
Newbury, Berkshire
RG14 2LR
United Kingdom
Tel: +44 (0) 1635 264500
Fax: +44 (0) 1635 264555
www.pccox.co.uk
DECLARATION OF CONFORMITY
This is to declare all Airow 1 pneumatic dispenser tools including models
PPA300A PPA600A PPA750A PPA1200A PPA1500A
Manufactured by P C Cox Ltd are in compliance with the following Directives:
The Machinery Directive 2006/42/EC,
Pressure Equipment Directive 97/23/EC
Applied Standards:
EN ISO 11148-6:2010 - Hand held non-electric power tools
- Part 1 Assembly power tools for non-threaded mechanical fasteners.
EN ISO 15744:2008 – Hand held non-electric power tools
– Measurement of noise.
EN ISO 8662-11:2009 - Hand held non-electric power tools
– Measurement of vibration at the handle.
Technical Data:
Air pressure 6.8 bar (max)
Thrust 5.1 kN (max)
Tool Data:
Noise emissions 109dB(A) Peak
Hand Arm Vibration 0.04 m/s2
Signed for & on behalf of P C Cox by:
Date: 30 November 2014
C Beckett: Engineering Director
This manual suits for next models
1
Other COX Dispenser manuals
