Cozy N Safe Tristan i-Size EST User manual

76cm-150cm
Instruction Manual
EST - 542
CHILD INFORMATION
(KEEP WITH CAR SEAT AT ALL TIMES IN CASE OF EMERGENCY)
NAME:
..................................................................................................................................................
DATE OF BIRTH (DD/MM/YYYY):
..................................................................................................................................................
ADDRESS:
..................................................................................................................................................
..................................................................................................................................................
..................................................................................................................................................
ALLERGIES/MEDICAL CONDITIONS:
..................................................................................................................................................
..................................................................................................................................................
..................................................................................................................................................
EMERGENCY CONTACT 1:
NAME:
..................................................................................................................................................
PHONE NUMBER:
..................................................................................................................................................
EMERGENCY CONTACT 2:
NAME:
..................................................................................................................................................
PHONE NUMBER:
..................................................................................................................................................
www.cozynsafe.com
Without Compromise...
Tristan i-Size
Without Compromise...
Tristan i-Size
Cozy N Safe
Oxford Street, Wolverhampton, West Midlands, WV14 7DP, UK

Contents
1. Important notice
2. Features
3. Using the car seat in the vehicle
4. Installation - children who's stature is
4-1 76cm-105cm(≤18kg)
4-2 100cm-150cm
4-3 100cm-150cm
5. Adjusting and using the child car seat
5-1 Recline position adjustment
5-2 Harness adjustment
5-3 Headrest adjustment
5-4 Fitting and removing the 5-point harness system
5-5 ISOFIX installation and removal
5-6 Top Tether installation and removal
6. Child car seat cover removal and refitting
6-1 Cover Removal
6-2 Cover Refitting
7. Cleaning and maintenance
8. Notice
9. Steps to take after an accident 21
10. Warranty 21
01
03
04
06
06
07
09
10
10
10
11
12
14
16
18
18
19
20
20
1. Important Notice
01
1. This child car seat is suitable for child’s who’s stature is 76cm-105cm/≤18kg
i-Size-universal ISOFIX, 100cm-135cm i-Size booster seat, 135cm-150cm Specific
Vehicle booster seat.
2. Locate the instruction manual from the net bag inside the back cover of the child
seat and read carefully.
3. Please read the instruction manual carefully before installation. Serious injury
may occur if installed incorrectly. The manufacturer will not take responsibility for
any risks in this case.
4. Never use the child car seat without the cover. Never use any cover which is not
recommended by manufacturer to replace an old cover, because the cover
constitutes an integral part of the child car seat performance.
5. When the child car seat is not provided with a textile cover, the chair should be
kept away from direct sunlight, otherwise it may be too hot for child's skin.
6. The customer is advised not to use the child car seat in seating positions where
there is an active frontal airbag installed.
7. The child car seat should be replaced when it has been subject to violent
stresses in an accident.
8. Please ensure all passengers in the vehicle use safety belts, goods in the vehicle
must be fixed down, otherwise the passengers and goods may injure the child in
the event of an emergency.
9. The buckle should not be in a semi-locked status. Always confirm the child car
seat buckle is locked before using. So that in an emergency the child can be
taken out quickly.
10. Don't make any changes to the harness system in the child car seat, this could
seriously affect the security and functionality.
11. It is dangerous to make any alterations or additions the child car seat without
the approval of the Type Approval Authority. It’s also dangerous to not closely
follow the installation instructions provided by the child car seat manufacturer.
12. Ensure that children are not left in their car seat unattended.
13. Keep the child seat away from any corrosive substances.

2. Features
0302
14. Always keep the child car seat secured in the vehicle even when it is
unoccupied and ensure that children are not left in their child car seat unattended.
15. DO NOT use a second hand child car seat.
16. It is important to ensure that any lap strap is worn low down so that the pelvis is
firmly engaged.
17. Any straps holding the child car seat to the vehicle should be tight, and any
straps restraining the child should be adjusted to be suitable to the child's body.
Ensure that the straps are not twisted.
18. Do not use any load bearing contact points other than those described in the
instructions and marked in the child car seat.
19. Do not use the child car seat in a forward-facing position when the child's
stature is less than 76cm.
20. The instructions can be retained on the child car seat for it’s life time, ensure to
take good care of the manual.
21. The rigid items and plastic parts of the child car seat must be located and
installed so that they are not liable, during everyday use of the vehicle, to become
trapped by a movable seat or in the door of a vehicle.
22. The child car seat should only be used in a forward facing position when in use.
23. Any luggage or other objects liable to cause injuries in the event of a collision
should be properly secured.
24. If you have any questions about the use and installation of the child car seat,
please contact the manufacturer or retailer.
25. The child car seat should not be used without the cover.
26. Prior to installing the child car seat the user should refer to the vehicle
manufacturer's handbook.
"IMPORTANT - DO NOT USE BEFORE THE CHILD'S
AGE EXCEEDS 15 months.
09
01
03
04
05
06
07
08
11
12
14
13
10
15
02
16
17
18
19
21
20
24
22
1
2
3
4
5
6
7
8
9
10
11
12
13
14
15
16
17
18
19
20
21
22
23
24
Headrest
Shoulder Belt
Guide Hook
Shoulder Pads
Instruction Manual Pocket
Inner Cushion (Stature less than 87cm)
Harness Adjusting Button
Harness Adjustment Strap
Recline Adjustment Handle
Headrest Adjustment
Handle
Headrest Adjustment Handle Cover
Shoulder Strap
Buckle
Buckle Pad
2nd Lock Button
Lower Belt Guide Slot
Top Tether Pocket
Seat Back Pocket
Top Tether Strap
Top Tether Hook
ISOFIX
ISOFIX Adjustment
strap
ISOFIX Insert Guides
ISOFIX 2nd Lock Button
ISOFIX Release Button
23

In order to properly protect your child, please read the instruction
manual carefully.
3. Using the car seat in the vehicle
Car seat belt–shoulder belt
Lap belt
Vehicle seat ISOFIX anchor fitting
Top tether
Car seat
anchor point
ISOFIX
anchor point
on vehicle seat
Danger! DO NOT use on a passenger seat with an active
airbag. If hit by the airbag, death or serious injury may occur. Before using the ISOFIX and Top Tether, make sure the vehicle is
equipped with ISOFIX and top tether anchor points. Only when the
anchor points are located and match can the child car seat be
installed.
Read the vehicle user manual to check whether the vehicle seats are
equipped with ISOFIX anchors and whether the recommended ISOFIX
type match the car seat ISOFIX size.
0504
Car seat belt –lap belt
Correct / suitable
Wrong / not suitable
Child car seat can only be used here with the shoulder belt and lap
belt both equipped.
The child car seat should not be used in the front passenger seat
with an airbag.

4. Installation
ISOFIX + top tether + harness system
4-1 76cm-105cm(≤18kg)
ISOFIX+Vehicle 3 Point seat belt
4-2 100cm-150cm
1. Take the top tether strap 18 and top tether hook 19 from the Seat
Back Pocket 17, and then close it.
2. Pull the ISOFIX adjustment strap 21 to pull the ISOFIX 20 out, until
you hear a" Click".
3. Fit ISOFIX 20 onto the anchor
point of vehicle seat (see 5-5),
make sure it is locked. Press the
2nd lock button 14 and push
towards the vehicle seat, to
ensure that the back of the child
seat is closely positioned against
the vehicle seat back.
Hide the 5-point harness system when using the child car seat to fit
the child in this height range. (see 5-4)
1. Pull the ISOFIX adjustment
strap 21 to pull the ISOFIX 20
out, until the you hear a
"CLICK".
The end of the ISOFIX strap should be
pulled when adjusting the ISOFIX.
The end of the ISOFIX strap should be
pulled when adjusting the ISOFIX.
0706
CLICK
ISO/F2X
Notice
4. Fit the Top Tether Hook 19 onto the vehicle anchor point
according to the vehicle manual, make sure the straps are
tightened. (see details 5-6)
5. Fit the child in the car seat with 5 point harness system. (see
details 5-4)
1. Check the Top Tether , 5 point harness system
and ISOFIX fittings, ensure the child and child car
seat are secure.
2. The straps of Top Tether and 5 point harness
should not be twisted or folded.
3. The inner cushion is required if the child’s
height less than 87cm.
4. Use ISOFIX insert guides 22 for an easier
installation.
Notice
Notice
ISO/B2
17
18
19
20
21
14
20
19
22
20
21

100cm-150cm
Vehicle 3 Point Seat Belt
4-3
0908
2. Feed the vehicle shoulder belt S
through the shoulder belt guide hook
02 and across the child's shoulder.
3. Feed the vehicle lap belt T through
the lower belt guide.
4. Feed both the shoulder and lap belt
through the lower belt guide Slot 15 on
the other side on seat base, and insert
the tongue into the buckle.
CLICK
Notice
Notice
2. Fit the ISOFIX 20 onto the anchor
points on the vehicle seat (see 5-5),
ensure that the back of the child seat is
closely positioned against the vehicle seat
back.
3. Feed the vehicle shoulder belt S through the shoulder belt guide
hook 02 and across the child's shoulder.
4. Feed the vehicle lap belt T through the lower belt guide.
5. Feed both the shoulder and lap belt through the lower belt guide
Slot 15 on the other side on seat base, and insert the tongue into the
buckle.
1. The vehicle belt must not be twisted or folded.
2. Ensure the vehicle lap belt goes across the child’s pelvis. This must restrain child’s
pelvis properly.
3. Check the ISOFIX and vehicle seat belt fitting, ensure that the child and child car
seat are secure.
4. Use the ISOFIX guides 22 for easier installation.
1. Push the car seat to ensure that the
back of the child seat is positioned
against the vehicle seat’s back.
1. The vehicle belt must not be twisted and folded.
2. Ensure the vehicle lap belt goes across child’s pelvis. This must restrain the child’s
pelvis properly.
3. Check the vehicle seat belt fitting, ensure that the child and child car seat are
secure.
14
02
S
T
15
02
15
S
T

5. Adjusting and using the child car seat
5-1 Recline position adjustment
5-2 Harness adjustment
5-3 Headrest adjustment
Warning. Watch your fingers don’t get
pinched when adjust the position!
Loosen:Press down the harness
adjuster button 06 on the seat
base with one hand and with the
other hand grasp the two
shoulder straps 11 (please don’t
pull the shoulder pads 03) and
pull them away from the seat.
Please operate the adjusting button 06
according to the picture.
Tighten: Grasp the adjustment strap 07 and pull forward.
The height of the shoulder belt should
be at the same level or a little higher
than your child’s shoulder.
Pull up:Grasp and lift the headrest adjustment handle 09 on the top
of the headrest.
Push down:Pull the headrest adjustment handle 09 at the top of the
head rest and push down.
Headrest should be adjusted to
the same level or a little higher
than your child’s shoulders.
1110
Hold the seat base with one hand
and adjust the recline position with
recline adjustment handle 08 with
your other hand. There are 3
positions in total, find the most
suitable position for your child using
the recline adjustment handle 08.
Notice
Notice
Notice
Notice
Notice
1. Please loosen the shoulder
strap 11 before fitting the child
in the 5-point harness system.
(See details in 5-2)
2. When using the 3-point
vehicle belt, adjust the
headrest height to fit your
child.
1
2
3
08
03
11
06
07
09
11
The child restraint may not fit in all
approved vehicles when used in one
of these positions.

5-4 Fitting and removing the 5-point harness system
1. Place the child in the child car seat, the
shoulder strap 11 and the shoulder pad 03
goes above the child’s shoulder, put the
child’s legs either side of the Buckle pad 13.
5-4-1 Fitting the child
5-4-2 Hiding the 5 point harness belt
2. Put the right and left tongues B of the
buckle together, and insert to the buckle
12, it is locked when a “CLICK” sound is
heard. Pull the adjuster strap to tighten the
shoulder belts. Adjust the shoulder strap
11 to a suitable length (please refer 5-2 to
check how to adjust the shoulder belts).
Do not cross or twist the shoulder
straps.
1. Loosen the shoulder straps 11
(refer to 5-2)
2. Press the red button A on buckle 12, release the buckle 12.
3. Remove the inner cushion 05 and the Buckle pad 13.
4. Remove the soft-goods from the child car seat and keep them in a secure
location.
1312
If there is no shoulder pad 03 or Buckle
pad 13, then the baby child car seat
should not be used.
Notice
Notice
Notice
Tips
Press the red button to release
the buckle.
Grasp the adjustment strap 07 and pull forward
slowly. When there are two adult fingers worth of
space between the shoulder pads 3 and the child,
release the adjustment straps. This is the most
suitable tightness for the shoulder straps.
03
11
13
11
06
B
12
B
A
07
11
11
12
13
05
A

5-5 ISOFIX installation and removal
5-5-1 Fitting the ISOFIX in the car
5. Move the buckle 12 through the back of the crotch pad hole, hide the
buckle 12 in the buckle compartment V, and cover it.
6. Hide the shoulder pad 03, shoulder straps 11 and buckle inserts in the slots
in each side of the car seat.
7. Put the covers back onto the seat once the 5 point harness is hidden.
1. If your vehicle is not equipped with the
ISOFIX insert guides 22 as standard, clip
the two insert guides provided with the
cut-out facing upwards onto the two ISOFIX
anchor points K of your vehicle.
ISOFIX anchor point is between the seat
and backrest.
1514
2. Pull the ISOFIX adjustment strap 21, the
ISOFIX 20 locking arm will be fully extended
when you hear “CLICK”.
The end of the ISOFIX strap should be pulled when
adjusting the ISOFIX.
The locking arms are only correctly engaged if both
of the green safety buttons are completely green.
3. Push ISOFIX 20 into the insert guides, until
the ISOFIX 20 locking arms engage on both
sides. You should hear a “CLICK”. Then use
the same method for the other side.
4. Press and hold the second lock button 14
and push the child seat towards the vehicle seat
back.
Tips
Notice
Tips
03
11
V
12
K
22
21
20
CLICK
20
14

5-6 Top Tether installation and removal
5-5-2 Release ISOFIX from vehicle
5-6-1 The installation of the Top Tether
5-6-2 The removal of the Top Tether
1. Press the ISOFIX second lock button 23 and ISOFIX release button 24
together, until the ISOFIX 20 separates from the vehicle seat.
2. Press the second lock button 14 (located at the front of the car seat base)
and push the ISOFIX, until it retracts into car seat base.
1. Open the seat back pocket 17, take out
the top tether strap 18 and top tether hook
19 from the pocket.
2. Ensure the car seat is facing the driving
direction.
3. Press the button top tether N to adjust the top tether Strap 18.
4. The top tether strap 18 should go through the vehicle seat headrest.
Tip: Top tether strap 18 should go through the bottom of the headrest (if the
headrest of the vehicle can not be adjusted, then the top tether should go
over the top of the headrest)
5. Fit the Top Tether Hook 19 on the fitting anchor point according to the
vehicle’s manual, then tighten the top tether Strap 18. (When tightening the
top tether, the indicator on the hook of the top tether will show green)
1. Press the Top Tether Hook 19 and remove from the vehicle anchor point.
1716
Check the hook of the top tether is
properly installed before each journey.
Do not use the luggage hook instead of the top tether anchor point.
Check the vehicle’s user manual for the anchor symbol.
Notice
Tips
14
24
17
18
19
18
19
N
N
19
Tips
When the anchor point of the top tether
is on the car roof, please make sure that
the top tether is not twisted after
installation.

2. Roll up the top tether strap 18, open the
seat back pocket and store the top tether in
the pocket 16 and close the seat back
pocket 17.
18 19
1. Loosen the shoulder straps 11 (see
details 5-2)
2. Press the red button A on buckle 12 to
release the buckle 12.
3. Remove the inner cushion 05 and the
Buckle pad 13.
4. Remove the headrest pad and seating
pad from the shell.
5. Remove the seat cover from the shell.
6-1 Cover Removal
6. Child car seat cover removal and refitting
1. Adjust the headrest to highest
position.
2. Put the headrest cover and
seat cover on carefully.
3. Install buckle pad 13 and inner
cushion 05.
16
17
6-2 Cover Refitting
Use the cover dress tool R to make refitting easier
Tips

2120
8. Notice
Notice
This is an i-Size booster seat Enhanced Child Restraint System. It is approved
according to UN Regulation No.129, for use primarily in “i-Size seating positions
as indicated by vehicle manufacturers in the vehicle user's manual.
If in doubt, consult either the Enhanced Child Restraint System manufacturer
or the retailer. Only suitable if the approved vehicles are fitted with 3 point
safety-belts, approved to UN/ECE Regulation No. 16 or other equivalent standards.
Notice
This is an i-Size Enhanced Child Restraint System. It is approved according to
UN Regulation No. 129, for use in, i-Size compatible vehicle seating positions
as indicated by vehicle manufacturers in the vehicle user's manual.
If in doubt, consult either the Enhanced Child Restraint System
manufacturer or the retailer.
7. Cleaning and maintenance
Washing instruction:
The fabric cover should be removed, washed in 30 degree water and line dried only.
You can use soapy water and a wet dishcloth to clean the plastic parts of the seat. Do not use
strong cleaners (such as solvents).
Seat belts can be cleaned using soapy water.
Important notice:
The Fabric cover is an important part of child car seat for ensuring safety. Do not use the child car
seat without the fabric cover and do not use a different fabric cover to replace the original one. This is
dangerous for your child as the fabric covers are an integral part of the car seats functionality and
security.
9. Steps to take after an accident
After an impact, if the speed was greater than 10km/h, the child car seat should not be
used and you should consult your insurer and retailer for further assistance.
10. Warranty
For the seat, we extend a warranty against defects in materials and workmanship for up to
one year. The warranty period begins on the date of purchase.
A valid receipt is required for all claims.
The warranty covers a child car seat that has been handled properly and is returned in an
orderly and clean condition.
The warranty does not cover:
-Normal wear and tear, and damage due to unreasonable use.
-Damages due to improper or inordinate usage.
Covers: All of our fabrics meet the highest standards regarding colourfastness against UV
radiation. Nevertheless, all fabrics fade when exposed to UV radiation.
This is not due to defective materials, but to normal wear and tear, which is not covered
by the warranty.
Please contact the manufacturer immediately in the event of a warranty claim.
Machine wash, cold Do not bleach Do not dry cleanDo not spin dry Do not iron
This manual suits for next models
1
Table of contents
Popular Baby Accessories manuals by other brands
Philips AVENT
Philips AVENT SCD150/50 brochure

Arrue
Arrue K2 manual
DrBrowns
DrBrowns Milestones Cheers360 Spoutless Transition... quick start guide
Peg-Perego
Peg-Perego seat unit Instructions for use
Philips AVENT
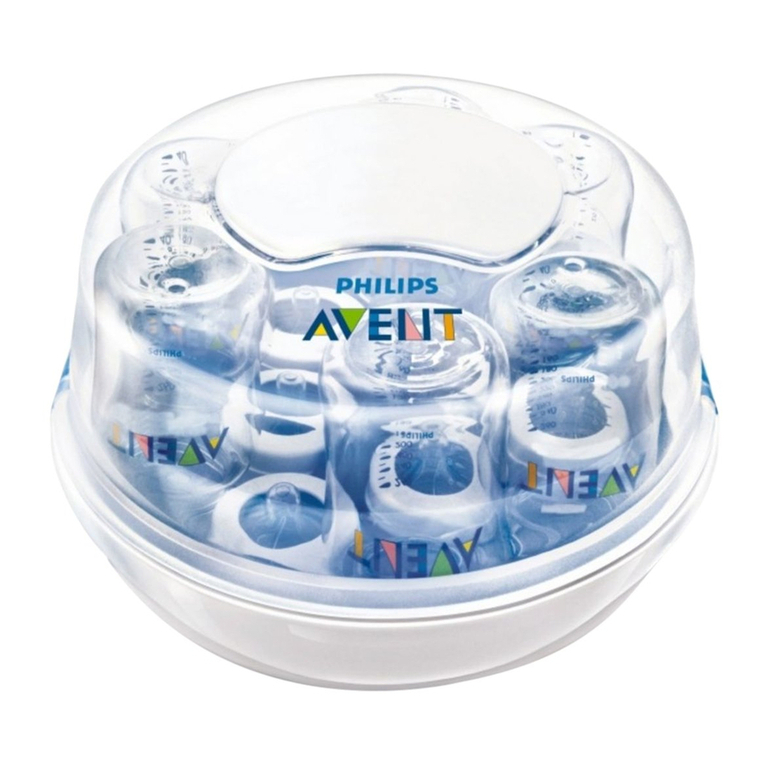
Philips AVENT Express II SCF271/02 product manual

Lupilu
Lupilu BABY MOBILE Instructions for use


