CPG 351IDCPG19A User manual

www.cookingperformancegroup.com 1
User Manual
Drop-In
Induction Range
with Remote Control Panel
REVISED 11/2023
351IDCPG19A, 351IDCPG38M

. www.cookingperformancegroup.com
2
User Manual
Congratulations on your purchase of Cooking Performance Group commercial cooking equipment!
At Cooking Performance Group, we take pride in the design, innovation, and quality of our products.
To ensure optimal performance, we have outlined the following instructions and guidelines in this
manual carefully for your review. Cooking Performance Group declines any responsibility in the event
users DO NOT follow the instructions or guidelines stated here.
Contents
Safety Precautions ........................................3
Before First Use ..........................................4
Installation Instructions ....................................5
Induction Cooking ........................................7
Control Panel.............................................7
Operation ................................................8
Troubleshooting ..........................................9
Cookware Guide ..........................................9
Cleaning & Maintenance ................................. 10
4010671 4010671
NEMA
5-20P
NEMA
6-20P
Conforms to UL STD. 197
Conforms to NSF/ANSI STD. 4
IDCPG19A IDCPG38M

www.cookingperformancegroup.com 3
User Manual
• These units are designed for commercial use and not for household use.
• Turn off and disconnect the unit from the power supply prior to servicing.
• DO NOT use if glass surface is damaged.
• DO NOT use if power cord or electrical wires are frayed or worn.
• Exterior surfaces on unit will get hot. Use caution when touching these areas. DO NOT touch any surfaces
labeled "CAUTION HOT" while the product is in use.
• DO NOT leave the appliance unsupervised when in use. This appliance is not intended for use by persons
(including children) with reduced physical, sensory or mental capabilities, or lack of experience and knowledge
unless they have been given instruction concerning use of the appliance by a person responsible for their safety.
• DO NOT leave packaging components within the reach of children - danger of suffocation!
• DO NOT immerse cord, plug, or appliance in water or other liquid. Do not leave appliance on wet surface.
• DO NOT pour or drip any liquids at the motor base or cord. When liquids are spilled on the motor base,
immediately switch OFF, unplug, and let the motor base dry thoroughly.
• DO NOT wash the appliance and power cord in the dishwasher.
CAUTION
CAUTION DANGER OF ELECTRIC SHOCK
THIS APPLIANCE IS NOT A TOY
IMPROPER INSTALLATION, ADJUSTMENT, ALTERATION, SERVICE, OR MAINTENANCE CAN CAUSE
PROPERTY DAMAGE, INJURY, OR DEATH. READ THE INSTALLATION, OPERATING, AND MAINTENANCE
INSTRUCTIONS THOROUGHLY BEFORE INSTALLING OR SERVICING THIS EQUIPMENT.
KEEP WATER AND OTHER LIQUIDS FROM ENTERING THE INSIDE OF THE UNIT. LIQUID INSIDE THE
UNIT COULD CAUSE AN ELECTRIC SHOCK.
IF LIQUID SPILLS OR BOILS OVER ONTO THE UNIT, IMMEDIATELY UNPLUG THE UNIT AND REMOVE
COOKWARE. WIPE UP ANY LIQUID WITH A PADDED CLOTH.
WARNING
DO NOT STORE OR USE GASOLINE OR OTHER FLAMMABLE VAPORS OR LIQUIDS IN THE VICINITY
OF THIS OR ANY OTHER APPLIANCE.
FOR YOUR SAFETY
WARNING ELECTRICAL SHOCK HAZARD
Safety Precautions

. www.cookingperformancegroup.com
4
User Manual
• DO NOT touch heated surfaces with your hands or other parts of your skin.
• DO NOT place empty pots or other empty cookware on the appliance when it is in operation.
• ALWAYS use handles or pot holders, as this unit can cause cookware and products to become extremely hot.
• ALWAYS place the unit on heat-resistant surfaces.
• Maintain required clearances for combustible and non-combustible surfaces.
• DO NOT block the air supply and ventilation of the appliance.
• DO NOT overheat the cookware.
• DO NOT pull on the cord to move the appliance.
• DO NOT move the appliance while in operation or with hot cookware on it. Danger of burning!
• In case of ames, DO NOT try to extinguish with water. Use a damp cloth.
• DO NOT place any other magnetic objects near the appliance (i.e. TV, radio, credit cards, cassettes etc.).
• DO NOT operate the appliance if any parts of it are damaged to avoid all risks. The appliance is damaged when
there are any cracks, excessively broken or frayed parts, or leaks. In this case, immediately stop using the
appliance and return the entire appliance (including any parts and accessories).
• Make sure to store the appliance in a dry, clean place, safe from frost, excessive strain (mechanical or electrical
shock, heat, moisture), and out of the reach of children.
• The use of accessories and spare parts that are not recommended by the manufacturer may cause damage to
the device or injuries to person.
• Unplug the appliance:
- After each use and when the appliance is not in use.
- Before changing accessories or cleaning the appliance.
- To unplug the appliance, never pull on the cord. Take the plug directly at the outlet and unplug.
• From time to time, check the cord for damages. Never use the appliance if cord or appliance shows any signs of
damage, as it could be dangerous.
• DO NOT operate appliance when:
- Power cord is damaged.
- If product has fallen down and shows visible damage or malfunction.
• This appliance requires a dedicated circuit.
• All installation and repairs must be performed by a certied and insured foodservice equipment technician.
CAUTION DANGER OF BURNING AND FIRE

www.cookingperformancegroup.com 5
User Manual
Installation Instructions
TO BE COMPLETED BY A CERTIFIED AND INSURED FOODSERVICE EQUIPMENT TECHNICIAN
• Installation must conform to all applicable codes. Improper installation will void the manufacturer’s warranty.
Do not obstruct or reduce the airflow of the ventilation openings on the sides, bottom, or the rear of the unit.
Blocking airflow could cause the unit to overheat.
• Do not install near any combustible surfaces. There must be a minimum of 4" between the induction range and
any non-combustible surface to allow sufficient airflow around the unit. There must be at least ¾″ between the
bottom of the induction range and the surface. Avoid placing on soft surfaces that could restrict the airflow to
the bottom of the unit. There must be at least 12″ of clearance on the sides and back from combustible surfaces.
• Do not operate this product in high heat environments. Avoid placing this product near gas equipment. The
maximum ambient room temperature must not exceed 100°F. Temperatures are measured in ambient air while
all appliances in the kitchen are in operation.
• The power supply must comply with the rated voltage, frequency, and plug specified on the data plate and must
be grounded. Do not use an extension cord with plug and cord models.
• This product conforms to UL-197 standards and must be installed under a ventilation hood for operation.
Consult local laws and regulations for exhaust and ventilation. A 48" clearance above this unit. Please ensure
your electrical connection matches the specifications indicated on the serial plate.
• As a precaution, persons using a pacemaker should stand back 12″ from an operating unit. Studies have shown
that the induction element will not disrupt a pacemaker. Keep all credit cards, driver licenses, and other items
with a magnetic strip away from an operating unit. The unit’s magnetic field might damage the information on
these strips.
• All models are equipped with an "overheating protection" feature. If the temperature of the cooking surface
becomes too hot, the unit will turn off. All models are equipped with a pan detection system and a "Safety Off"
feature so that when cookware is removed, the unit is switched to Standby Mode until a pot or pan is placed
back on the hob.
Before First Use
• Remove all packaging components and make sure that the appliance is in perfect condition.
• Clean the unit surface with a slightly moist cloth and dry.

. www.cookingperformancegroup.com
6
User Manual
FRONT
TOP
A
BB
C
1
2 4
2 4
3
C
C
C
Drop-In Model Installation
1. Ensure the installation location has proper ventilation. There must be at least 7" of available space under the
mounted induction range, and the inside temperature of the cabinet must not exceed 90°F.
2. Drop-in models feature remote control. The control panel will be mounted separately for easy access.
3. Use and place the provided template in the intended installation location, allowing at least 4" of countertop space
on each side. Cut the countertop using the template and cutout dimensions illustrated. (Fig. 1)
4. Insert the induction range into the cutout and apply a thin layer of silicone sealant around the surface.
5. Repeat similar instructions for the control panel. Center the control panel to the induction range whenever possible.
6. Connect the control panel cable to the induction range.
• Countertop thickness must not exceed 2".
• Drop-in models should only be installed by professionals.
FIG. 1 AMax. 2"
Countertop Depth
BMin. 7"
Cabinet Clearance
CMin. 4"
Countertop Clearance
112.99"
Range Cutout Height
212.2"
Range Cutout Width
32.87"
Controller Cutout Height
46.1"
Controller Cutout Width

www.cookingperformancegroup.com 7
User Manual
Special Notes for Your Safety:
• This unit has been designed to meet the applicable standards for non-interference with other electronic devices.
Make sure other electronic devices in the vicinity, including pacemakers and other active implants, have been
designed to meet their corresponding applicable standards. As a precaution, persons using a pacemaker should
stand back 12" (30cm) from an operating unit. Studies have shown that the induction element will not disrupt
a pacemaker.
• To avoid any risks, do not place very big magnetic objects (i.e. griddles) onto the cooking zone of the glass eld.
Do not place other magnetic objects other than cookware (i.e. credit cards, TV, radio, cassettes) near or on the
glass surface of the induction cooking plate when it is in operation.
• It is recommended not to put metallic utensils (i.e. knives, pot or pan covers, etc.) on the cooking plate in case of
switching on the appliance. They might get hot.
• Do not insert any objects (i.e. wires or tools) into the ventilation slots. This may cause electrical shock.
• Do not touch the hot surface of the glass eld. Please note: Even though the induction cooking plate does not
heat up during cooking, the temperature of the heated cookware heats up the cooking plate.
Induction Cooking
• The induction cooking plate and the cookware placed on it become connected via electromagnetism.
• Heat is generated in the bottom of the cookware and immediately directed into the food. The energy is absorbed
immediately into the cookware. This guarantees extremely high cooking speed and minimal heat loss.
• High effectiveness during parboiling and minimum power consumption during cooking reduces total energy
consumption up to 30%.
• Precise controlling (by 2 different adjustable functions) guarantees quickly and tightly focused heat input.
• As the induction cooking plate is only heated up by the heated cookware, the risk of scorching or burning of food
residues is reduced. The induction cooking plate does not stay hot as long as standard cooking plates for easy cleaning.
• When the cookware is removed, the device automatically switches into the Standby Mode.
• The device detects whether suitable cookware is placed on the cooking plate.
NOTE: The cookware must be magnetic. Before switching on the appliance, always place the magnetic cookware
centered onto the cooking eld.
How Induction Cooking Works:
Control Panel
SETTINGHOLDING TIMER PUSH (ON/OFF)
21 MM ON/OFF Button & Rotating Knob
LED Display
Holding
Function Button
Timer
Button
Setting
Button

. www.cookingperformancegroup.com
8
User Manual
Operation
1. Always place suitable cookware filled with food centered onto the induction cooking plate before plugging in
unit or error function will occur (See Troubleshooting on Page 8).
2. Insert the plug into a suitable socket. After the unit it plugged in, a long acoustic signal will sound and the display
will show “----".
3. Pushing the Rotating Knob will switch the device into Standby Mode. The display will show “0000” and a short
acoustic signal will sound. Whenever you press button again or new button, a short acoustic signal will sound.
4. Pressing the button will turn on the inside fan automatically. The display will now show 15, this is an
automatic setting. The appliance is now in power mode. Set the desired power (1-30) by rotating the knob.
5. Press the button to program the temperature model. Set the desired temperature (90 - 450°F) by rotating
the knob.
6. If desired, press the button to program the cooking time. Adjust the desired cooking time (0 - 180 min.) by
rotating the knob in 1 minute increments. This is an optional timer. If you do not set the timer, it will default to
180 minutes.
7. The function is a quick-select low-medium temperature (~155°F) for holding the product.
8. Cooking time will be indicated at the display by counting down the minutes. When cooking time is finished, this
will be indicated by several acoustic signals and the unit will keep working.
9. This unit will heat continuously until the “OFF” switch is pressed. It is recommended that you only use the unit
for 2-3 hours at a time to lengthen the life of the unit. The fans will continue to run for 20 minutes after the unit
is turned OFF. DO NOT restrict airflow to cooling fans.
Please follow the sequence below when adjusting the appliance. You can adjust power level, temperature, and
cooking time (minutes) by using the rotating knob to increase or decrease.
• Power Levels: 1/2/3/4/5/6/7/8/9/10...30. Defaults to 15.
• Temperature Levels: 90/95/100/105/110/115/120...460°F. Defaults to 200°F.
• Time Pre-Setting: 0 – 180 minutes (in 1 minute increments). Defaults to 180 minutes if not set.
• DO NOT use the appliance if it shows any sign of damage or malfunction. Please contact customer service.
• DO NOT place empty cookware on the appliance and DO NOT leave cookware on the appliance for too long to avoid
liquid cooking off completely. Overheating the cookware will activate the boil dry protection of the device.
• The unit will automatically shut OFF after 10 continuous hours of use as a built-in safety feature. You may turn it
back ON and continue using it.

www.cookingperformancegroup.com 9
User Manual
Troubleshooting
ERROR
CODE INDICATES SOLUTION
E0
No cookware or non-usable cookware.
(The unit will not switch ON to heat. The unit will
switch to standby mode after 1 minute.)
Make sure to use the correct, high-quality, induction-ready
cookware. Steel, cast iron, enameled iron, or stainless steel
with at bottom pans/pots with diameter of 5 - 10".
E1 Low voltage (< 100V). Ensure voltage is higher than 100V.
E2 High voltage (> 280V). Ensure voltage is lower than 280V.
E3
Top plate sensor is overheating or short circuiting.
(The unit's overheat/boil dry protection will trip if
the temperature of cookware rises above 450°F.)
The unit will need to be turned off, unplugged, and allowed
to cool.
Turn the unit back on.
If error code persists, the sensor has failed. Please contact
customer service.
E4
Top plate sensor has an open circuit or is without
connection.
The sensor has been damaged. (Could have
occurred during shipping.)
Bad sensor and PCB connection due to loose
fasteners.
If you see loose wires, contact customer service.
E5 IGBT sensor is overheating or short circuiting.
Fan without connection.
If the error occurs but the fan is still functioning, contact
customer service.
If the error occurs and the fan has stopped functioning, or is
not running well, turn the unit off and check to see if debris is
lodged in the fan.
E6 IGBT sensor open circuit. Contact customer service.
Cookware Guide
• Induction-ready cookware must be used with these units.
• The quality of the cookware will have an impact on the equipment's performance.
TIP:
Test with a magnet if the cookware you plan to use is suitable for induction cooking.
Examples of Usable Pans
• Steel or cast iron, enameled iron, stainless steel, pans/pots
with flat bottoms.
• Flat bottom diameter from 4¾" to 10¼" (9" recommended).
Examples of Non-Usable Pans
• Heat-resistant glass, ceramic, copper, aluminum pans/pots.
• Pans/pots with rounded bottoms.
• Pans/pots with bottom measuring less than 4¾" or greater than 10¼".

. www.cookingperformancegroup.com
10
User Manual
Cleaning & Maintenance
1. Wipe the plates and stainless steel surface with a damp cloth only.
2. Use of additional non-abrasive cleaning liquids is recommended for induction cooking plates to extend their lifetime.
3. When not in use, store the device in a dry place.
• Clean the device after each use to remove food residues.
• Make sure that no water gets into the device.
• To avoid any danger or risk of electrical shock, never immerse the device or the cord into water or any other liquid.
• DO NOT put the device and the cord into the dishwasher!
• To avoid damaging the surface of the unit, never use abrasive cleaners, cleaning pads, or any sharp objects (i.e. metal
scouring pads). If using metal objects to clean, the sensitive surface can be damaged easily by scratches.
• Always handle the appliance with care and without any force.
• DO NOT use any petrol products to clean the device to avoid damaging the plastic parts and the control panel.
• DO NOT use any ammable acid or alkaline materials or substances near the device, as this may reduce the service life
of the device.
• The appliance must be stored in a place which is not within reach of children.
• ALWAYS SWITCH OFF AND UNPLUG THE APPLIANCE AFTER USE AND BEFORE CLEANING.
• LET THE APPLIANCE COOL DOWN BEFORE CLEANING AND STORAGE.
• NEVER IMMERSE THE APPLIANCE IN WATER OR CLEAN IT UNDER RUNNING WATER.
CAUTION DANGER OF BURNING AND ELECTRIC SHOCK
This manual suits for next models
1
Table of contents
Other CPG Range manuals

CPG
CPG 351S24 Series User manual
CPG
CPG 351RCPG12NL User manual
CPG
CPG 351S24(L/N) User manual
CPG
CPG 351CPGSPR18 User manual

CPG
CPG 351S24(L/N) User manual
CPG
CPG HP212 Installation instructions
CPG
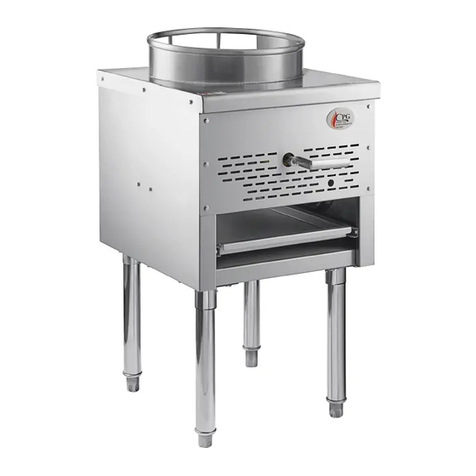
CPG 351WOKR13L User manual
CPG
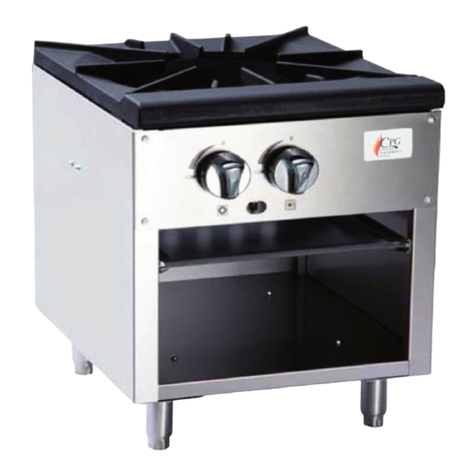
CPG 351CPGSPR18L User manual
CPG
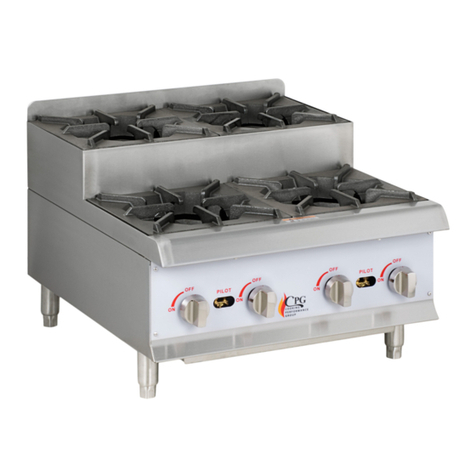
CPG 351SRCPG12NL User manual

CPG
CPG 351RCPG12NL User manual
Popular Range manuals by other brands
Bosch
Bosch HKK99V85.M manual
Frigidaire
Frigidaire FCS367F Factory parts catalog
Fulgor Milano
Fulgor Milano Sofia FSRC 3606 P MG ED 2F Series instruction manual
Frigidaire
Frigidaire FGFL77ASJ Use & care manual
Crosley
Crosley ELECTRIC RANGE Use & care manual
Electrolux
Electrolux EW30DS65GS - 30" Slide-In Dual Fuel Range Wiring diagram
